Introduction
- In the previous blog, we saw the Unit Test in Flutter.
- Unit Testing is a great testing technique. It allows us to test a single function, method, or class individually. This is a fantastic way to make sure that a unit of logic produces the expected value.
- However, they don't provide much confidence since they focus on small pieces of code and not on how the pieces integrate with each other.
- In this blog, we are going to see another testing technique in Flutter which is Widget Test.
- Widget testing is a technique that allows us to ensure that various portions of the user interface work as intended without the need for a physical device or simulator.
- They can be a great way to isolate small parts of your app and find out whether your code is behaving as expected.
- They usually increase the level of confidence compared to unit tests. And the execution time allows us to run hundreds of tests in less than a minute.
- They will seem familiar to you since they are very similar to the unit test that we have previously written.
- However, due to the
flutter_test package, we can utilize several handy tools and utilities to interact with our application.
- To continue with our calculator project, we will now add widget testing to our flutter application.
- The first step is to make a
test folder if you don't already have one.
- Next, we'll create our first test file,
calculator_app_test.dart, in which we'll write our test.
- Now we are going to create our first tests. This time however we need to make sure that we import the
flutter_test package so we can use the testWidgets() method instead of the previous test() method that we use for unit test.
import 'package:flutter_test/flutter_test.dart';

void main() {
  group(' ', () {
    testWidgets(' ',
        (WidgetTester tester) async {
       }
    );
  });
}
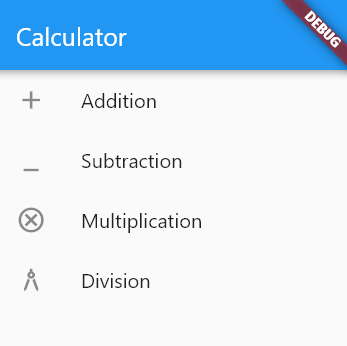
- To begin testing, we must first develop a page that has some widgets. Let's make a CalculatorApp page that displays four ListTile widgets. Which displays several icons for operations and related titles.
import 'package:flutter/material.dart';

void main() {
  runApp(const CalculatorPage());
}

class CalculatorPage extends StatelessWidget {
  const CalculatorPage({Key? key}) : super(key: key);

  @override
  Widget build(BuildContext context) {
    return MaterialApp(
      home: Scaffold(
        appBar: AppBar(
          title: const Text("Calculator"),
        ),
        body: Column(
          children: const [
            ListTile(
              title: Text("Addition"),
              leading: Icon(Icons.add),
            ),
            ListTile(
              title: Text("Subtraction"),
              leading: Icon(Icons.minimize),
            ),
            ListTile(
              title: Text("Multiplication"),
              leading: Icon(Icons.cancel_outlined),
            ),
            ListTile(
              title: Text("Division"),
              leading: Icon(Icons.architecture),
            ),
          ],
        ),
      ),
    );
  }
}
- To test these widgets, navigate to the
calculator app test.dart file.
- Now create a group called 'CalculatorApp.'
void main() {
   group('CalculatorApp', () {
   });
}
- Then insert the test description within the
testWidgets method. testWidgets is like test in unit testing, but for widget testing.void main() {
group('CalculatorApp', () {
testWidgets('Render 4 widgets of Type ListTile',
(WidgetTester tester) async {
});
});
}
- The function takes one argument called
WidgetTester, which is used to interact with the application.
- When we launch the application, we can see four list tile widgets on the screen. As a result, the most basic test we can write here is: When we launch the application, the four widgets are rendered.
- In a flutter, we use the function
runApp to inflate our application and attach it to the screen of the device.
- Similarly the
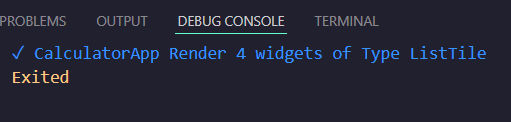
pumpWidget method from the widget tester class achieves the same. On a test environment it renders the initial UI of the given widget.void main() {
group('CalculatorApp', () {
testWidgets('Render 4 widgets of Type ListTile',
(WidgetTester tester) async {
await tester.pumpWidget(const CalculatorPage());
expect(find.byType(ListTile), findsNWidgets(4));
});
});
}
- Interacting with our application is crucial during the testing phase. After all, being able to tap a button, fill a form, or scroll through views is what adds value to our project.
- Consider the following example, where I’ve created two
Textfield for inputting two numbers for calculation. I also gave each of the Textfield a unique Key So that we can find that particular widget inside our tests.
- As you can see as soon as I fill up the Textfields the result gets appeared with a little background color animation.
- Let’s see how to test this behavior in our Calculator Test file.
- First of all, let’s create a group named
add. And then using pumpWidget let’s render the CalculatorPage.
group('add',(){
    testWidget('Show result when two inputs are given',(WidgetTester tester) async{
        await tester.pumpWidget(const CalculatorPage())
    })
})
- Now that we’ve rendered the UI. It’s time to input the numbers in the
TextField. In order to find the particular TextField, I’ve assigned a unique Key to each of them.
- In order to enter the value from the test, the
WidgetTester provides us a method called enterText(). group('add',(){
testWidget('Show result when two inputs are given',(WidgetTester tester) async{
await tester.pumpWidget(const CalculatorPage())
await tester.enterText(find.byKey(const Key('textfield_top_plus')), '3');
await tester.enterText(find.byKey(const Key('textfield_bottom_plus')), '6');
})
})
- It takes two parameters:
Finder: This must be an EditableText or have an EditableText descendant. For example TextField or TextFormField , or EditableText.String: It is basically the value which we want to be entered in the Field.
- Once the text is typed into the textfield, the result is shown, as seen in the output above.
- So now we can check if there is a text widget on the screen that has the string
Result: 9 or not.
- To do this, we can use the
find.text() function to obtain the Text, and then use findsOneWidget to determine whether or not any widget has the expected string.
group('add', () {
    testWidgets('Show result when two inputs are given',
        (WidgetTester tester) async {
      await tester.pumpWidget(const CalculatorPage());
      await tester.enterText(find.byKey(const Key('textfield_top_plus')), '3');
      await tester.enterText(find.byKey(const Key('textfield_bottom_plus')), '6');
      expect(find.text('Result: 9.0'), findsOneWidget);
    });
  });
- If you run the test, you will get an error that says
zero widgets with the text "Result: 9.0". This means none were found but one was expected. Why did this happen?
- This is due to the fact that when we input a number, the UI changes and shows the result. This change in the UI, or the new frame that was rendered, is exactly what we are lacking in our test.
- We need to figure out how to inform our widget test to render a new frame after we enter both numbers.
- The answer is to use the tester instance to invoke the
pump() method.
pump() instructs the system to paint a new frame so that we can meet our expectations with a newly updated user interface.
group('add', () {
    testWidgets('Show result when two inputs are given',
        (WidgetTester tester) async {
      await tester.pumpWidget(const CalculatorPage());
      await tester.enterText(find.byKey(const Key('textfield_top_plus')), '3');
      await tester.enterText(
          find.byKey(const Key('textfield_bottom_plus')), '6');
      await tester.pump();
      expect(find.text('Result: 9.0'), findsOneWidget);
    });
  });
- However, the method
pump() is rather restricted. Because it just refreshes a single frame, which is useless when working with animations.
- For instance, in our Calculator Page, let's show the result only when the background animation has finished.
- To do this, I've created a new variable called
resultAfterAnimation, and I'm setting its value when the animation has finished.
AnimatedContainer(
            padding: const EdgeInsets.all(8),
            duration: const Duration(milliseconds: 1000),
            onEnd: () {
              setState(() {
                resultAfterAnimation = result.toString();
              });
            },
            color: result == null ? Colors.transparent : Colors.green,
            curve: Curves.easeInOut,
            child: Text(
              resultAfterAnimation != null
                  ? 'Result: $resultAfterAnimation'
                  : 'Result: ',
              style: Theme.of(context).textTheme.bodyText1,
              textAlign: TextAlign.end,
  ),
),
- If you try to run the test now, you will receive an error. It's because there is no longer a single frame. The animation is updating many frames at the same time.
- To wait for the animation to finish, we must use the
pumpAndSettle() function provided by the WidgetTest.
- Simply replace the
pump() method with pumpAndSettle() and you're done.
group('add', () {
    testWidgets('Show result when two inputs are given',
        (WidgetTester tester) async {
      await tester.pumpWidget(const CalculatorPage());
      await tester.enterText(find.byKey(const Key('textfield_top_plus')), '3');
      await tester.enterText(
          find.byKey(const Key('textfield_bottom_plus')), '6');
      await tester.pumpAndSettle();
      expect(find.text('Result: 9.0'), findsOneWidget);
    });
  });
- Finding and locating the widget is very important in the Widget Test.
- The flutter test Package provides top-level find methods that allow us to locate the widgets.
- While there are plenty of ways to find the widgets, the most common method is finding widgets using
byKey().
byType(): If we know the class name of the widget that we want to locate orbyText(): If what we want to locate is a certain string on the screen- You can find more common finders by visiting this link
- Interacting with the Widget is very important in Widget Test. After all what we want to validate in most cases is that after the user interacted with our app like a button tap, our application transitions to a known state that we can assert in our tests.
- The
testWidget() method provides us a callback that gives us tester instance of a WidgetTester.
- With this object, we can interact with the widget that we have previously inflated with the
pumpWidget(). (In our case that is CalculatorPage()) .
- In our test, we can use
tester that ensureVisible() to make sure that a given widget is visible within a scrollable view.
- Then we can use
tester.tap() on TextFormField so they can gain focus.
And tester.enterText() to type the given text in the text field .
group('add', () {
  testWidgets('Show result when two inputs are given',
      (WidgetTester tester) async {

    await tester.pumpWidget(const CalculatorPage());

    final topTextFieldFinder = find.byKey(const Key('textfield_top_plus'));
    final bottomTextFieldFinder = find.byKey(const Key('textfield_bottom_plus'));

    await tester.ensureVisible(topTextFieldFinder);
    await tester.tap(topTextFieldFinder);
    await tester.enterText(topTextFieldFinder, '3');

    await tester.ensureVisible(bottomTextFieldFinder);
    await tester.tap(bottomTextFieldFinder);
    await tester.enterText(bottomTextFieldFinder, '6');

    await tester.pumpAndSettle();
    expect(find.text('Result: 9.0'), findsOneWidget);
  });
});
- You can study plenty of other tester methods here
- One of the greatest benefits of widget testing is that we can test different widgets and components in isolation without needing to launch the application.
- By doing this, our tests can be much more focused, faster and our code base will be much more modular, developer-friendly, and easy to maintain over time.
- Continuing with our calculator project we are going to apply this principle to the
OperationWidget.
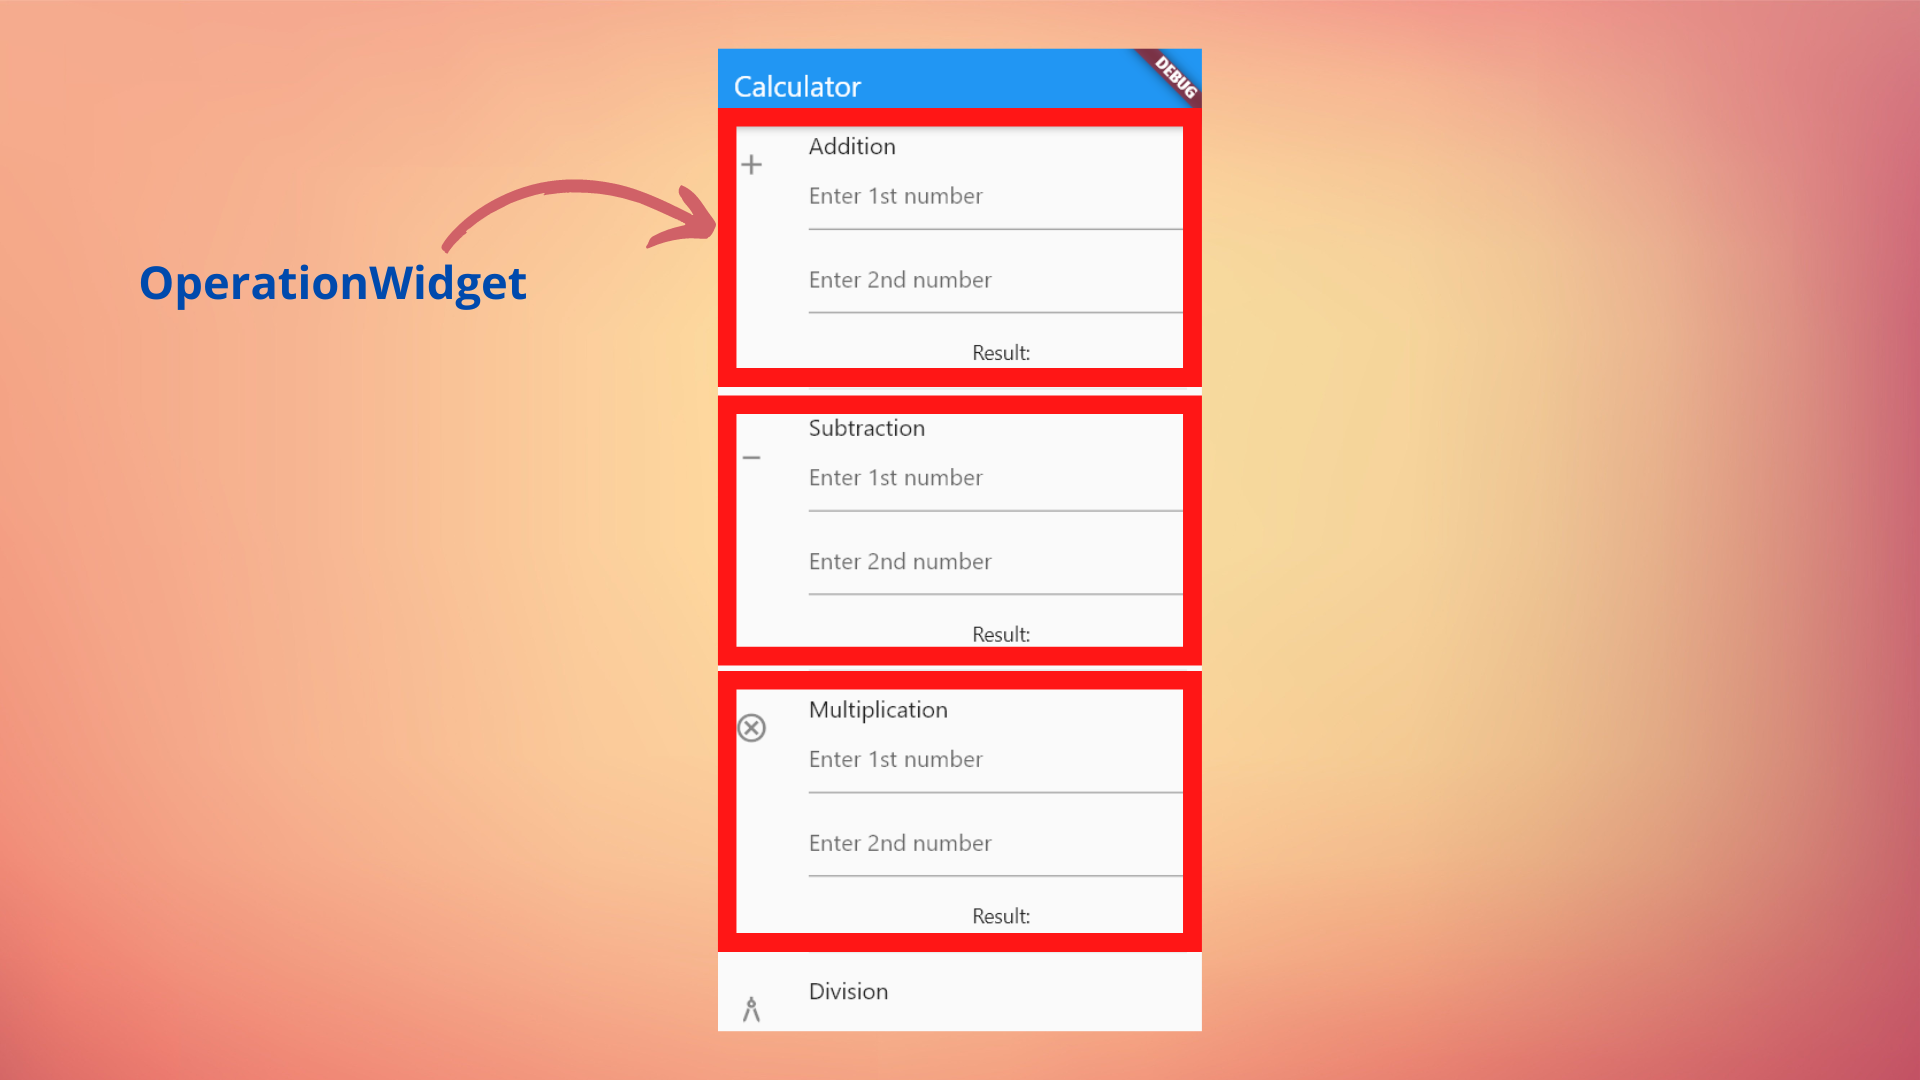
- To test this widget in isolation the approach did not differ from what we've already learned.
- The first step will be to pump our widget under test using
pumpWidget().
- Our
OperationWidget has five dependencies in its constructor, the icon, title, two keys, and the operation enum.
- Now we will pump our
OperationWidget using pumpWidget and all the other things remain the same.
main() {
  group('TwoDigit Addition Operation', () {
    testWidgets('render 10 when 5 and 5 added', (tester) async {
      final topTextFieldFinder = find.byKey(const Key('textfield_top_plus'));
      final bottomTextFieldFinder =
          find.byKey(const Key('textfield_bottom_plus'));

      await tester.pumpWidget(
         OperationWidget(
              operationIcon: Icons.add,
              operationTitle: "Addition",
              operationType: OperationType.add,
              textFieldTopKey: 'textfield_top_plus',
              textFieldBottomKey: 'textfield_bottom_plus',
            ),
      );

      await tester.enterText(topTextFieldFinder, '5');
      await tester.enterText(bottomTextFieldFinder, '5');

      await tester.pumpAndSettle();

      expect(find.text('Result: 10.0'), findsOneWidget);
    });
  });
}
- But now if you run this test, you will get an error saying: Saying
The specific widget that could not find a Material ancestor was: TextField.
- In order to solve this issue, we need to wrap the
OperationWidget around MaterialApp and Scaffold widget.
main() {
group('TwoDigit Addition Operation', () {
await tester.pumpWidget(
MaterialApp(
home: Scaffold(
body: OperationWidget(
operationIcon: Icons.add,
operationTitle: "Addition",
operationType: OperationType.add,
textFieldTopKey: 'textfield_top_plus',
textFieldBottomKey: 'textfield_bottom_plus',
),
),
),
);
});
});
}
- Now if you will run the test, it should pass.
Wrapping Up
- I hope you enjoyed and learned something from this article. If you have any feedback/queries, leave them in the comments.
- In the next blog we are going to see the final testing method: Integration Test
- I've learned to test and wrote this article using the example provided by VGV. So big thanks to VGV.
- Thank you for spending time reading this article. See you in the next article. Until then...

Follow me on : Twitter, LinkedIn, Github