Slivers in Flutter - Part (1)
What is Sliver? What is CustomScrollView? An In-depth Explanation of SliverList and SliverAppBar with Example.
Sliver
Sliversare basically a scrollable area, that can be customized. Slivers help us to make the scrolling fancier instead of a normal boring scroll.Sliversare useful for placing multiple scrollable widgets (ListView, GridView) inside it. It means we can handle nested scroll view. Like below -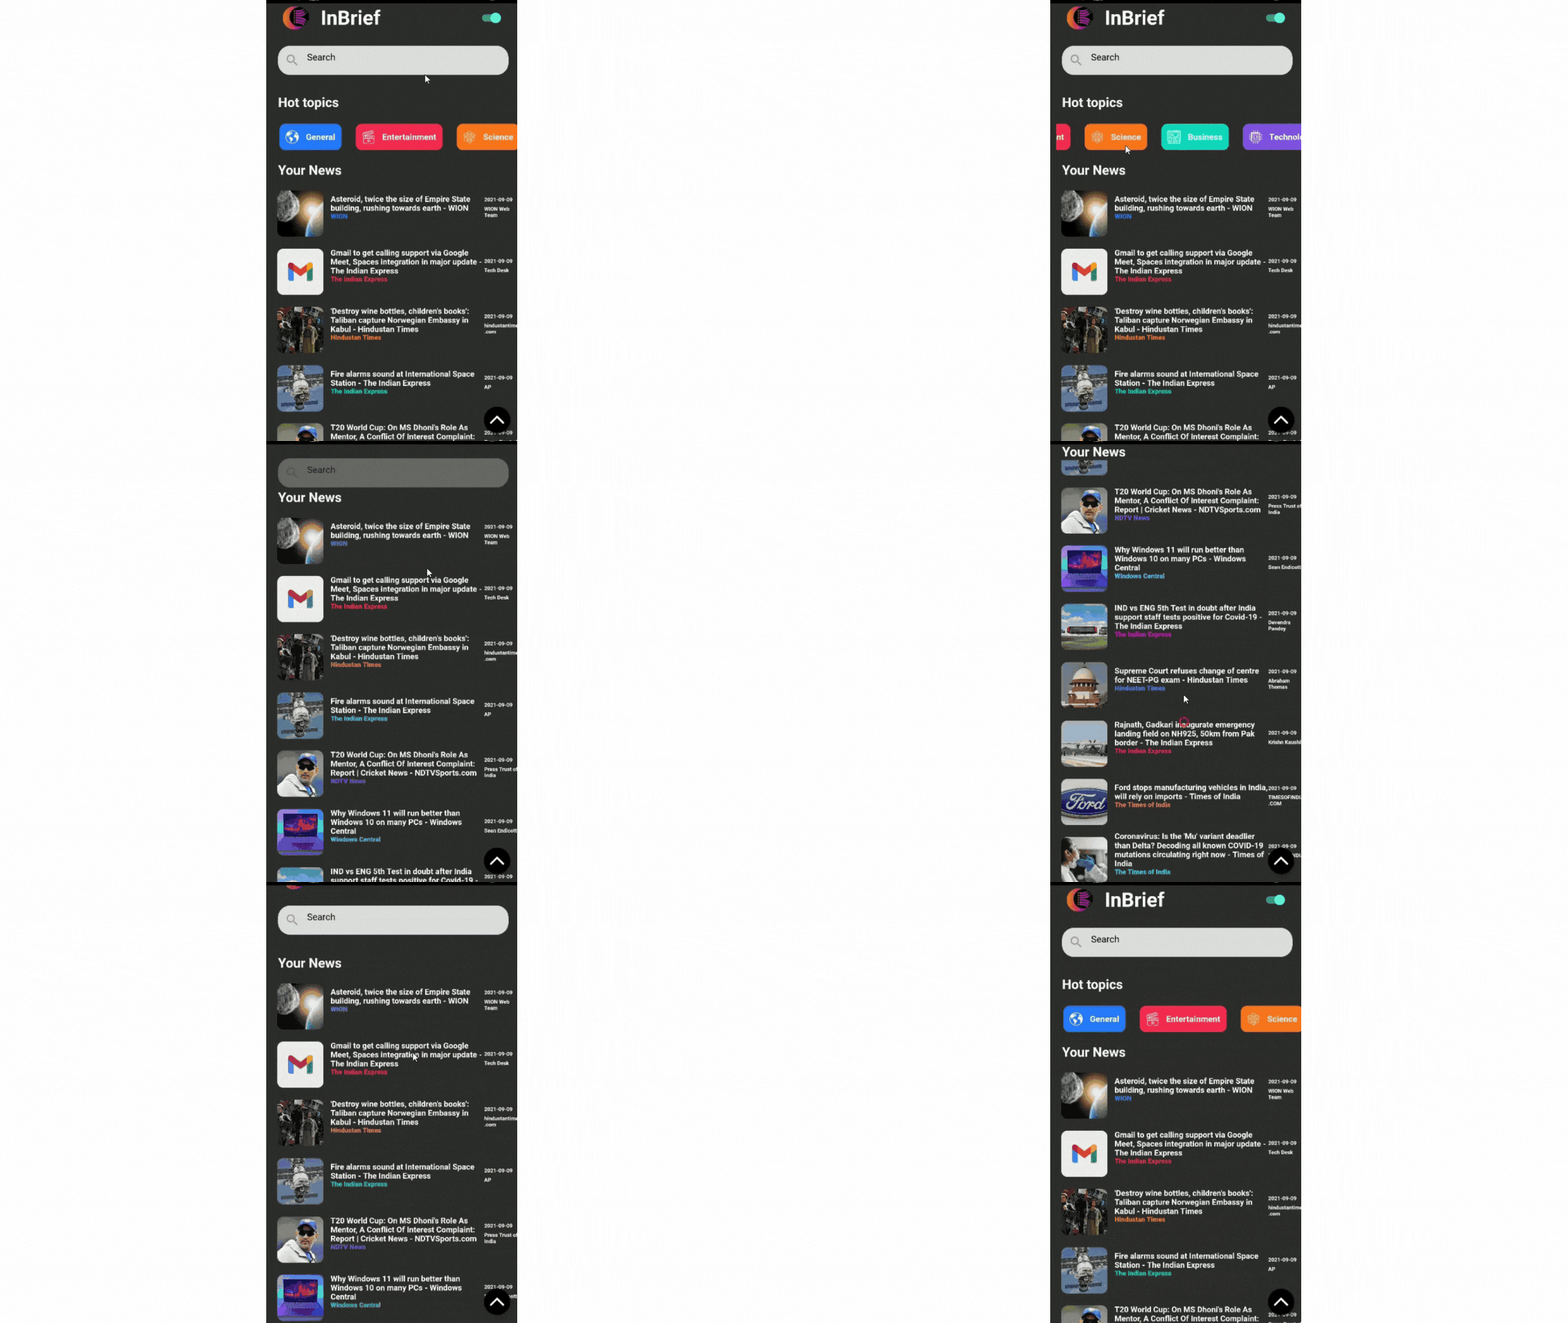
- In-fact, scrollable widgets like
ListView,GridView,SingleChildScrollView, etc are implementingsliversunder the hood.
CustomScrollView
- If you want to use different
Slivers, you need a special widget called CustomScrollView. All thesliversare placed inside it. CustomScrollViewis the Widget that allows different types of scrollable widgets and lists. And these scrollable lists and widgets are calledslivers.- There are several types of
sliversavailable. For example -SliverAppBar,SliverGridList, andSliverList, etc.One thing to note here is CustomScrollView only takes Slivers Widgets as a child. Normal widgets like
Container,ListTile, etc will not work. - Example :
Scaffold( body: CustomScrollView( slivers: [ SliverAppBar(/**/), SliverGridList(/**/), SliverList(/**/), //...... ] ), );- The
CustomScrollViewhas many properties and one of them isslivers. Which takes listsliversas an input. - Let's first understand different
sliversone by one with an example. And then we can define thosesliversinside theCustomScrollView.
SliverList
- The
SliverListis a widget that takes lists of items as child, same asListViewandGridView. - This is useful, If you have a
ListViewandGridViewand you want to scroll it together. Like below - 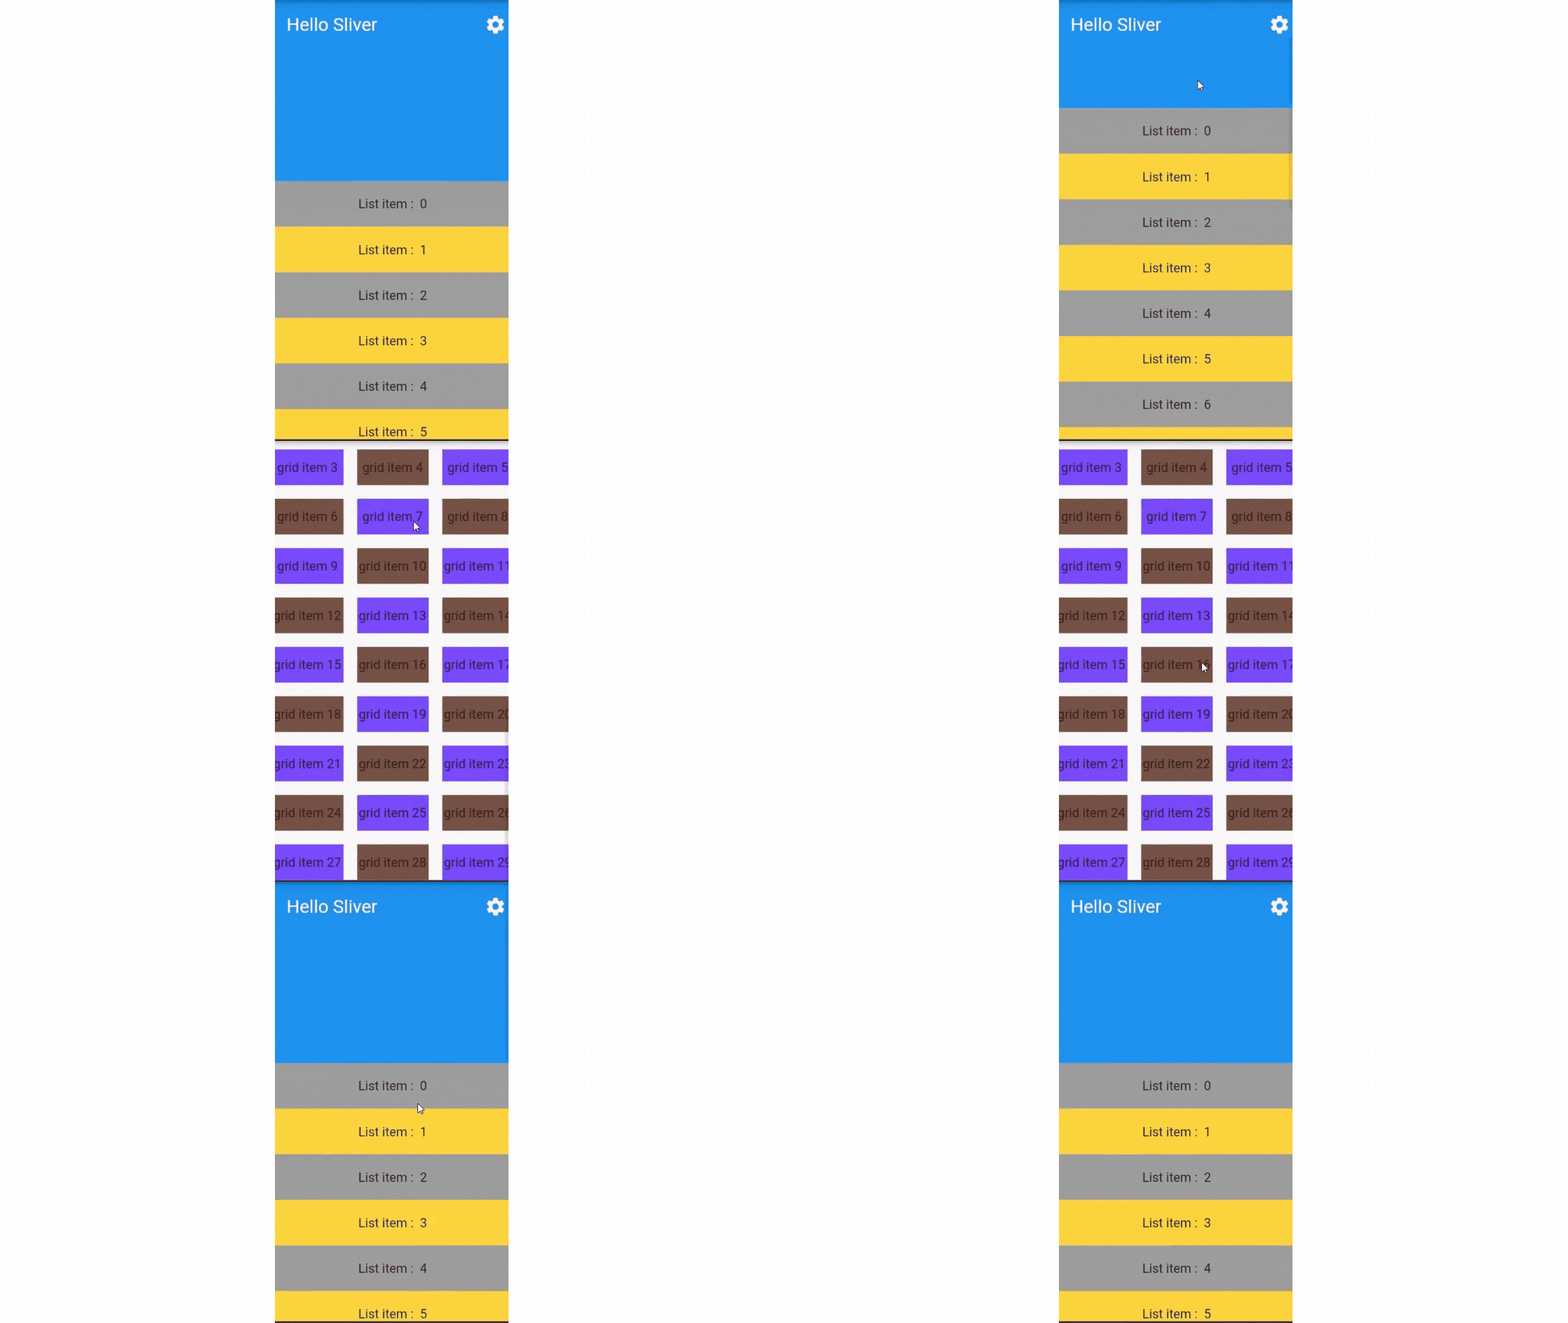
SliverList, has one parameter calleddelegate. There are two types ofdelegate-- SliverChildListDelegate: Takes a list of widgets that we want to display. Widgets defined in this list will be rendered at once. There will not be any lazy loading.
- SliverChildBuilderDelegate: Take a list of widgets that will be created lazily. It means as the user scrolls items get rendered.
Scaffold(
    body: CustomScrollView(
    slivers: [
      SliverList(
        delegate: SliverChildBuilderDelegate(
          (context, index) {
            return Container(
              height: 50,
              alignment: Alignment.center,
              color: index.isEven ? Colors.grey : Colors.amberAccent,
              child: Text('List item :  $index'),
            );
          },
          childCount: 12,
        ),
      ),
    ],
));
SliverAppBar
- This is the same as the
AppBarwidget, the difference is that it works withCutomScrollView. - It means it has all the properties like -
title,actions,leading,flexibleSpaceetc. - But it has some additional parameters like
pinned,floating,snap,expandedHeightwhich customizes the behavior of the AppBar. Let's see how these properties affect the scroll behavior, in the below example. - Creating
SliverAppBarwithtitleandactionScaffold( body: CustomScrollView( slivers: [ SliverAppBar( title: Text('Hello Sliver'), actions: <Widget>[ IconButton( icon: const Icon(Icons.settings), onPressed: () {/* ... */}, ), ], ) ], ) ); - Output:
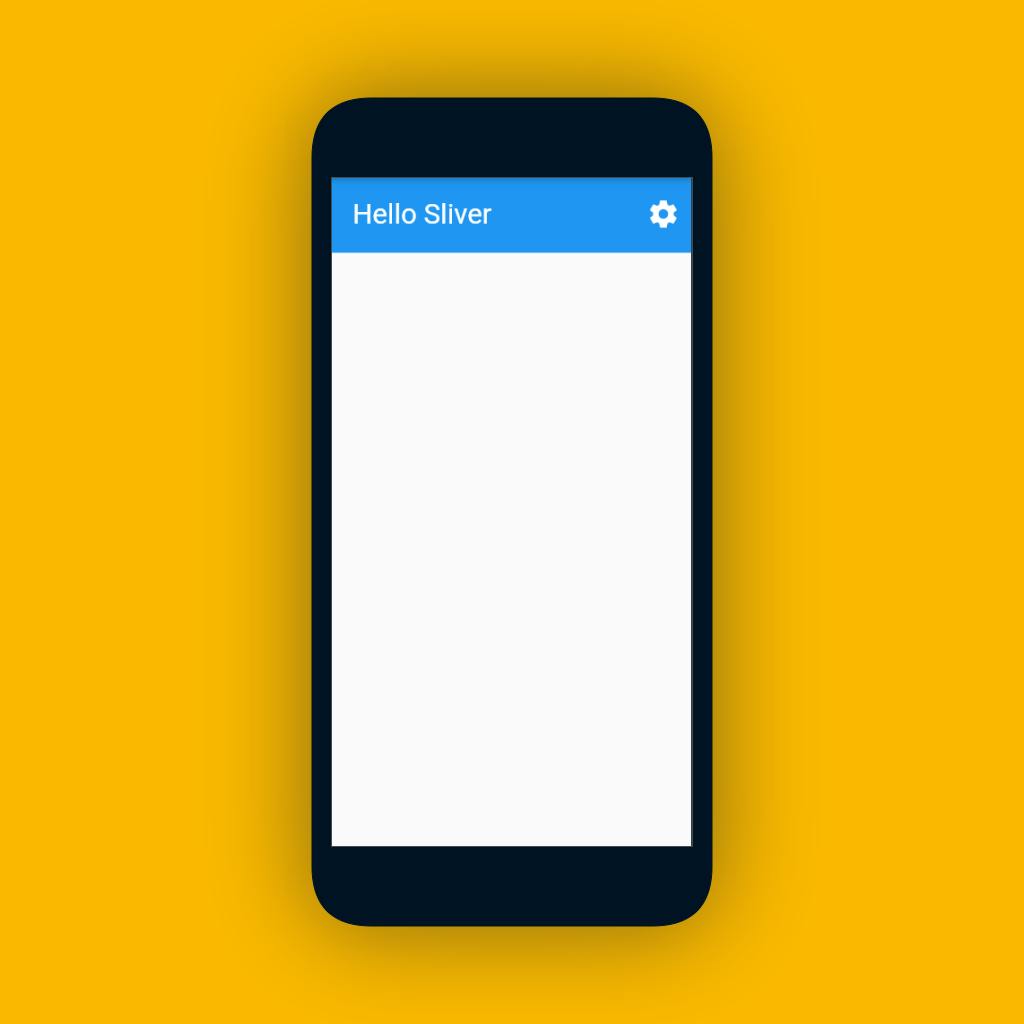
- As you can see this looks like a traditional material app AppBar.
- Let's understand the different properties of
SliverAppBar:expandedHeight: - This defines the size of the
AppBarwhen fully expanded. - Example:
SliverAppBar( expandedHeight: 200, title: Text('Hello Sliver'), actions: <Widget>[ IconButton( icon: const Icon(Icons.settings), onPressed: () {/* ... */}, ), ]),- The height will get shrink as the user scrolls down, like below -
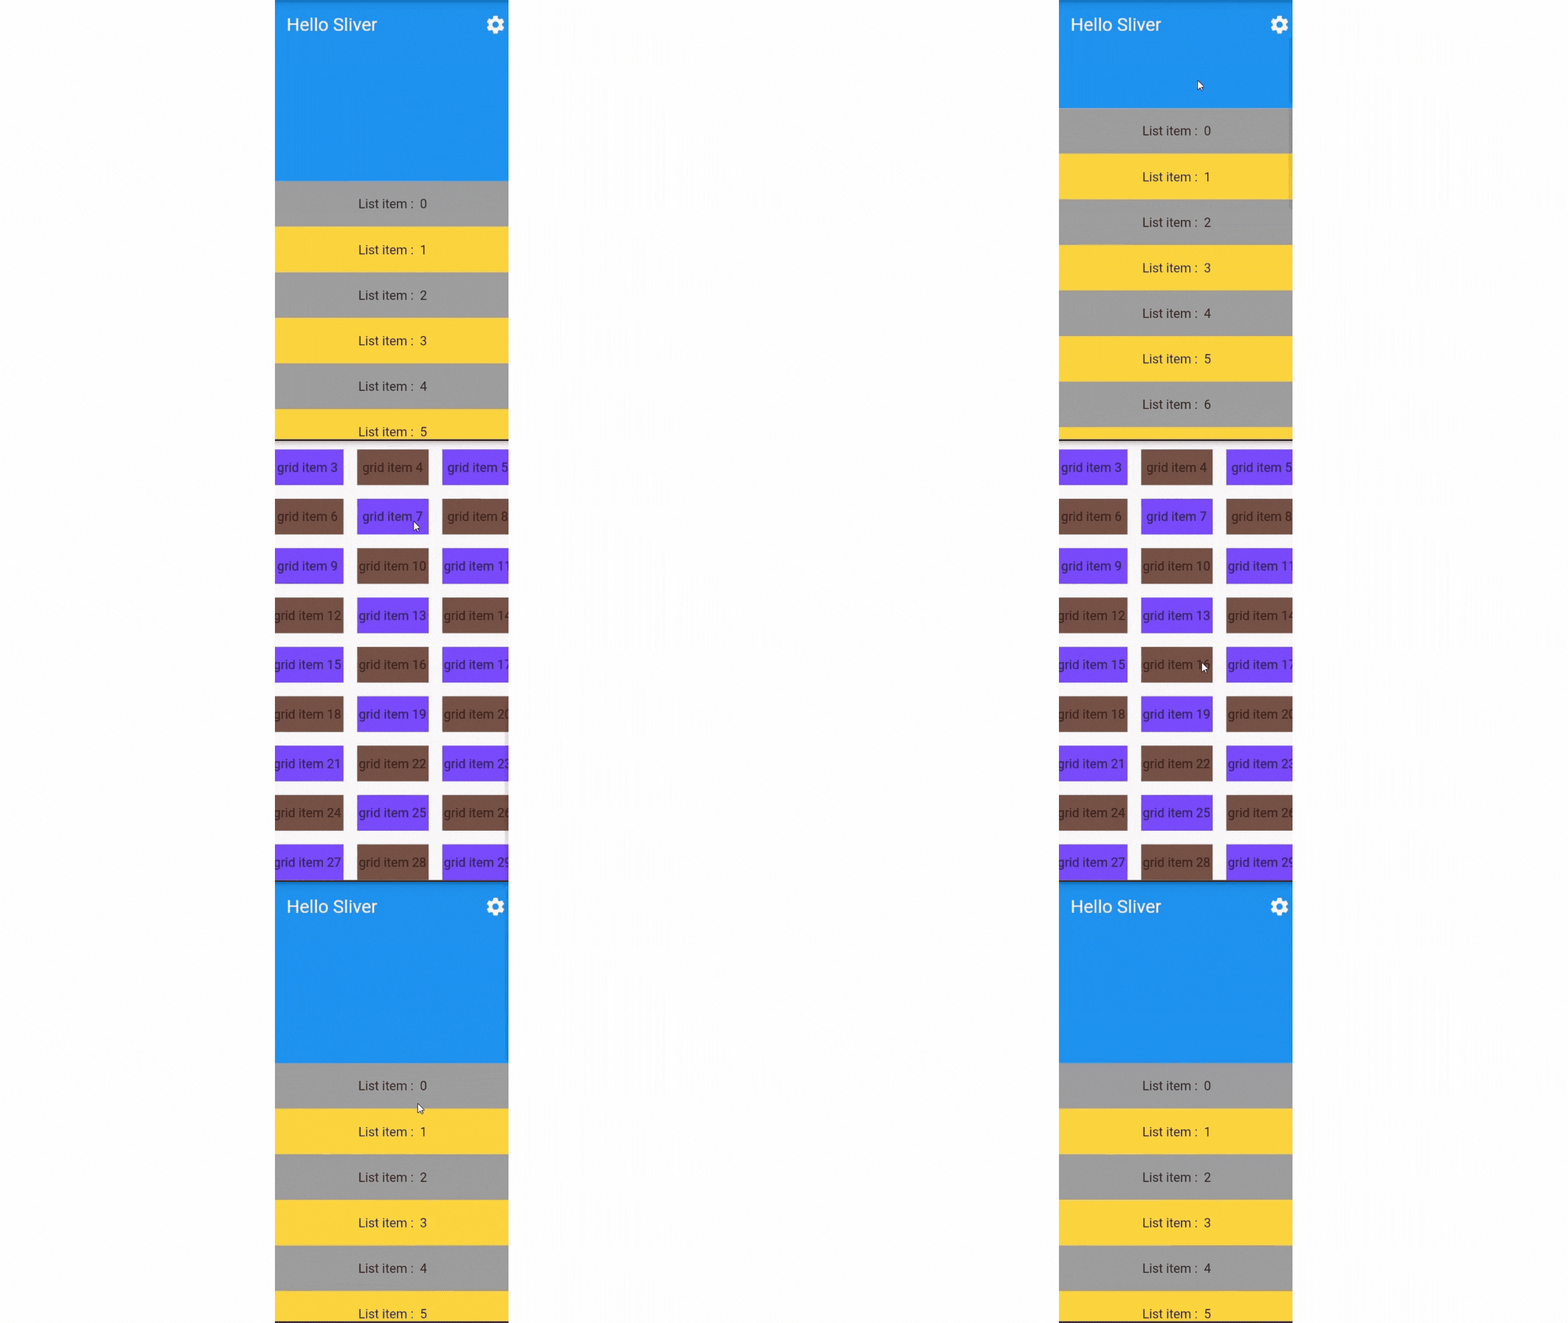
- But if you see, The AppBar hides when the user scrolls down. Let's pin the AppBar.
pinnned:
- This will determine, whether the AppBar remains visible on the screen when the user scrolls down or not.
- If
true: AppBar will not hide on scroll SliverAppBar( expandedHeight: 200, pinned: true, title: Text('Hello Sliver'), actions: <Widget>[ IconButton( icon: const Icon(Icons.settings), onPressed: () {/* ... */}, ), ]),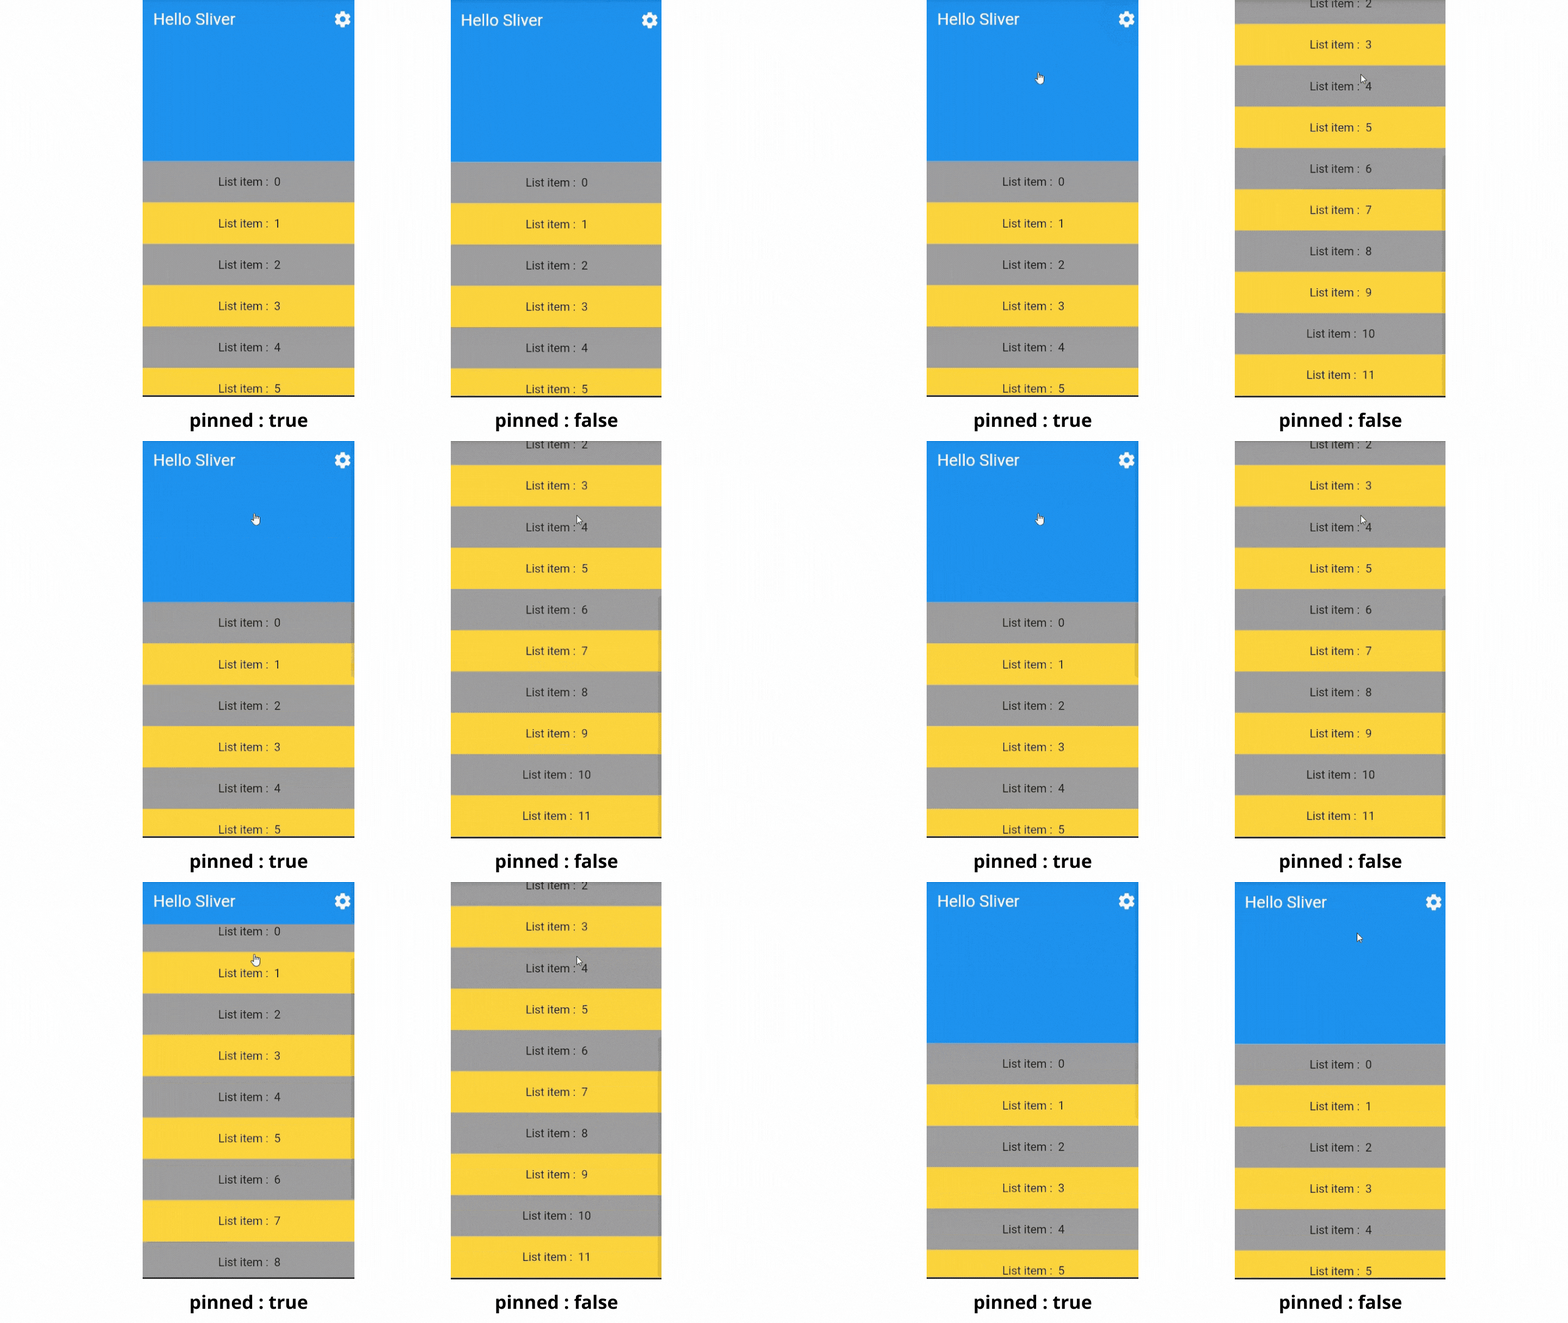
floating:
- If
true, then the AppBar will get visible as soon as the user scrolls towards the AppBar. - If
falsethen the user has to scroll all the way to the top in order to access AppBar SliverAppBar( expandedHeight: 200, floating:true title: Text('Hello Sliver'), actions: <Widget>[ IconButton( icon: const Icon(Icons.settings), onPressed: () {/* ... */}, ), ]),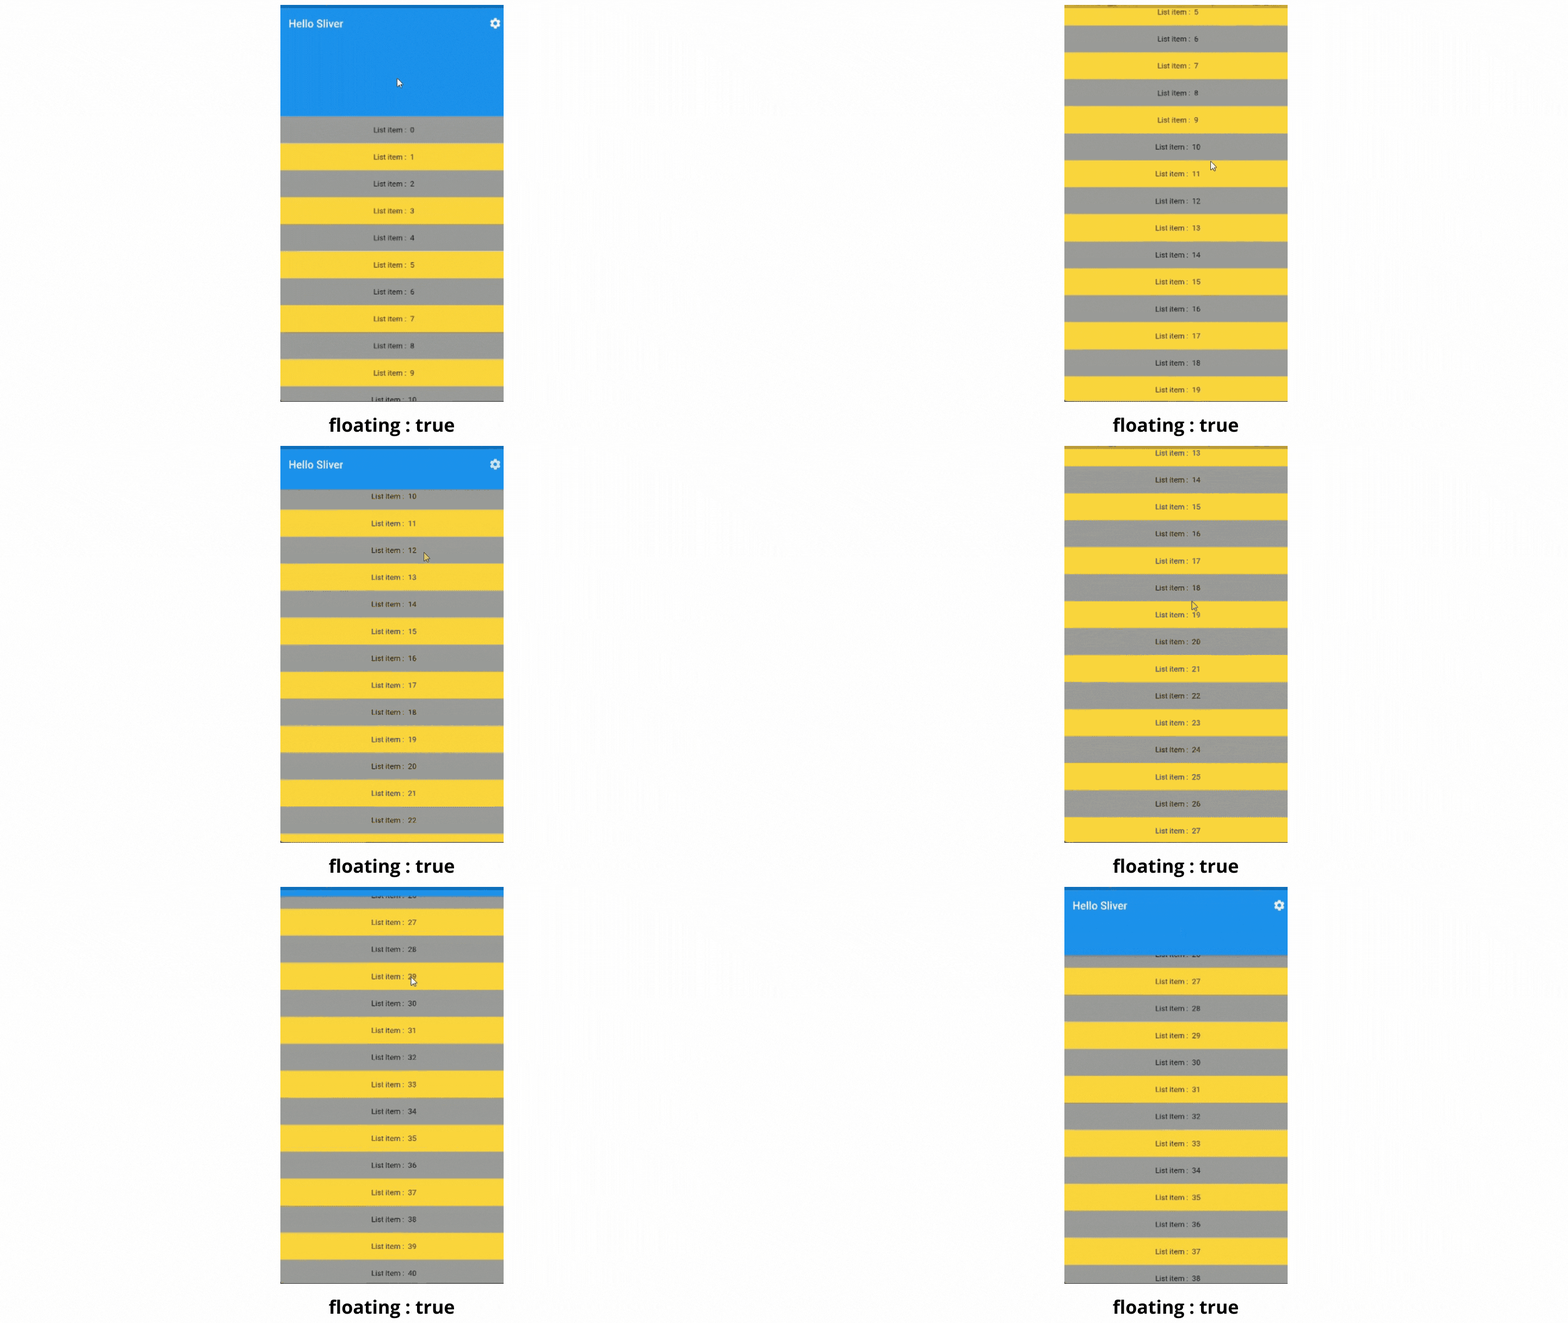
snap:
- If
true, Then the whole AppBar will be visible whenever a user tries to scroll toward the AppBar. - The
floatingvalue must havetruein order to runsnap.SliverAppBar( expandedHeight: 200, floating:true, snap: true, title: Text('Hello Sliver'), actions: <Widget>[ IconButton( icon: const Icon(Icons.settings), onPressed: () {/* ... */}, ), ]), 
- Difference between
snapandfloatingis,snapshows the AppBar at once, whereas thefloatingshows AppBar as the user scrolls up. 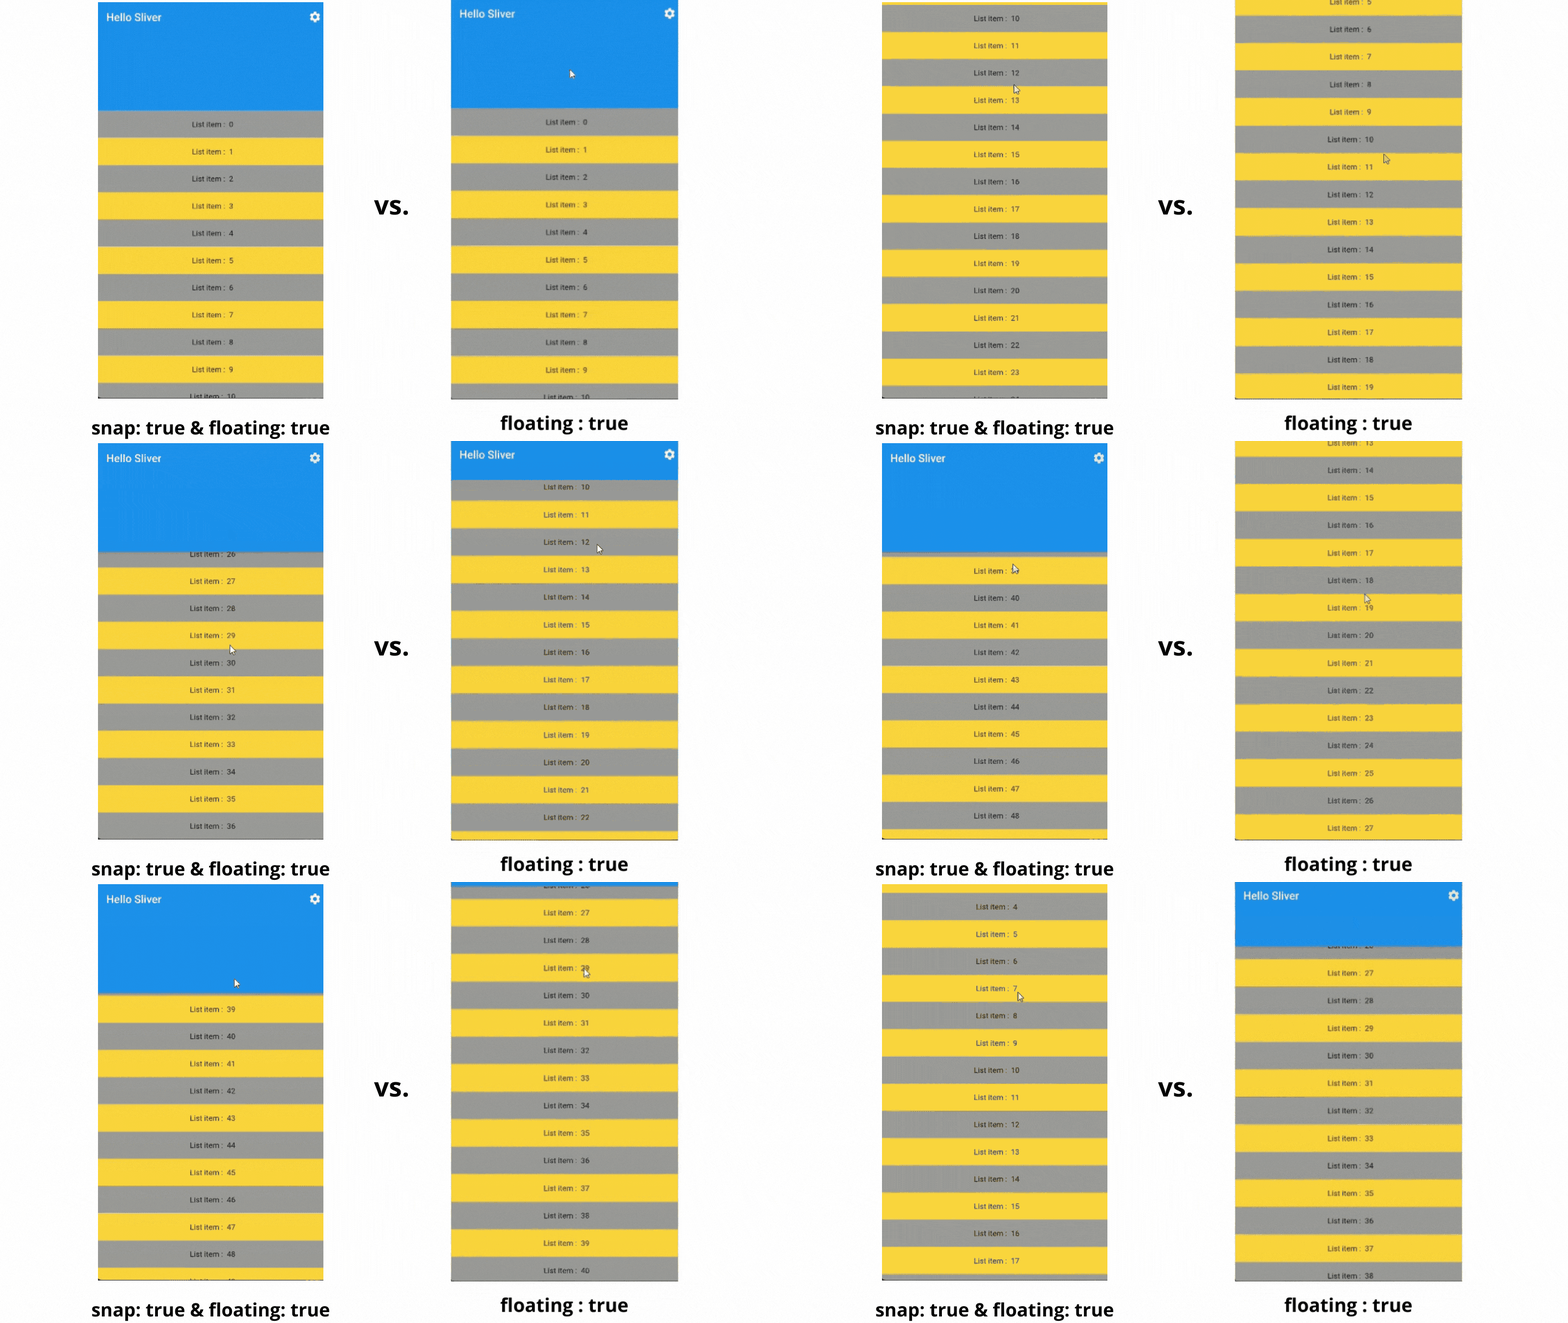
You can try different combinations of
floating,pinned, andsnapto get various results.
flexibleSpace
- It is used to give a
backgroundand variouscollapseModesto the AppBar. - There is
titleproperty also. It is placed at the bottom. When the user scrolls up, it will transform its position with the transition. - For example -
SliverAppBar(
         flexibleSpace: FlexibleSpaceBar(
                    title: Text("Welcome to Space"),
                    background: Image.network("url",fit: BoxFit.cover),
         ),
        expandedHeight: 200,
        pinned: true,
        actions: <Widget>[
        IconButton(
          icon: const Icon(Icons.settings),
          onPressed: () {/* ... */},
        ),
]),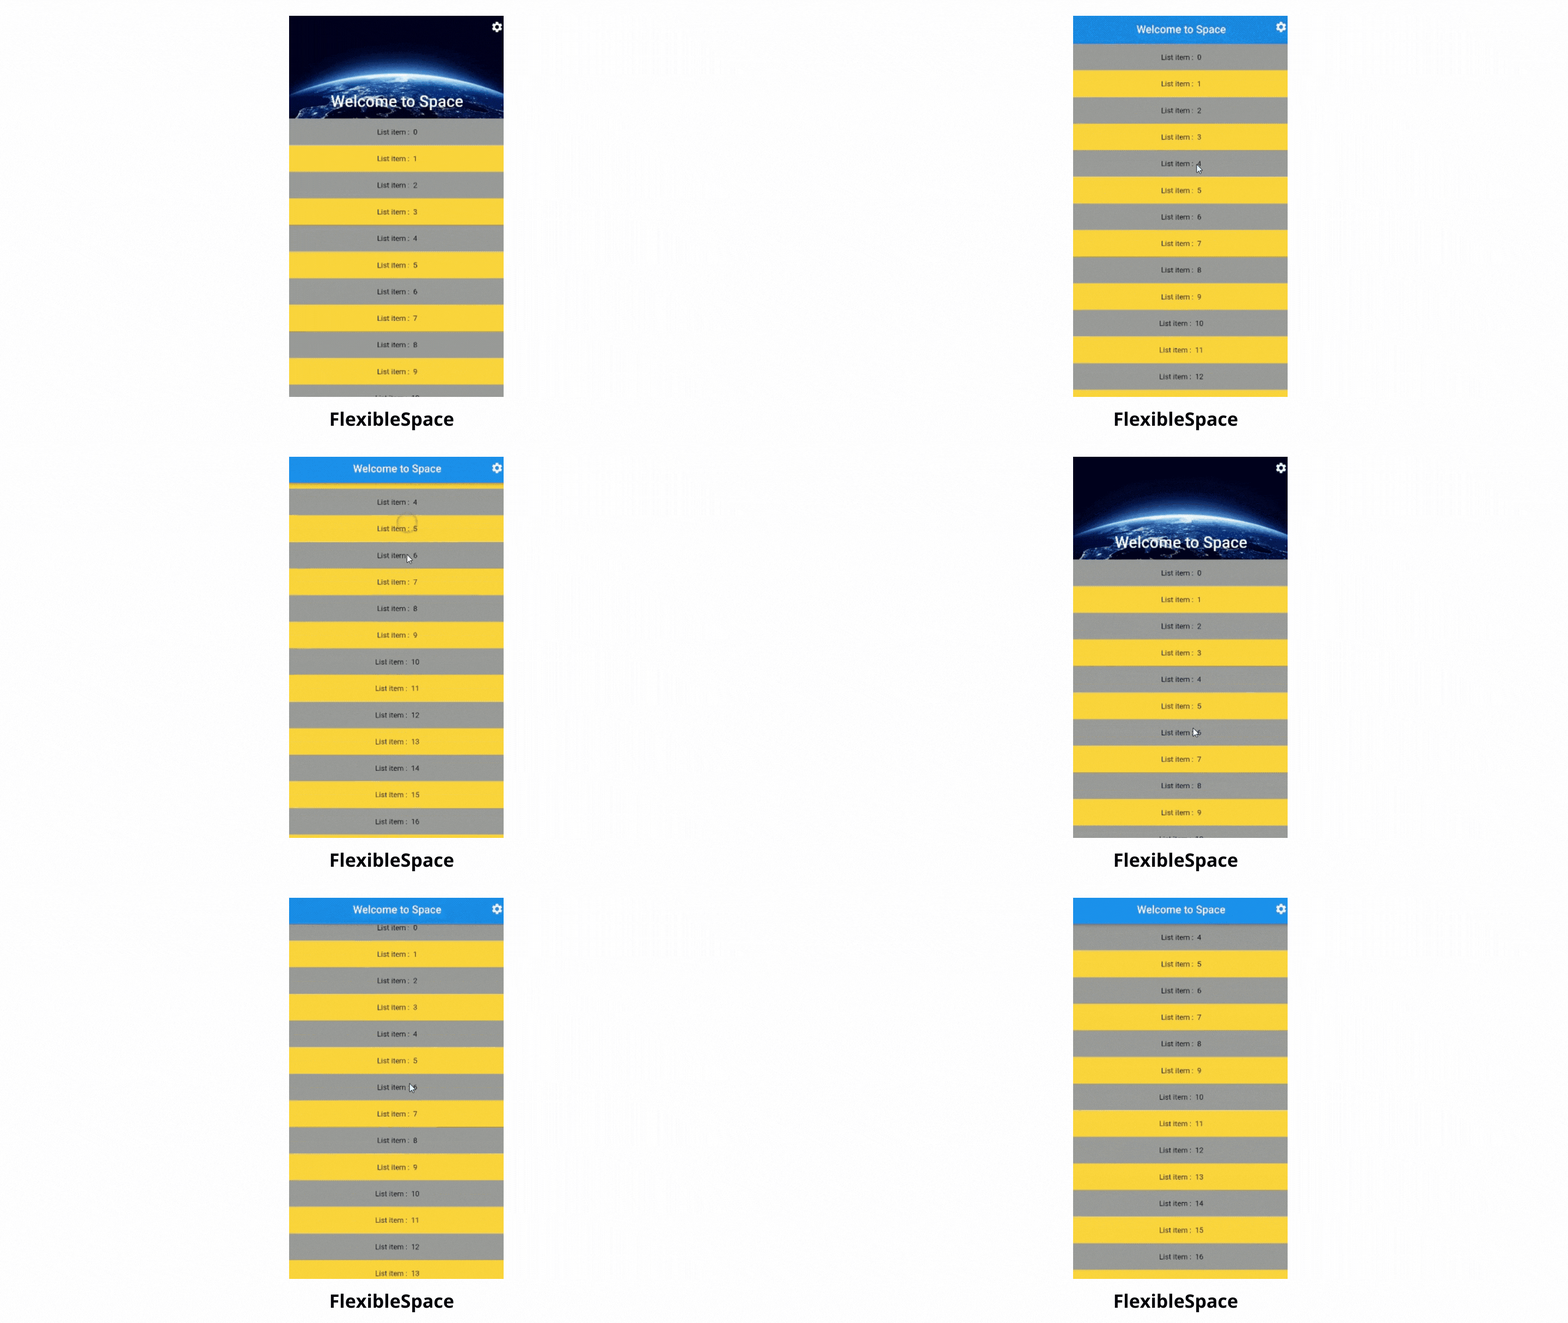
- Isn't it looking awesome? When we scroll up we are getting parallax effect. And it's because of the
collapseModeproperty. - The
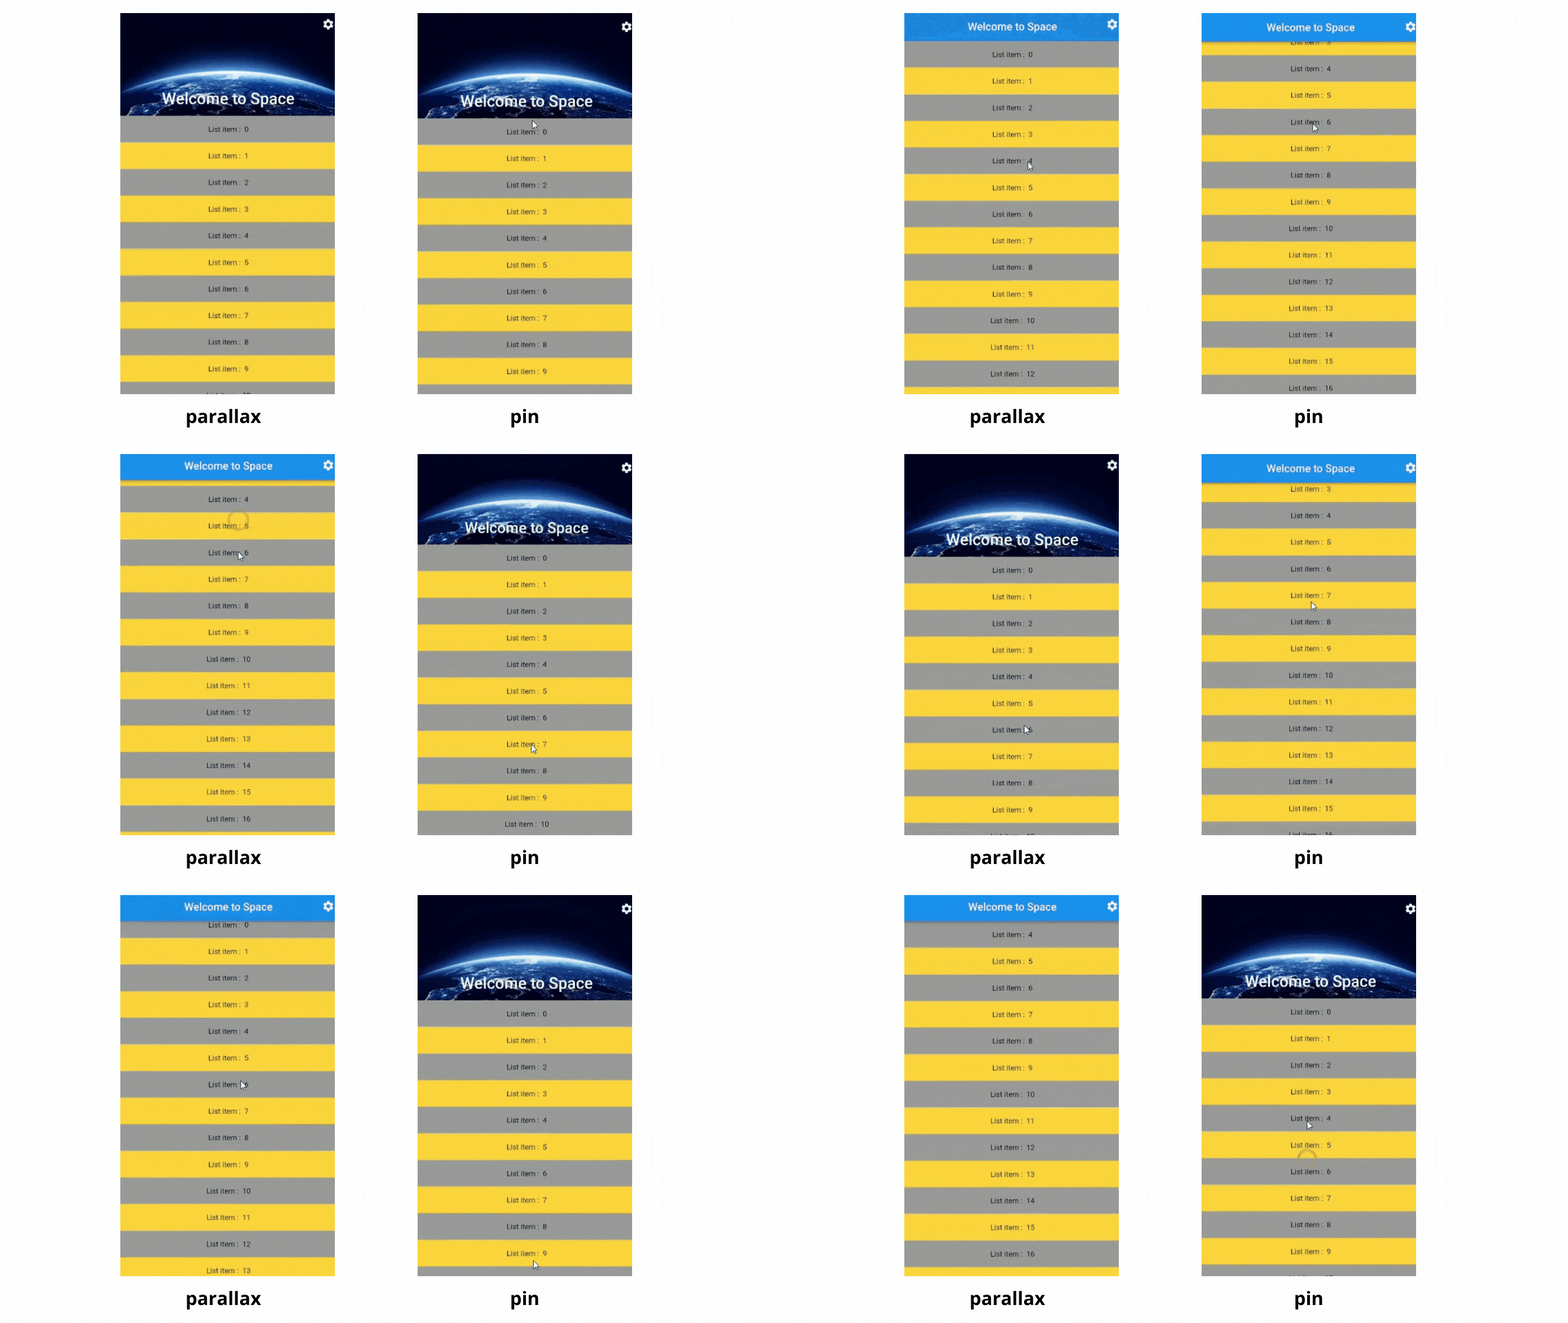
collapseModehas 3 mode - parallax, pin, none - If you put CollapseMode.pin then you will not get a parallax effect of the image. The image will simply change it's a position with AppBar and fades out, like below -
SliverAppBar(
         flexibleSpace: FlexibleSpaceBar(
                    collapseMode: CollapseMode.pin,
                    title: Text("Welcome to Space"),
                    background: Image.network("url",fit: BoxFit.cover),
         ),
        expandedHeight: 200,
        pinned: true,
        actions: <Widget>[
        IconButton(
          icon: const Icon(Icons.settings),
          onPressed: () {/* ... */},
        ),
]),
stretch
- Default value is
false. - If you scroll down when you're at the top then you will see the empty space, like below -
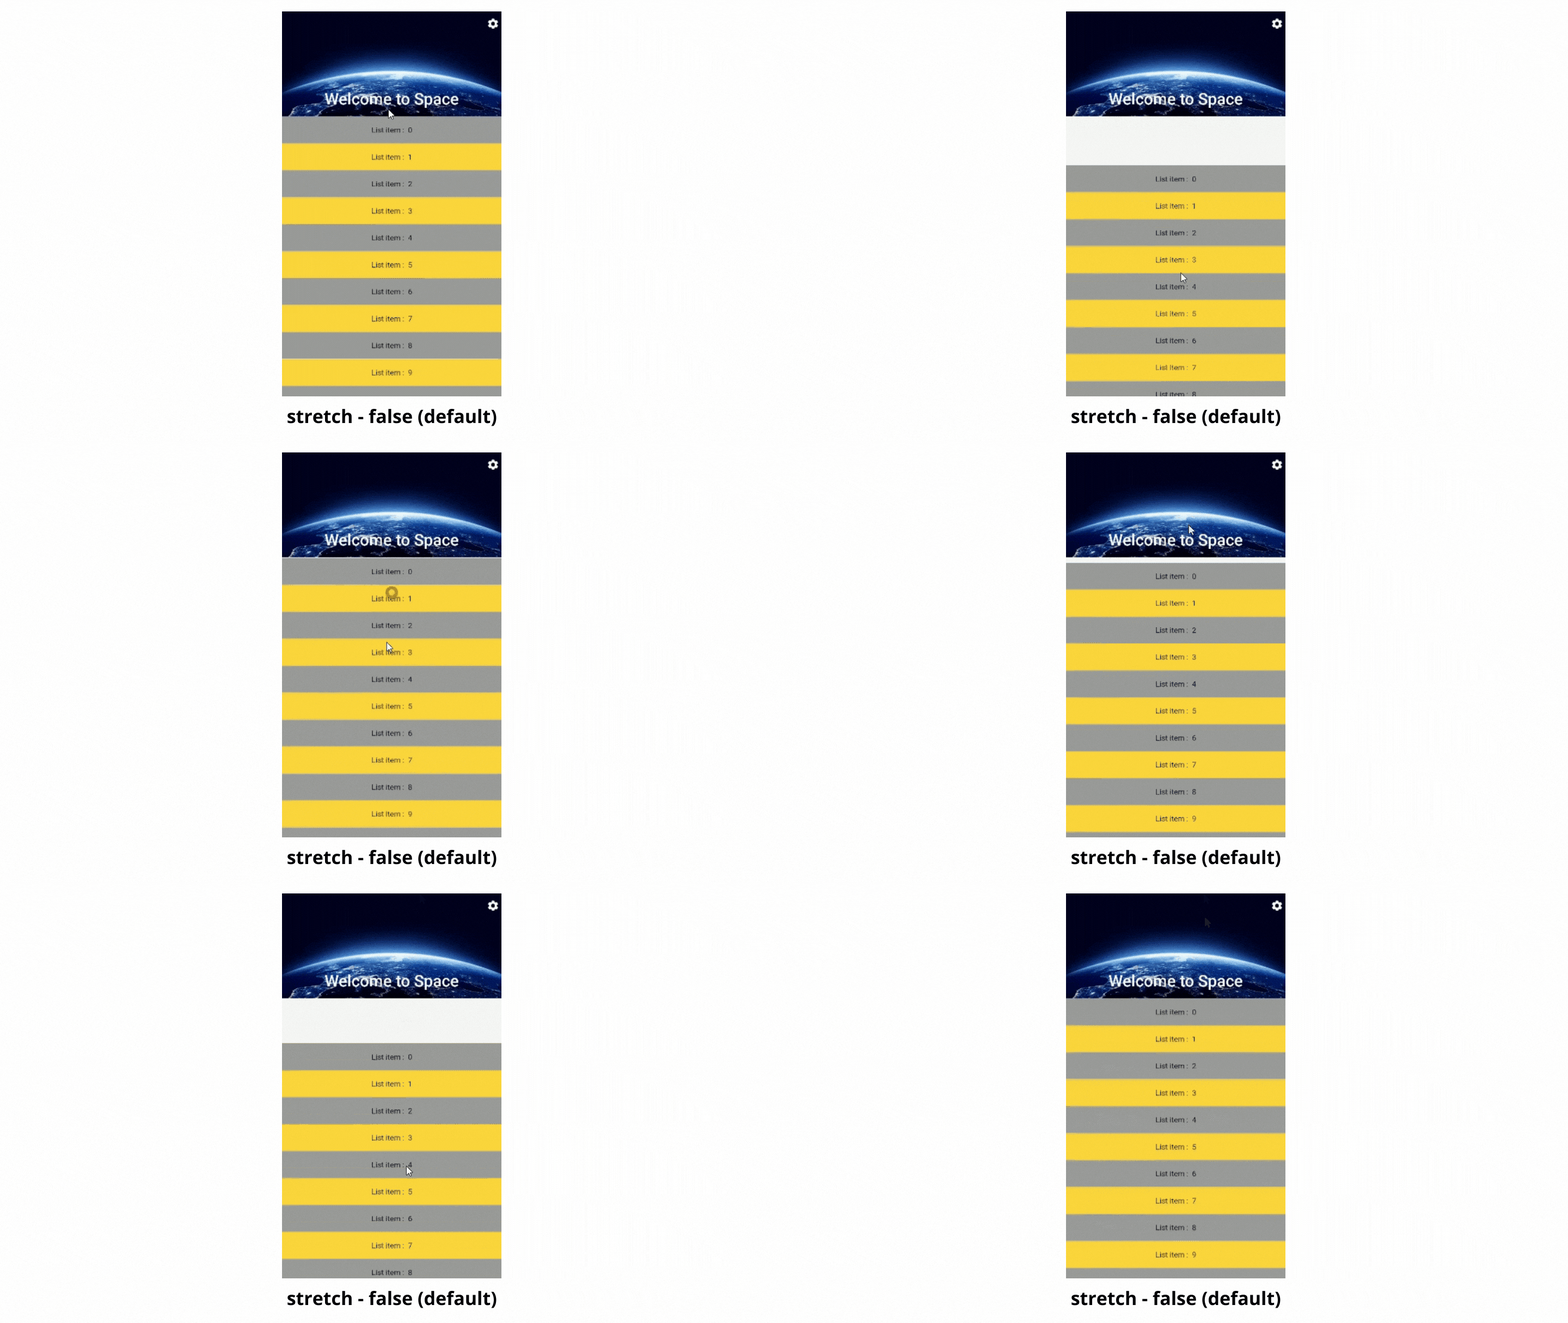
- To fill the overflowing space when the user scrolls down, give
stretcha valuetrue. SliverAppBar( stretch: true, flexibleSpace: FlexibleSpaceBar( collapseMode: CollapseMode.pin, title: Text("Welcome to Space"), background: Image.network("url",fit: BoxFit.cover), ), expandedHeight: 200, pinned: true, actions: <Widget>[ IconButton( icon: const Icon(Icons.settings), onPressed: () {/* ... */}, ), ]),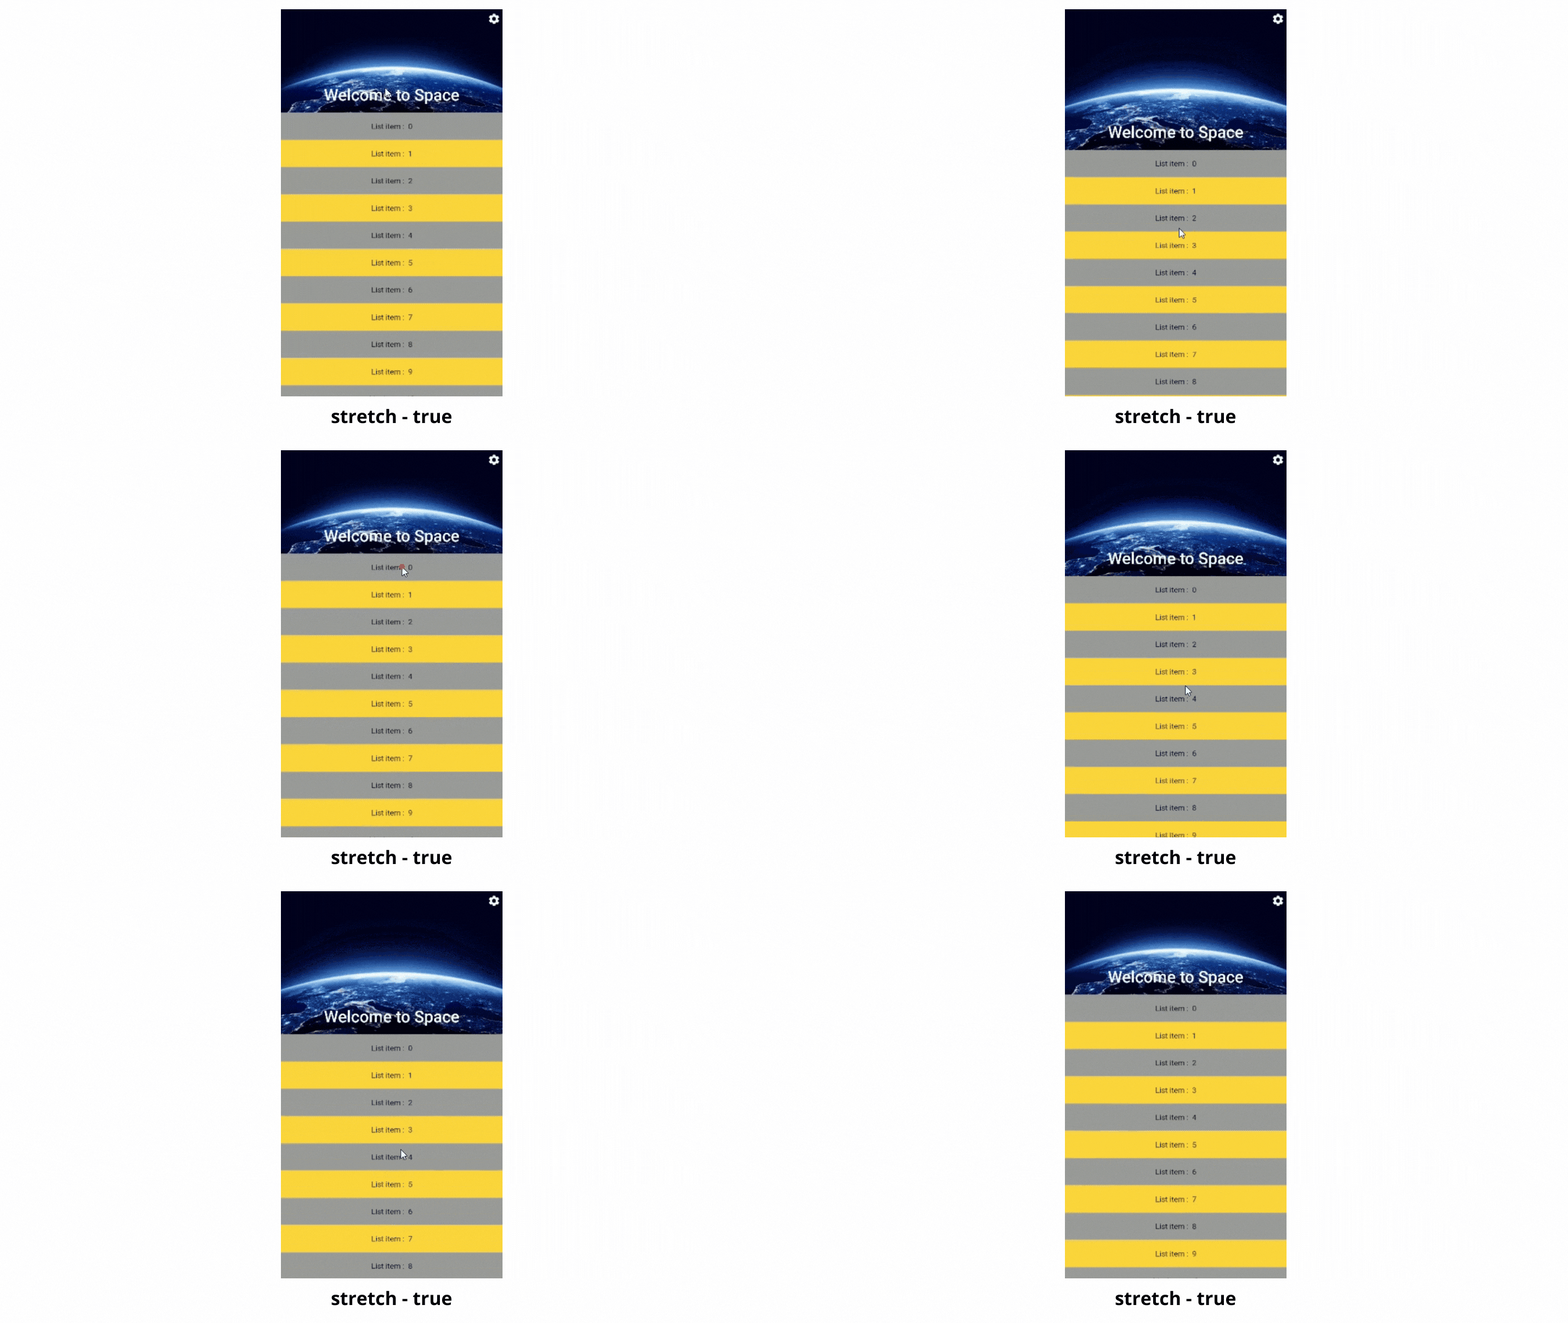
- You can also trigger a function when the user stretches by implementing
onStretchTriggerfunction ofSliverAppBar.Note: You have to provide
scrollBehaviorto theMaterialAppfor thebouncingscrolling effect.
stretchModes
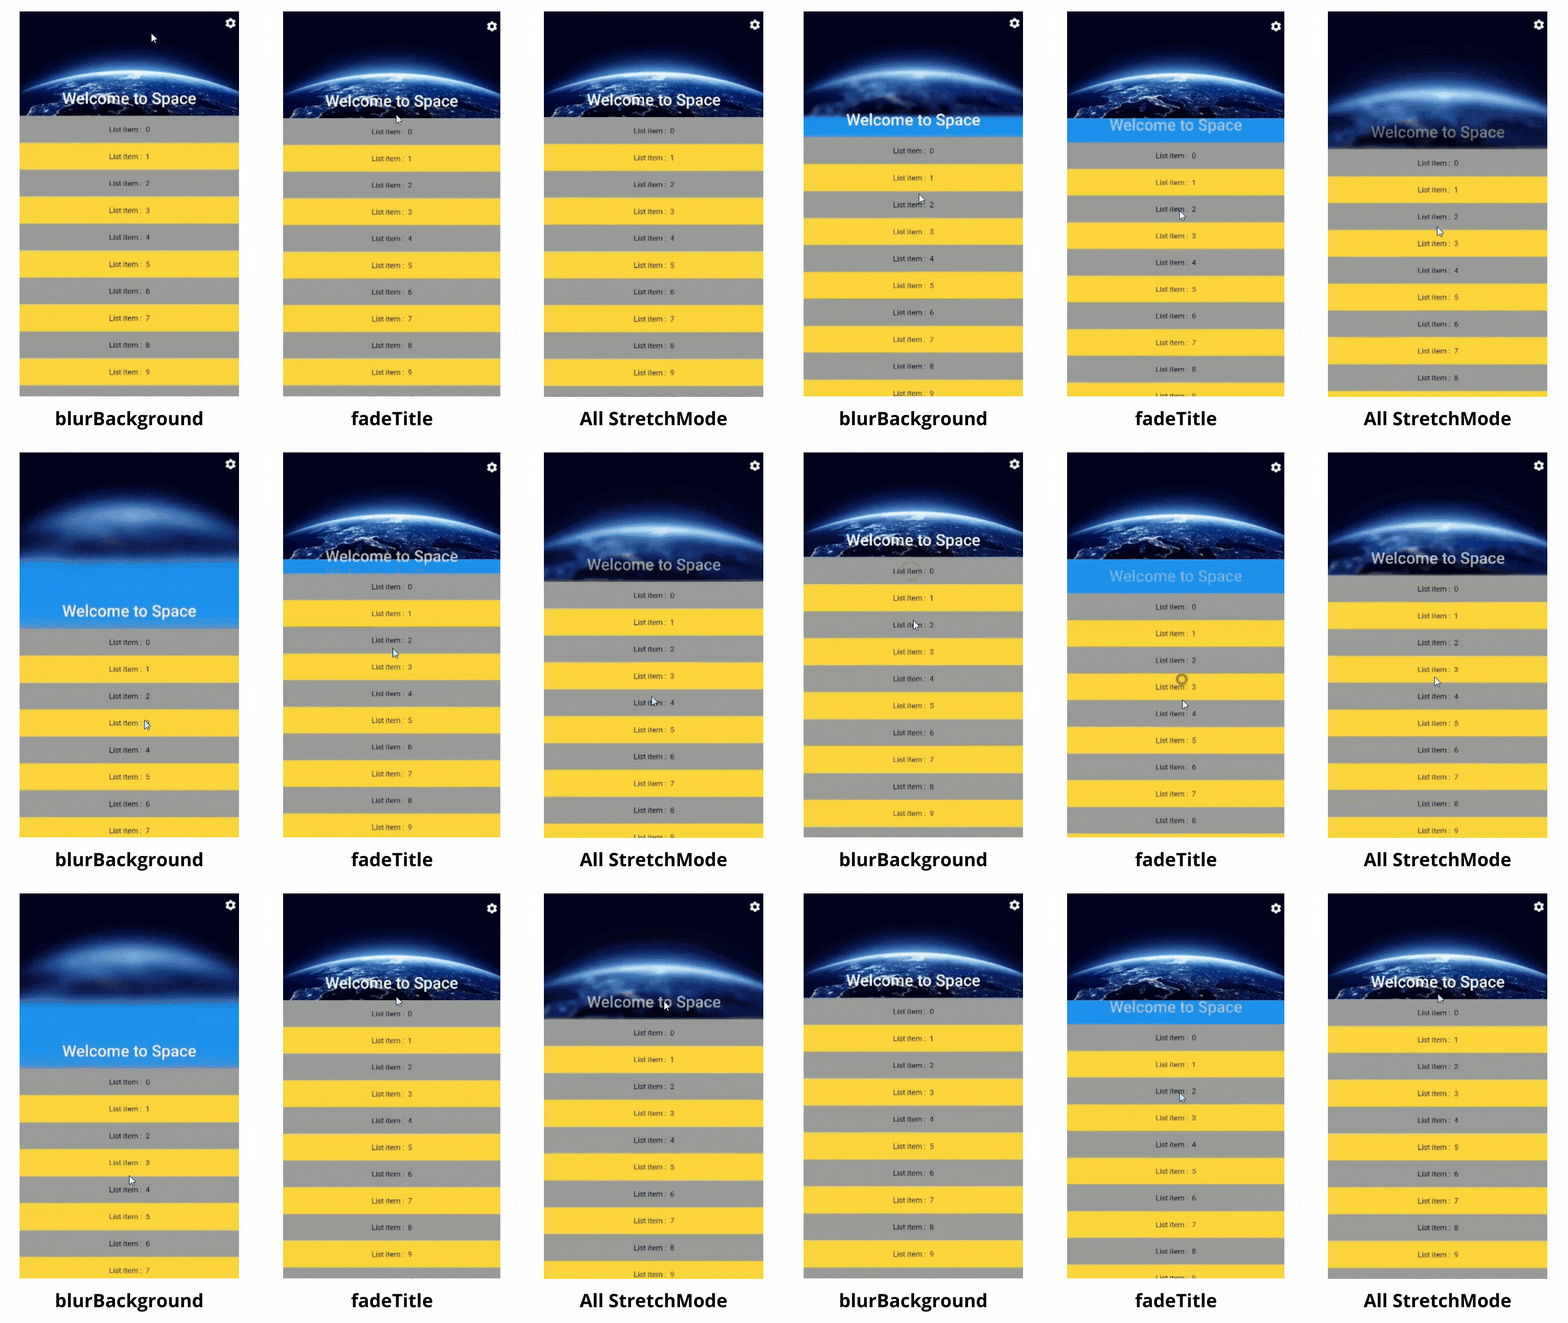
- If you want to
blur, orfadethe image on the overflowing scroll instead ofzooming, then you can provide differentstretchModesinside theFlexibleSpaceBar. - It has 3 main modes - blurBackground, fadeTitle and zoomBackground (default)
- Let's try the remaining 2 modes :
SliverAppBar(
         stretch: true,
         flexibleSpace: FlexibleSpaceBar(
                    collapseMode: CollapseMode.pin,
                    title: Text("Welcome to Space"),
                    background: Image.network("url",fit: BoxFit.cover),
                    stretchModes: [
                        StretchMode.fadeTitle,  // fades out the title
                        StretchMode.blurBackground, // blur out the background
                        StretchMode.zoomBackground // zoom the background
                ],
         ),
        expandedHeight: 200,
        pinned: true,
        actions: <Widget>[
        IconButton(
          icon: const Icon(Icons.settings),
          onPressed: () {/* ... */},
        ),
]),
Wrapping Up
- This is the Part - 1 of Advance Scrolling in Flutter.
- In Part-2 we will see different types of Sliver and how to use them.
- If you liked this article, share it with your developer friends and communities.
- Comments and Feedback are welcomed 😃
- See you in the next article. Until then.....
