
FVM (Flutter Version Management) - An Easier Way To Maintain Flutter Versions
Maintain Flutter Versions like a Pro

Intro to FVM
- Have you ever felt like managing Flutter versions was a pain? You're not alone.
- If you've ever tried to manage multiple Flutter versions across your project, you know what it's like to spend hours trying to make sure that every project has the correct version of Flutter installed and configured to work with each other, and that they're all consistent.
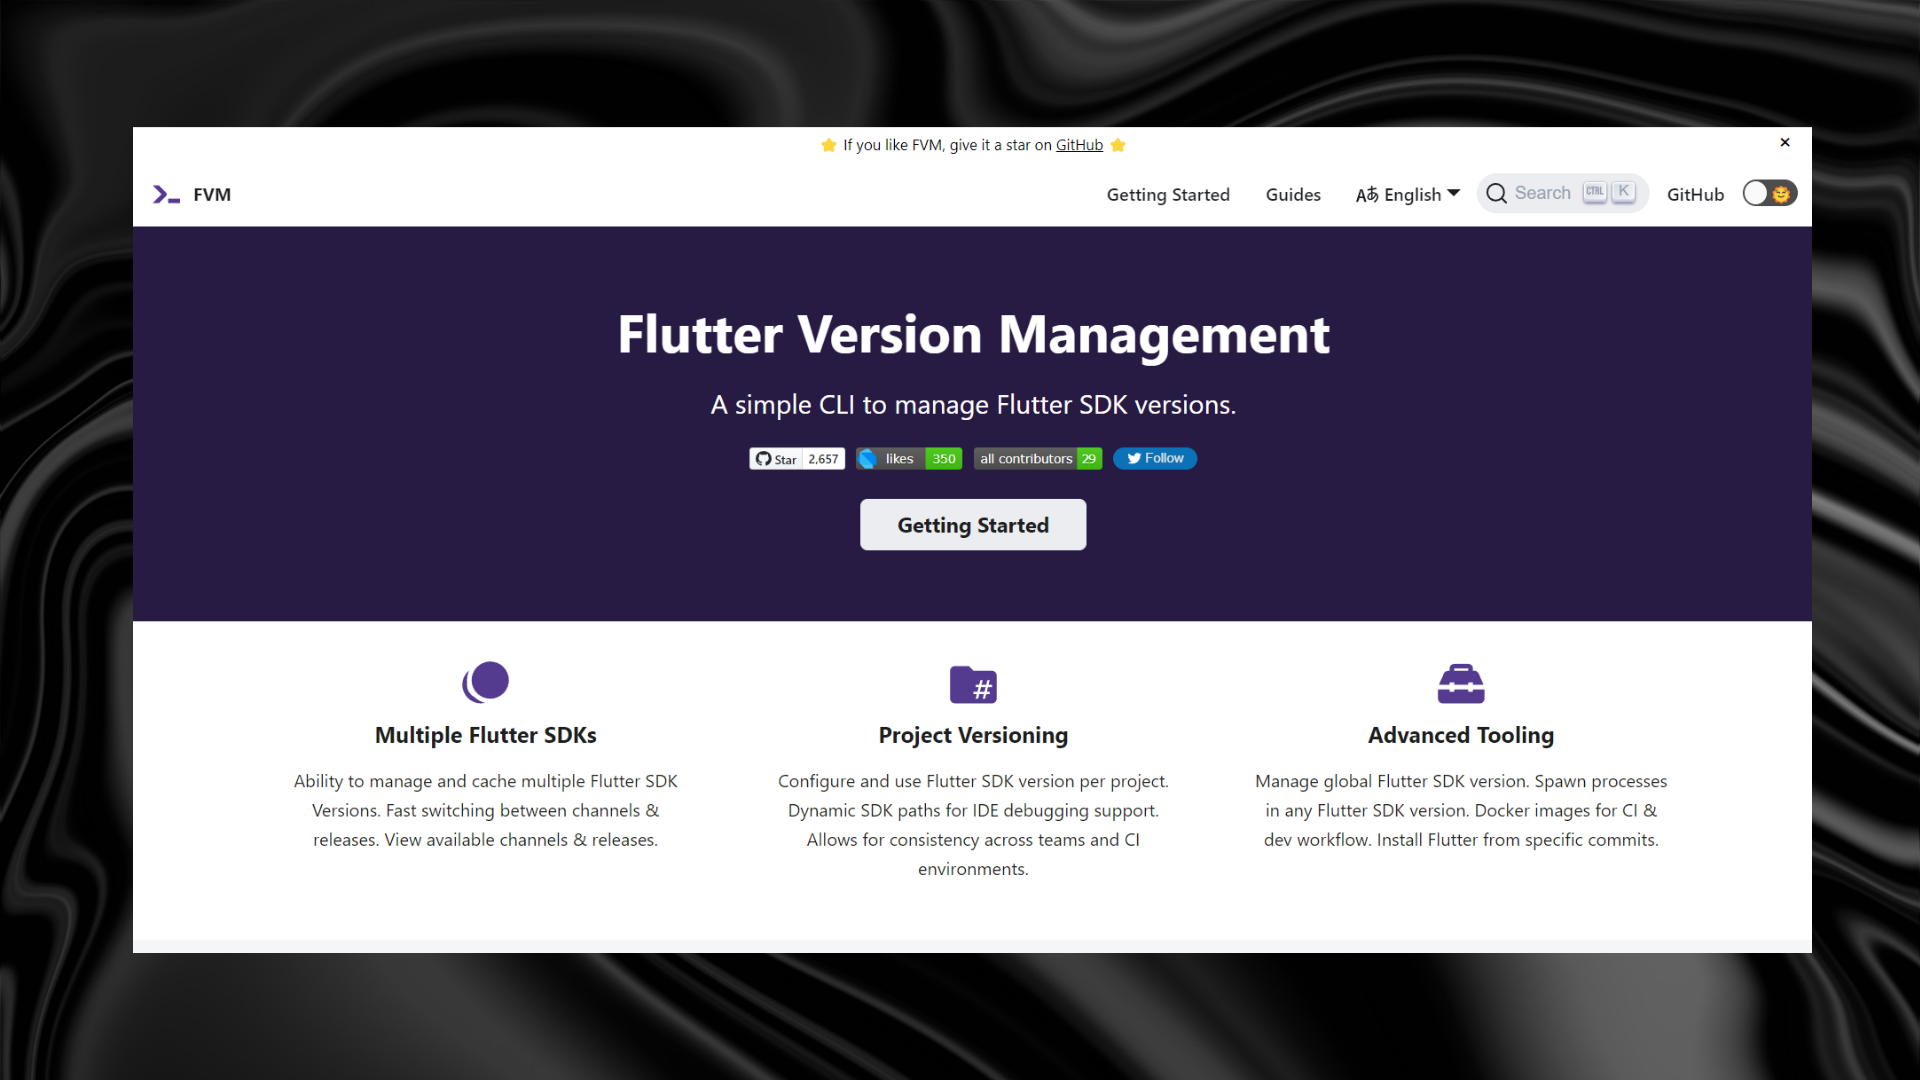
FVM (Flutter Version Management) is an open-source tool that makes it easy for you to keep track of your Flutter projects' versions, so you don't have to worry about it anymore!
FVM also helps with the need for consistent app builds by referencing the Flutter SDK version used on a per-project basis. It also allows you to have multiple Flutter versions installed to quickly validate and test upcoming Flutter releases with your apps without waiting for Flutter installation every time.
FVM Installation
Windows:
- To install fvm, run the following command from the command line or from PowerShell:
choco install fvm
- As you can see you need choco. If you don't have choco installed on your machine, then open the PowerShell using Admin and run the below command.
Set-ExecutionPolicy Bypass -Scope Process -Force; [System.Net.ServicePointManager]::SecurityProtocol = [System.Net.ServicePointManager]::SecurityProtocol -bor 3072; iex ((New-Object System.Net.WebClient).DownloadString('https://community.chocolatey.org/install.ps1'))
Wait a few seconds for the command to complete. If you don't see any errors, you are ready to use Chocolatey! Type
chocoorchoco -?now, to verify.You can also install FVM as a pub package using the below command.
dart pub global activate fvm
However, if you plan on using FVM to manage your global Flutter install the above approach is recommended by the author.
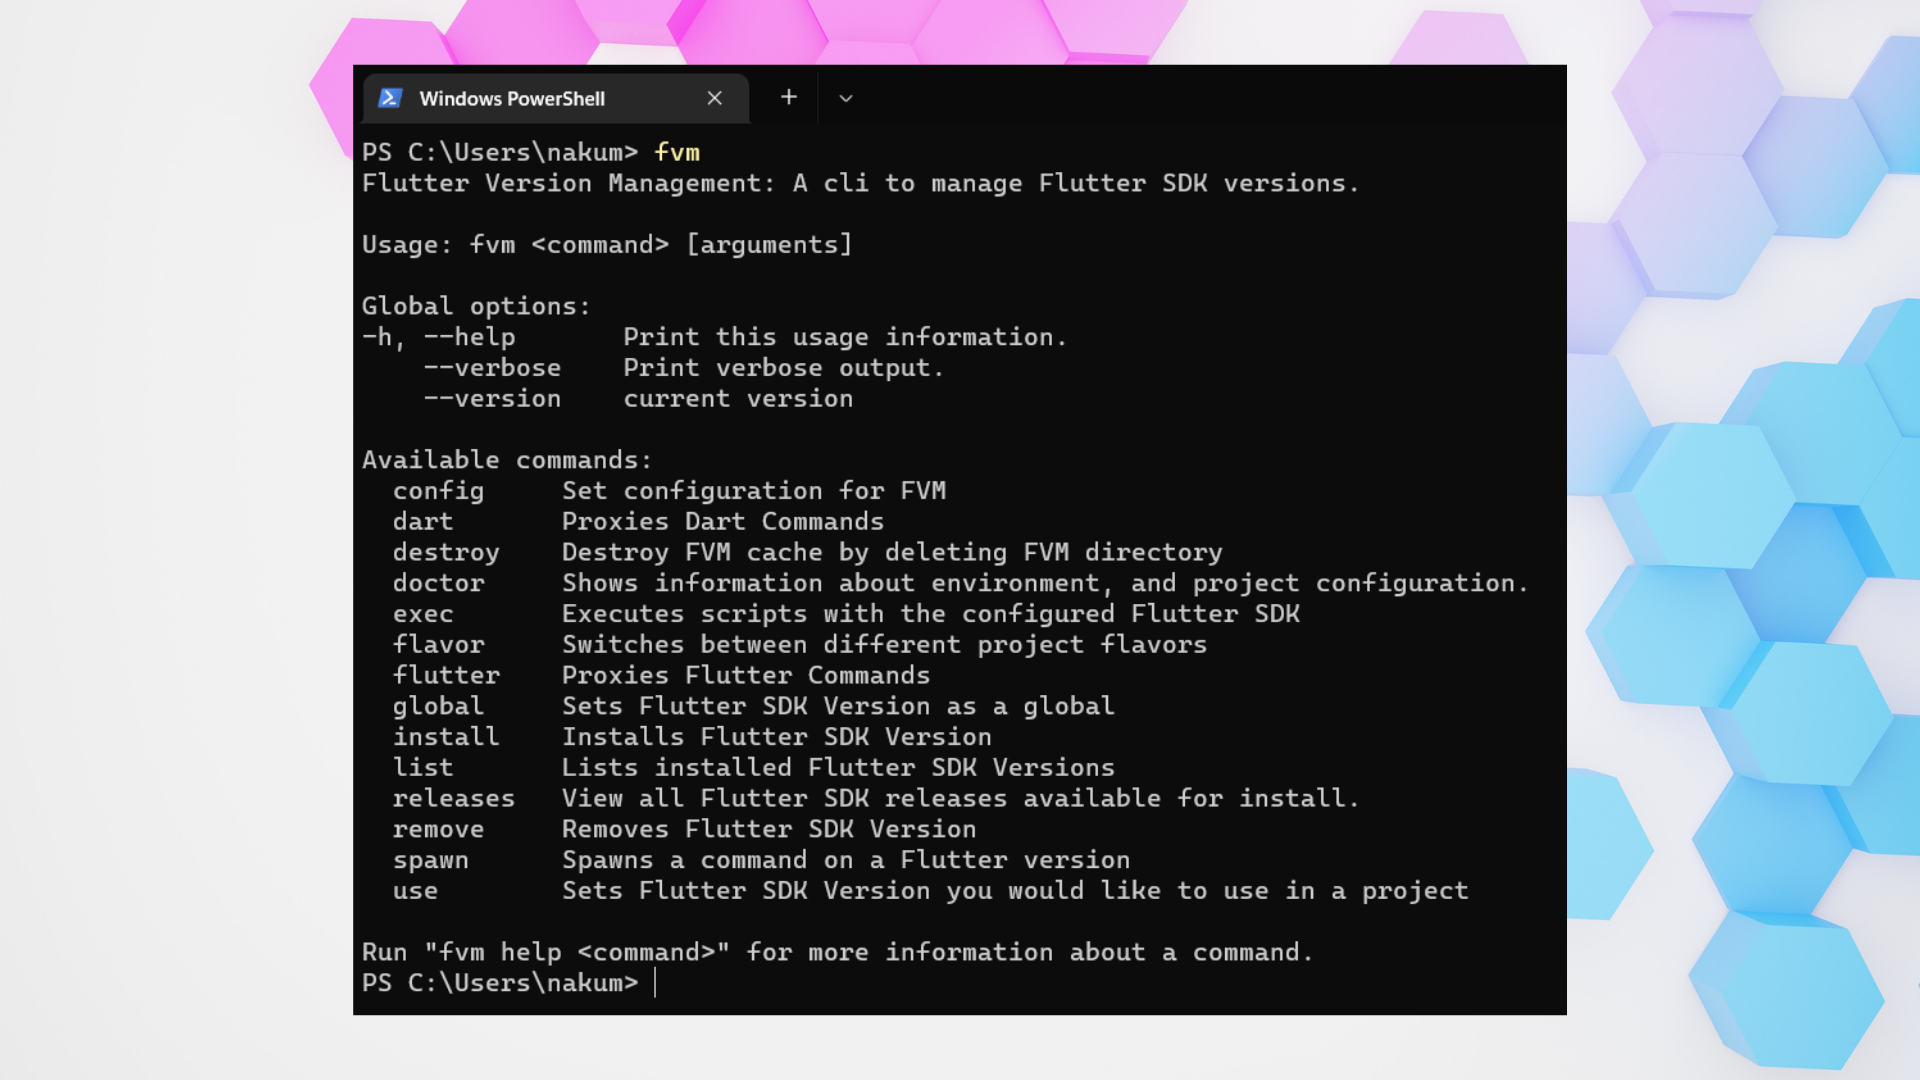
After the successful installation of FVM you are able to run the
fvmcommand in the terminal, which gives the following result.
- Got a warning like below?
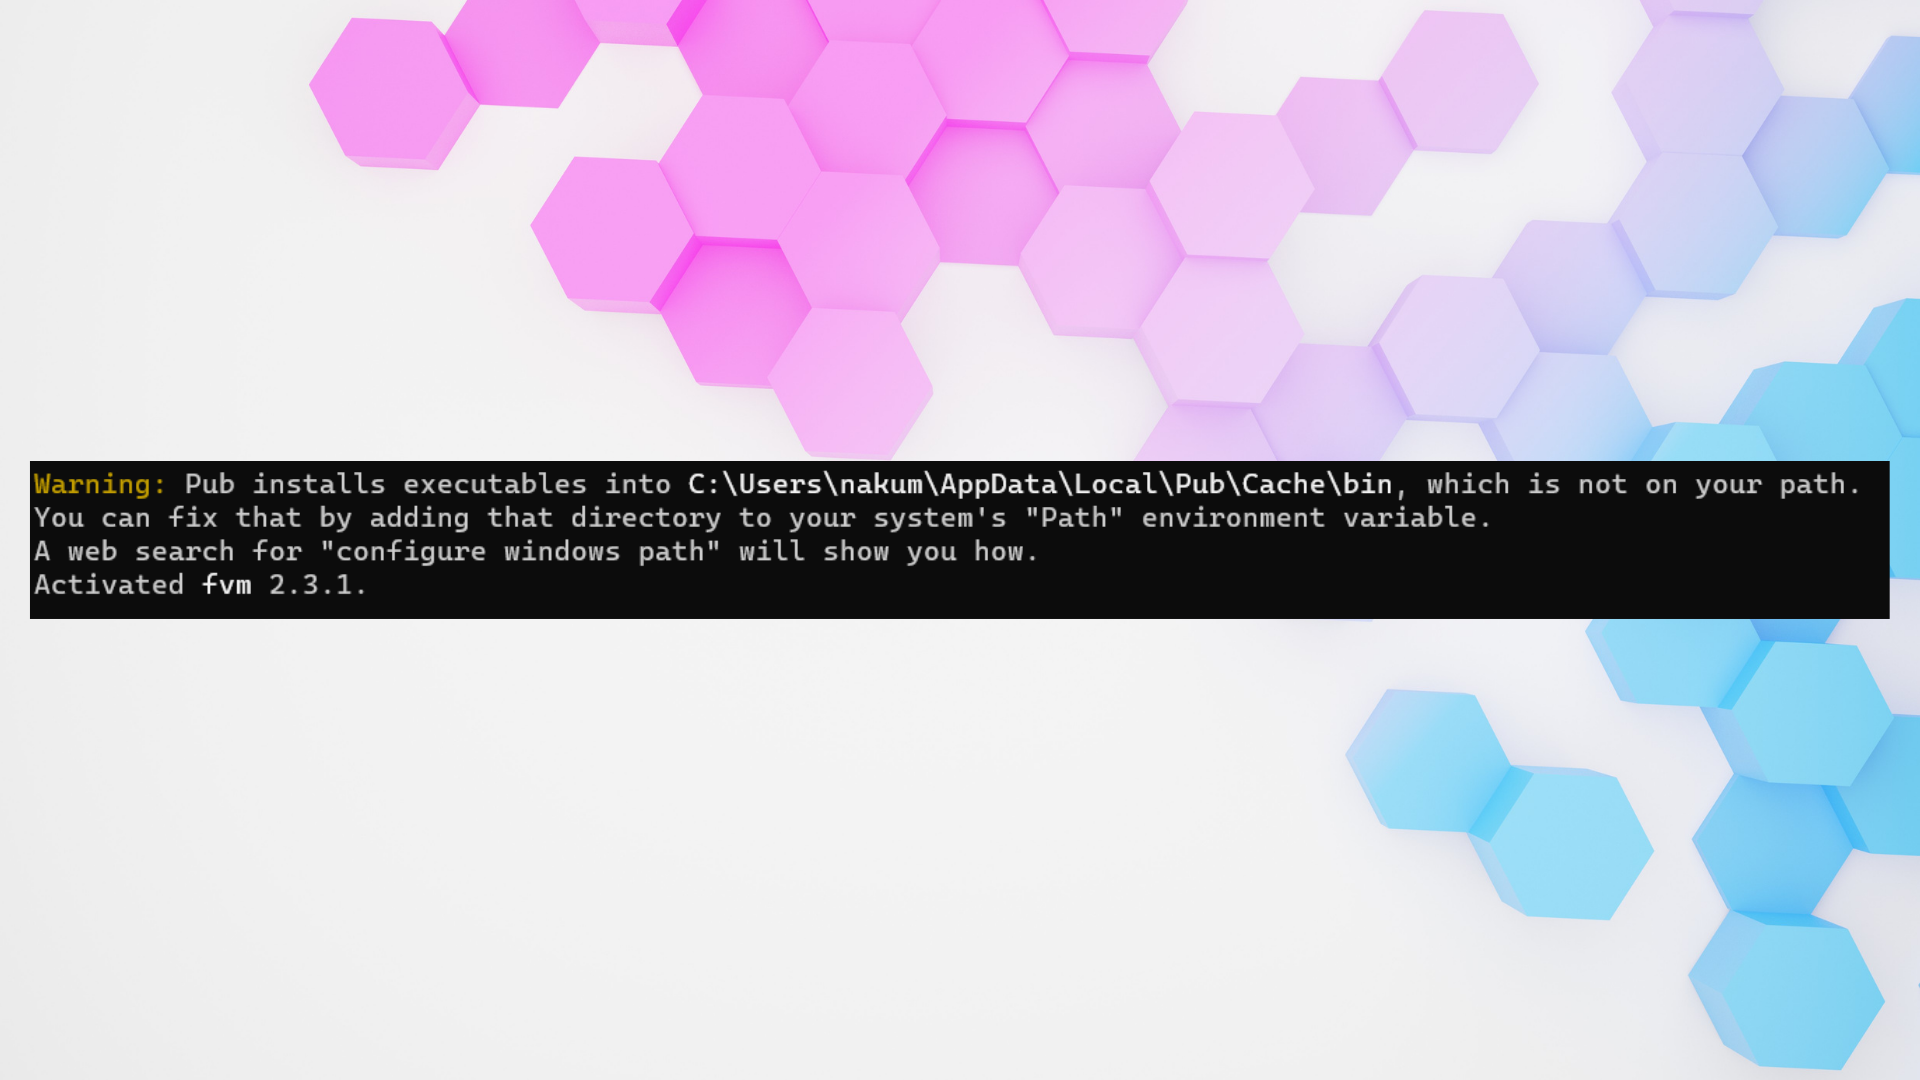
- Copy that path and set it to the Environmental variables
Mac
- In order to install fvm in Mac run the following command in terminal
brew tap leoafarias/fvm
brew install fvm
FVM Commands
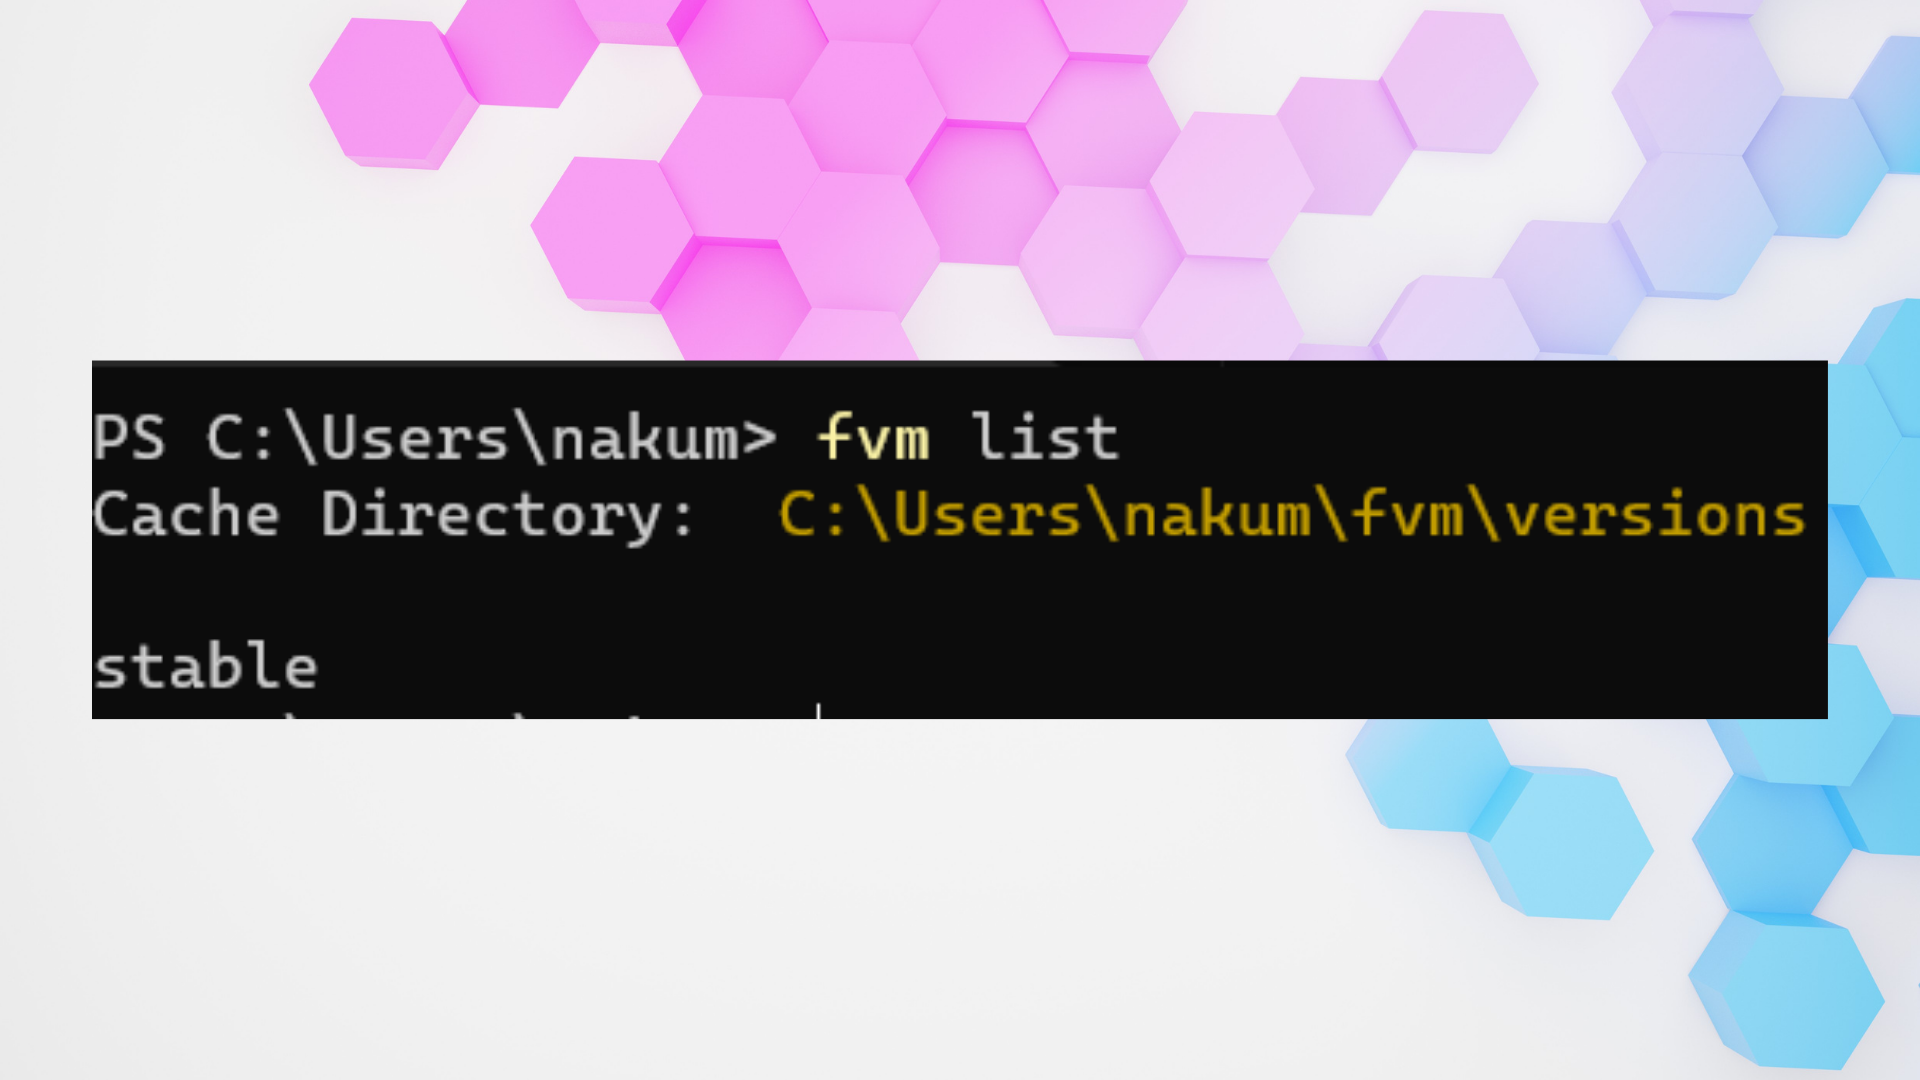
fvm list and fvm install
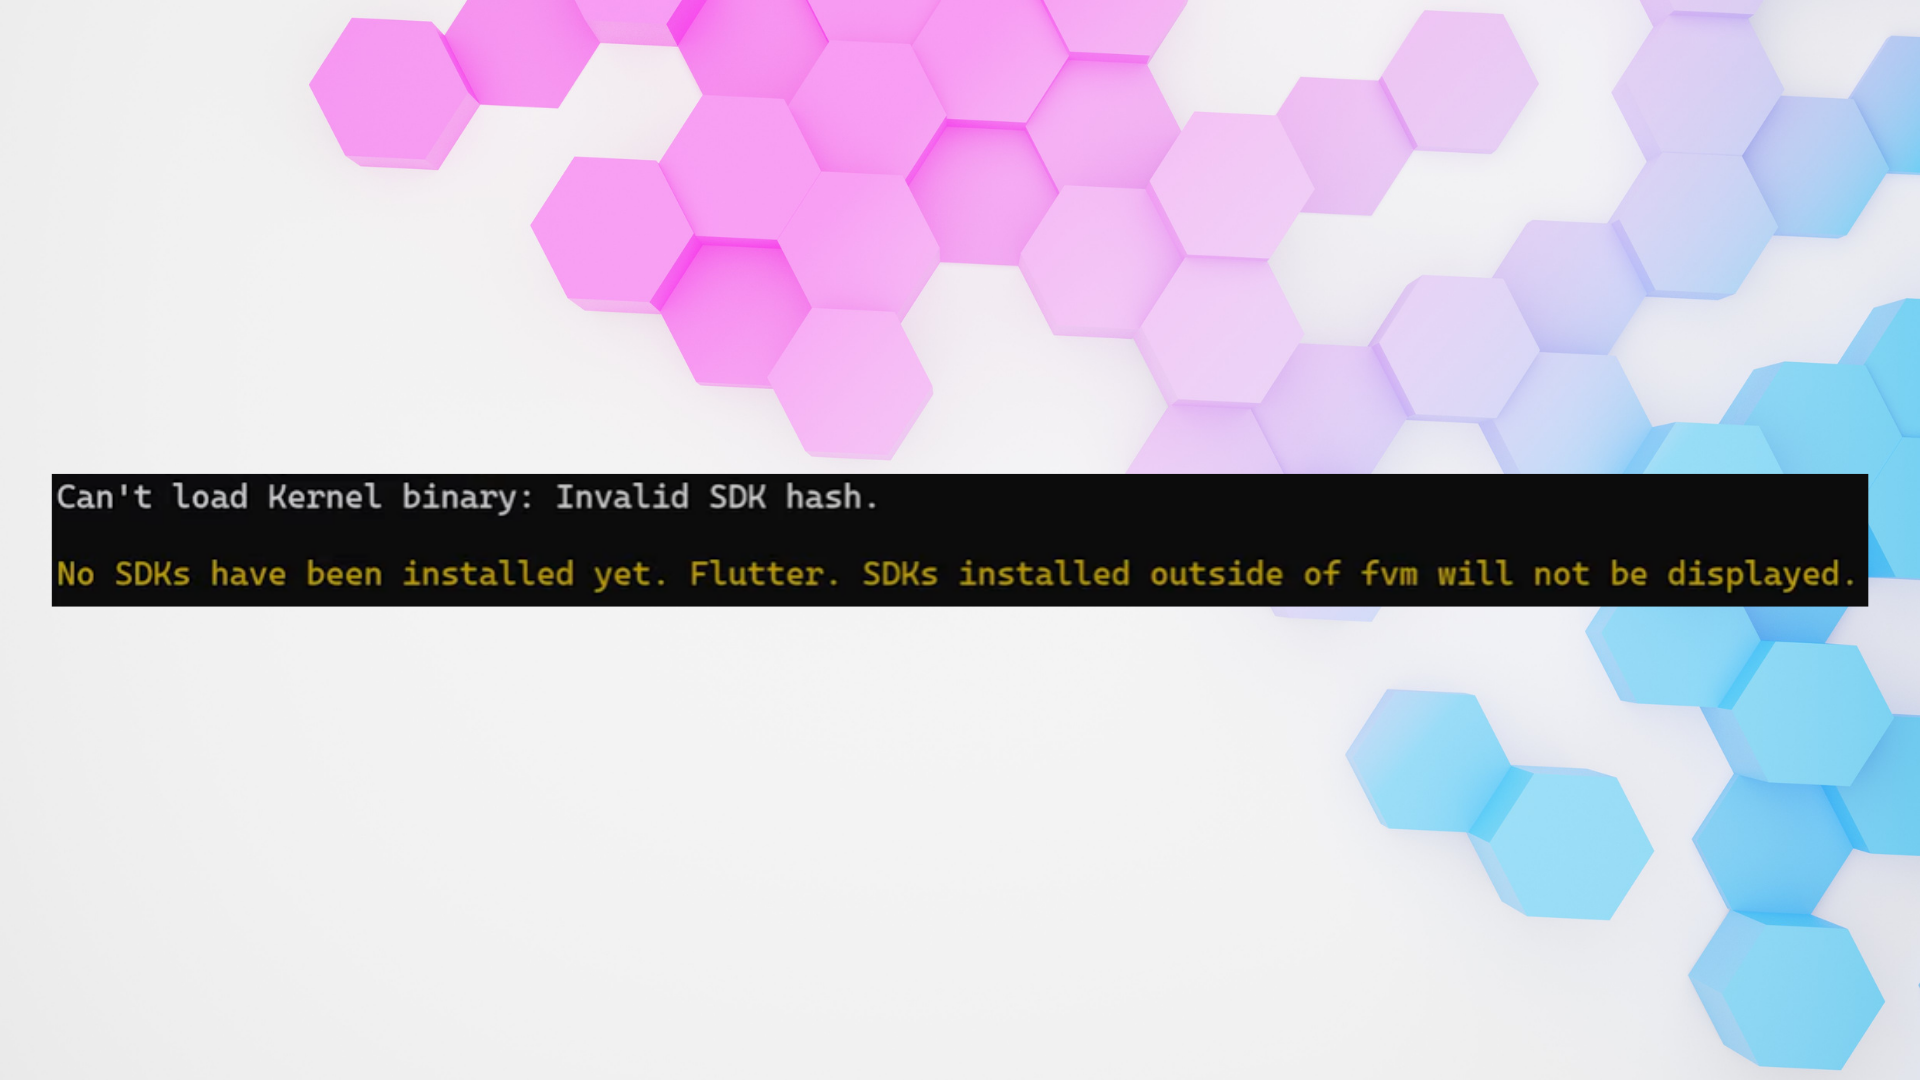
fvm listLists all the installed Flutter SDK Versions.- If you run the
fvm listcommand for the first time and don't have a flutter version installed on your machine, you will see the below warning.
- We can go ahead and install an SDK. In this case, we're going to install this stable version of flutter. Run the following command in the terminal
fvm install stable

- Now, if you run the
fvm listagain you will see the stable version there.
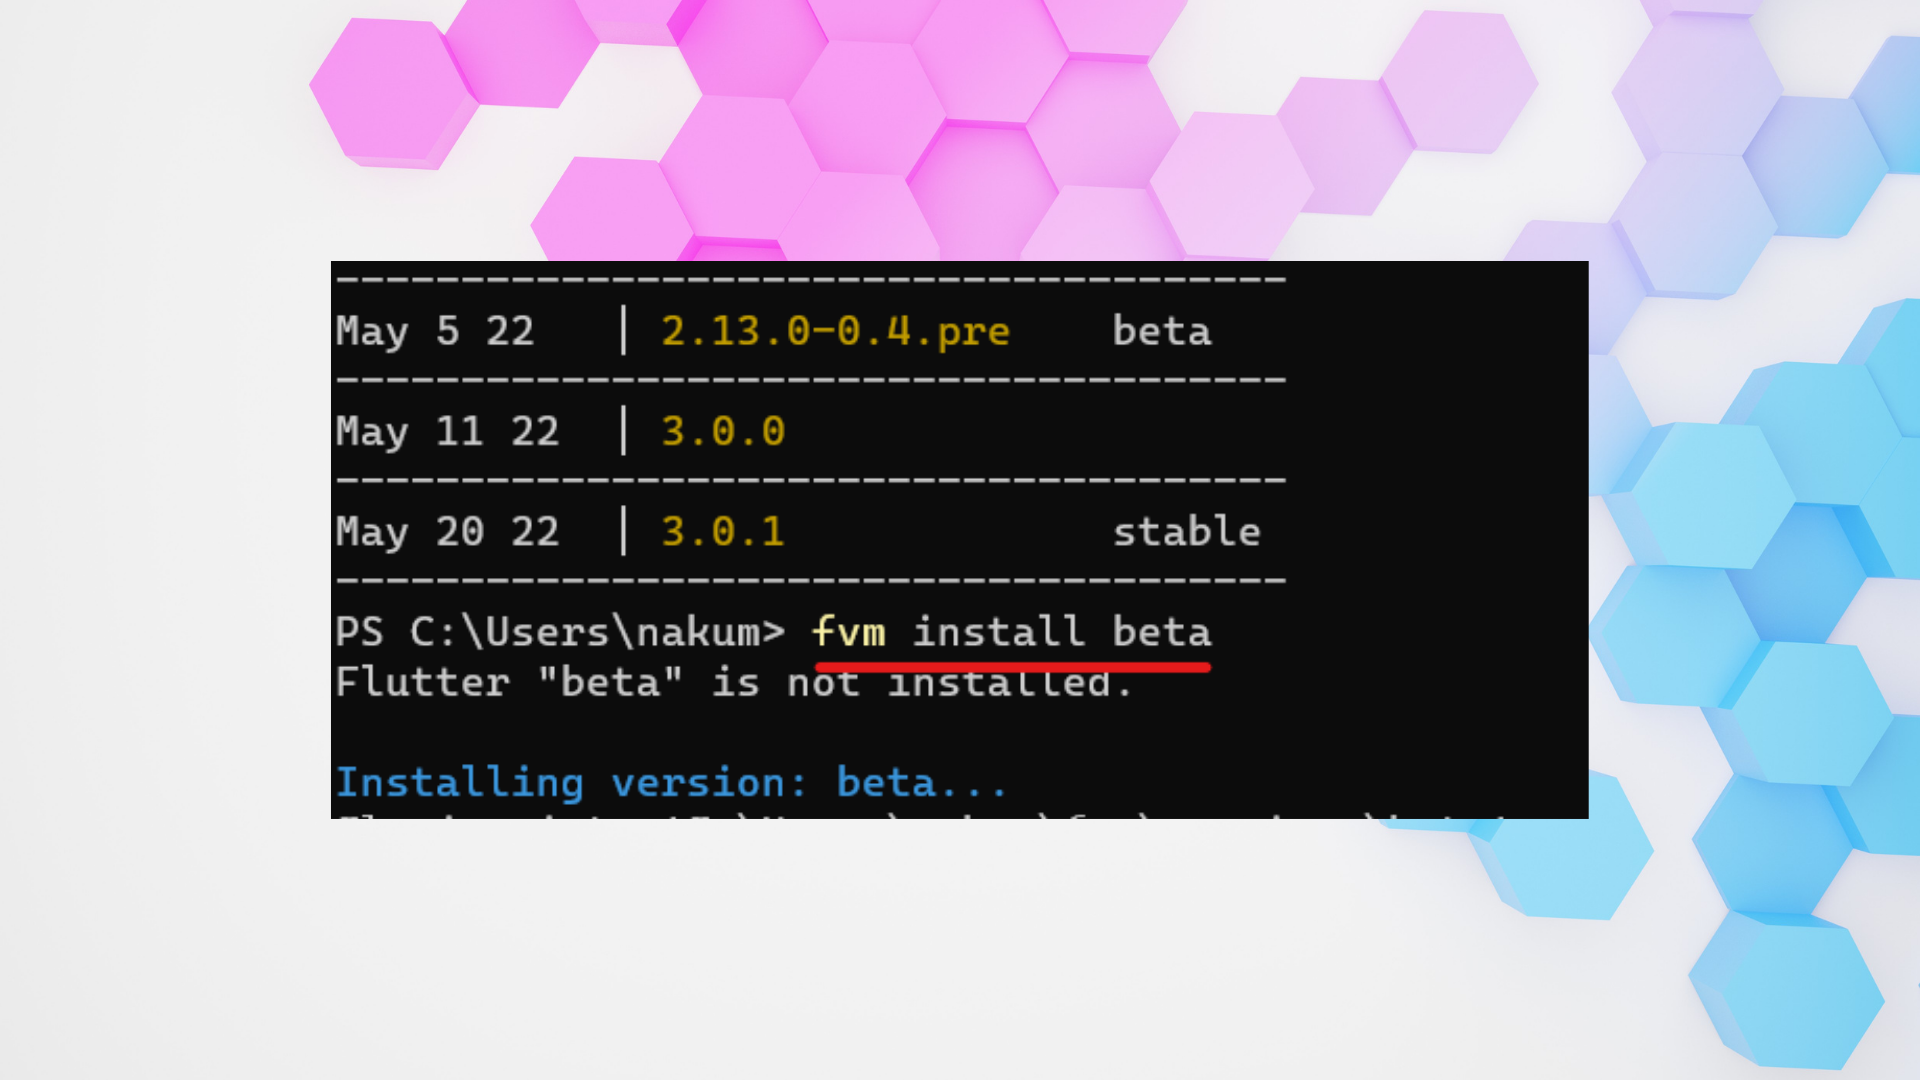
fvm releases
- If you are not sure which versions are available currently, you can run the below command.
fvm releases
- This will list all the Fluter versions
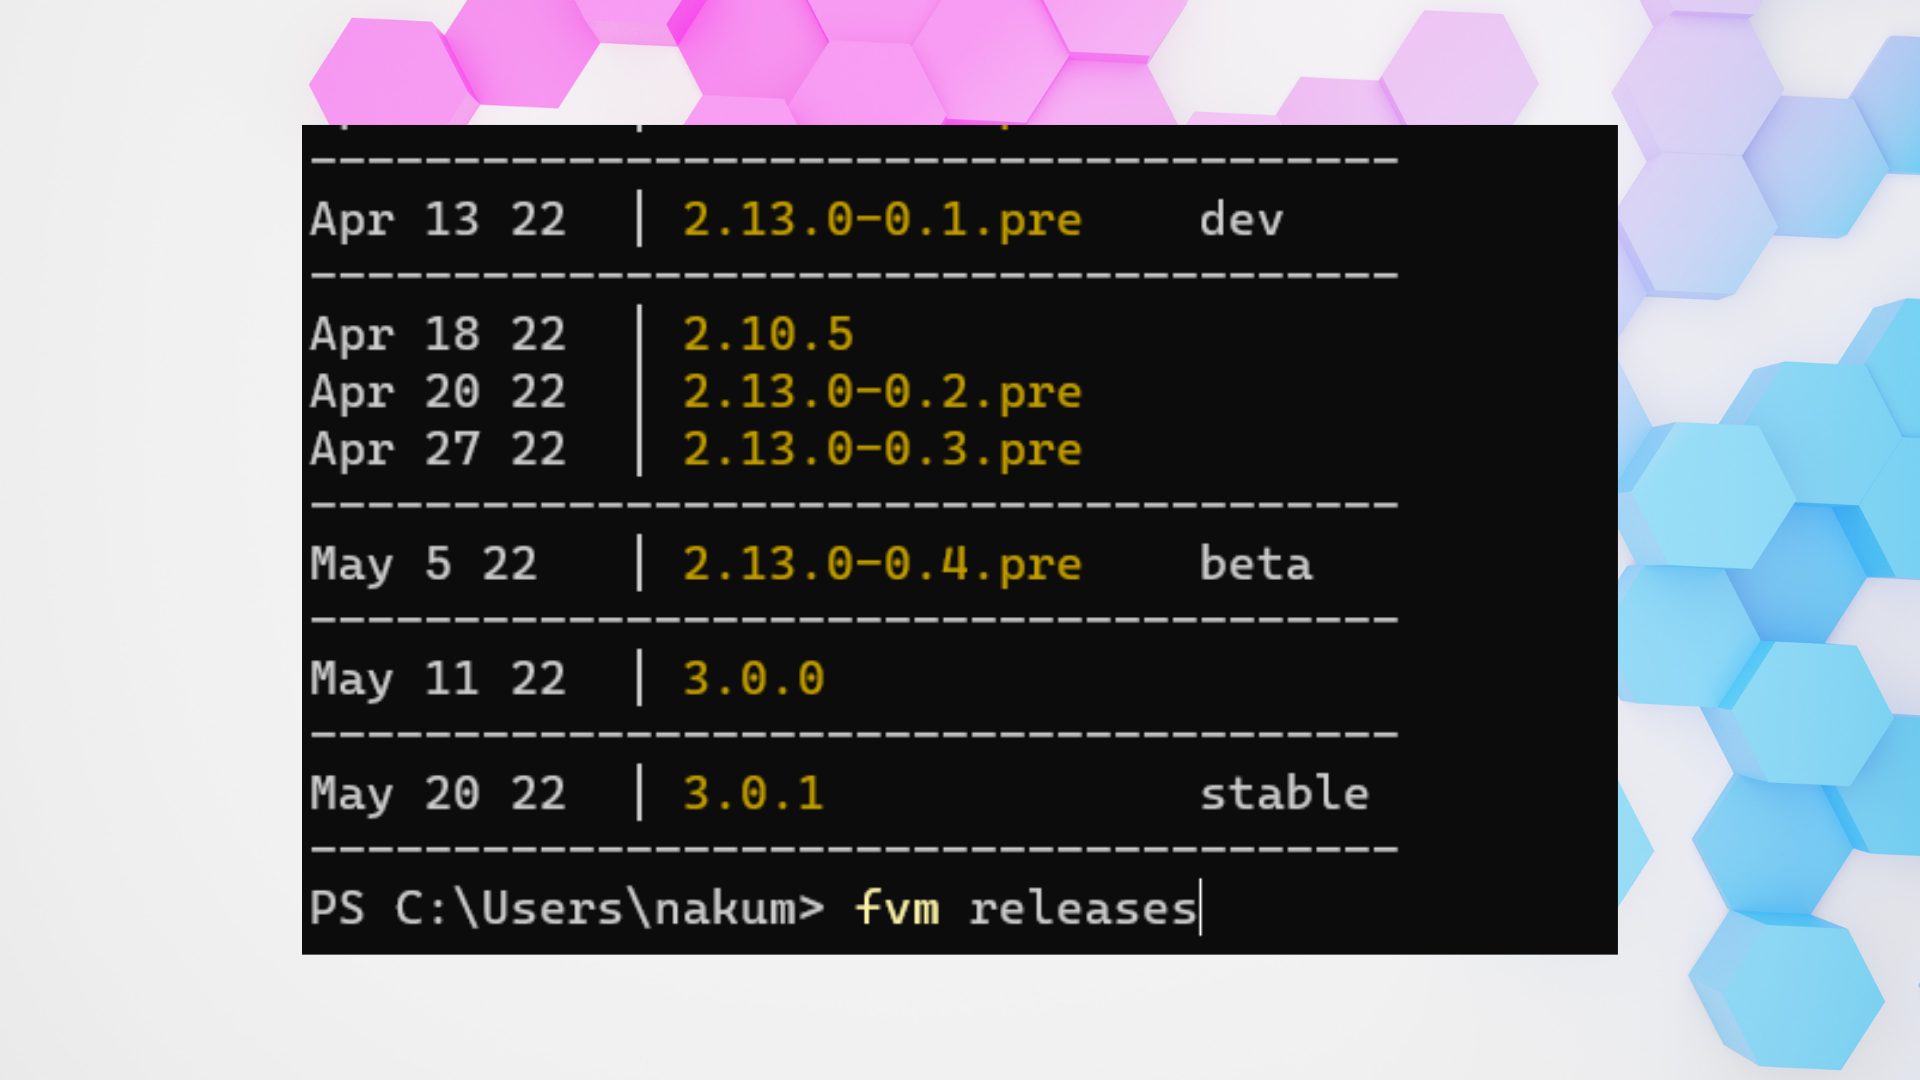
- As you can see at the time of writing the blog the stable version is
3.0.1.
fvm global
- Now if you want to use the stable version that we've just installed globally inside all of your projects. You can do that by simply running the below command.
fvm global stable
- Here you might get a warning as shown below
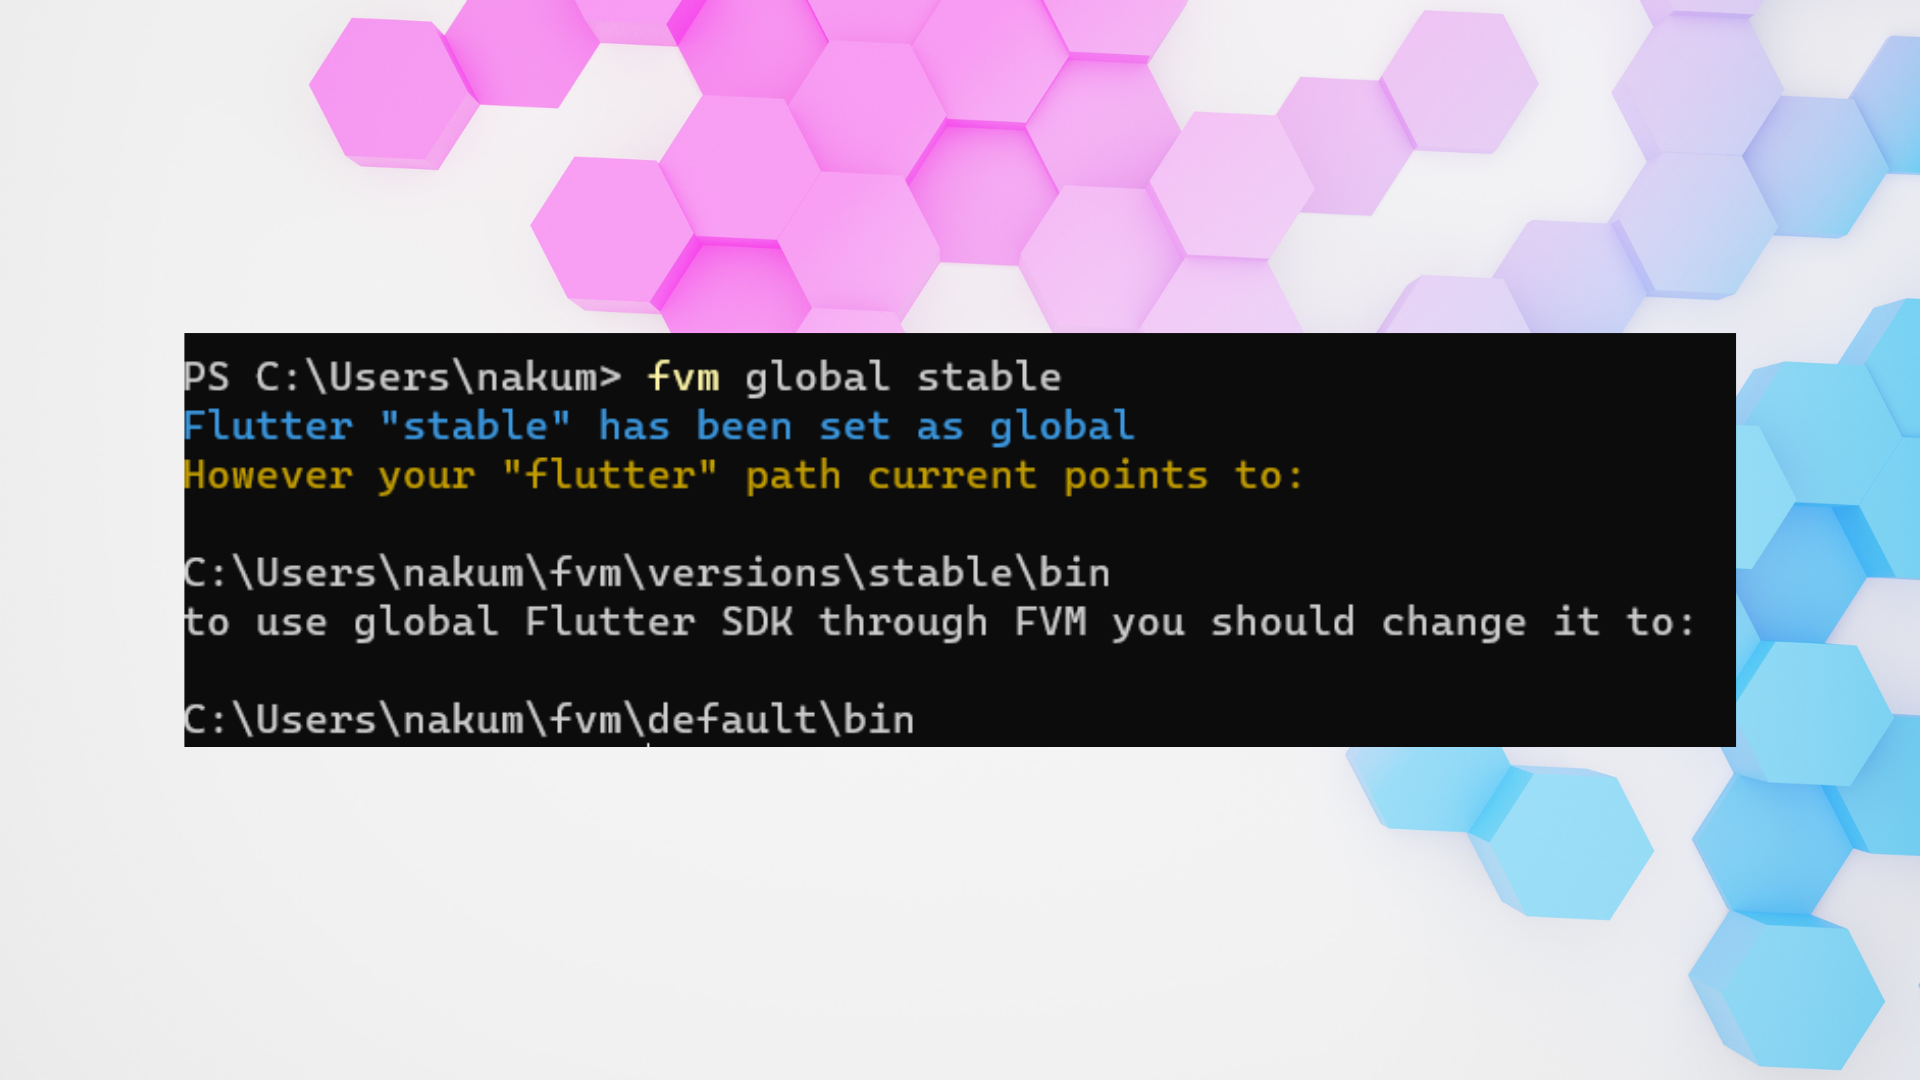
In order to resolve this, copy the second path, head over to Environmental variables, and replace the current flutter path with the copied one.
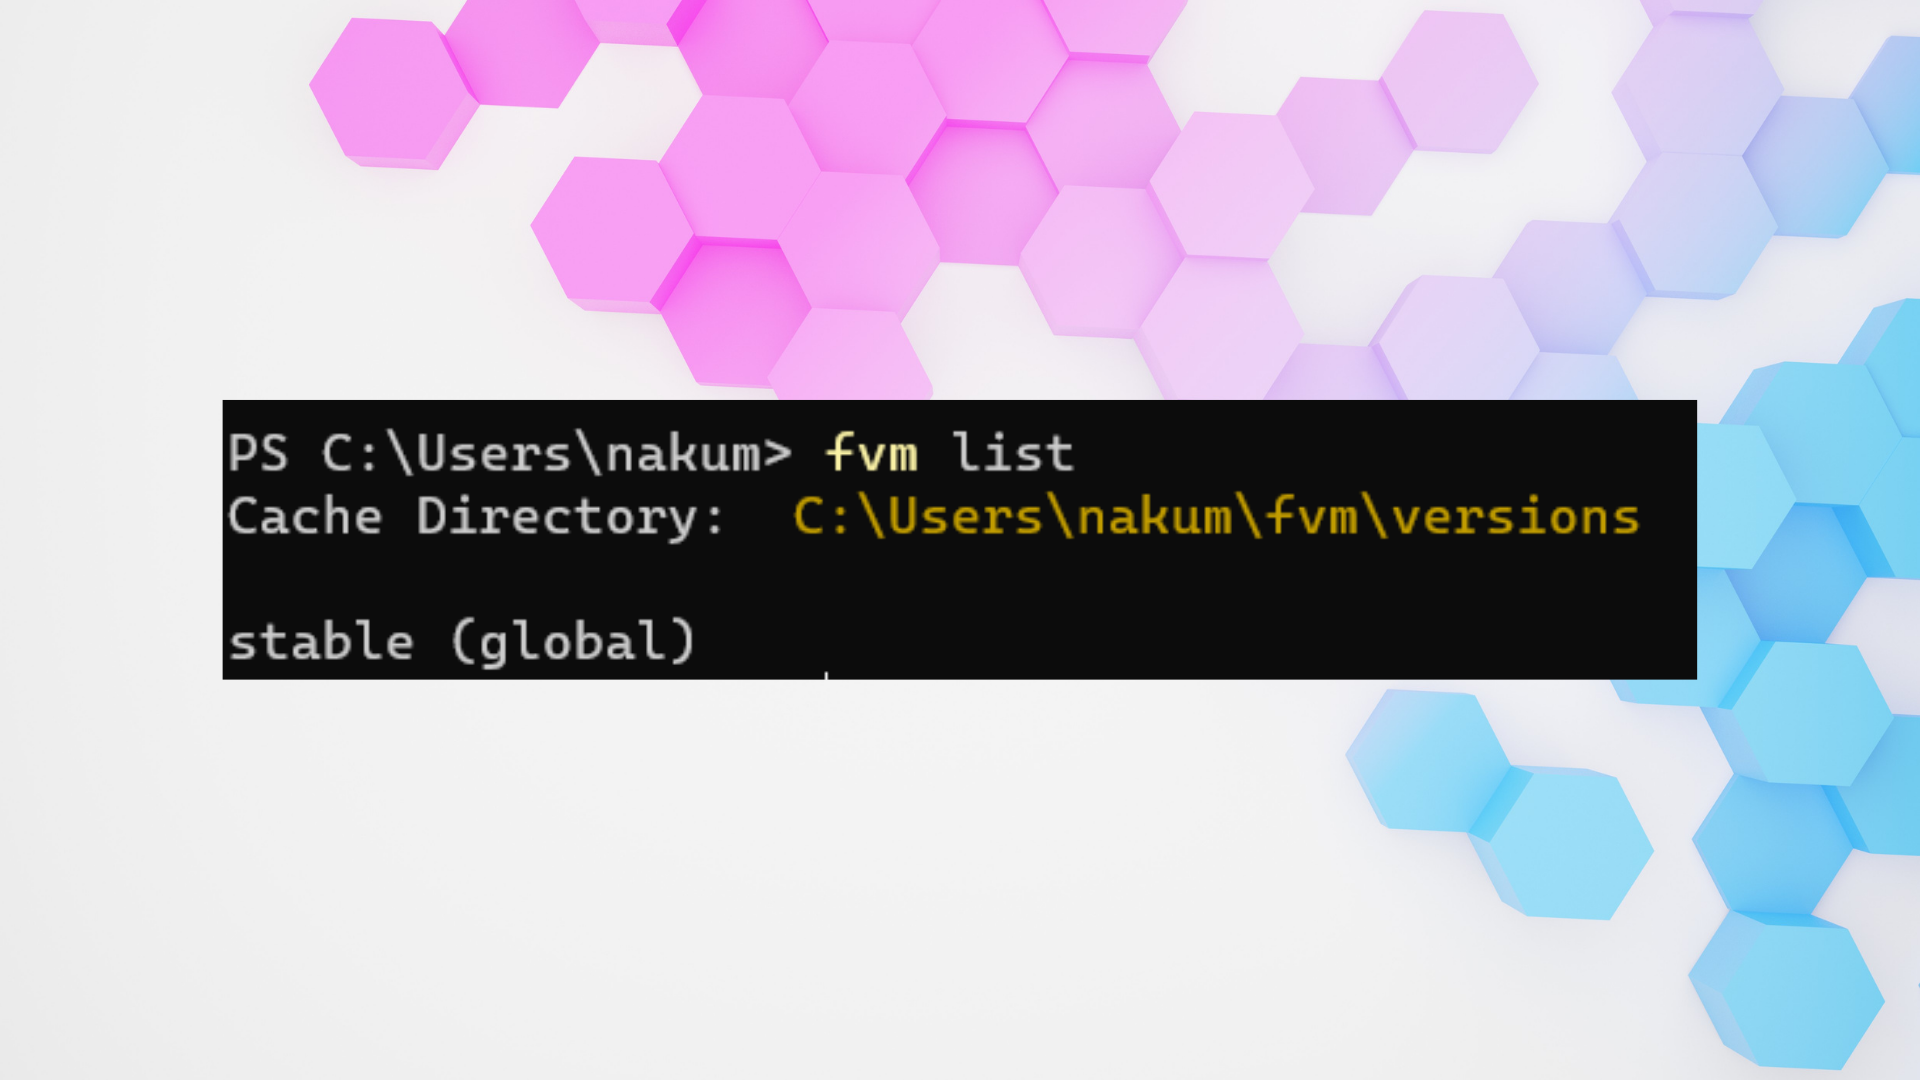
Now if you run the
fvm listagain you will see that thestableis set as global.
Switching to Multiple Versions
- The main advantage of using FVM is that we can easily switch into multiple versions of Flutter. Let's see how we can do that.
- As we only have the stable version, In order to switch between another version, we need one more flutter version.
- To do that, let's install the beta version of flutter. To do that run
fvm install beta.
- After that run
fvm listcommand to see if it's installed correctly

- Let's now change the current global version to beta from stable.
- Run
fvm global beta
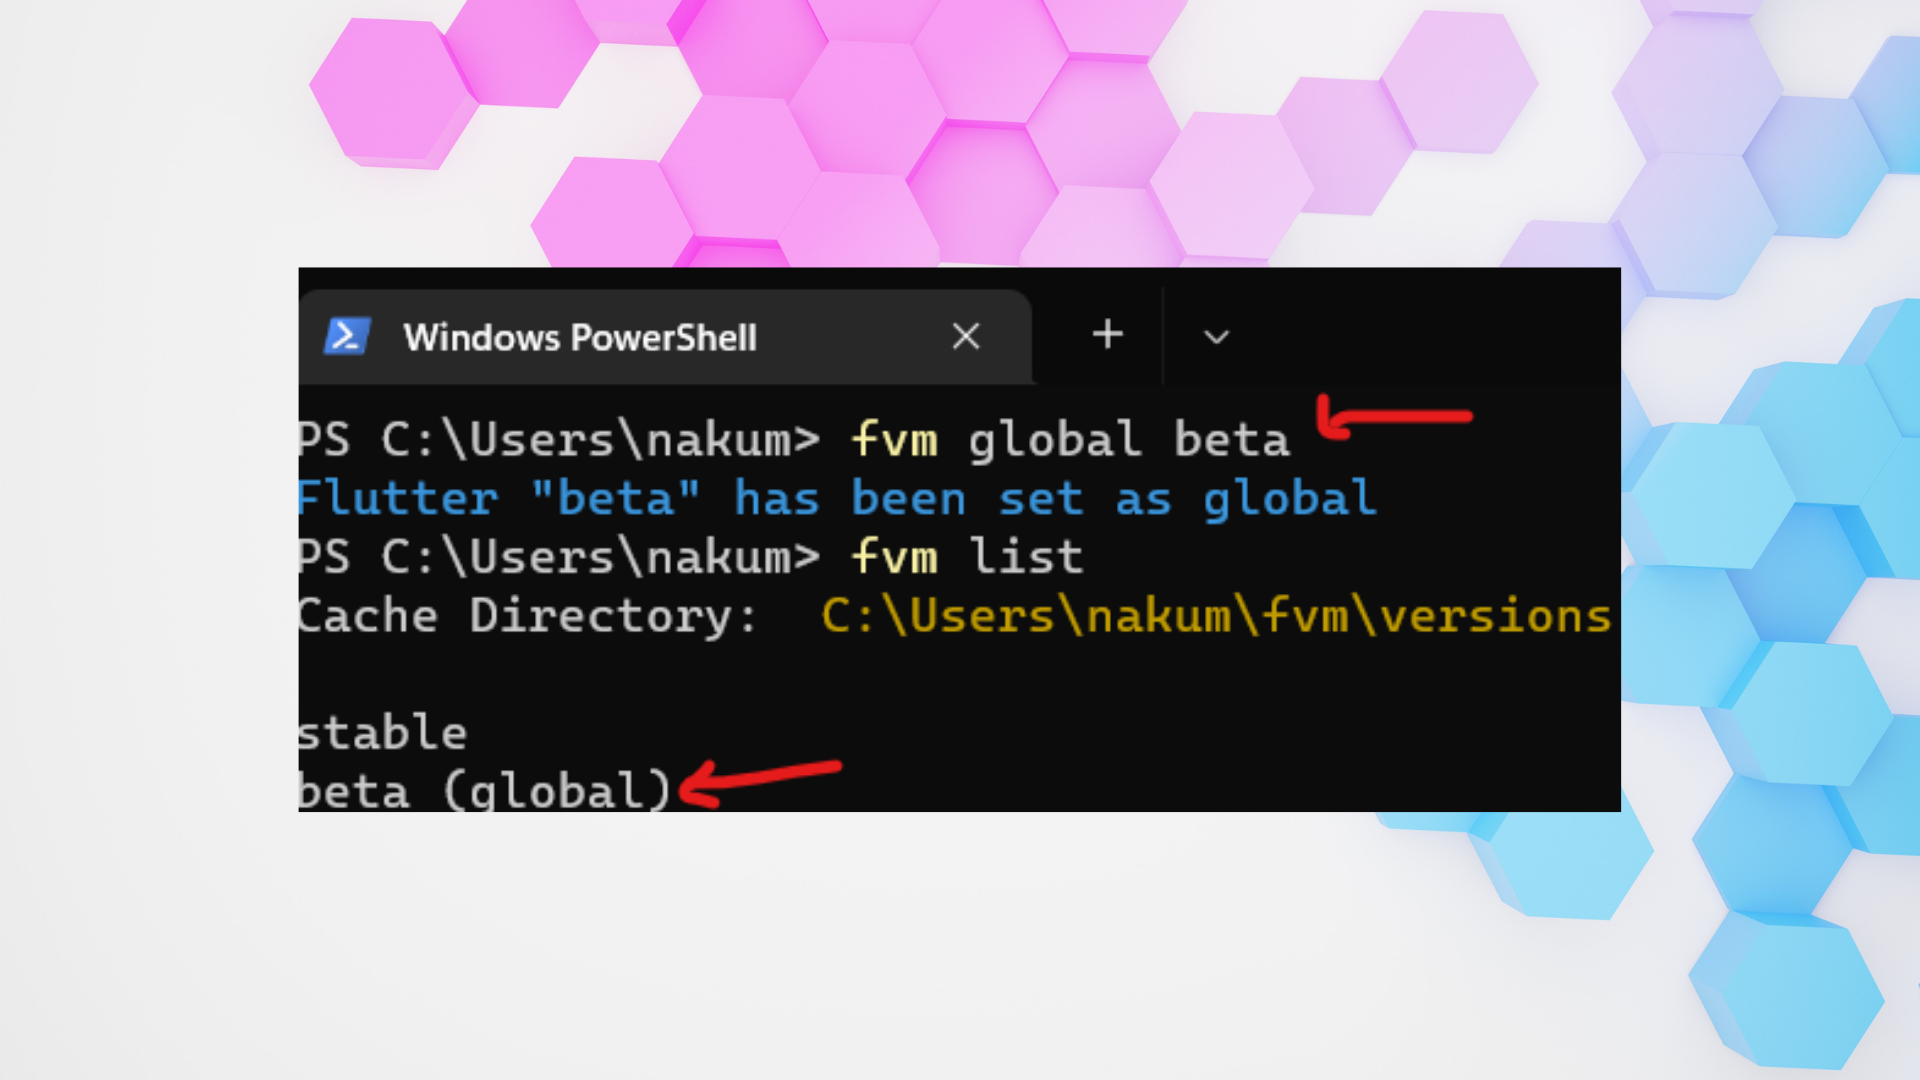
- Woahh!!! That's quick, isn't it? Now if you did this without using
fvmyou will need to download the whole beta again.
Running Flutter
- Now let's go ahead and use fvm inside the real project.
- Go ahead and create a brand new flutter project.
fvm use
- Now let's say we want to use a stable version, beta, or any specified version for the project. How are we gonna do it? Well, it's very simple. Open up a terminal inside your project and let's say we want this created project to use the stable version for now. To do that run the following command
fvm use stable
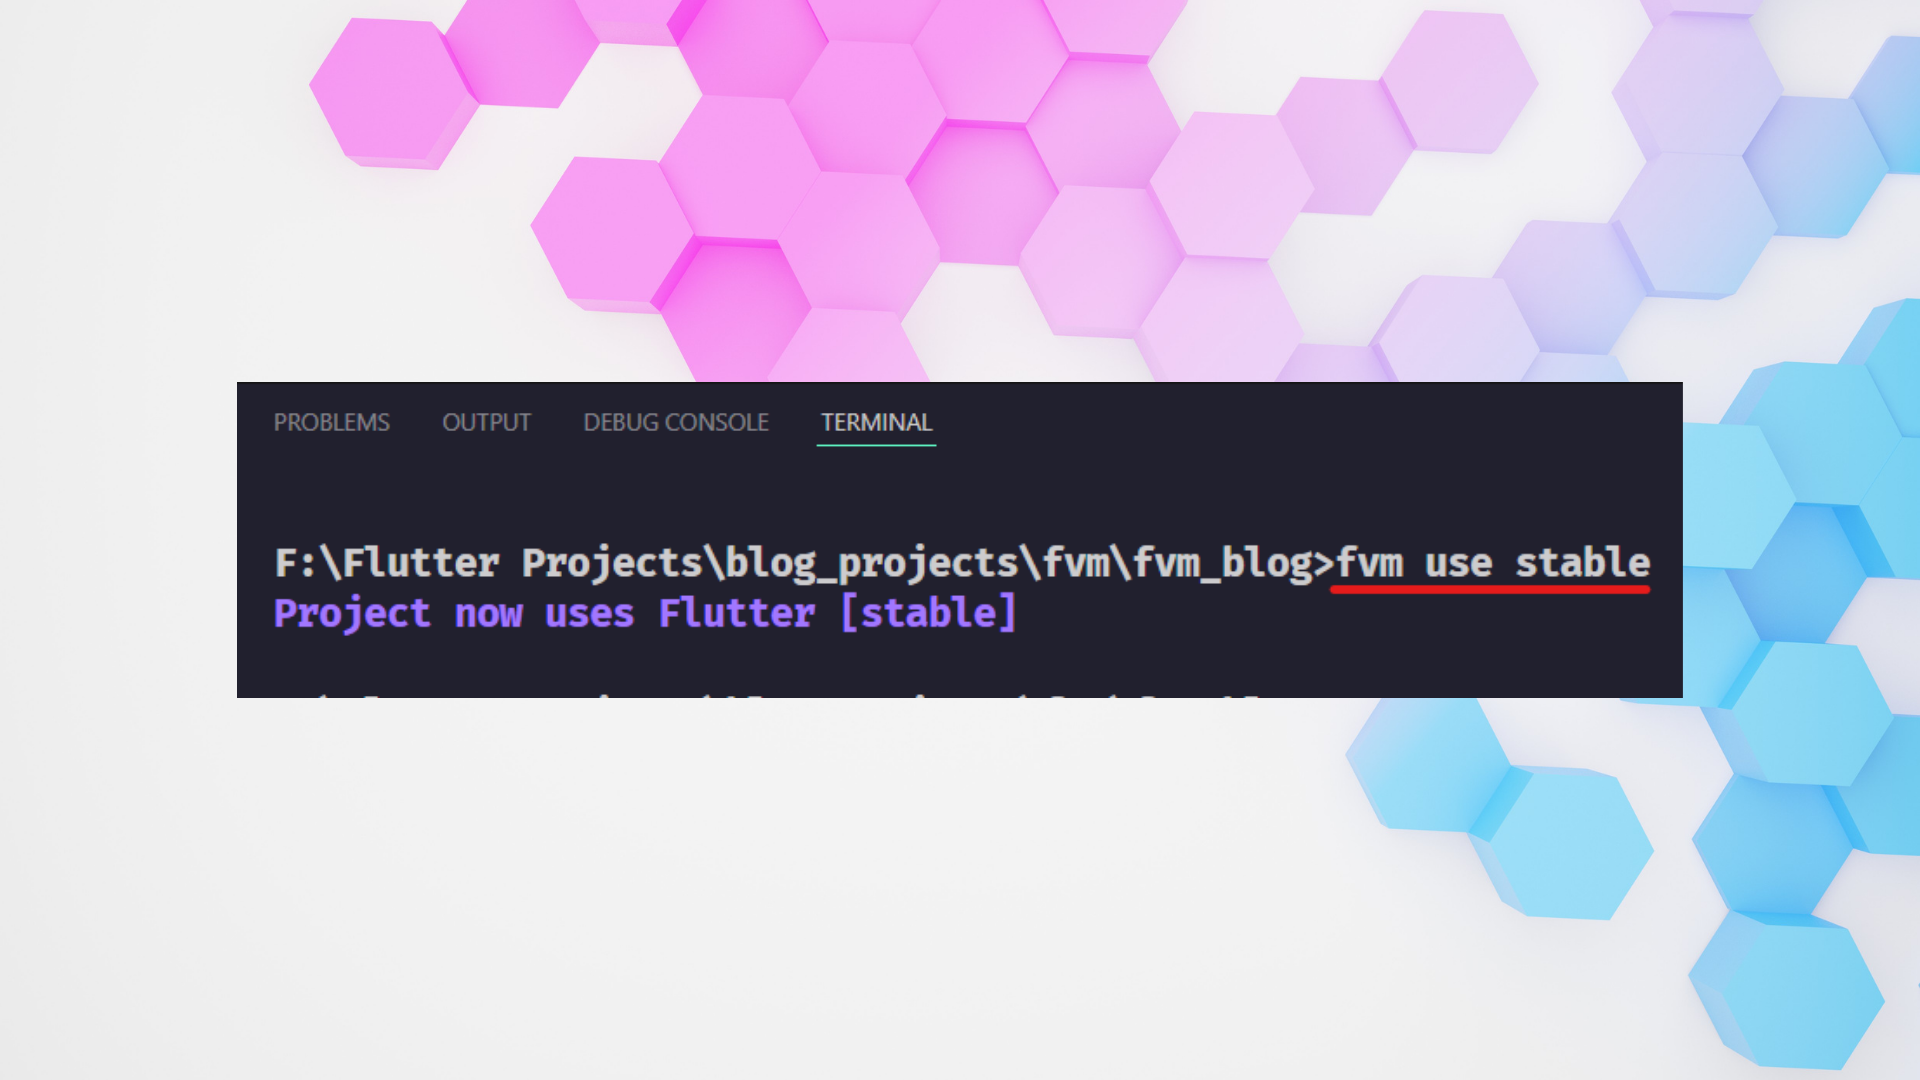
- You can also specify the version number in place of the
stable, likefvm use 3.0.0
.fvm Folder
- After running the above command you will see one folder is created inside your project named
.fvm
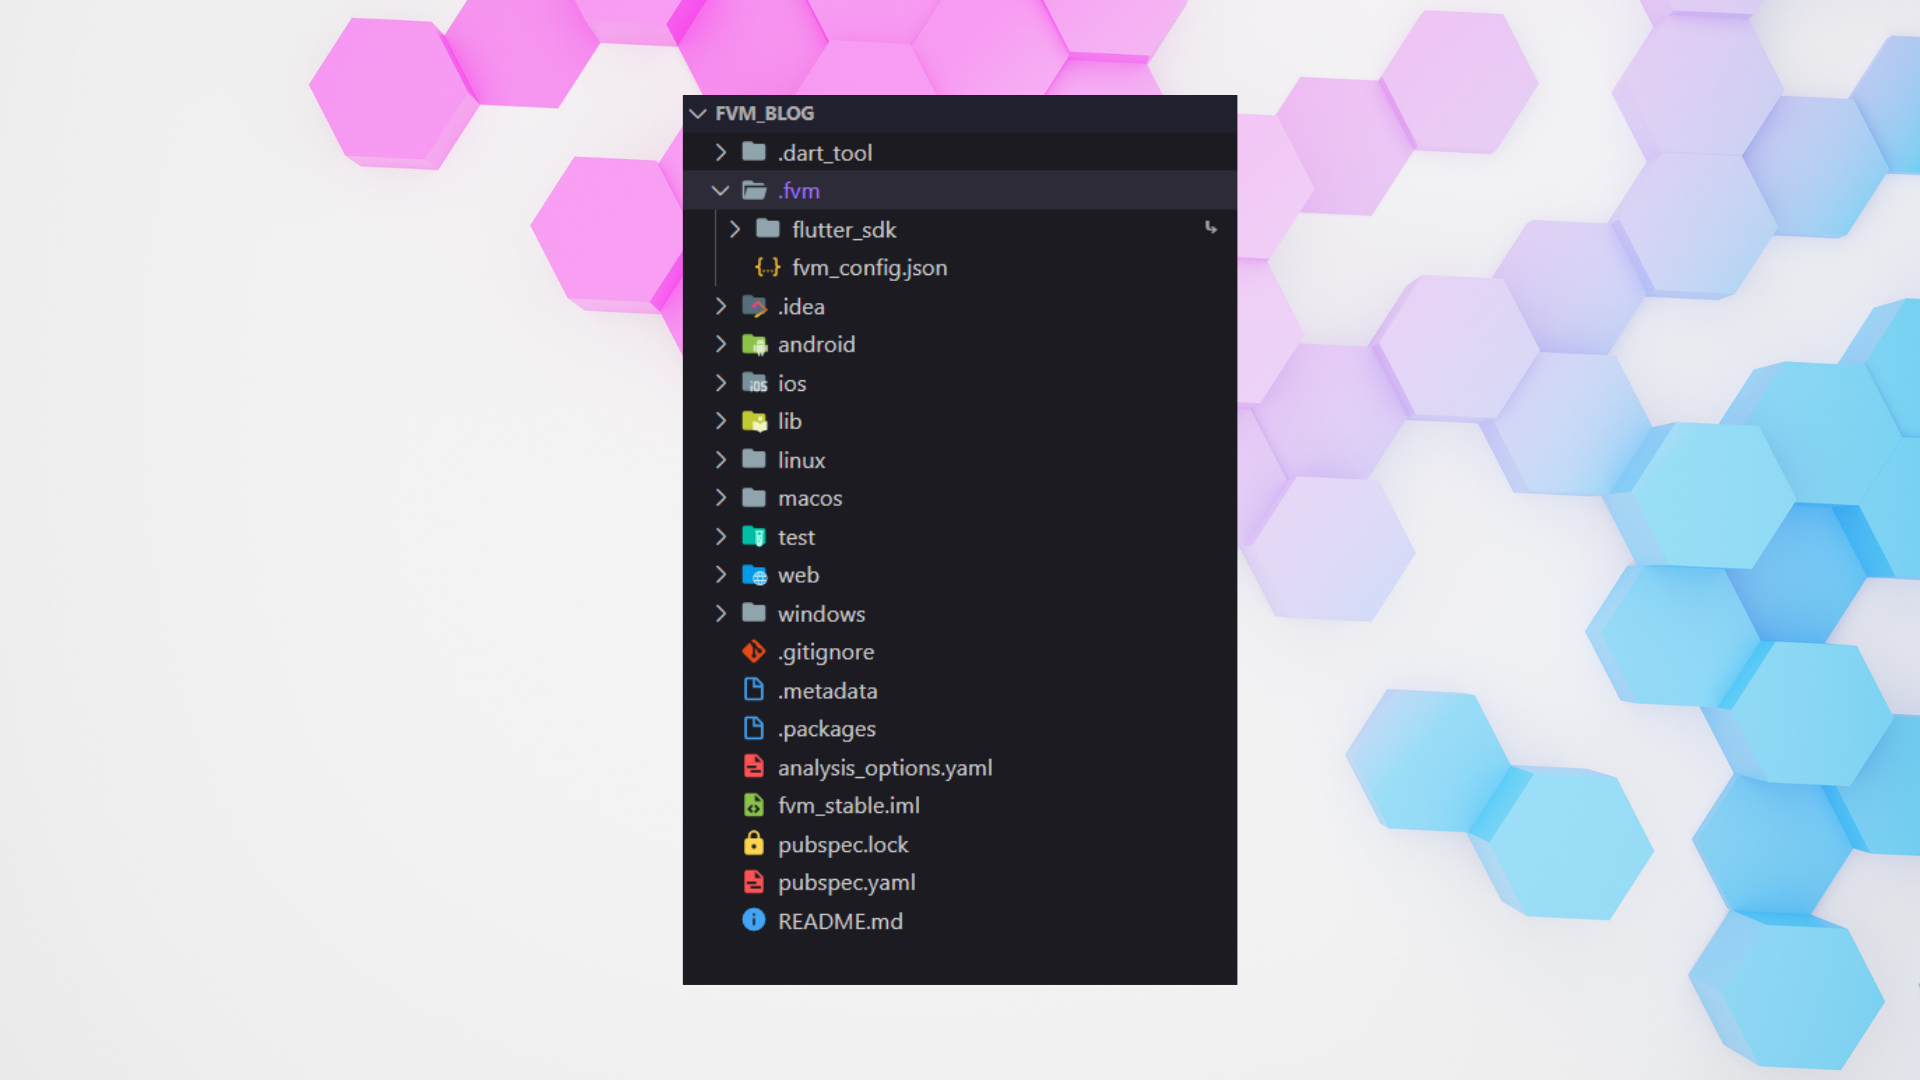
- As you can see there are two main things:
SDK Folder: This is the actual library of flutter for this particular version
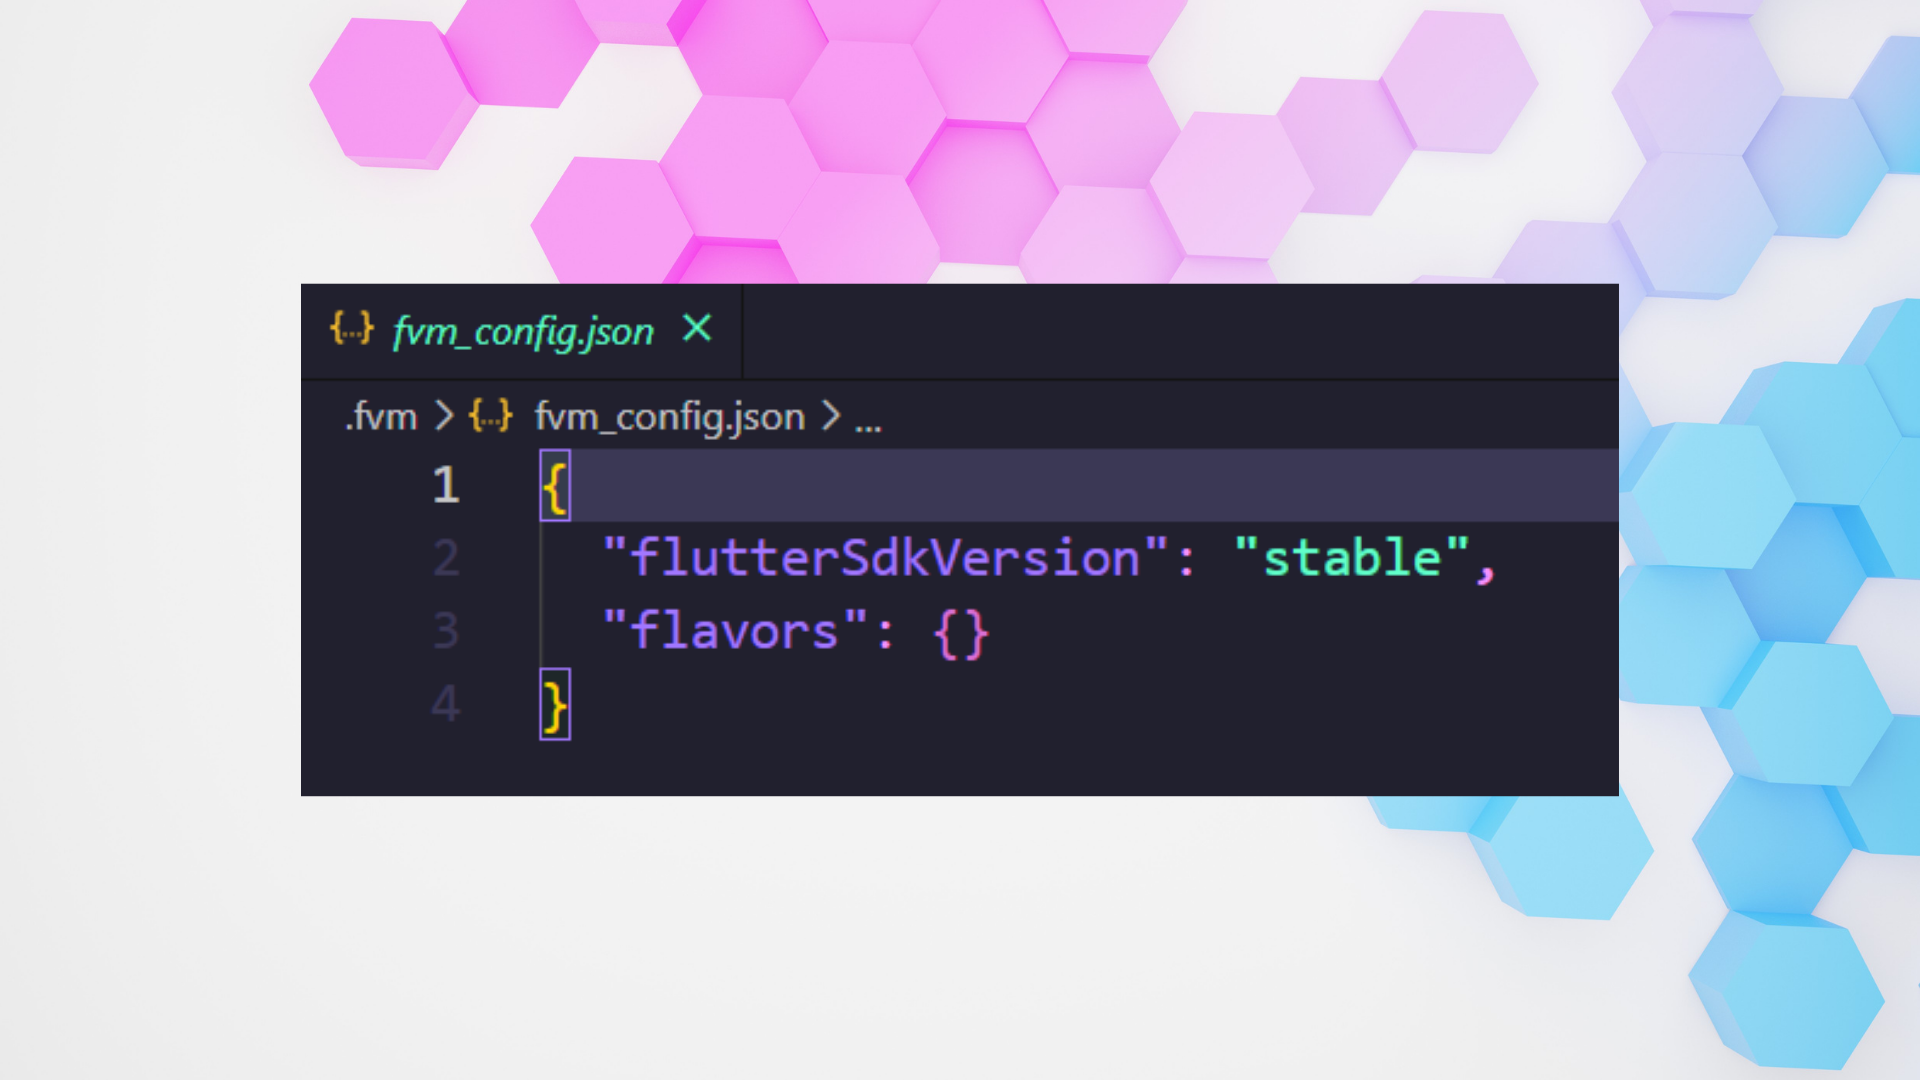
fvm_config.json: The fvm_config file says what particular version of flutter we are using for this project
Update .gitignore file
- As you can see we have the flutter SDK inside the .fvm folder, We don't want this folder to commit. So we need to ignore this folder inside the .gitignore file.
- Paste the below line inside the
.gitignorefile.
.fvm/flutter_sdk
VS Code and Android Studio Configuration
- In order to switch versions dynamically you need to add the version symlink inside the
settings.jsonfile of VS Code. To do that add the following things inside your VS Codesettings.json
{
  "dart.flutterSdkPath": ".fvm/flutter_sdk",
  // Remove .fvm files from search
  "search.exclude": {
    "**/.fvm": true
  },
  // Remove from file watching
  "files.watcherExclude": {
    "**/.fvm": true
  }
}
What this will do, is whenever you run the project, the project will use the fvms' flutter SDK instead of the globally installed flutter.
For Android studio configuration Follow this.
Project Flavours
- In Flutter flavors are basically pointing out that, this one is your staging application, the other is your production application, and lastly your development application.
- You can have multiple Flutter SDK versions configured per project environment or release type. FVM follows the same convention of Flutter and calls these flavors.
- It allows you to create the following configuration for your project.
{
  "flutterSdkVersion": "stable",
  "flavors": {
    "dev": "beta",
    "staging": "2.0.3",
    "production": "1.22.6"
  }
}
- As you can see, the above configuration is saying, that for dev we are using
beta, for staging we are using2.0.3and for production we are using1.22.6. - You can pin the particular version to specific flavors using the below command
fvm use {version} --flavor {flavor_name}
Wrapping Up
- I hope you enjoyed and learned something from this article. If you have any feedback/queries, leave them in the comments.
- Thank you for spending time reading this article. See you in the next article. Until then...

Follow me one Twitter, LinkedIn, and Github for more updates.


