Flutter Payment Integration: Google Pay
Adding Google Pay to Flutter App: A Step-by-Step Guide

Introduction

In today's digital age, mobile payments have become increasingly popular as more and more consumers rely on their smartphones to make purchases.
To meet this demand, many businesses are looking to integrate mobile payment options such as Google Pay, Apple Pay, Paypal, etc into their apps.
In this blog post, we will explore how to integrate Google Pay payment options into a Flutter app, providing a seamless and secure experience for your users.
Whether you're a developer looking to add this feature to your app or a business owner looking to improve the user experience, this guide will walk you through the process step by step.
So without further a do let's get started.
Setting up Google Pay
Creating a Google Pay merchant account
Note: If you just want to test GPay, this step is not required. You can directly move to 'Installing the Pay plugin' Section.
Creating a Google Pay merchant account is the first step in integrating the google payment option into your app.
Head over to Google Pay & Wallet Console. You will see a dialog in which you need to specify your business name and country.

After entering your Business details you will be redirected to the Dashboard of the Google Pay Console.
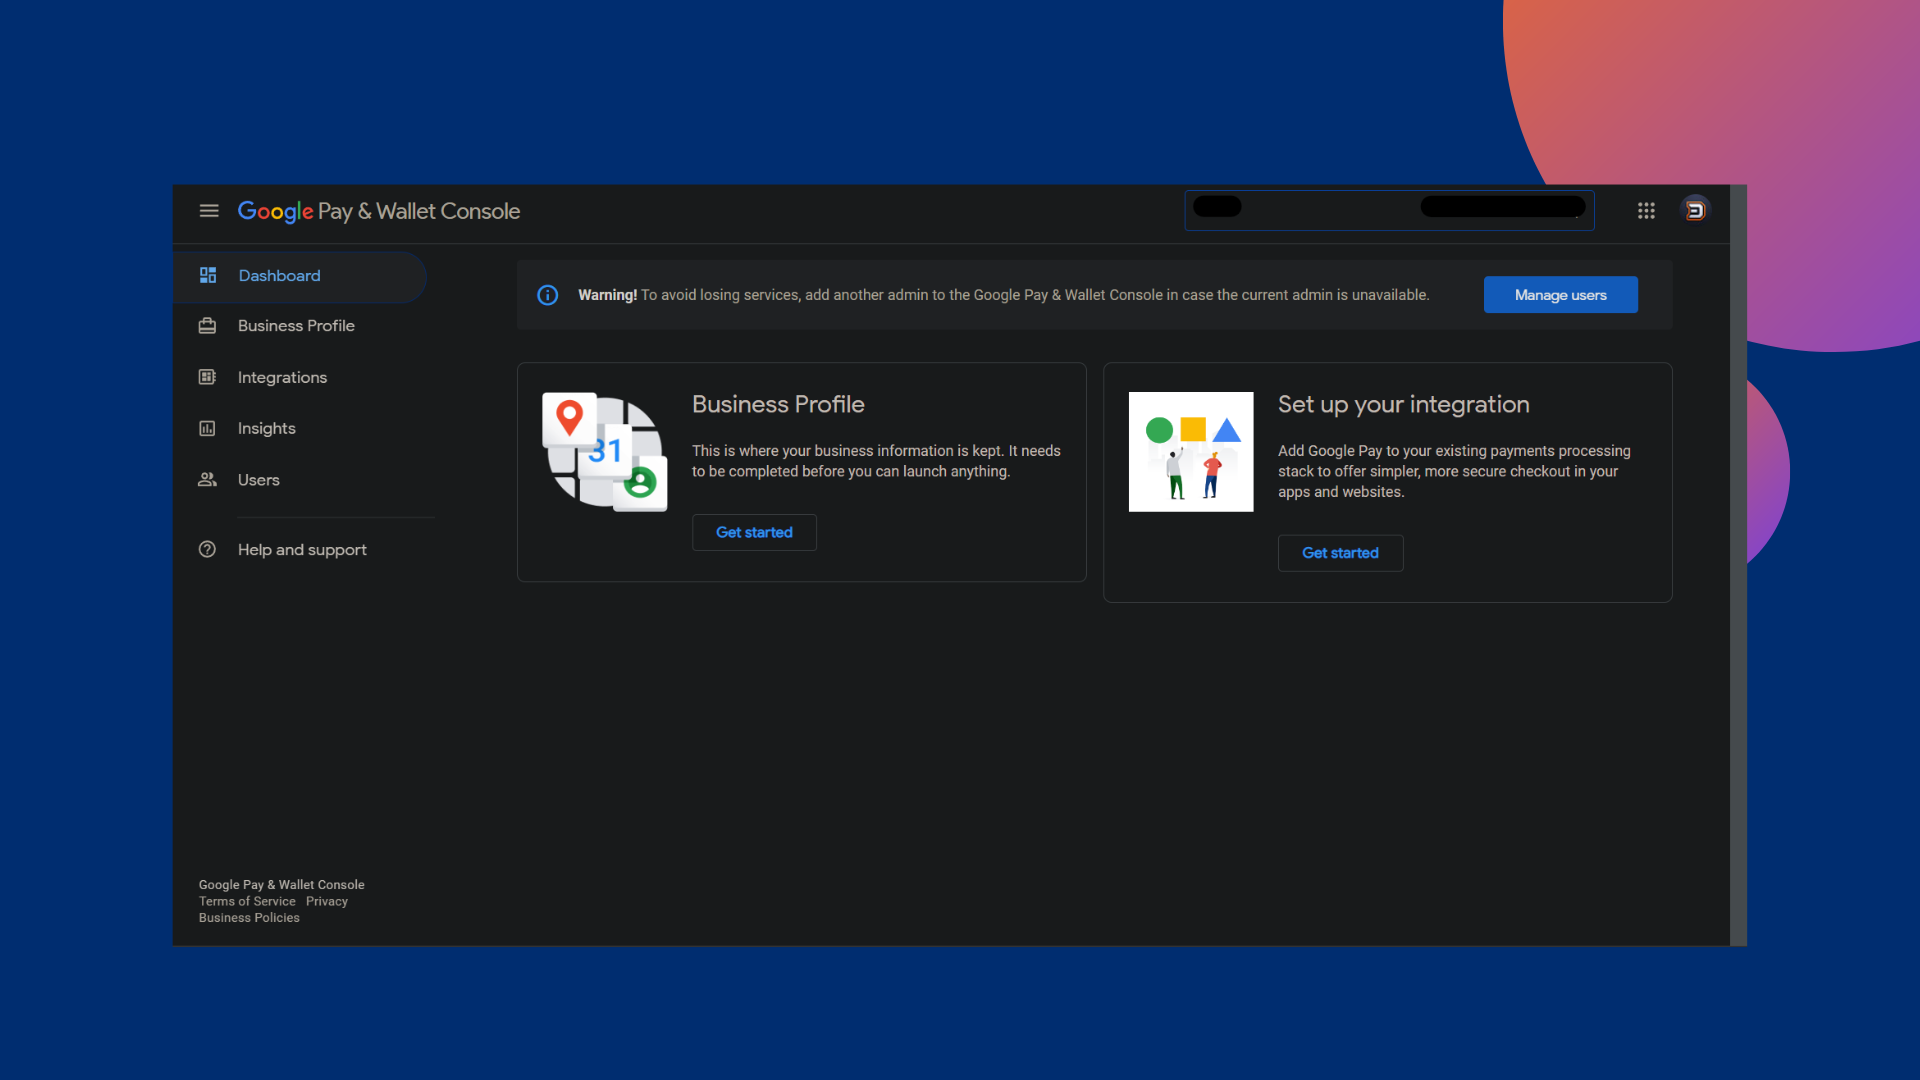
Verifying Business Profile
Now that we have created a Business in GPay Console, we need to set up the Business Profile.
This is mandatory if we need to enable all Pay & Wallet Console features in our app.
Click on the Business Profile section on the left of the Dashboard.
You will see 2 sections :
Business Identity and
Business Information.

- Let's first fill Business Information.
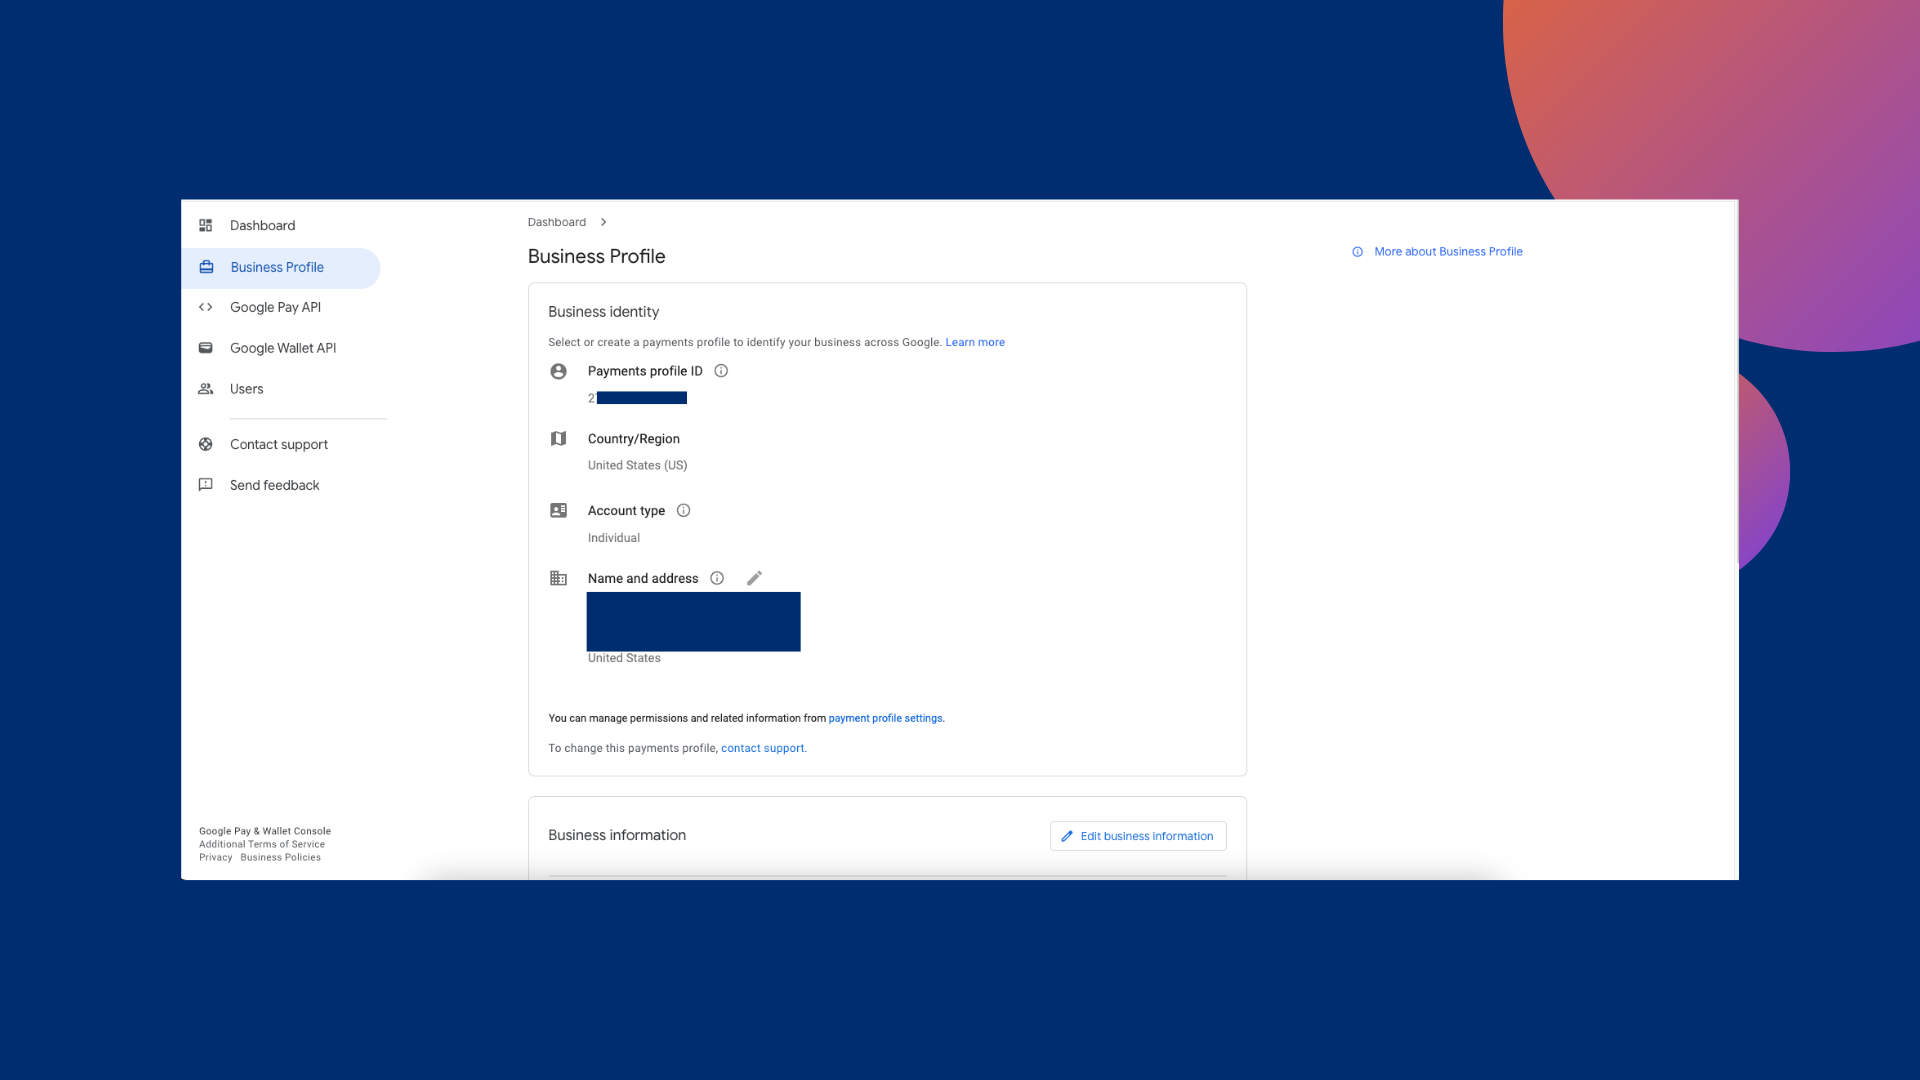
- Now let's fill in Business Information
You will see different form that you need to fill according to your selected Country.
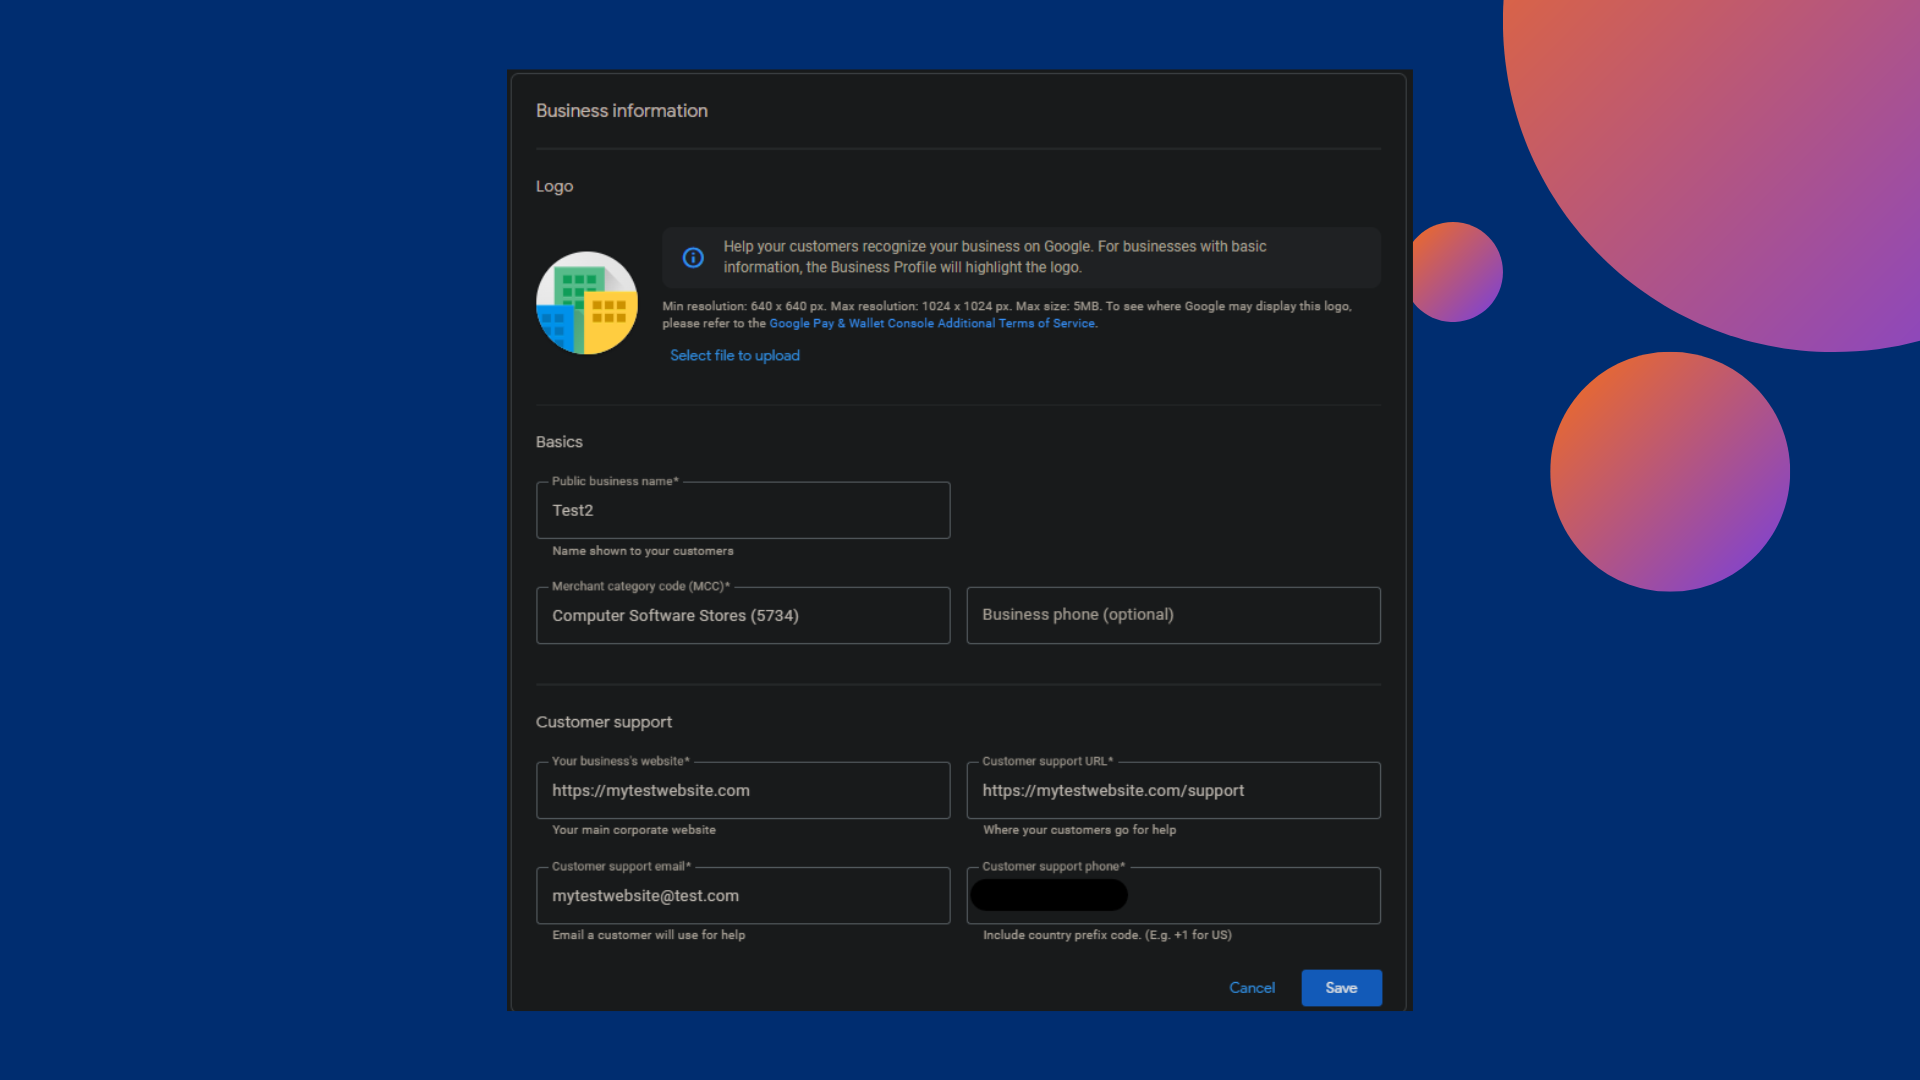
Please note that: I've entered dummy info, just to show you. You need to fill valid information, otherwise it will not get approved.
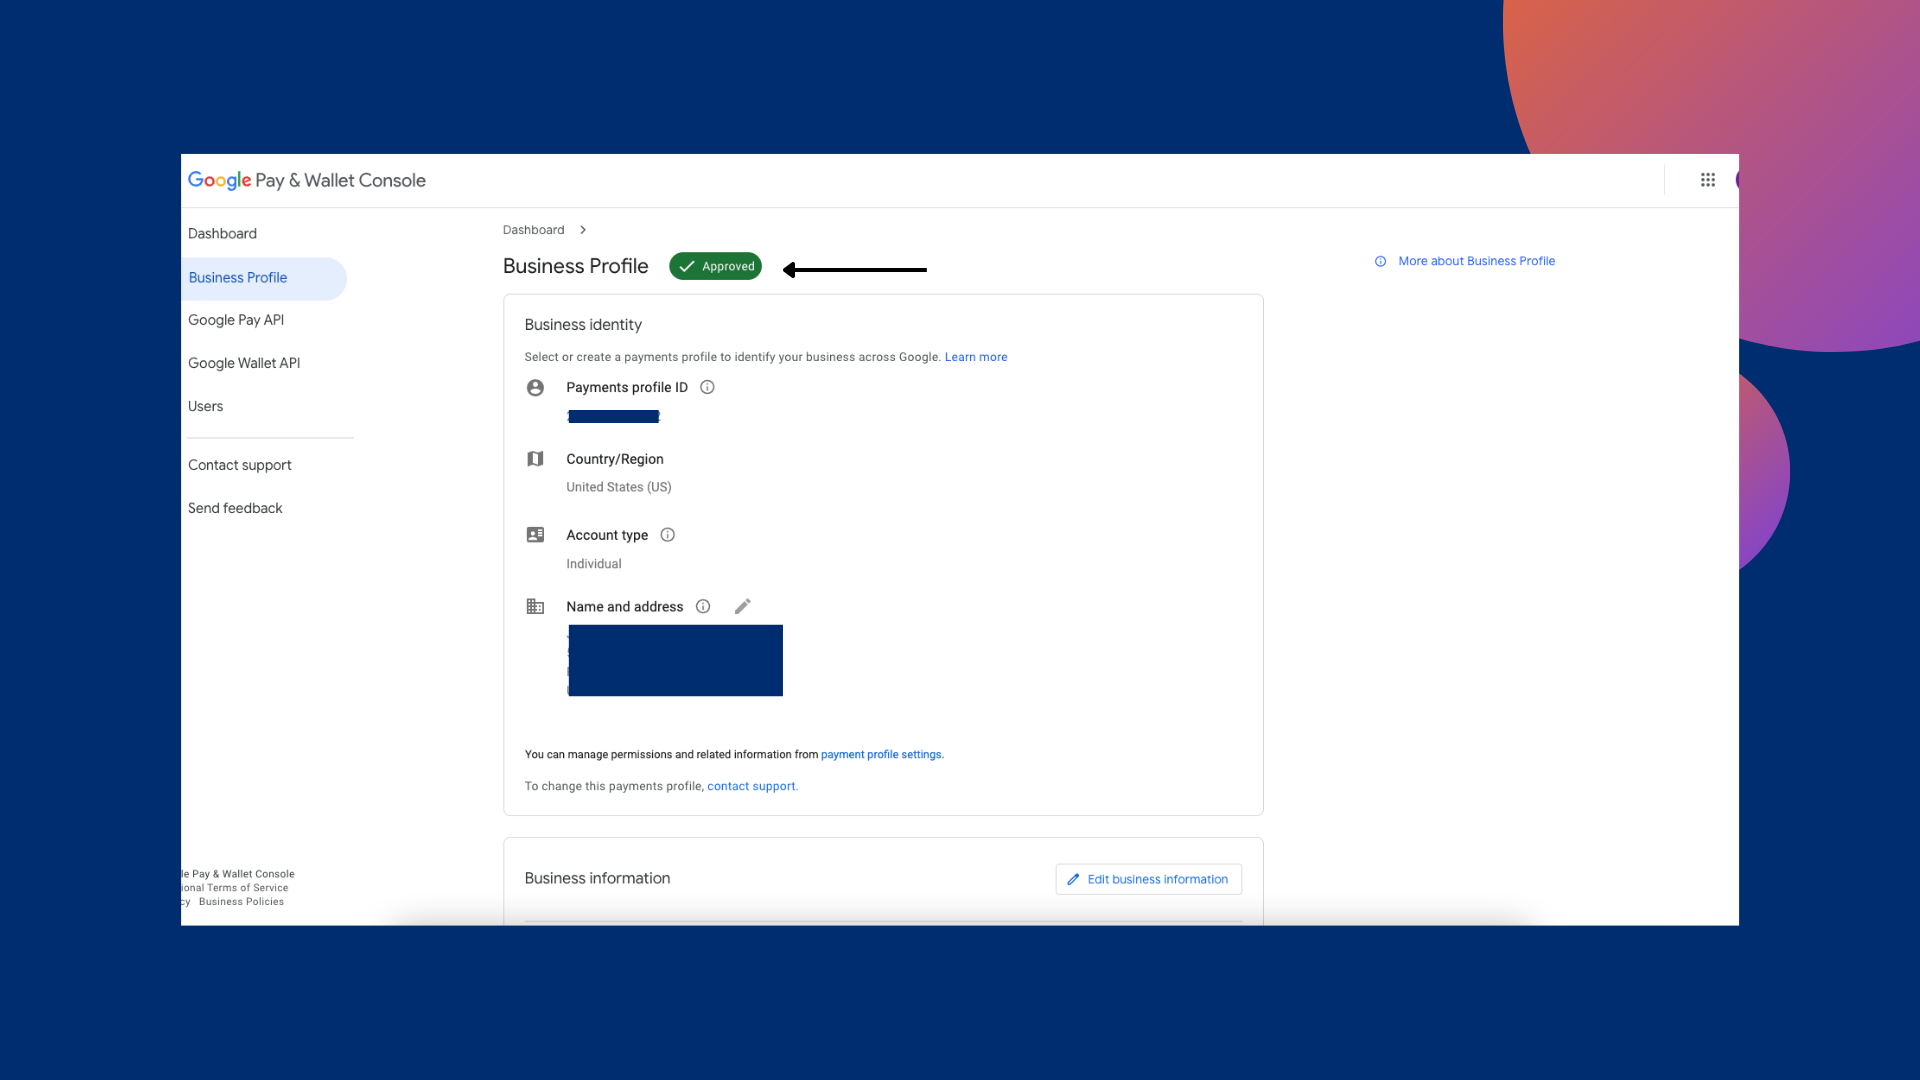
Okay, so after filling in all the details hit the Save button. After a few minutes, your business profile will be approved. If not, you can contact them via e-mail.
You will see the approved label right after Business Profile.
Installing the Pay plugin
Okay, so now that we've done the setup in Google Pay Console. We are ready to use Google Pay in our Flutter App.
We are going to the use pay package to add support for payments.
So, head over to
pubspec.yamland add this package :
dependencies:
    pay: <latest-version>
Configuring the plugin and integrating it into the app
After adding the package, we need to provide a configuration file of Google Pay.
There are two ways to provide this file:
From locally and
From the Remote Server.
We are going to provide this file locally as of now. So, create a
assetsfolder inside your root directory and creategpay.jsonfile and paste the below JSON in it:
{
  "provider": "google_pay",
  "data": {
    "environment": "TEST",
    "apiVersion": 2,
    "apiVersionMinor": 0,
    "allowedPaymentMethods": [
      {
        "type": "CARD",
        "tokenizationSpecification": {
          "type": "PAYMENT_GATEWAY",
          "parameters": {
            "gateway": "example",
            "gatewayMerchantId": "gatewayMerchantId"
          }
        },
        "parameters": {
          "allowedCardNetworks": ["VISA", "MASTERCARD"],
          "allowedAuthMethods": ["PAN_ONLY", "CRYPTOGRAM_3DS"],
          "billingAddressRequired": true,
          "billingAddressParameters": {
            "format": "FULL",
            "phoneNumberRequired": true
          }
        }
      }
    ],
    "merchantInfo": {
      "merchantId": "01234567890123456789",
      "merchantName": "Example Merchant Name"
    },
    "transactionInfo": {
      "countryCode": "US",
      "currencyCode": "USD"
    }
  }
}
environment: Please change this when you are ready to ship your app.allowedPaymentMethods: You can configure here, which payment methods are allowed in GPay.merchantInfo: Do not forget to update this when you are ready to ship. You can getmerchantIdandmerchantNamein your Google Pay Console.transactionInfo: Here you can mention the currency code. ex: USD, EUR, INR, etc.
Reminder: Do not forget to add
assetsfolder inpubspecfile.
Creating a payment button and handling payment responses
There are two ways through which we can handle payment using
paypackage.Using the Pre-Built Button Widget or
By Manually triggering the Payment Process.
Let's Look at the 1st way:
1. GooglePay Widget
- The pay package provides a GooglePay Button which does all the heavy lifting for us. Let's put it to use.
import 'package:pay/pay.dart';

class HomePage extends StatelessWidget {
  const HomePage({super.key});

  @override
  Widget build(BuildContext context) {
    return Scaffold(
      body: Center(
        child: GooglePayButton(
          paymentConfigurationAsset: 'gpay.json',
          paymentItems: const [
            PaymentItem(
              label: 'Total',
              amount: '10.00',
              status: PaymentItemStatus.final_price,
            )
          ],
          type: GooglePayButtonType.pay,
          margin: const EdgeInsets.only(top: 15.0),
          onPaymentResult: (result) {
            log(result.toString());
          },
          loadingIndicator: const Center(
            child: CircularProgressIndicator(),
          ),
        ),
      ),
    );
  }
}
That's it. That's all you need to do to initiate the payment.
But there is one little issue. When you try to run the app, you will get an error saying:
You need to set
minSdkVersionto at least19. To resolve that head over toandroid/app/build.gradleand updateminSdkVersionto19.defaultConfig { applicationId "com.example.payment" minSdkVersion 19 //flutter.minSdkVersion targetSdkVersion flutter.targetSdkVersion versionCode flutterVersionCode.toInteger() versionName flutterVersionName }Now Finally, Let's run the app. Hopefully, there is no error now 🤞🏻.


Okay, Let's Try to tap on the button and see if it initiates the Payment or not.
As the Recording is getting blacked out when I tap on the Button, Also cannot take a Screenshot due to security reasons, I'm sharing a photo taken from another phone 😅.

Handling Response
- After pressing the Continue button, if the transaction was successful you will receive a success response as shown below:
{
  "apiVersion": 2,
  "apiVersionMinor": 0,
  "paymentMethodData": {
    "description": "Visa••••1111",
    "info": {
      "billingAddress": {
        "address1": "1600 Amphitheatre Parkway",
        "address2": "",
        "address3": "",
        "administrativeArea": "CA",
        "countryCode": "US",
        "locality": "Mountain View",
        "name": "Card Holder Name",
        "phoneNumber": "6505555555",
        "postalCode": "94043",
        "sortingCode": ""
      },
      "cardDetails": "1111",
      "cardNetwork": "VISA"
    },
    "tokenizationData": {
      "token": "examplePaymentMethodToken",
      "type": "PAYMENT_GATEWAY"
    },
    "type": "CARD"
  }
}
- In the
tokenizationDatathere is ourtokenwhich we can use further to place orders for example.
2. Manual Payment Handling
This is a more advanced use case, where you are given more control over handling each request and button individually. Let's also see this.
First of all, we need to create a
Payclient object.
Pay payClient = Pay.withAssets(['gpay.json']);
This
payClienthas a method named userCanPay() which is basically used to determine whether the user can start a payment process with a given provider.So let's use this method and show our UI according to its state. As this method returns future, we are going to use
FutureBuilderclass HomePage extends StatefulWidget { const HomePage({super.key}); @override State<HomePage> createState() => _HomePageState(); } class _HomePageState extends State<HomePage> { late Future<bool> _userCanPay; Pay payClient = Pay.withAssets(['gpay.json']); @override void initState() { _userCanPay = payClient.userCanPay(PayProvider.google_pay); super.initState(); } @override Widget build(BuildContext context) { return Scaffold( body: Center( child: Visibility( visible: Platform.isAndroid, child: FutureBuilder( future: _userCanPay, builder: (BuildContext context, AsyncSnapshot snapshot) { if (snapshot.connectionState == ConnectionState.done) { if (snapshot.data == true) { return ElevatedButton( child: const Text('Pay With GPay'), onPressed: () async {}, ); } else { // userCanPay returned false // Consider showing an alternative payment method } } return Container(); }, ), ), ), ); } }- Let's run the app to see if the button actually shows up or not.

🥳 Cool. Now that the button is visible, Let's initiate the payment.
To initiate the payment sheet, we need to use
showPaymentSelectormethod from the payClient object.ElevatedButton( onPressed: () async { final result = await payClient.showPaymentSelector( provider: PayProvider.google_pay, paymentItems: [ const PaymentItem( amount: '50.00', status: PaymentItemStatus.final_price, ) ], ); log(result.toString()); }, child: const Text('Pay with GPay',), ),Output:

Important: If you are going for the 2nd approach, you will need to follow Google's Design guidelines and API guidelines. Otherwise your application might get rejected from the Play Store.
Conclusion
In conclusion, integrating mobile payment options such as Google Pay into your Flutter app can greatly enhance the user experience by providing a seamless and secure way for users to make purchases.
By following the steps outlined in this guide, you can set up a merchant account, install and configure the appropriate plugins, and integrate the payment options into your app.
It's important to test the integration on both Android and iOS devices before deploying the app to the app stores. Remember to comply with the requirement of Google Pay for your business.
This guide has provided a comprehensive overview of the process, but it's important to stay up to date with any changes or updates to the Google Pay APIs.
Wrapping Up
I hope you found this article useful and informative. If you have any questions, please leave them in the comments section.
Thank you for reading and I look forward to our next article. Until then..