Flutter MobX: How to Fetch Data From an API? - 2022 Guide
What is MobX? How to use MobX in Flutter? Understand everything with a simple example.

D
I'm a mobile/web developer 👨💻 who loves to build projects and share valuable tips for programmers
Follow me for Flutter, React/Next.js, and other awesome tech-related stuff 😉
Introduction
- State management can be somewhat of a headache when it comes to building complex applications.
- You see, managing state for apps can be challenging because you have to keep your data synchronized with the UI, and code that deals with such data often ends up being scattered throughout the app's component tree.
- As an application gets more complex, figuring out how to keep the UI and your app state in sync can be a problem. I won't dive into details, but long story short, whenever your view's state is updated and you want to persist it back, you need to trigger various things that involve navigation or saving data and so on.
- But how do we fix this? Well, the answer is simple: use a library that allows us to manage state in a more seamless way.
- In this blog post, I will show you how using MobX can help make your application code cleaner, organized, and easier to write.
MobX

- MobX is a state management library that makes it very simple to connect the reactive data of your application with the UI.
- This is a tricky problem to tackle, but MobX has some pretty clever smarts around what is being consumed (observables) and where (reactions), and automatically tracks it for you.
- When the observables change, all reactions are re-run. What's interesting is these reactions can be anything from a network call to re-rendering the UI.
- MobX's concepts of Observables, Actions and Reactions make it intuitive to figure out how to model the state of an application. We will see all these concepts in detail in this blog.
Dependencies Installation
- Add the following dependencies to your
pubspec.yamlfile.
dependencies:
    mobx: ^2.0.6+1
    flutter_mobx: ^2.0.4
- For Code generation add the following
dev_dependencies:
dev_dependencies:
    build_runner: ^2.1.7
    mobx_codegen: ^2.0.5+2
Store in MobX
- When you are building an application, it's common to have some business logic and state connected crosswise applications. I frequently see applications with a state included inside the UI. This gets messy as the application grows.
- The main responsibility of stores is to move business logic and state out of your UI.
- So we basically create a class where we write all the business logic and then we link it with the UI.
- In our case we are going to create a Store named PostStore where we put all the logic of getting the list of post, loading state, etc.
- Create a new file
post_store.dartin\lib\stores\postfolder and add the following code to it.
// #3
part 'post_store.g.dart';

// #2
class PostStore = _PostStore with _$PostStore;

// #1
abstract class _PostStore with Store {
}
- Every store in MobX should be declared with the above boilerplate. This is probably the only boilerplate that gets repeated. Let's try to understand what the above code does.
- Abstract
_PostStoreClass- We've created a private
abstractclass of PostStore in which we are going to store/write all the business logic. Also notice that we've included aStoremixin. - The
Storemixin is primarily meant for code-generation and used as part of themobx_codegenpackage that we've installed already. mobx_codegensimplifies the usage of MobX. It will detect annotations like@observables,@computedand@actionand generate the code needed to support these behaviors.- We will take a look at these annotation as we go further. So don't worry if you are not familiar with these terms.
- For now consider this abstract class as a box where we put all the store related code.
- We've created a private
PostStoreclass- In order to access the methods and variables defined in the
_PostStoreabstract class, we need to create a class PostStore through which we can get access to it. - Here, we've used a
_$PostStoremixin with the_PostStoreclass. You will see the error over it, it's because this_$PostStoremixin doesn't exists yet. As we will run the code generation the file namedpost_store.g.dartwill get generated. Which contains the_$PostStoremixin.
- In order to access the methods and variables defined in the
partdirective- The generated code will be inside the part file:
post_store.g.dart, which we include with thepartdirective. - Note that the basename of the part-file must match the containing-file exactly! In the above case, the part file is called
post_store.g.dart, which matches thepost_store.dartfile in which it is contained. - In order to generate this file run the following command:
flutter pub run build_runner watch --delete-conflicting-outputs - You will see a file
post_store.g.dartgenerated at the same location wherepost_store.dartis. 
- The generated code will be inside the part file:
- Abstract
Post Model
- As each post has certain properties defined with the data, we will need a model class which we will use in the UI.
- Paste the below code inside
\lib\data\models\post\folder
class Post {
  int? userId;
  int? id;
  String? title;
  String? body;

  Post({
    this.userId,
    this.id,
    this.title,
    this.body,
  });

  factory Post.fromMap(Map<String, dynamic> json) => Post(
        userId: json["userId"],
        id: json["id"],
        title: json["title"],
        body: json["body"],
      );

  Map<String, dynamic> toMap() => {
        "userId": userId,
        "id": id,
        "title": title,
        "body": body,
      };
}
API Class
- We are going to use JSONPlaceHolder in order to fetch the post data.
- Head over to
\lib\data\network\api\posts\folder and create a filepost_api.dartand paste the below code in it:class PostApi { Future<List<Post>> getPosts() async { try { final res = await http.get( Uri.parse( "http://jsonplaceholder.typicode.com/posts", ), ); final data = (jsonDecode(res.body) as List) .map((post) => Post.fromMap(post)) .toList(); return data; } catch (e) { debugPrint(e.toString()); rethrow; } } } - We've used
httppackage to make a get request. Make sure to include it inside the pubspec.yaml file. - As everything is setup we can now head over to PostStore and write the logic
Building Post Store
- Paste the below code first and then I'll explain what it does:
import 'package:mobx/mobx.dart';
import 'package:mobx_flutter/data/models/post/post.dart';
import 'package:mobx_flutter/data/network/apis/posts/post_api.dart';

part 'post_store.g.dart';

class PostStore = _PostStore with _$PostStore;

abstract class _PostStore with Store {
  _PostStore(PostApi postApi) : _postApi = postApi;
  // #1
  late final PostApi _postApi;

  // #2
  // store variables:-----------------------------------------------------------
  @observable
  List<Post> posts = [];

  @observable
  bool isLoading = false;

  // #3
  // actions:-------------------------------------------------------------------
  @action
  Future getPosts() async {
    isLoading = true;
    final postList = await _postApi.getPosts();
    posts = postList;
    isLoading = false;
  }
}
- Before we understand the above code I would like to explain to you about the 3 annotation / reactive states that are most important:
MobX Annotations
1) @observable :
- This annotation is used when we want to make any field of our store observable.
- It means whenever that field changes its values, the widget observing to that field gets notified and update accordingly.
- Ex : In our case we want a list of post and a loading bool to be observable. Let's create it inside our PostStore
abstract class _PostStore with Store {
  // store variables:-----------------------------------------------------------
  @observable
  List<Post> posts = [];

  @observable
  bool isLoading = false;
}
2) @action
- We annotate a function/method with
@action. We mutate the observable inside this method. - As defined in the docs : Actions are functions that encapsulate the mutations on observables.
- In simple term Actions are operations that mutate Observable.
- In our case we will define a
getPosts()action and will set the returned list of posts to thepostsobservable
abstract class _PostStore with Store {
  // store variables:-----------------------------------------------------------
  @observable
  List<Post> posts = [];

  @observable
  bool isLoading = false;

  // actions:-------------------------------------------------------------------
  @action
  Future getPosts() async {
    isLoading = true;
    final postList = await _postApi.getPosts();
    posts = postList;
    isLoading = false;
  }
}
- Changes to the observables are only notified at the end of the action. This ensures all mutations happen as an atomic unit.
- If you're familiar with
ChangeNotifier, you know you need to callnotifyListeners()whenever you want to, well, notify listeners about a state change. For MobX, it's the same but instead of you manually notifying listeners, MobX does it for you when a method is annotated with@action. - We can call nested action too, the change will occur when top most action gets completed.
3) @computed
- When there is a situation where one observable depends on other observable and we want to get notified when one of these observable changes then we to make use of
@computedannotation. - Suppose, there are two dices and we want to track the sum of two random numbers. The normal way to do this is like below:
abstract class _Dice with Store {
  @observable
  int left = Random().nextInt(6) + 1;

  @observable
  int right = Random().nextInt(6) + 1;

  @observable
  int total;

  @action
  void roll() {
    left = Random().nextInt(6) + 1;
    right = Random().nextInt(6) + 1;
    total = left + right;
  }
}
- The action-method
roll()defined with@actionannotation is used to update the dice counts every time user taps on the dice. - But there is one issue, The
totalcount isnullfor the very first time. It gets updated only when the action-methodroll()is called. - To solve this we can make use of
@computedannotation.
abstract class _Dice with Store {
  @observable
  int left = Random().nextInt(6) + 1;

  @observable
  int right = Random().nextInt(6) + 1;

  @computed
  int get total => left + right;

  @action
  void roll() {
    left = Random().nextInt(6) + 1;
    right = Random().nextInt(6) + 1;
  }
}
- Now
totalis a computed observable annotated with@computed. Computed observables are in-sync every time left or right count is updated. - The value of
totalis automatically updated when the instance of the store is created so I no longer have the null value when I load the app.
4) @readonly
- As the name suggest class field annotated with this annotation is only available for reading and not for mutating its value.
- Syntax :
abstract class _SomeStore with Store {
  @readonly
  int youCantChangeMe = 0;
}

// Now
// someStore.youCantChangeMe = 41 is not possible. We cant change it
- Now let's understand the code that I said just paste it we will understand after the knowledge of different annotations.
abstract class _PostStore with Store {
  // store variables:-----------------------------------------------------------
  @observable
  List<Post> posts = [];

  @observable
  bool isLoading = false;

  // actions:-------------------------------------------------------------------
  @action
  Future getPosts() async {
    isLoading = true;
    final postList = await _postApi.getPosts();
    posts = postList;
    isLoading = false;
  }
}
- Now, I bet If you have properly understood the above annotation you will not have any problem understanding the above code.
- The
postsis initially an empty list, which will get filled after thegetPosts()method invoked. - In the same way when the
getPost()method is invoked, we first toggle theisLoadingto true to show the loading indicator and then will toggle it again to false after the posts are successfully fetched. - Also the fields that are changing is annotated with the
@observableannotation and thegetPosts()method which is responsible for observable mutation is annotated with@action.
Observer Widget
- As the name suggest, it observes the observable "mentioned" inside of it.
- In simple term, the widget is defined under this widget will get re-rendered / rebuild whenever the observable used inside this widget changes.
- In our case we will observe two field :
isLoadingandpostslist. Whenever these field gets changed the widget defined under Observer will get re-rendered.
class Home extends StatefulWidget {
  const Home({Key? key}) : super(key: key);

  @override
  State<Home> createState() => _HomeState();
}

class _HomeState extends State<Home> {
  final _postStore = getIt.get<PostStore>();

  @override
  void initState() {
    getPost();
    super.initState();
  }

  Future<void> getPost() async {
    await _postStore.getPosts();
  }

  @override
  Widget build(BuildContext context) {
    return Scaffold(
      appBar: AppBar(
        title: const Text("Posts"),
      ),
      body: Observer(
        builder: (context) {
          if (_postStore.isLoading) {
            return const Center(
              child: CircularProgressIndicator(),
            );
          }
          return ListView.builder(
            itemCount: _postStore.posts.length,
            itemBuilder: (context, index) {
              final post = _postStore.posts[index];
              return ListTile(
                title: Text(post.title ?? ""),
                subtitle: Text(post.body ?? ""),
              );
            },
          );
        },
      ),
    );
  }
}
Using GetIt to Provide Store
- Using the GetIt package, we can setup a kind of App level store. Then using the getIt.get() API, we can read this value inside our Screens/UI.
- So, to provide a store create a file in
\lib\di\folder namedlocator.dartand paste the below code.
final GetIt getIt = GetIt.instance;

void setup() {
  getIt.registerSingleton(PostApi());
  getIt.registerSingleton(PostStore(getIt.get<PostApi>()));
}
- Also call this
setup()method before therunApp()inmain.dart
void main() {
  setup();
  runApp(const MyApp());
}
- And now we can access the PostStore anywhere inside our app like below :
final _postStore = getIt.get<PostStore>();
- If you want to learn more about Dependency Injection: Check the below article
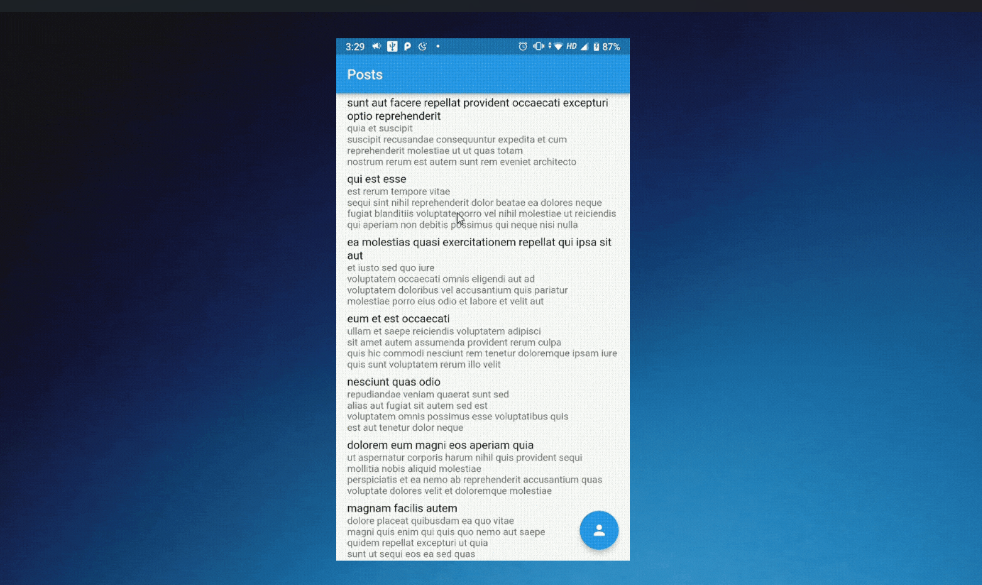
Final Output
Project Repo
Wrapping Up
- I hope you enjoyed and learned something from this article. If you have any feedback/queries, leave them in the comments.
- Thank you for spending time reading this article. See you in the next article. Until then...