
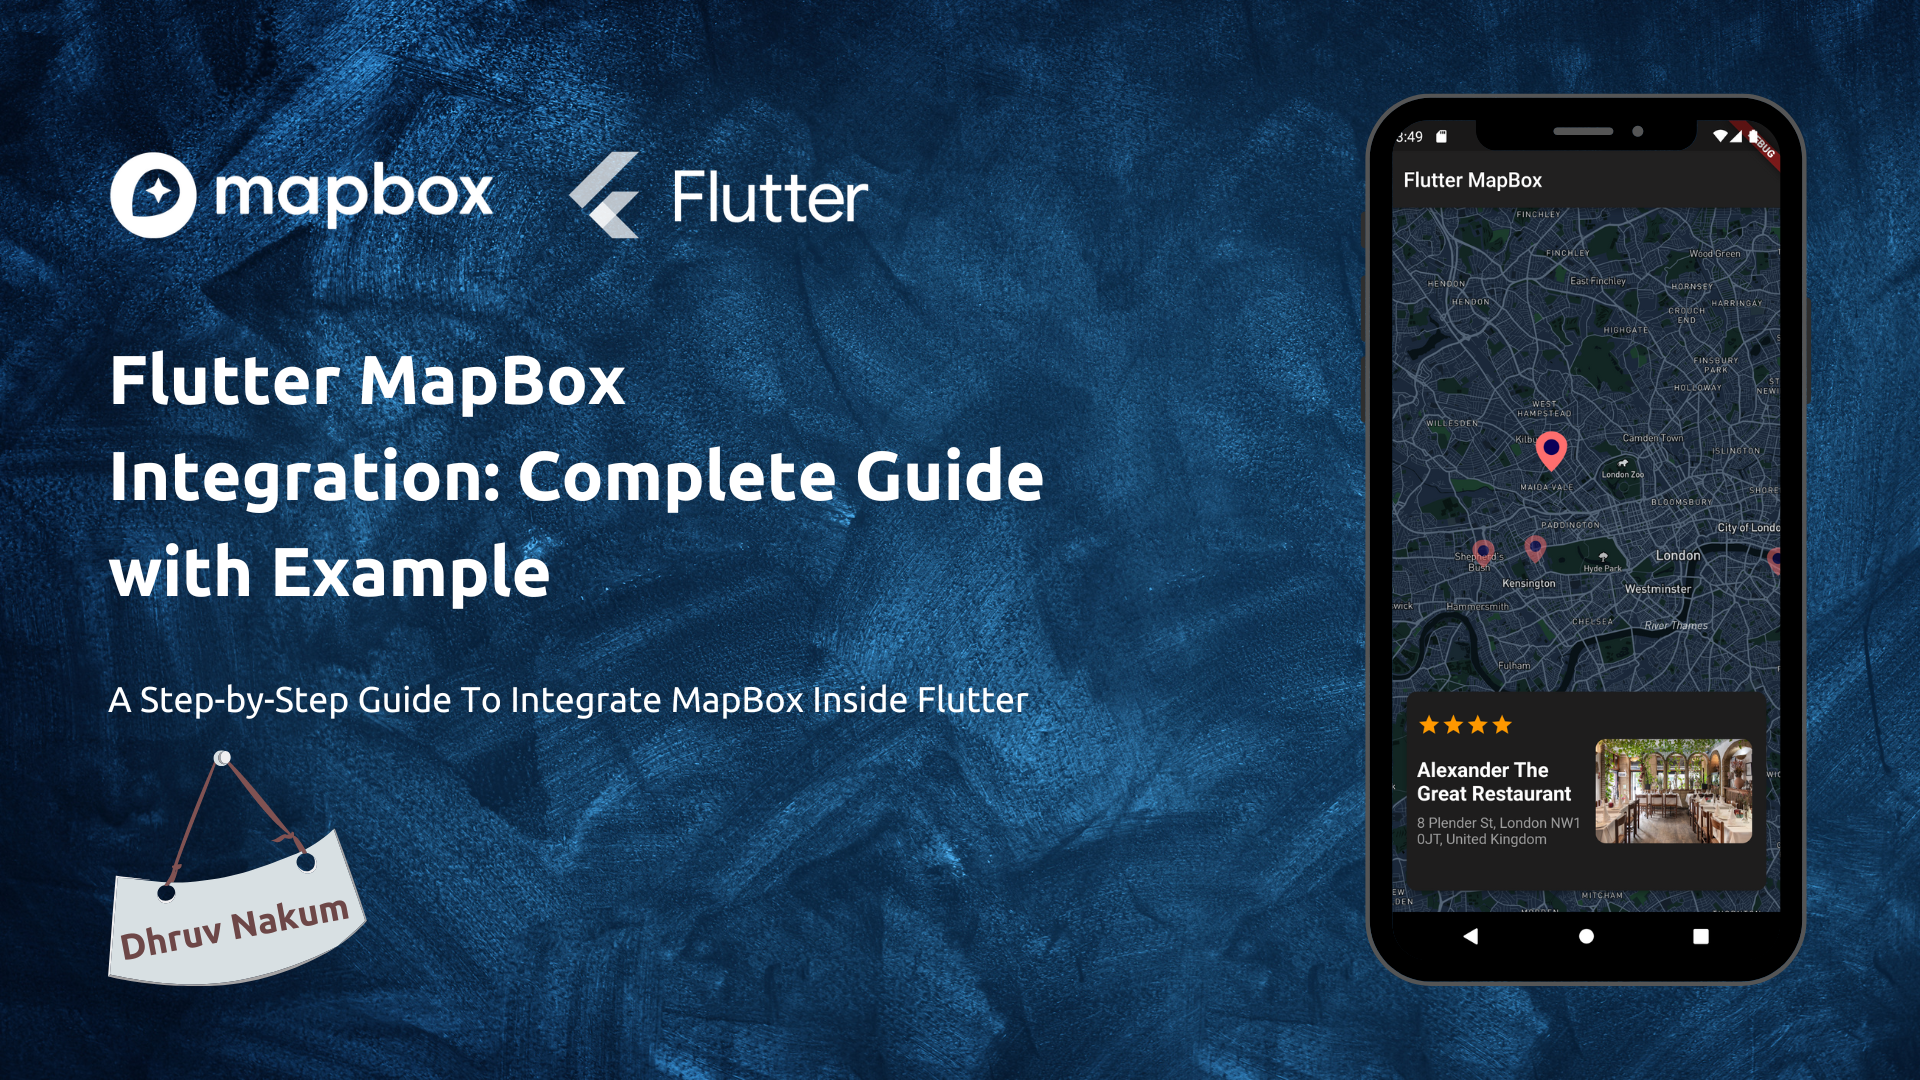
Flutter MapBox Integration: Complete Guide with Example
A Step-by-Step Guide To Integrate MapBox Inside Flutter
Intro to MapBox
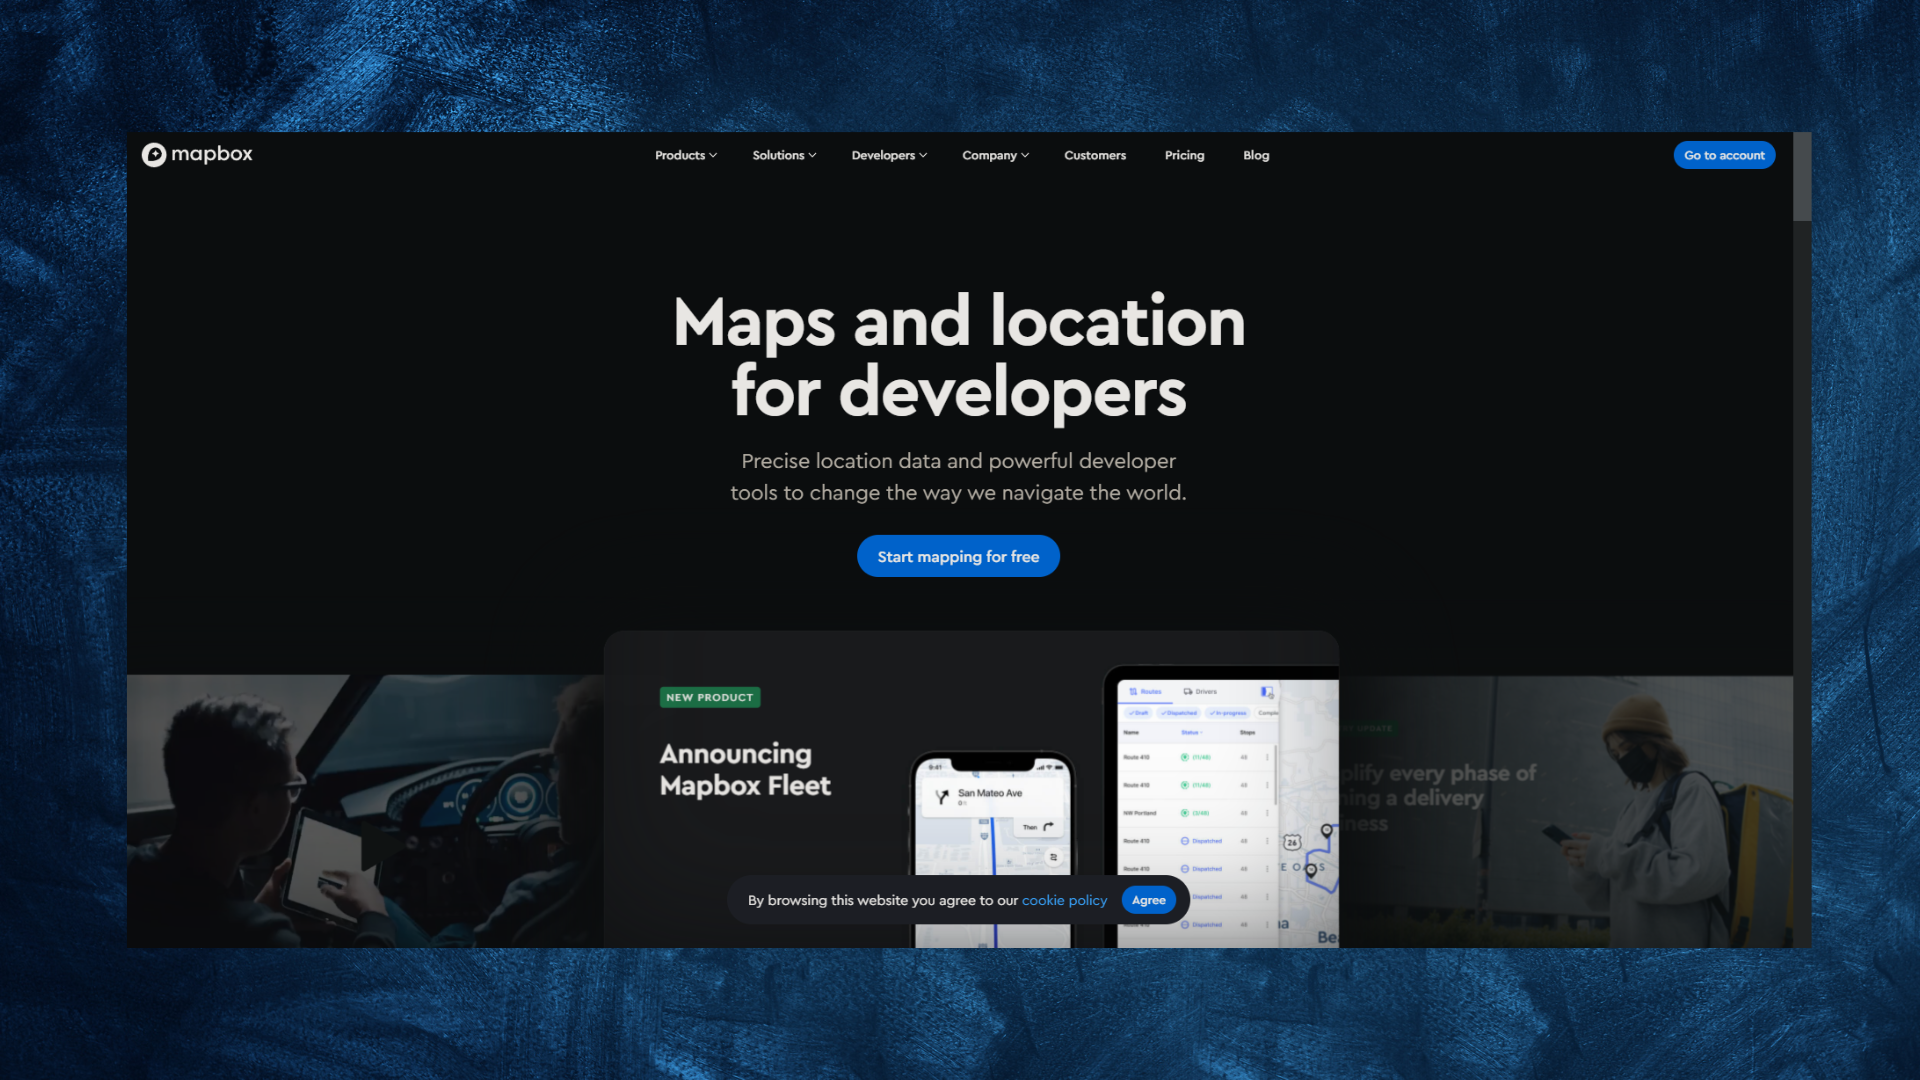
- MapBox is used to get maps and locations. Many businesses trust MapBox, as seen by the list below:

- MapBox offers a wide range of different services, some of which are listed below:
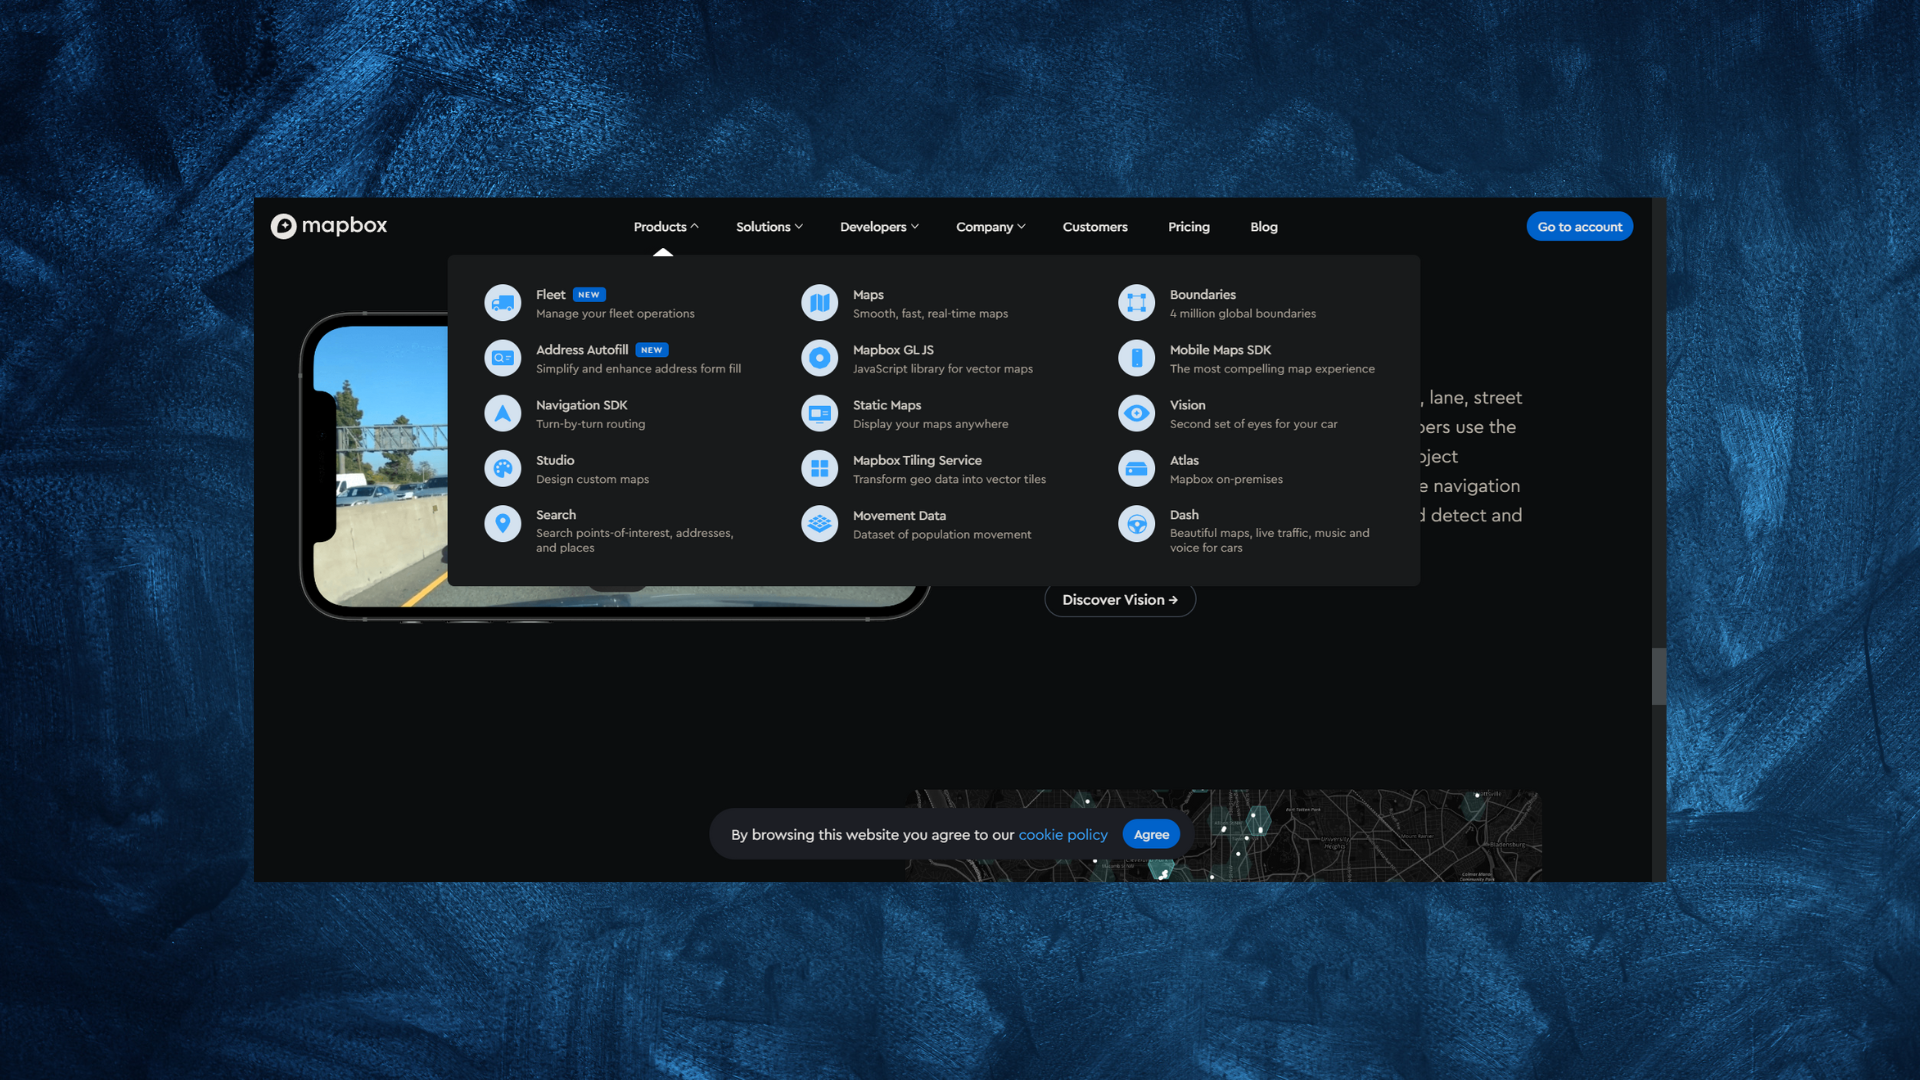
- The existence of a Mapbox Studio is among Mapbox's greatest features. Similar to Photoshop for maps is Mapbox Studio. You have complete control over everything, including typefaces, colors, 3D effects, camera angles, and even the pitch of the map when a car turns.
- To assist you in creating interesting navigation experiences, Mapbox also offers potent routing algorithms, precise, traffic-powered trip timings, and clear turn-by-turn directions.
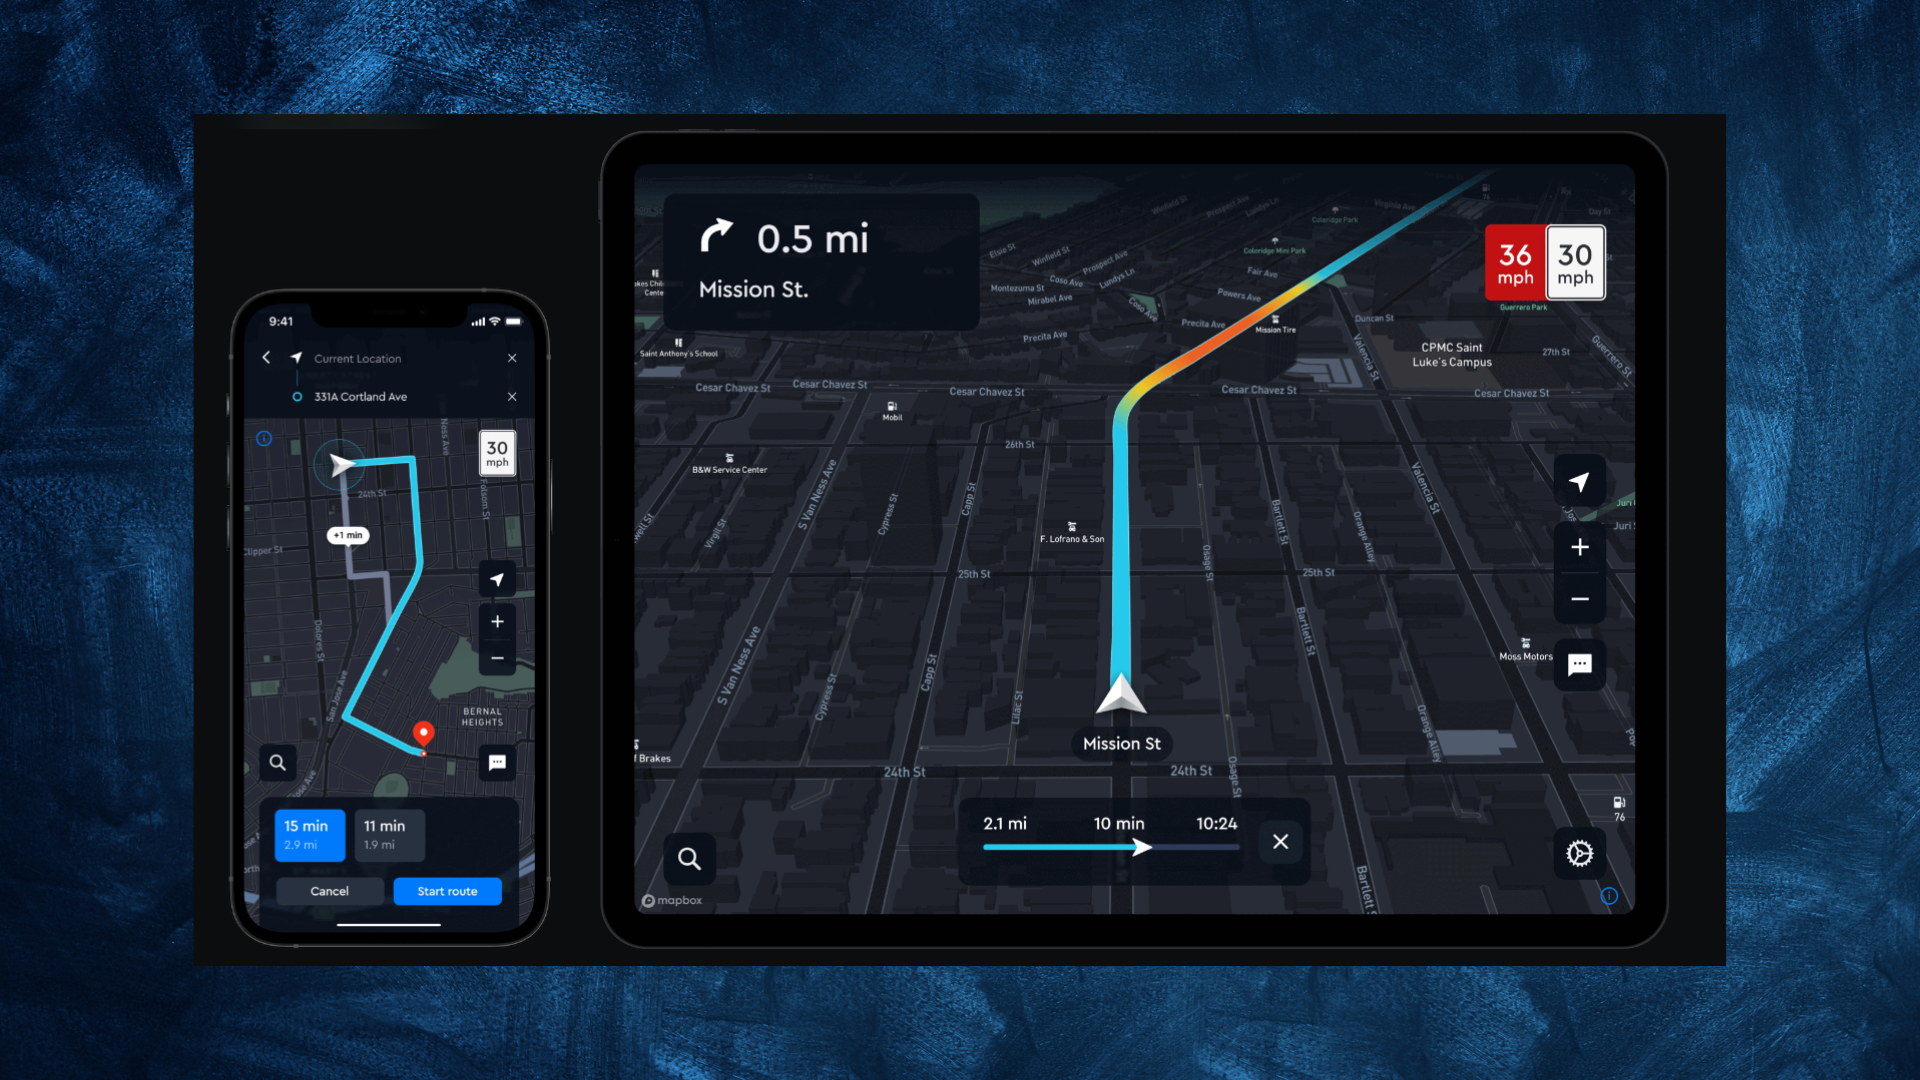
As you can see, utilizing MapBox instead of Google Maps has several benefits since it provides you greater control over the map you're integrating into the app.
So, without further-a-do let's see how we can integrate MapBox inside a Flutter Application.
Create MapBox Account
You must first register for a MapBox account in order to use MapBox. Create an account by going to MapBox SignIn.
After the successful sign in you'll be redirected to the Dashboard.
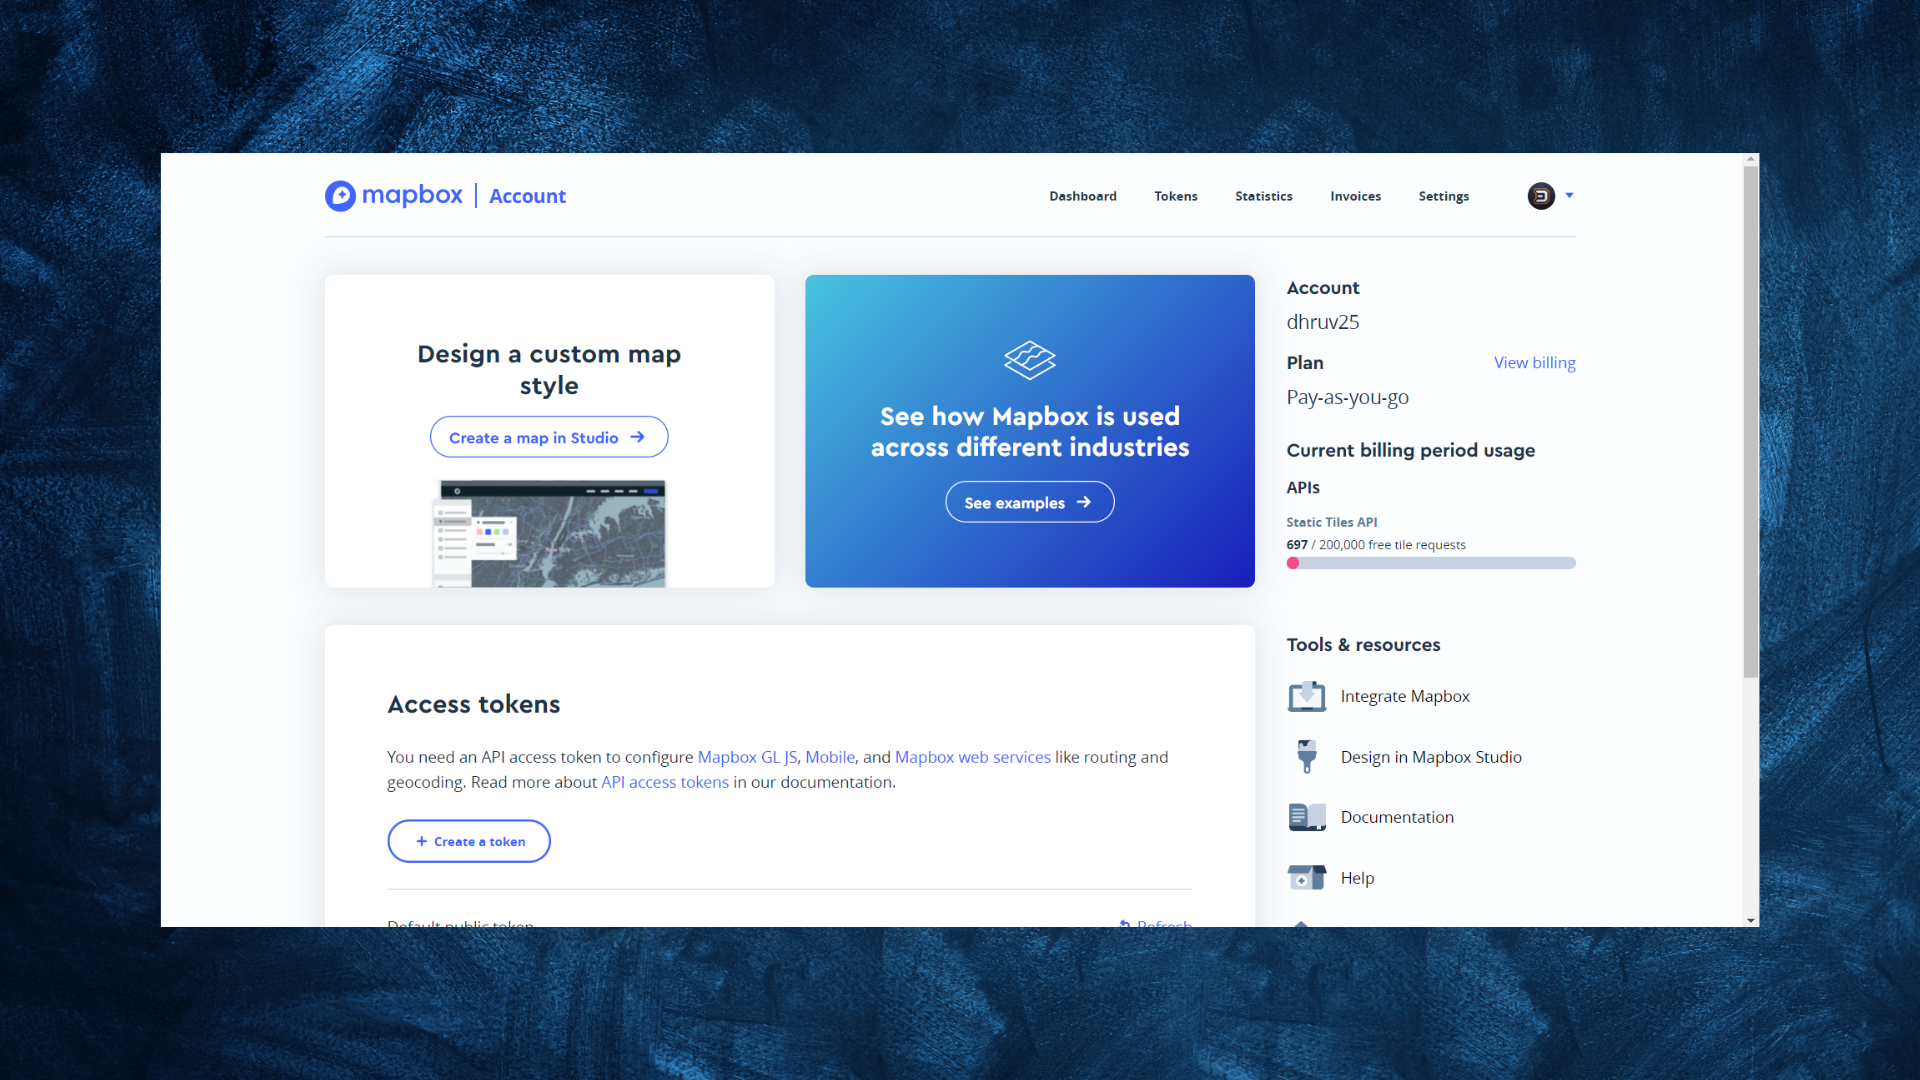
- Your access token, which is required for any application to display the map, found under the Access Tokens section.
Flutter Map Package
- We will use flutter_map as it is very simple and easy to integrate, also it is customizable and configurable.
- Head over to your project and install this package inside
pubspec.yaml.
dependencies:
  flutter_map: ^1.1.1
Visit the documentation website here, for all information about how to use this library, including setup and usage instructions.
Getting Access Token and Style ID
- In order to show a Mapbox map, you need two things:
- Access Token
- Style ID
- You will find your access token inside the dashboards' Access Tokens section
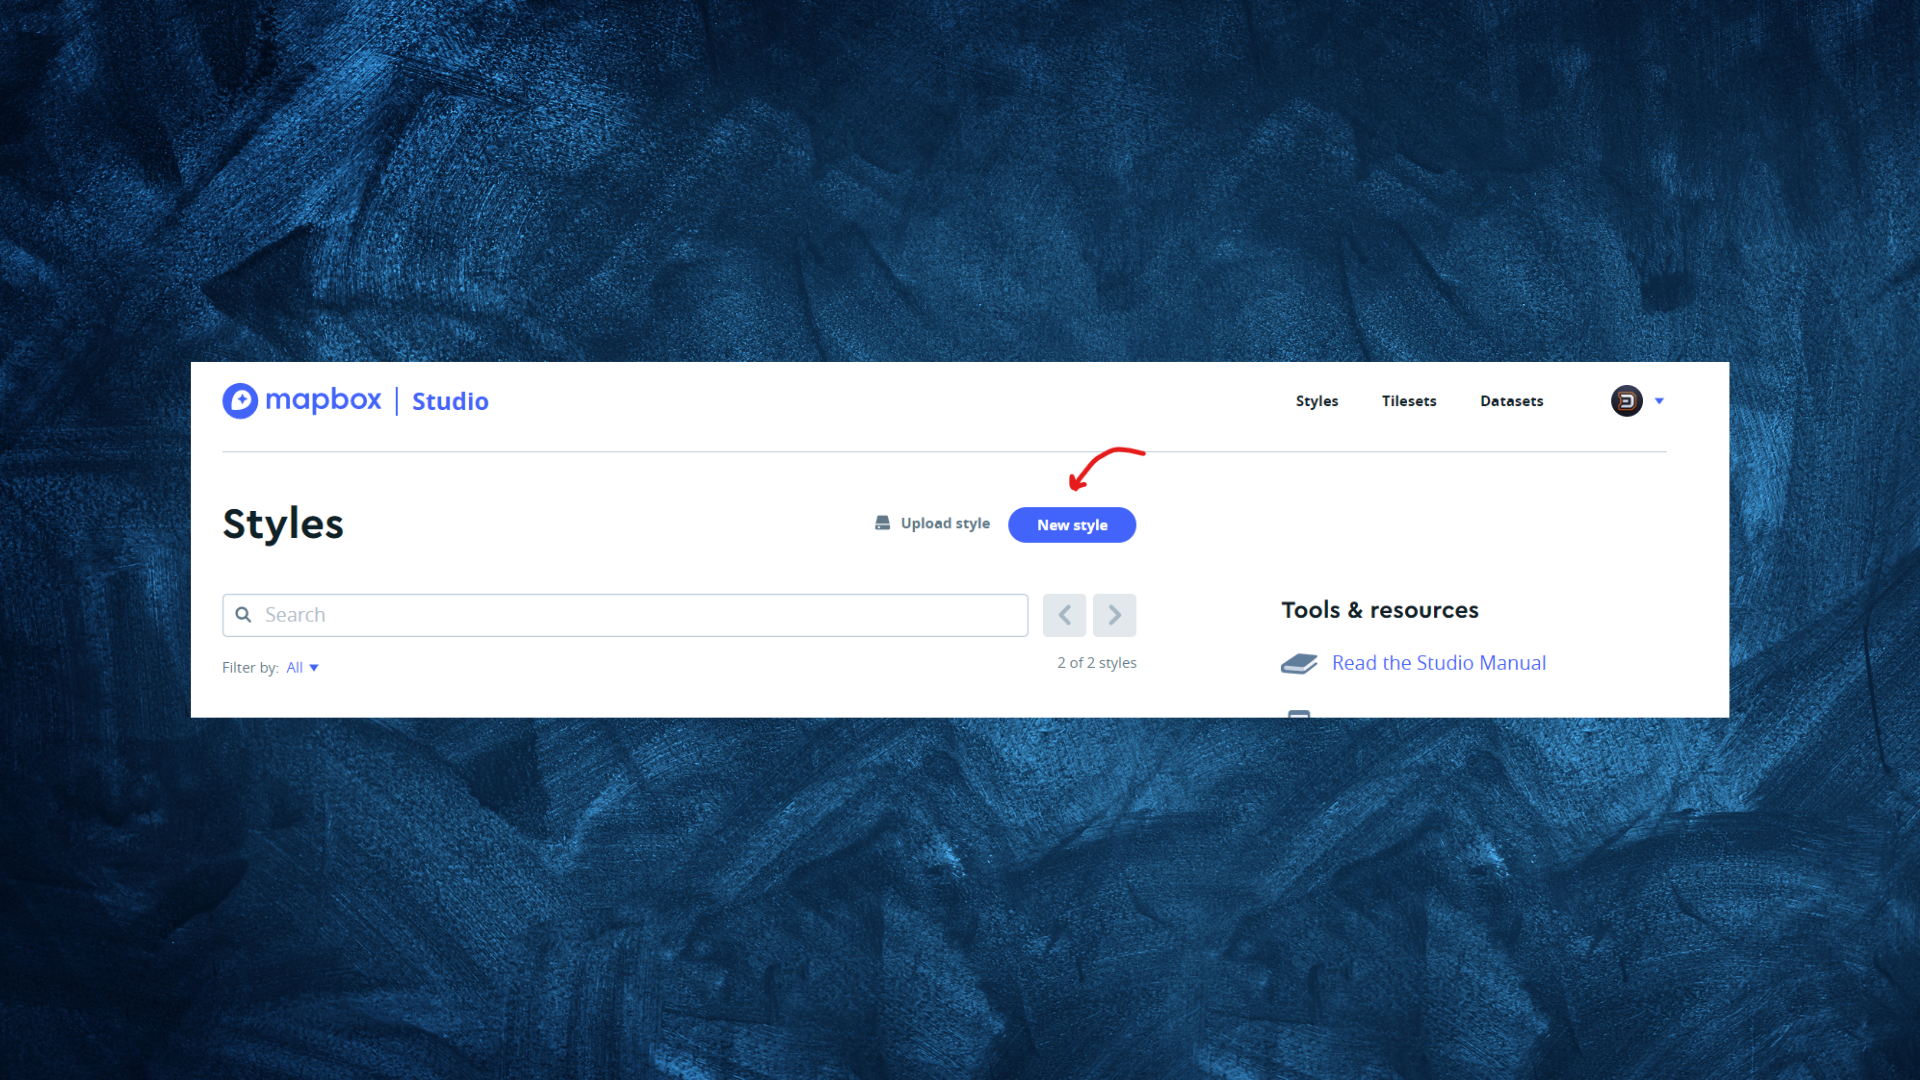
- To get the Style Id head over to MapBox Studio, here you will see a button named New Style.
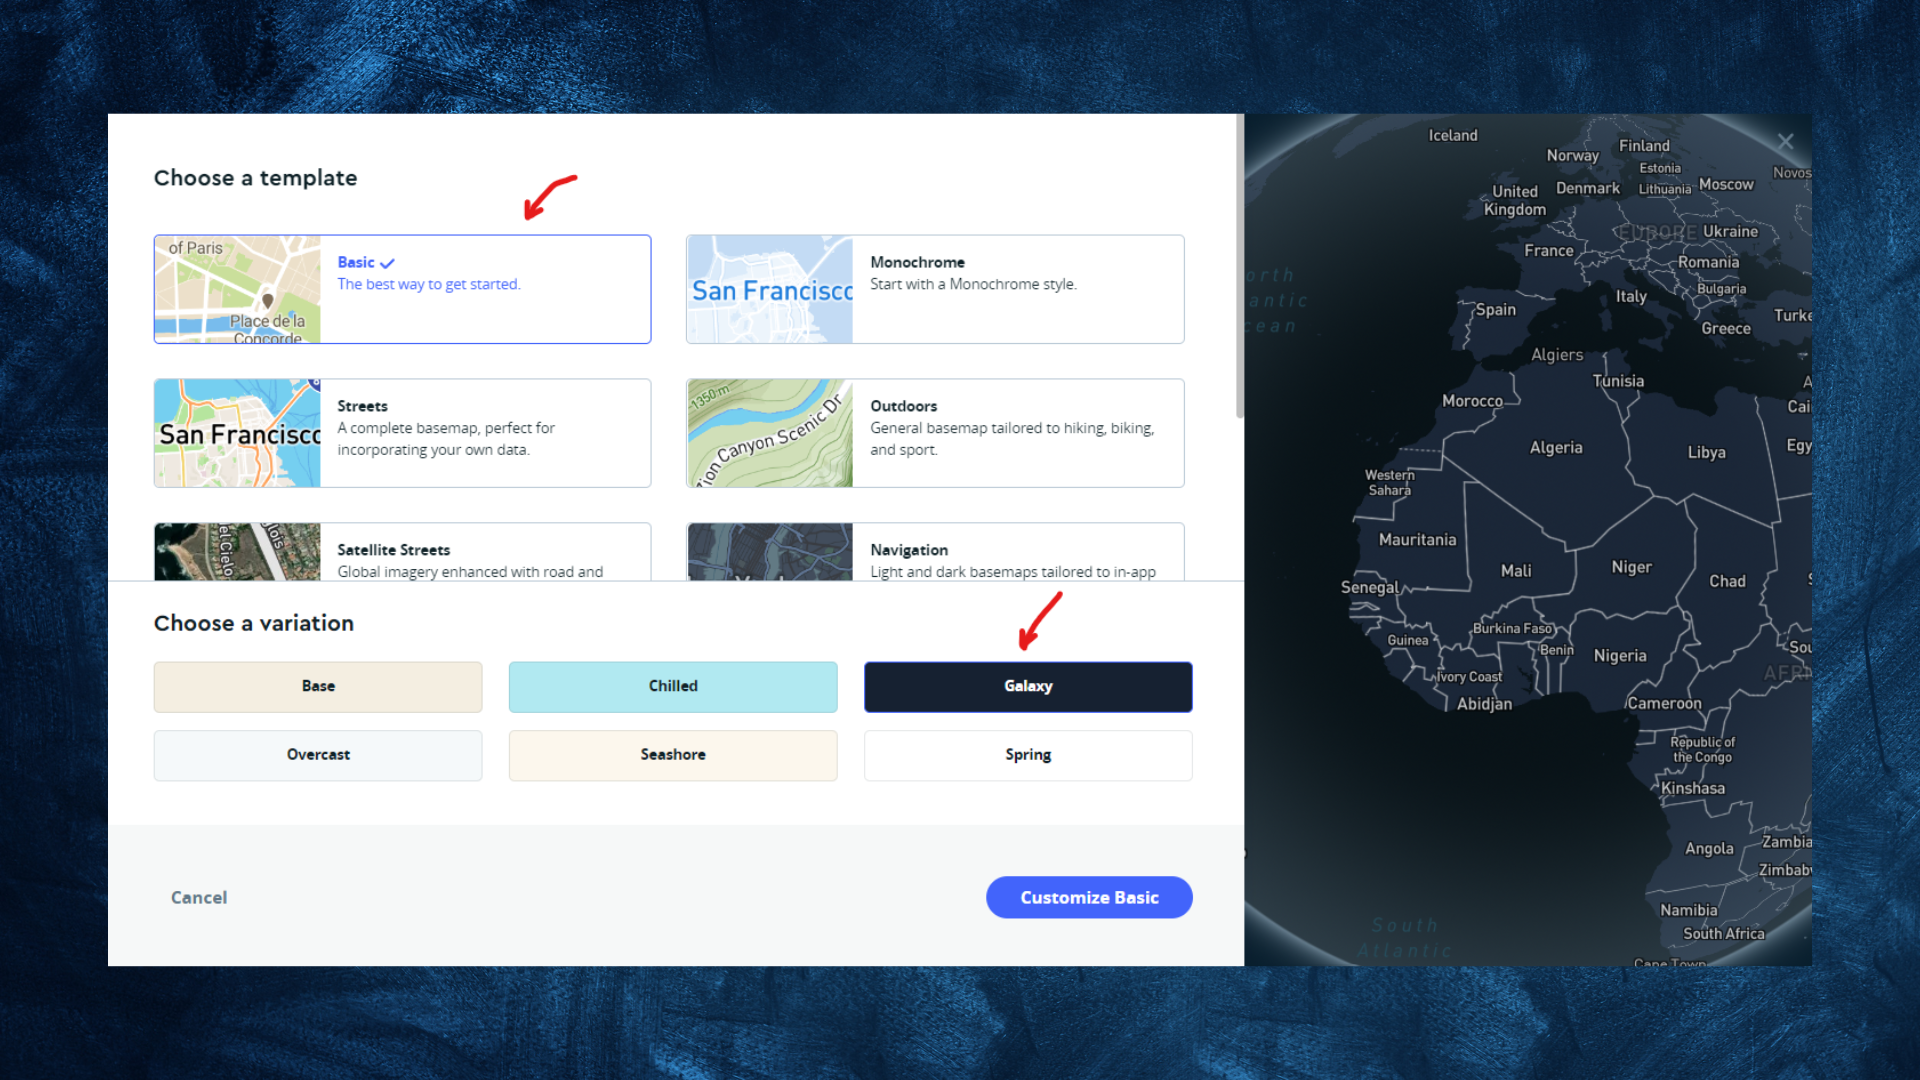
- Here you can see different styles of maps. Choose your style as per your need and then hit the Customize basic button.
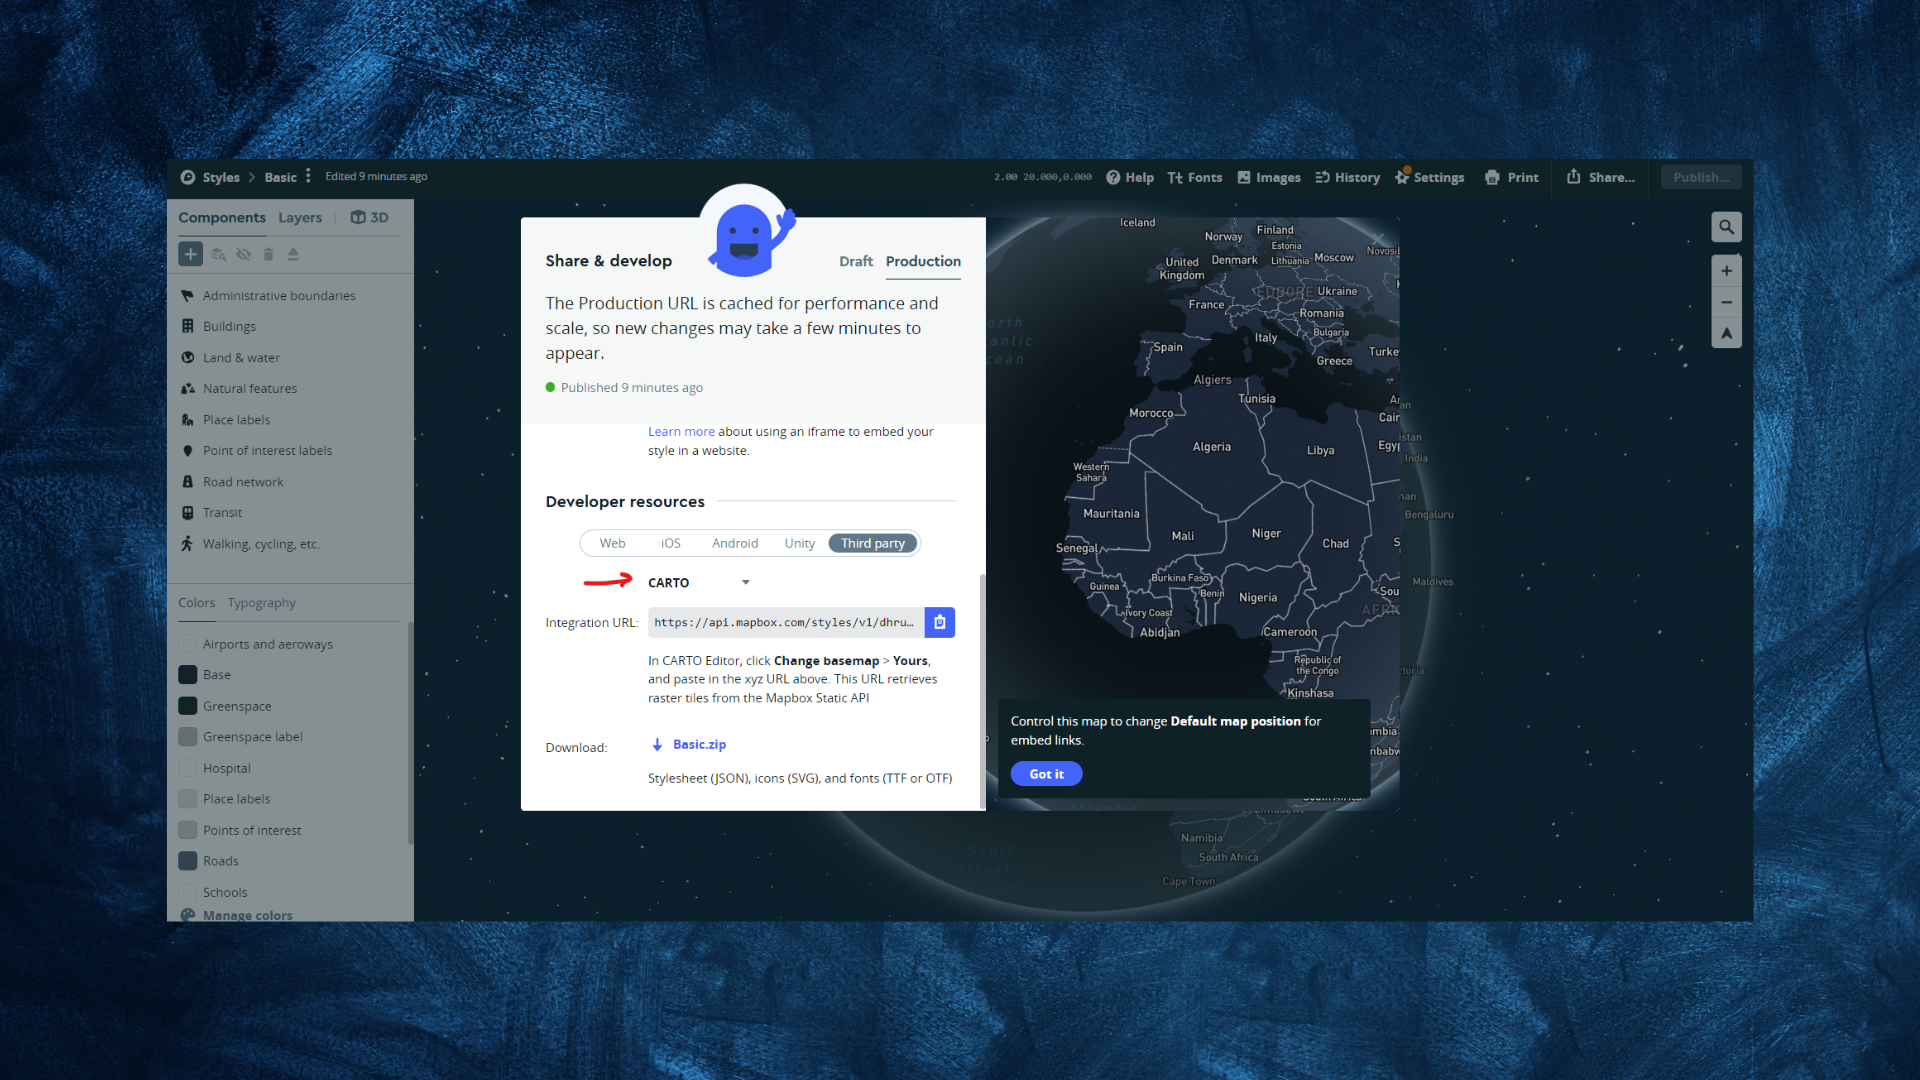
- In this example, I'm using the Basic template, with Galaxy variation.
- After selecting the style, you will be redirected to the map customization section. Where you can customize many things.
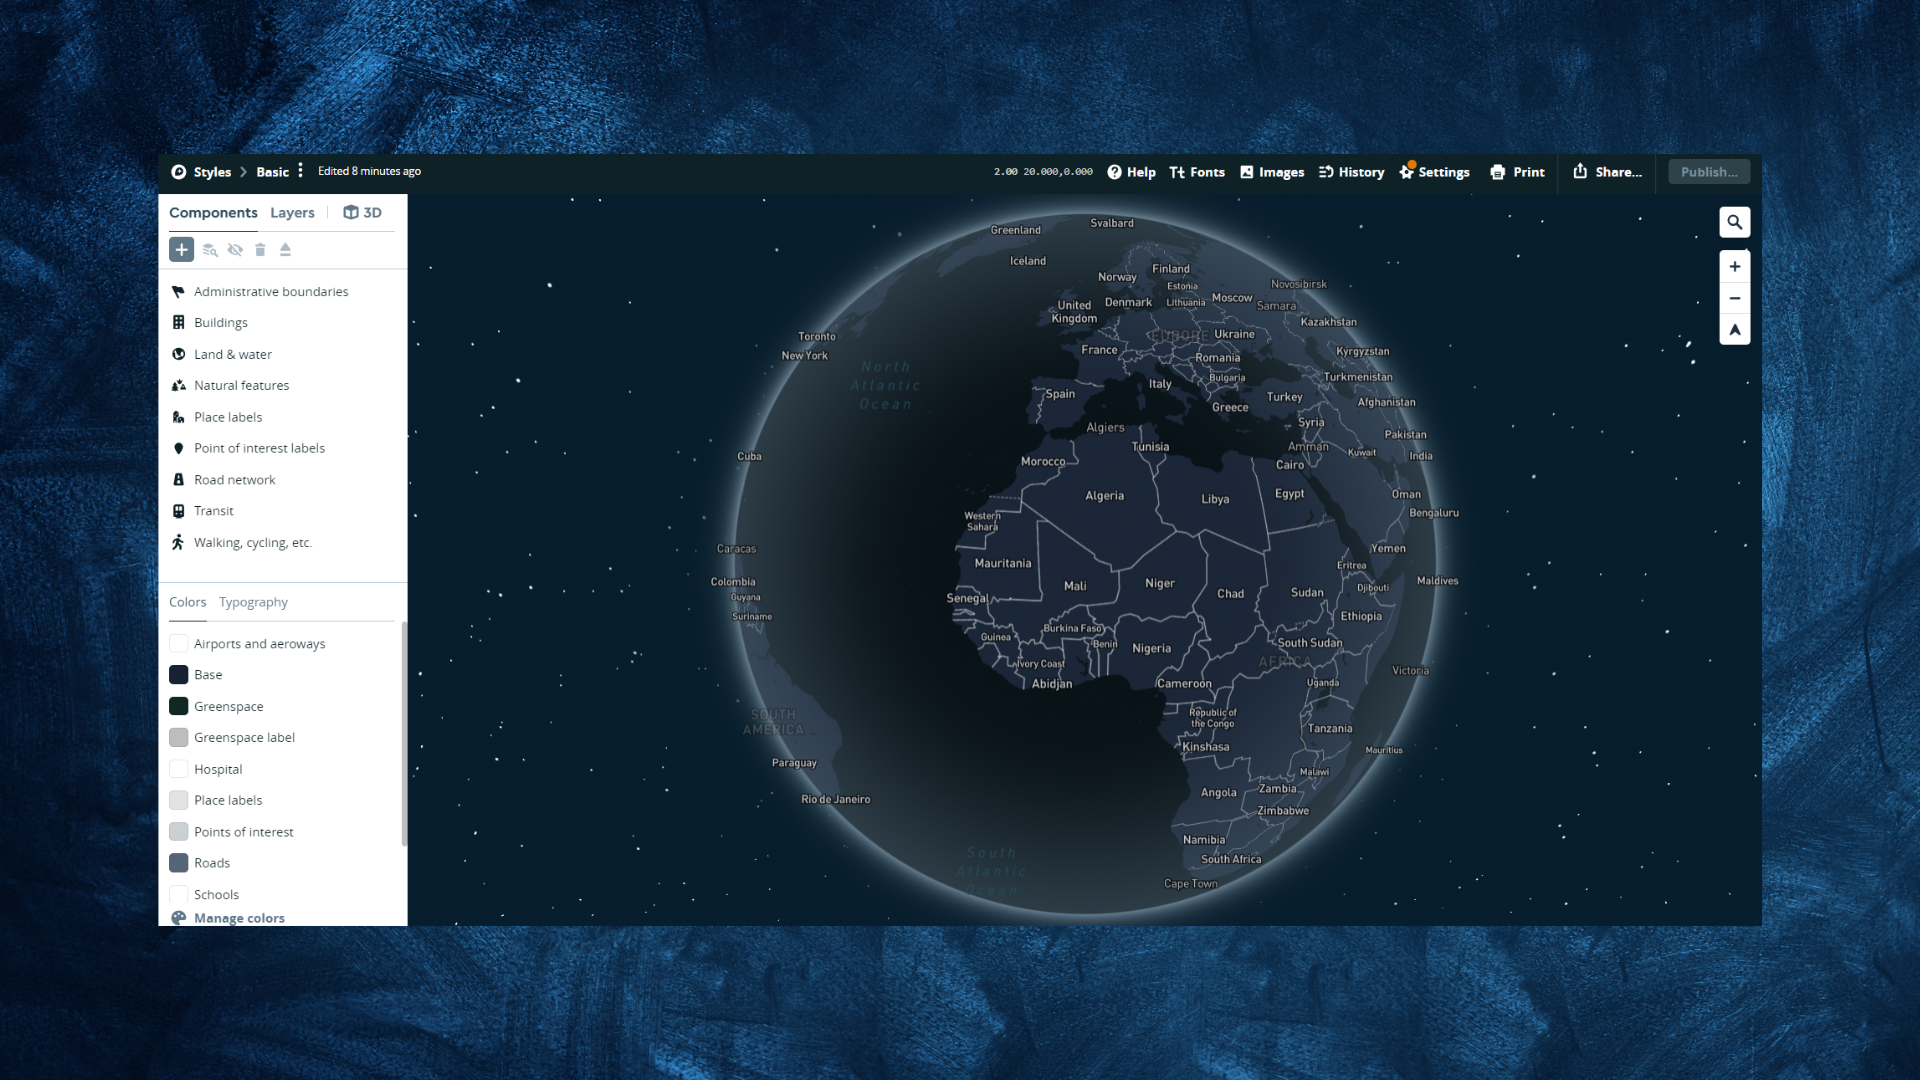
- In order to get the URL of the selected Map style, click on the Share button located in the upper right corner and click on the Third-Party tab.
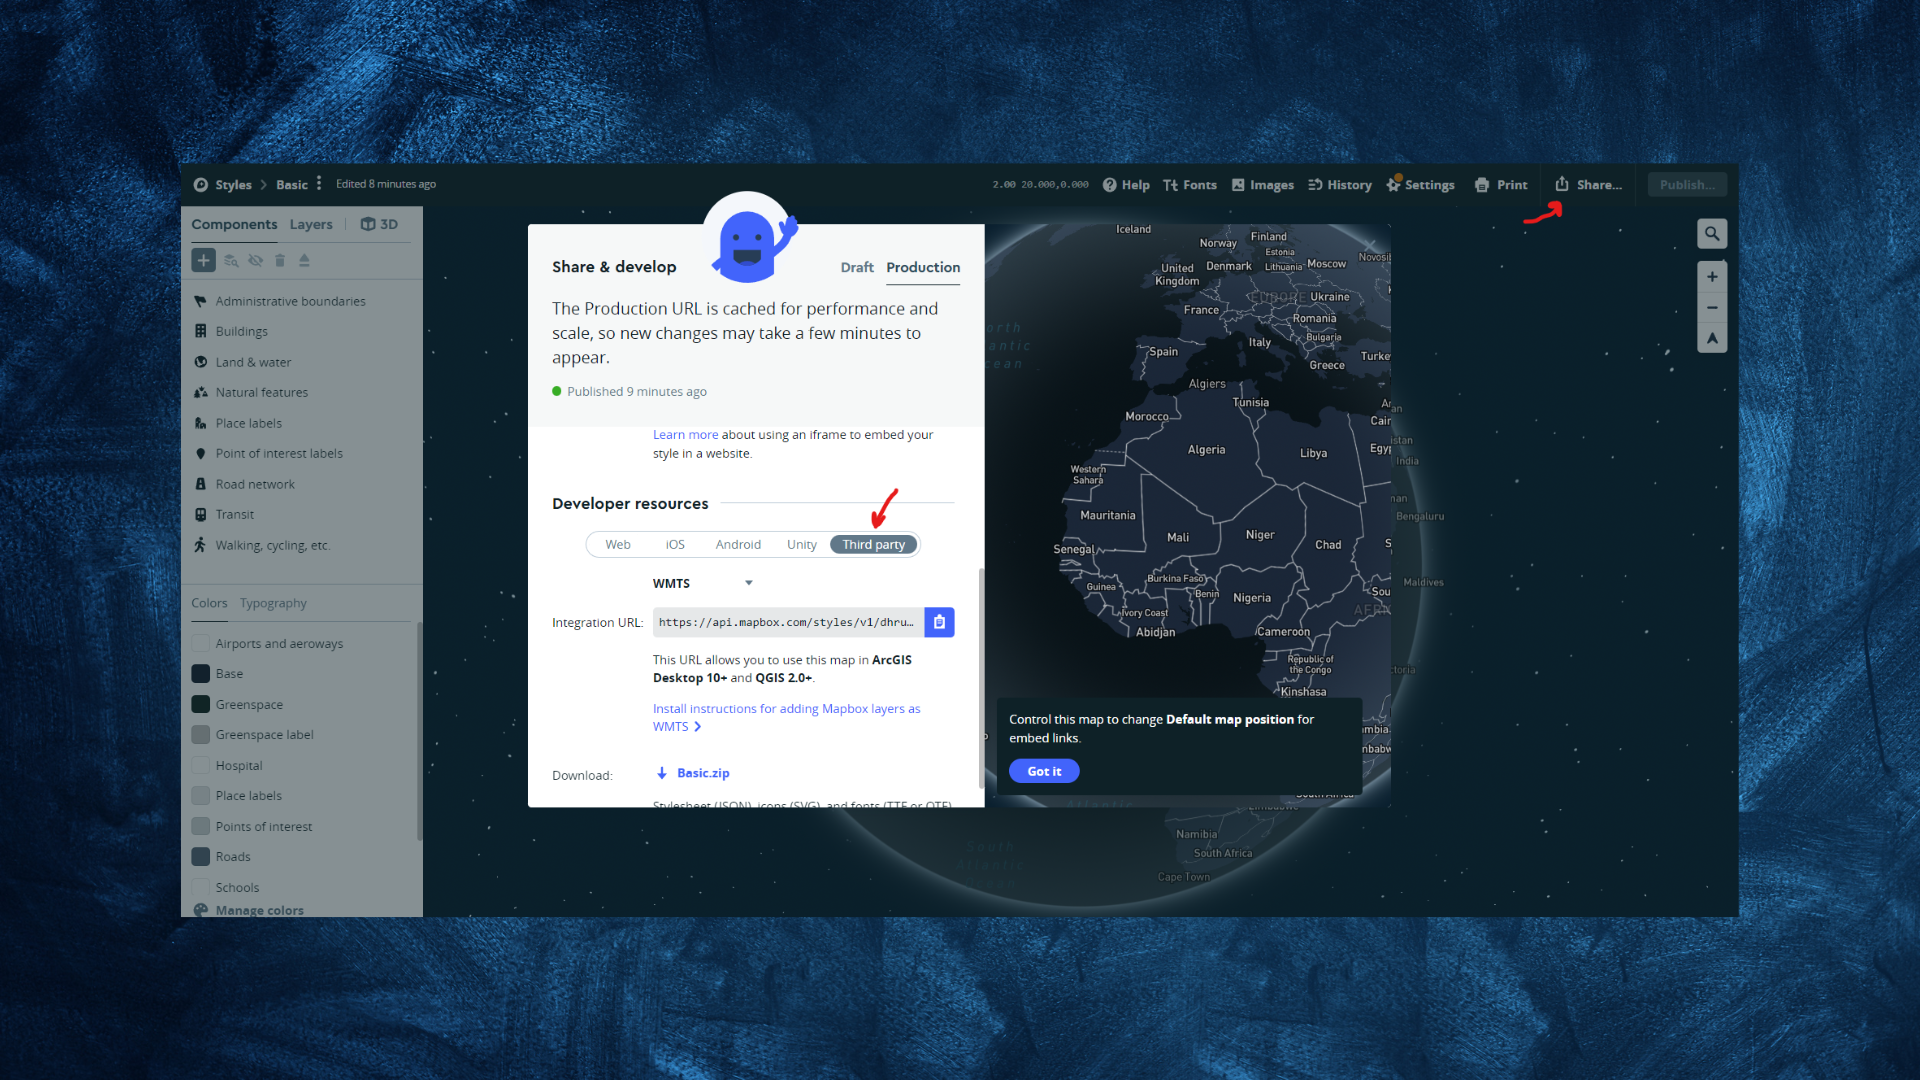
- Here, select the CARTO option, and copy the Integration URL:. In this URL, the Style ID is located after your username.
// Example
"https://api.mapbox.com/styles/v1/dhruv25/{mapStyleId}/tiles/256/{z}/{x}/{y}@2x?access_token={accessToken}"
Showing Map
- Now that you have both: Access Token, and Style Id. We can show a map inside our application.
Constants
- Let's first create a constant file, where all the tokens and ids are defined. Create one constant file and paste the below code:
import 'package:latlong2/latlong.dart';

class AppConstants {
  static const String mapBoxAccessToken = 'YOUR_ACCESS_TOKEN';

  static const String mapBoxStyleId = 'YOUR_STYLE_ID';

  static final myLocation = LatLng(51.5090214, -0.1982948);
}
FlutterMap Widget
- The flutter_map package provides a Widget called FlutterMap through which we can define our map configurations.
- Let's see how we can use it. First, create a page, HomePage in this case. and replace the build method with the below code:
  @override
  Widget build(BuildContext context) {
    return Scaffold(
      appBar: AppBar(
        backgroundColor: const Color.fromARGB(255, 33, 32, 32),
        title: const Text('Flutter MapBox'),
      ),
      body: Stack(
        children: [
          FlutterMap(
            options: MapOptions(
              minZoom: 5,
              maxZoom: 18,
              zoom: 13,
              center: AppConstants.myLocation,
            ),
            layers: [
              TileLayerOptions(
                urlTemplate:
                    "https://api.mapbox.com/styles/v1/dhruv25/{mapStyleId}/tiles/256/{z}/{x}/{y}@2x?access_token={accessToken}",
                additionalOptions: {
                  'mapStyleId': AppConstants.mapBoxStyleId,
                  'accessToken': AppConstants.mapBoxAccessToken,
                },
              ),
            ],
          ),
        ],
      ),
    );
  }
- The majority of your map viewport settings, but not those that depend on a map layer, are configured in the options argument of type MapOptions that FlutterMap accepts. For instance, the lowest and maximum zoom levels, the map's centre, etc.
- More on options click here.
- The layers property accepts a list of widgets, which are typically offered by this library. To add more functionality to the default map display, layers may be built on top of one another.
TileLayerOptions
- This is where we define the tile URL of the map.
A tile map is a map in which each region is represented by a single tile of the same shape and size. For example, a square tile map of the United States would consist of square tiles of the same size for each state, regardless of the geographic area of each state.
- As you can see in the above code, I've added two placeholders. One is for
accessTokenand the second is formapStyleId. - To fill these two placeholders add the values of it inside the additional parameter as shown above.
As suggested in flutter_map documentation we need to add internet permission inside the AndriodManifest file. So copy the below line and paste it inside the
manifesttag.
<uses-permission android:name="android.permission.INTERNET"/>
- Now, If you run the app you will see the map loaded inside your application successfully.
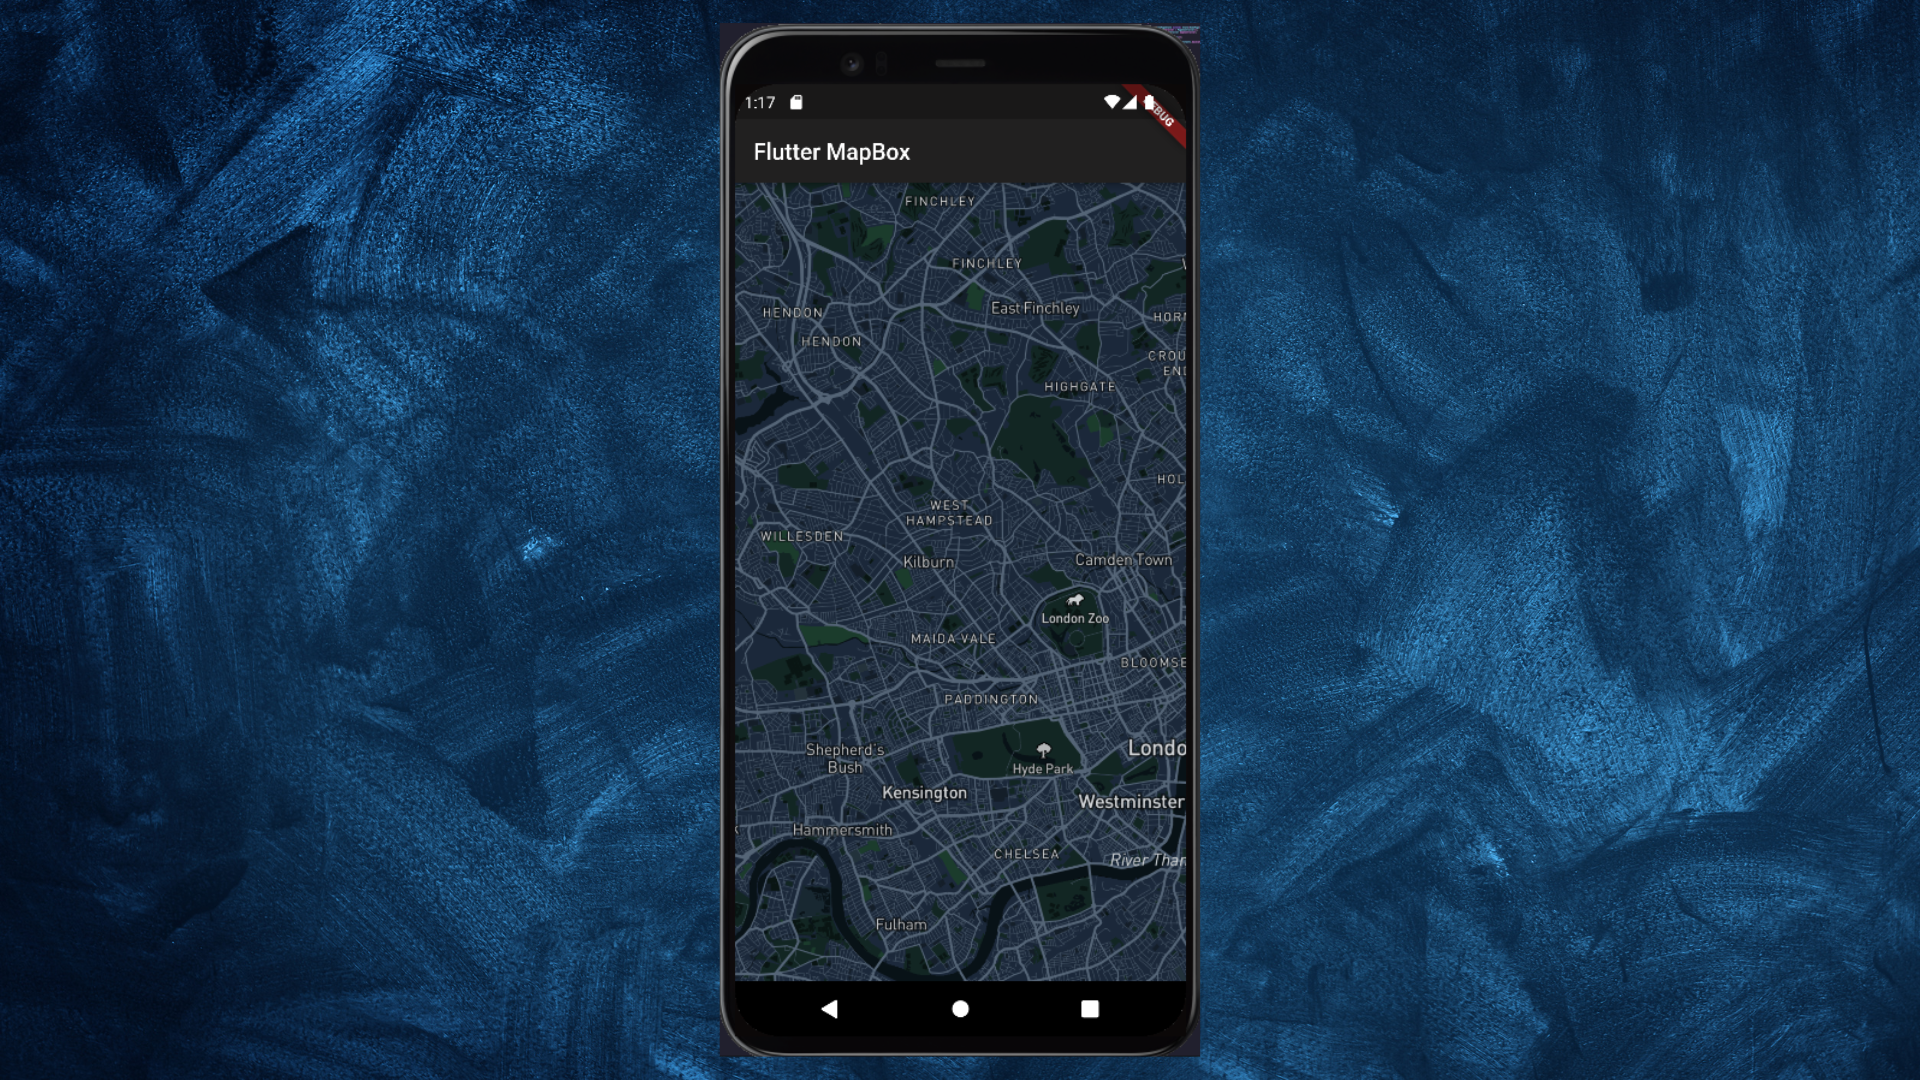
- Now, let's go ahead and add some markers over the map.
Adding Markers to The Map
- In order to add multiple markers over the map, FlutterMap has MarkerLayerOptions.
- A list of markers is shown on the map using MarkerLayerOptions.
- Let's start by creating many static restaurants at various lat-lng positions. Create a MapMarkerModel class and paste the following code into it to do that.
import 'package:latlong2/latlong.dart';

class MapMarker {
  final String? image;
  final String? title;
  final String? address;
  final LatLng? location;
  final int? rating;

  MapMarker({
    required this.image,
    required this.title,
    required this.address,
    required this.location,
    required this.rating,
  });
}

final mapMarkers = [
  MapMarker(
      image: 'assets/images/restaurant_1.jpg',
      title: 'Alexander The Great Restaurant',
      address: '8 Plender St, London NW1 0JT, United Kingdom',
      location: LatLng(51.5382123, -0.1882464),
      rating: 4),
  MapMarker(
      image: 'assets/images/restaurant_2.jpg',
      title: 'Mestizo Mexican Restaurant',
      address: '103 Hampstead Rd, London NW1 3EL, United Kingdom',
      location: LatLng(51.5090229, -0.2886548),
      rating: 5),
  MapMarker(
      image: 'assets/images/restaurant_3.jpg',
      title: 'The Shed',
      address: '122 Palace Gardens Terrace, London W8 4RT, United Kingdom',
      location: LatLng(51.5090215, -0.1959988),
      rating: 2),
  MapMarker(
      image: 'assets/images/restaurant_4.jpg',
      title: 'Gaucho Tower Bridge',
      address: '2 More London Riverside, London SE1 2AP, United Kingdom',
      location: LatLng(51.5054563, -0.0798412),
      rating: 3),
  MapMarker(
    image: 'assets/images/restaurant_5.jpg',
    title: 'Bill\'s Holborn Restaurant',
    address: '42 Kingsway, London WC2B 6EY, United Kingdom',
    location: LatLng(51.5077676, -0.2208447),
    rating: 4,
  ),
];
- Now, that we've 5 different restaurants let's show these restaurants on the map.
- Add MarkerLayerOption, and inside
markersproperty add the below code.
MarkerLayerOptions(
                markers: [
                  for (int i = 0; i < mapMarkers.length; i++)
                    Marker(
                      height: 40,
                      width: 40,
                      point: mapMarkers[i].location ?? AppConstants.myLocation,
                      builder: (_) {
                        return GestureDetector(
                          onTap: () {},
                          child: SvgPicture.asset(
                              'assets/icons/map_marker.svg',
                            ),
                        );
                      },
                    ),
                ],
              ),
- As you can see, We looped over the list of markers that we've created inside MapMarker class and returned a Marker.
- You can customize markers' height and widget according to your need.
- The
pointparameter is the actual location of the Marker in the form of LatLng. - Using Mapbox has several advantages, one of which is the ability to modify your Marker to meet your needs.
- To give your customized marker, you need to implement the builder property of Marker.
- A Widget is returned by this "builder" function. It means that any type of widget may be returned here. Isn't it awesome?
- I included a SVG image of the marker in this example.
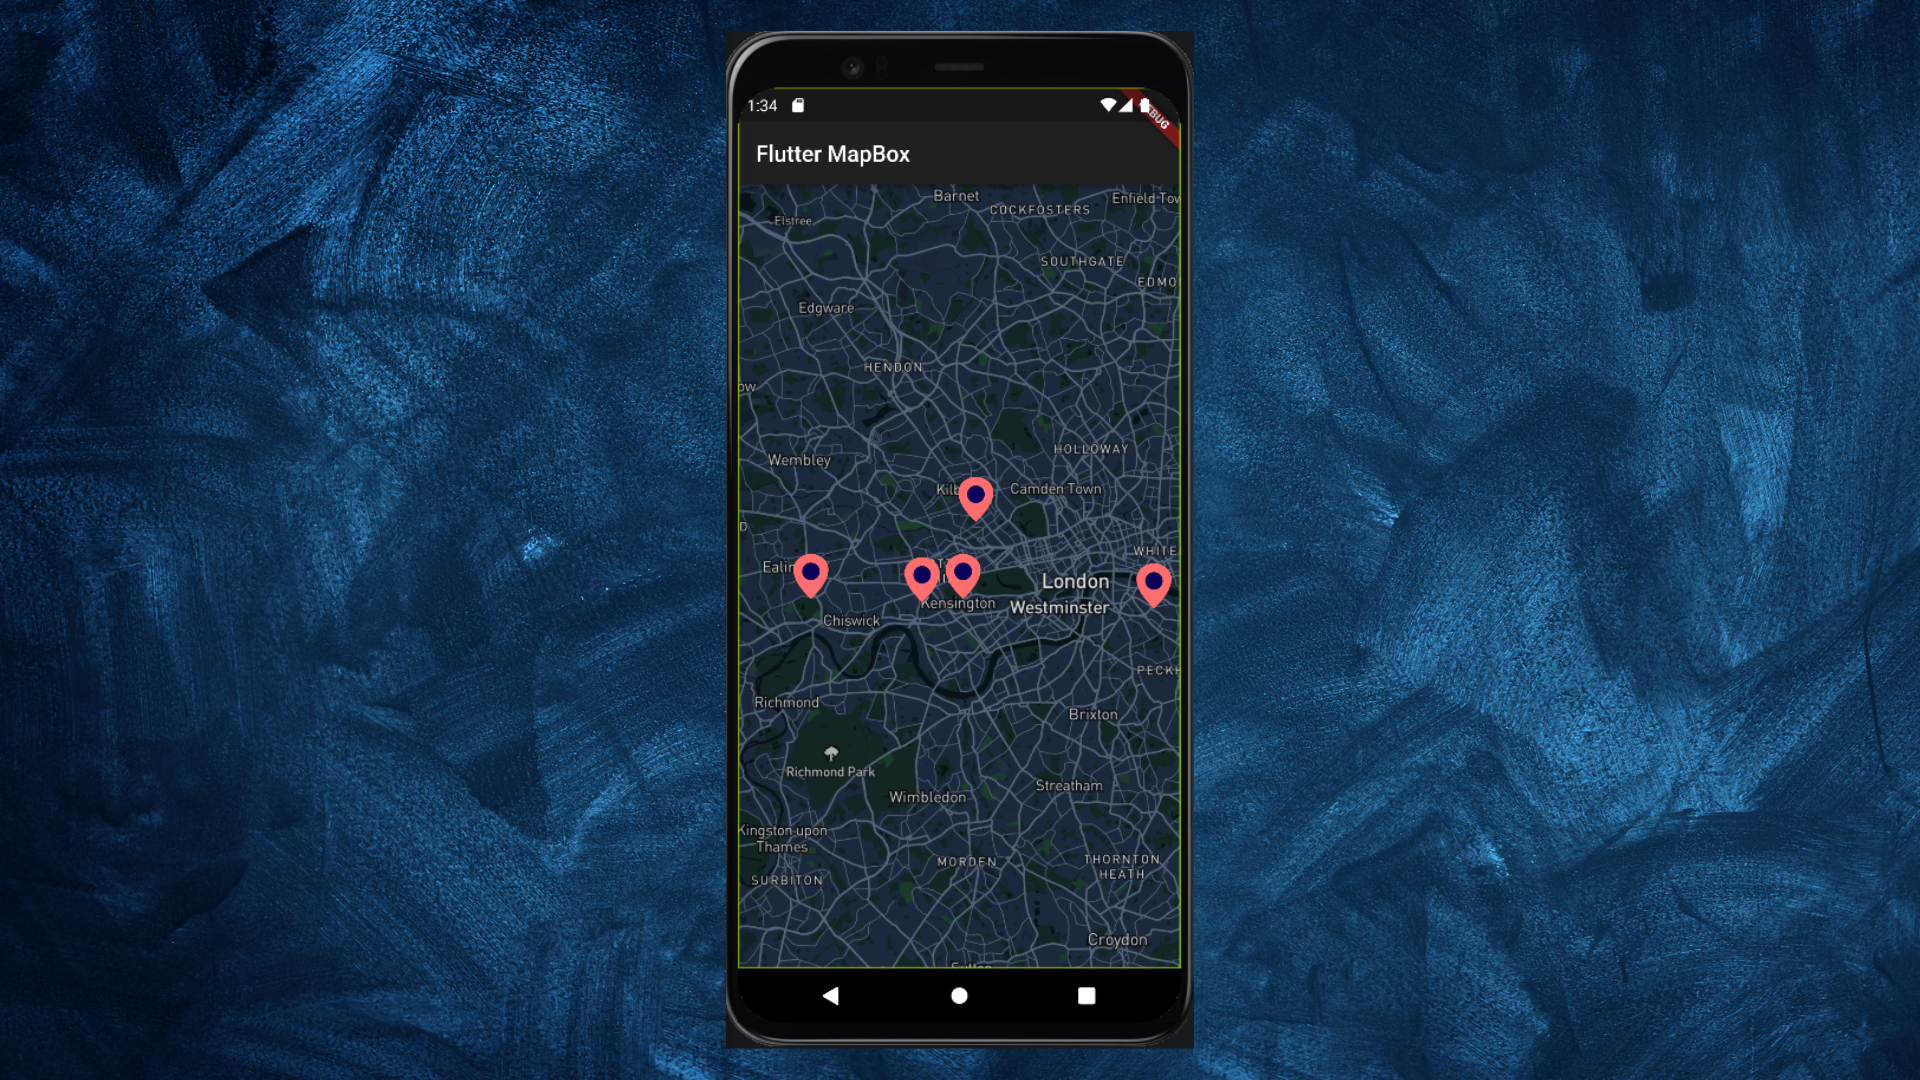
- The marks on the map will now appear as follows if you restart the application:
Showing Restaurant Information on Marker Tap
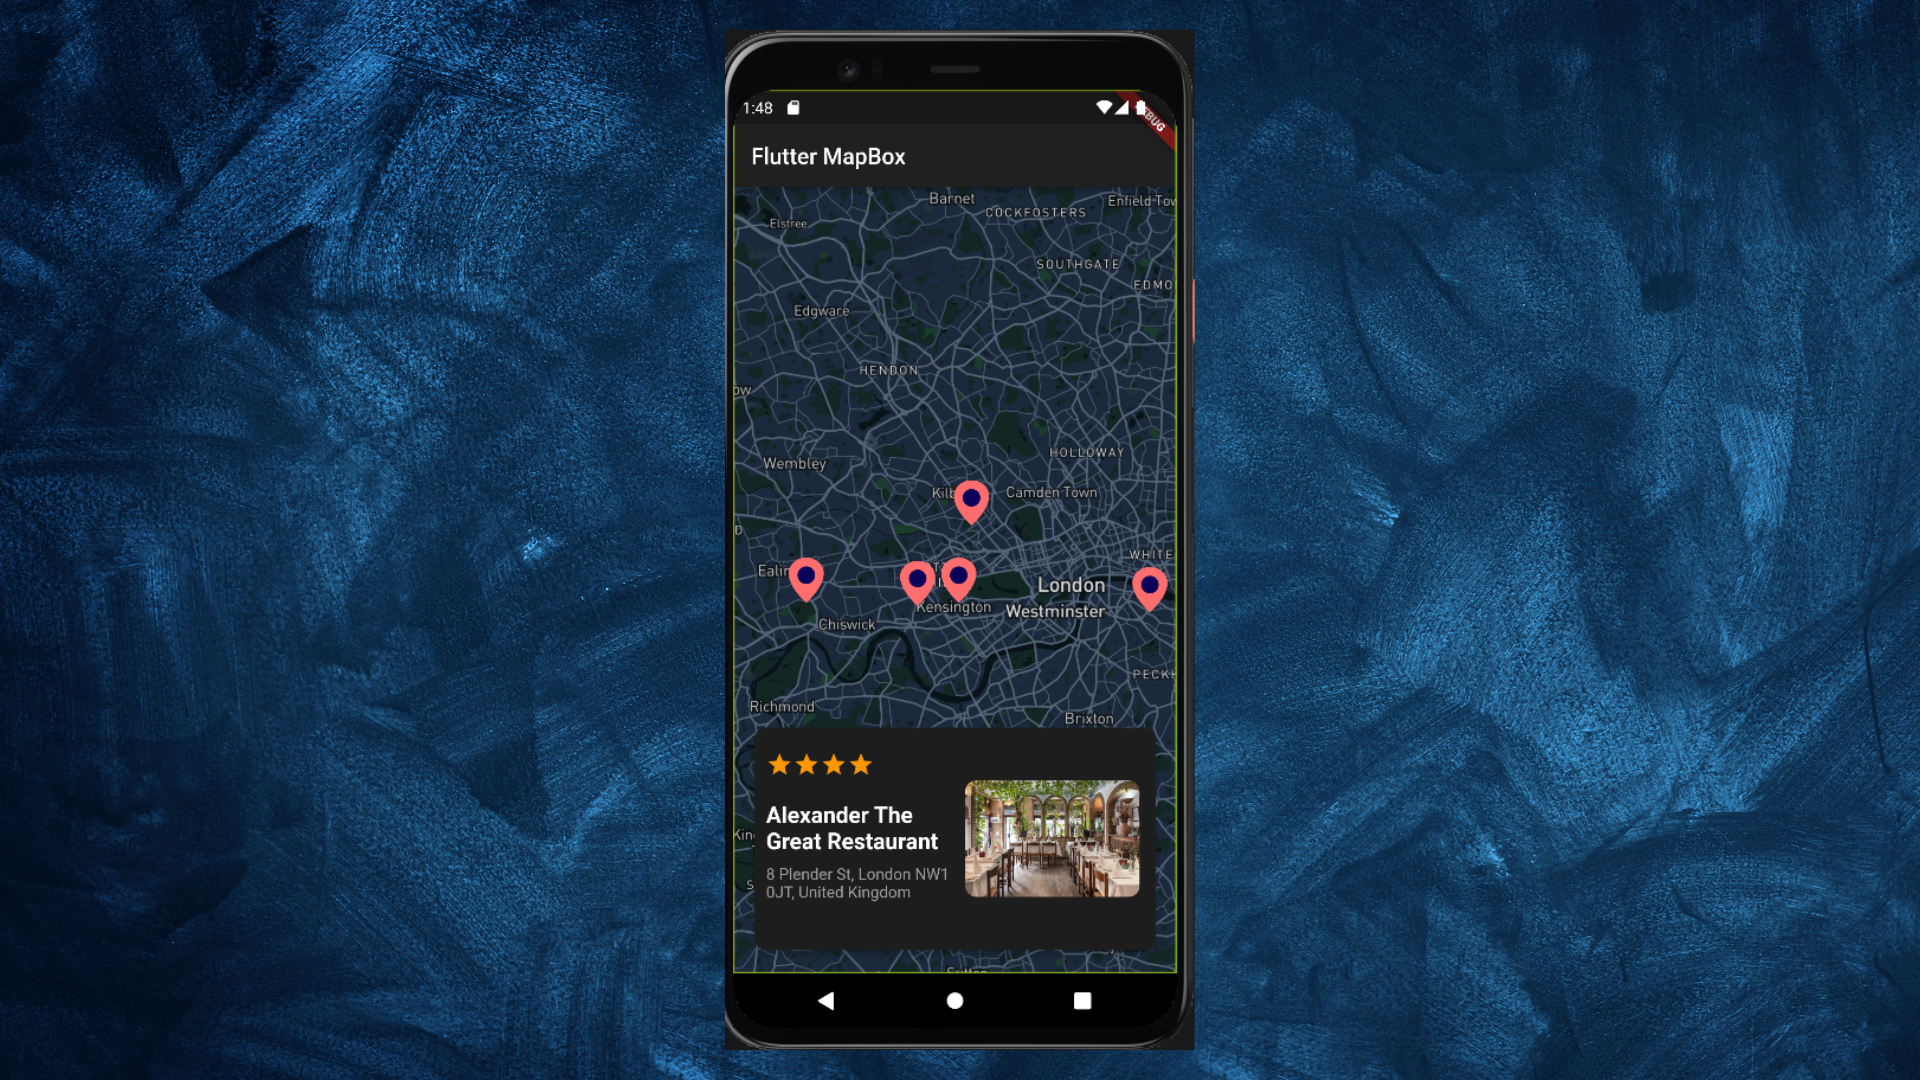
- Only markers don't give any information. We need to show some info related to it on the screen, something like below:
- To implement this UI we need to make use of the PageView Widget of Flutter.
- After the FlutterMap widget add the following code.
Positioned(
            left: 0,
            right: 0,
            bottom: 2,
            height: MediaQuery.of(context).size.height * 0.3,
            child: PageView.builder(
              onPageChanged: (value) {},
              itemCount: mapMarkers.length,
              itemBuilder: (_, index) {
                final item = mapMarkers[index];
                return Padding(
                  padding: const EdgeInsets.all(15.0),
                  child: Card(
                    elevation: 5,
                    shape: RoundedRectangleBorder(
                      borderRadius: BorderRadius.circular(10),
                    ),
                    color: const Color.fromARGB(255, 30, 29, 29),
                    child: Row(
                      children: [
                        const SizedBox(width: 10),
                        Expanded(
                          child: Column(
                            mainAxisAlignment: MainAxisAlignment.center,
                            children: [
                              Expanded(
                                child: ListView.builder(
                                  padding: EdgeInsets.zero,
                                  scrollDirection: Axis.horizontal,
                                  itemCount: item.rating,
                                  itemBuilder:
                                      (BuildContext context, int index) {
                                    return const Icon(
                                      Icons.star,
                                      color: Colors.orange,
                                    );
                                  },
                                ),
                              ),
                              Expanded(
                                flex: 2,
                                child: Column(
                                  crossAxisAlignment: CrossAxisAlignment.start,
                                  children: [
                                    Text(
                                      item.title ?? '',
                                      style: const TextStyle(
                                        fontSize: 20,
                                        fontWeight: FontWeight.bold,
                                      ),
                                    ),
                                    const SizedBox(height: 10),
                                    Text(
                                      item.address ?? '',
                                      style: const TextStyle(
                                        fontSize: 14,
                                        color: Colors.grey,
                                      ),
                                    ),
                                  ],
                                ),
                              ),
                            ],
                          ),
                        ),
                        const SizedBox(width: 10),
                        Expanded(
                          child: Padding(
                            padding: const EdgeInsets.all(4.0),
                            child: ClipRRect(
                              borderRadius: BorderRadius.circular(10),
                              child: Image.asset(
                                item.image ?? '',
                                fit: BoxFit.cover,
                              ),
                            ),
                          ),
                        ),
                        const SizedBox(width: 10),
                      ],
                    ),
                  ),
                );
              },
            ),
          )
As you can see, we created a swipeable card on the screen using PageView.builder(). The layout is fairly straightforward. There is a Card with a Row widget inside of it. The two primary sections/children of the Row Widget are.
- Restaurant Details and
- Restaurant Image.
The Restaurant Details contain Rating, Name of the Restaurant, and Address.
Now, what we want is, when you click on any particular marker the information related to it should appear. It's pretty simple.
- First of all, we need to add PageController to our PageView. Add the below line of code inside your widget:
final pageController = PageController();
- Now give this controller to PageView :
PageView.builder(
              controller: pageController,
              ...
)
- Now, head over to our MarkerLayerOptions, and add the below code inside GestureDetectors
onTapparameter.
MarkerLayerOptions(
                markers: [
                  for (int i = 0; i < mapMarkers.length; i++)
                    Marker(
                      height: 40,
                      width: 40,
                      point: mapMarkers[i].location ?? AppConstants.myLocation,
                      builder: (_) {
                        return GestureDetector(
                          onTap: () {
                            pageController.animateToPage(
                              i,
                              duration: const Duration(milliseconds: 500),
                              curve: Curves.easeInOut,
                            );
                            setState(() {});
                          },
                          child:  SvgPicture.asset(
                              'assets/icons/map_marker.svg',
                            ),
                        );
                      },
                    ),
                ],
              ),
- As you can see, we are simply animating the page by giving the tapped index in it.
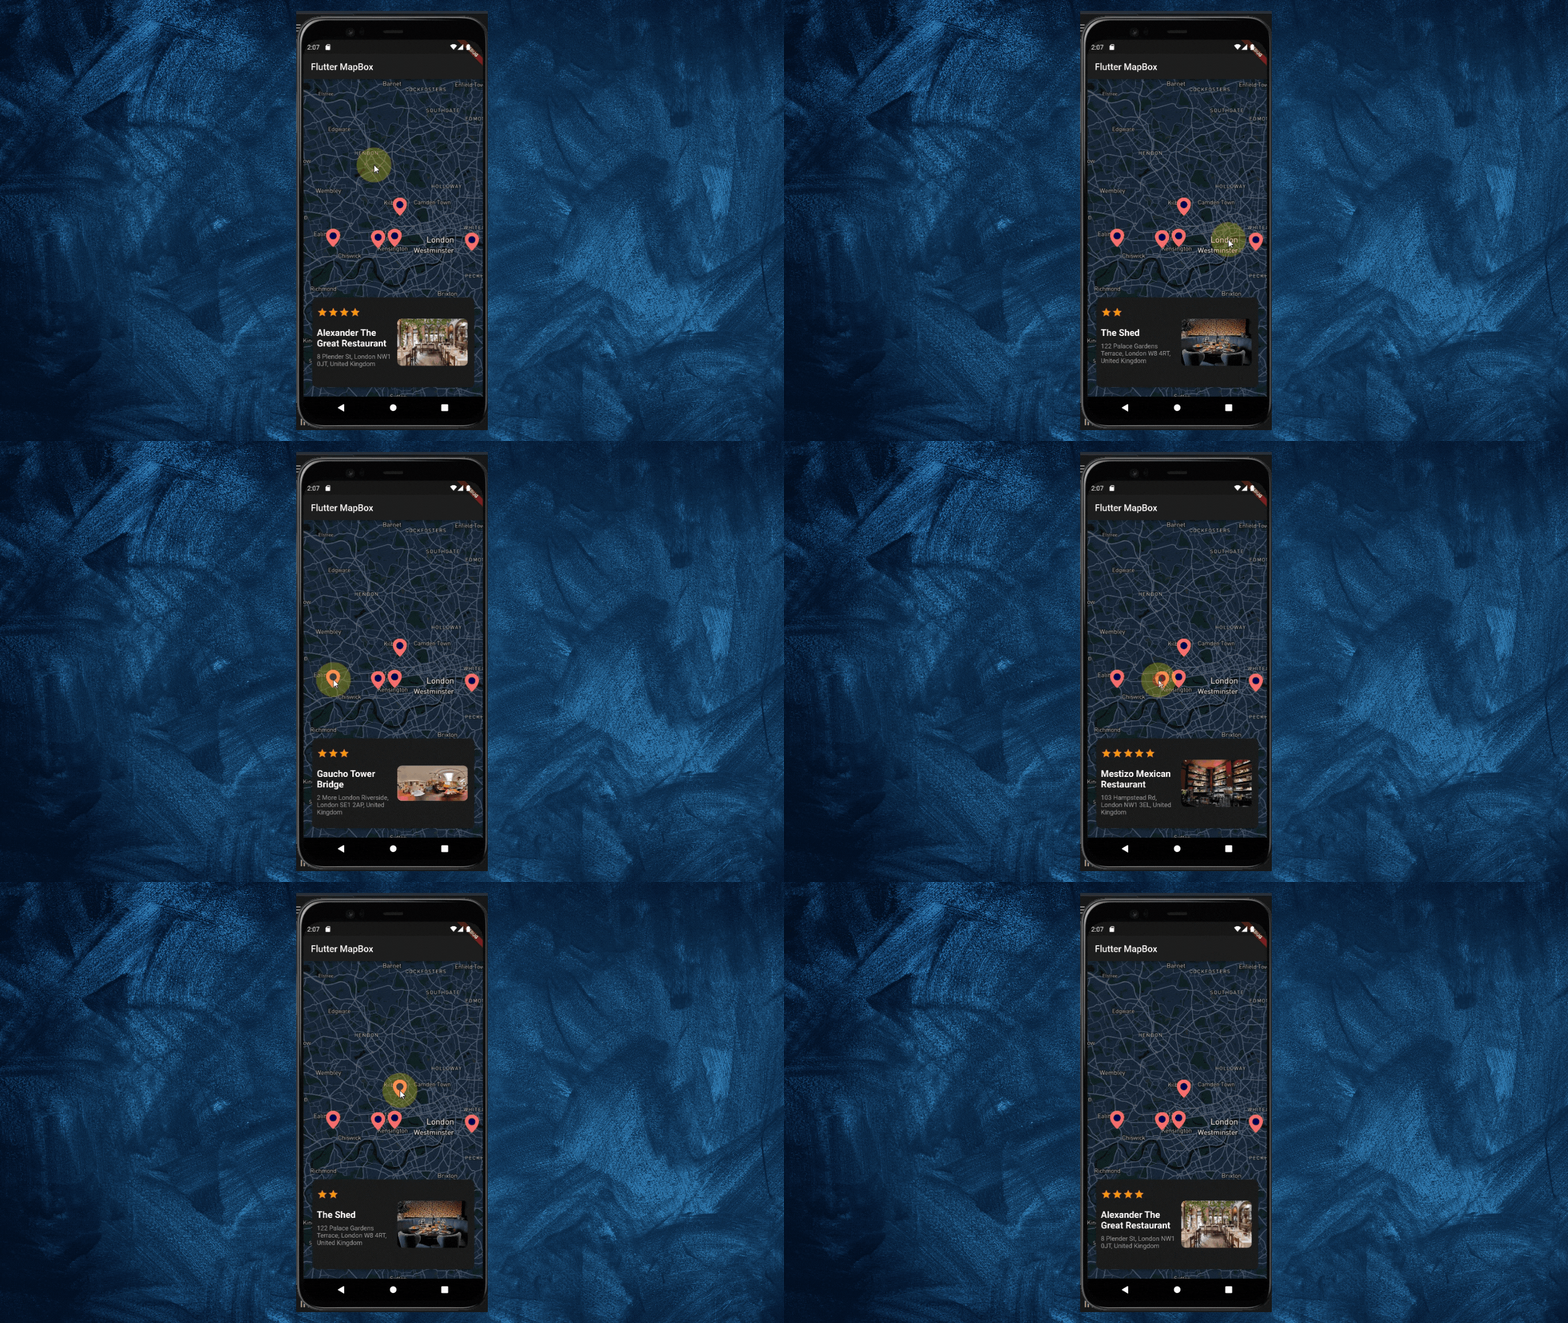
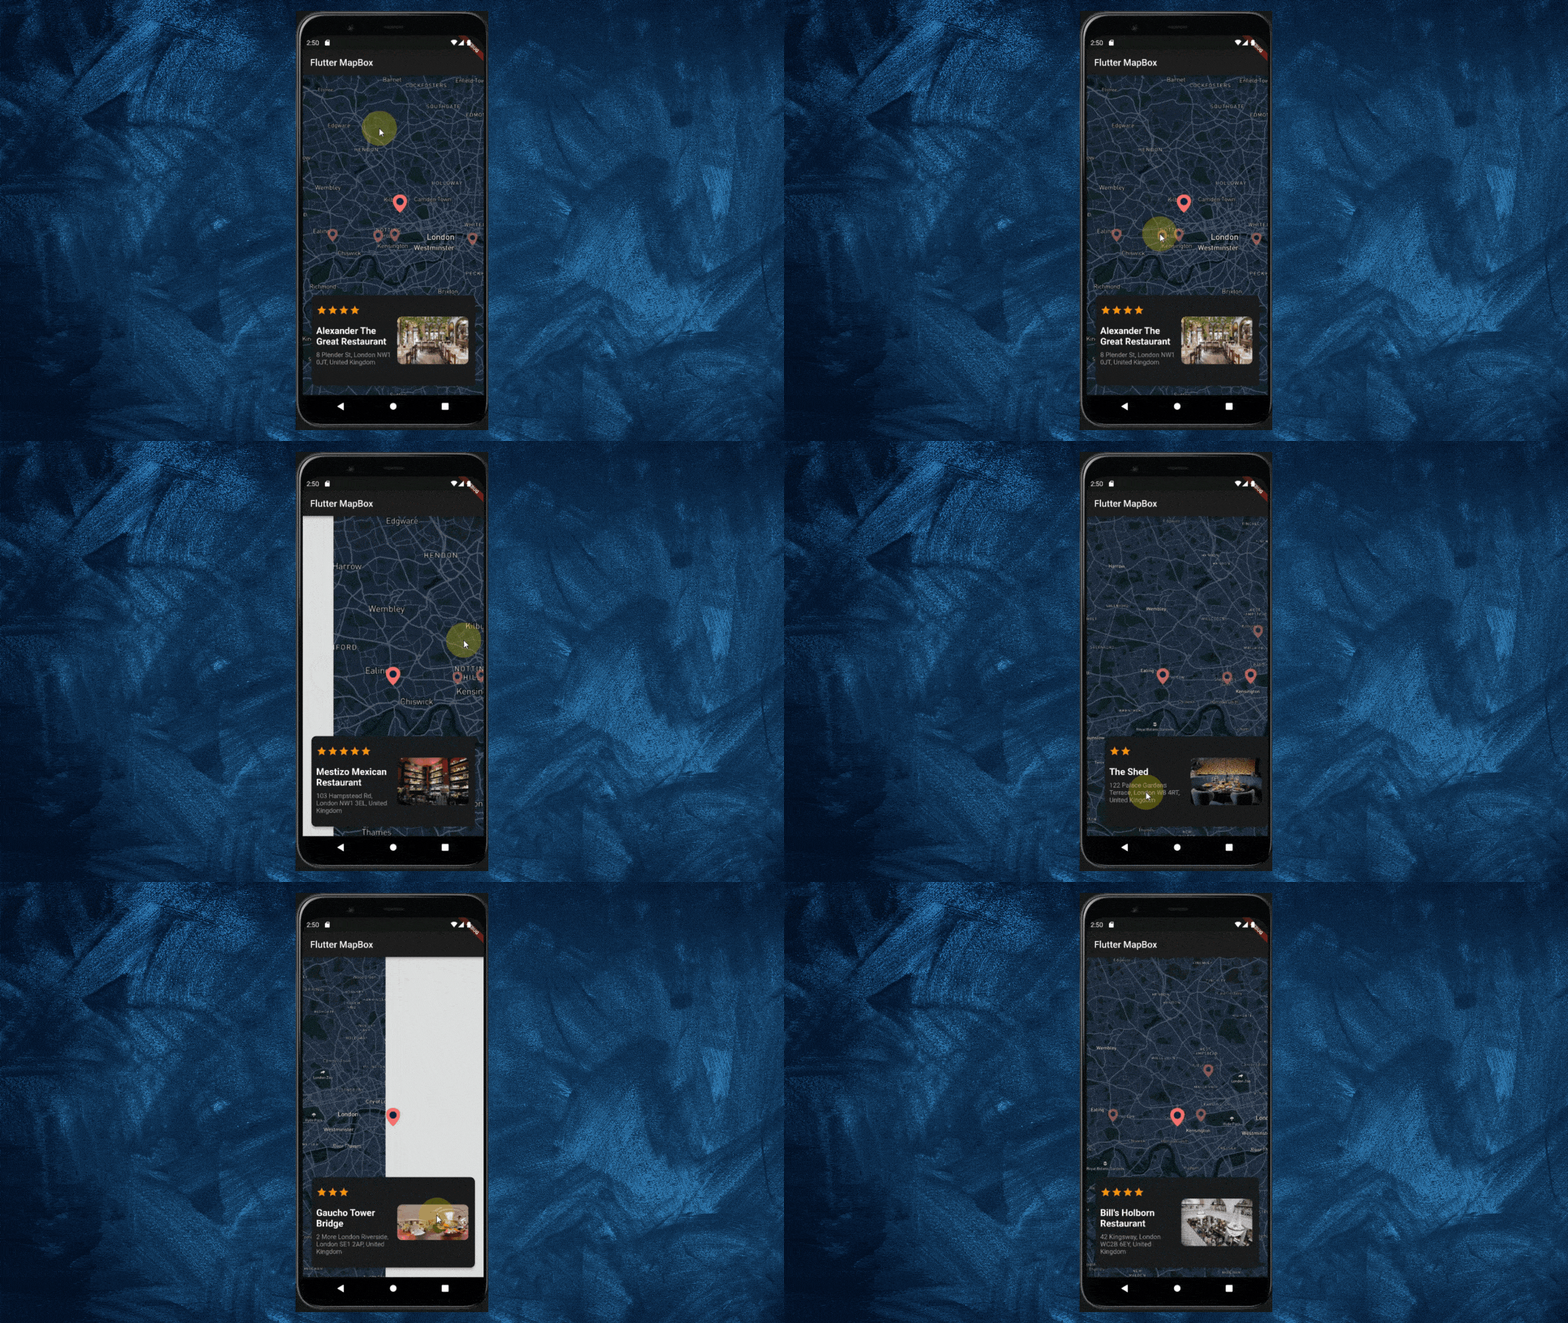
- Now if you tap on any particular marker, you should be able to see the card change.
Animate Marker on Click
- The above result doesn't truly convey which restaurant is now picked because it doesn't provide much visual identification.
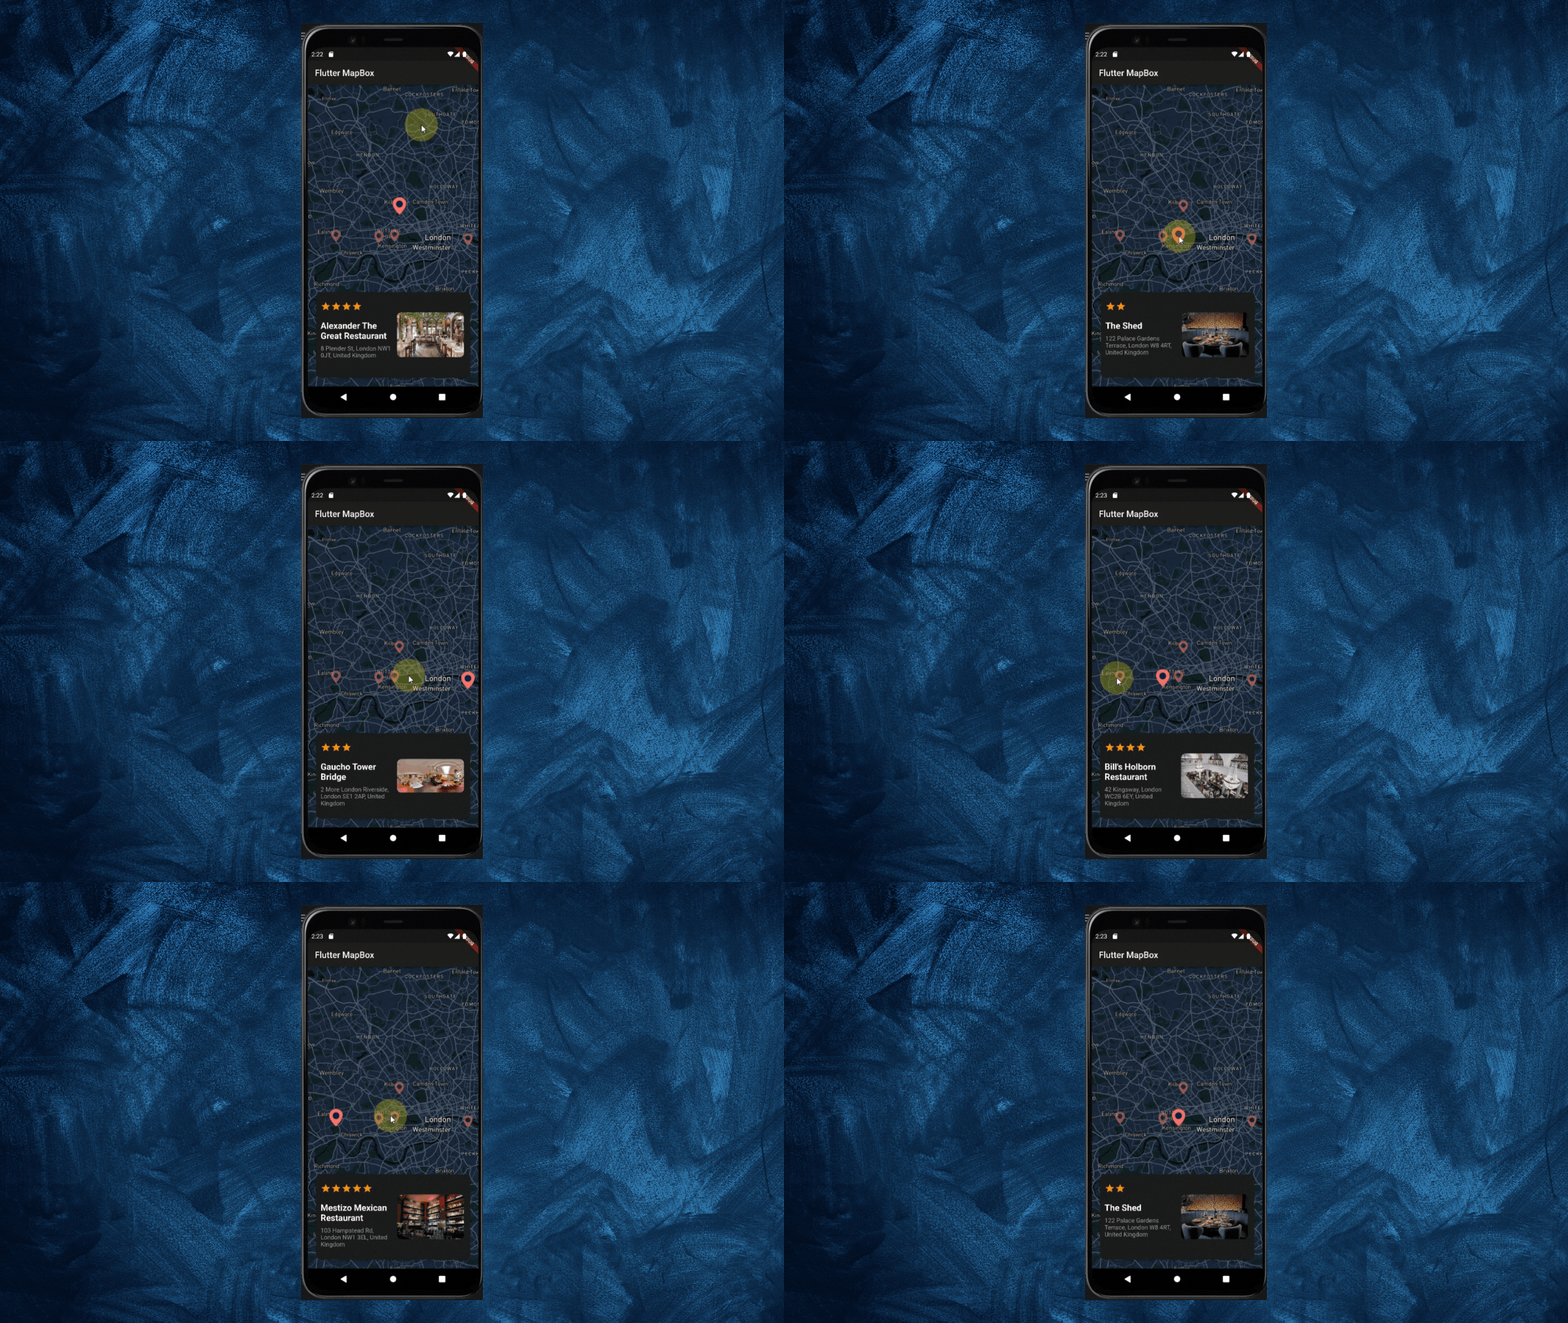
Let's give the marker some Opacity. What we want to do is that just that marker should have full opacity when it is tapped, leaving the other markers with only half.
First create a variable named
selectedIndex. And update it every time the marker is tapped.
int selectedIndex = 0;
- After that Wrap the SvgImage inside AnimatedOpacity and give opacity of the marker
1when selected and0.5when not. - Also let's add some Scale transition to the marker. Wrap the AnimatedOpacity around AnimatedScale and give the scale value
1when selected otherwise0.7
Marker(
                      height: 40 ,
                      width: 40,
                      point: mapMarkers[i].location ?? AppConstants.myLocation,
                      builder: (_) {
                        return GestureDetector(
                          onTap: () {
                            pageController.animateToPage(
                              i,
                              duration: const Duration(milliseconds: 500),
                              curve: Curves.easeInOut,
                            );
                            selectedIndex = i;
                            setState(() {});
                          },
                          child: AnimatedScale(
                            duration: const Duration(milliseconds: 500),
                            scale: selectedIndex == i ? 1 : 0.7,
                            child: AnimatedOpacity(
                              duration: const Duration(milliseconds: 500),
                              opacity: selectedIndex == i ? 1 : 0.5,
                              child: SvgPicture.asset(
                                'assets/icons/map_marker.svg',
                              ),
                            ),
                          ),
                        );
- Let's see the output now :
Woah 😮 Now that looks smoooooth.... Isn't it?
Okay, there is the last thing to do, it is we also want to update the marker when we manually swipe the card.
- To do this head over to the PageViews'
onPageChangedfunction, and paste the below code :
 PageView.builder(
              controller: pageController,
              onPageChanged: (value) {
                selectedIndex = value;
                currentLocation =
                    mapMarkers[value].location ?? AppConstants.myLocation;
                _animatedMapMove(currentLocation, 11.5);
                setState(() {});
          },
)
- In the above code, what we did is, we first update the
selectedIndex. And also I've created acurrentLocationvariable. Which will be useful, to tell the map where to center the map. The default value of it is myLocation defined in the constans file.
var currentLocation = AppConstants.myLocation;
- Also don't forget to update the
centervalue of MapOptions with currentLocation.
FlutterMap(
            options: MapOptions(
              minZoom: 5,
              maxZoom: 18,
              zoom: 11,
              center: currentLocation, // <---
            ),
     ...
)
- Now to center a map to the tapped restaurant location, we need to use MapController. Let's create a MapController and give it to the FlutterMap Widget.
  late final MapController mapController;

  @override
  void initState() {
    super.initState();
    mapController = MapController();
  }
 FlutterMap(
            mapController: mapController,
            options: MapOptions(
              minZoom: 5,
              maxZoom: 18,
              zoom: 11,
              center: currentLocation,
            ),
   ...
)
- Now, MapController does have the method
move()in order to move the map to a specific location. But It doesn't animate the map. To do smooth animation from one location to another we can use TweenAnimation.
To do that, first, extend your StateFulWidget with
TickerProviderStateMixin.
class _HomePageState extends State<HomePage> with TickerProviderStateMixin {}
- After that add the below code inside your widget.
void _animatedMapMove(LatLng destLocation, double destZoom) {
    // Create some tweens. These serve to split up the transition from one location to another.
    // In our case, we want to split the transition be<tween> our current map center and the destination.
    final latTween = Tween<double>(
        begin: mapController.center.latitude, end: destLocation.latitude);
    final lngTween = Tween<double>(
        begin: mapController.center.longitude, end: destLocation.longitude);
    final zoomTween = Tween<double>(begin: mapController.zoom, end: destZoom);

    // Create a animation controller that has a duration and a TickerProvider.
    var controller = AnimationController(
        duration: const Duration(milliseconds: 1000), vsync: this);
    // The animation determines what path the animation will take. You can try different Curves values, although I found
    // fastOutSlowIn to be my favorite.
    Animation<double> animation =
        CurvedAnimation(parent: controller, curve: Curves.fastOutSlowIn);

    controller.addListener(() {
      mapController.move(
        LatLng(latTween.evaluate(animation), lngTween.evaluate(animation)),
        zoomTween.evaluate(animation),
      );
    });

    animation.addStatusListener((status) {
      if (status == AnimationStatus.completed) {
        controller.dispose();
      } else if (status == AnimationStatus.dismissed) {
        controller.dispose();
      }
    });

    controller.forward();
  }
You don't need to understand the above code if you are not familiar with Animation in Flutter. It simply animates the zoom position, that's it.
Now add this method two
onPageChangedfunction
onPageChanged: (value) {
                selectedIndex = value;
                currentLocation =
                    mapMarkers[value].location ?? AppConstants.myLocation;
                _animatedMapMove(currentLocation, 11.5);
                setState(() {});
},
and to Markers' GestureDetector's onTap function
onTap: () {
                            pageController.animateToPage(
                              i,
                              duration: const Duration(milliseconds: 500),
                              curve: Curves.easeInOut,
                            );
                            selectedIndex = i;
                            currentLocation = mapMarkers[i].location ??
                                AppConstants.myLocation;
                            _animatedMapMove(currentLocation, 11.5);
                            setState(() {});
},
Final Result
Source Code
Wrapping Up
- That concludes this article. You can customize many things using MapBox. Head over to its Official Docs for more information.
- I hope you enjoyed and learned something from this article. If you have any feedback/queries, leave them in the comments. And also Don't forget to leave a 👍🏻.
- Thank you for spending time reading this article. See you in the next article. Until then....

Follow me on Twitter, LinkedIn, and Github for more updates.
About the author
- I'm a mobile/web developer 👨💻 who loves to build projects and share valuable tips for programmers Follow me for Flutter, React/Next.js, and other awesome tech-related stuff 😉
Comments
Join the discussionExcellent article, please friend do this same article with Bloc Flutter Bloc and if you can please using Google Maps and Flutter Bloc please yes?


