Animation In Flutter: Animation Class, Tween & CurvedAnimation
How to create custom animation? What exactly is Animation class? What is Tween animation? CurvedAnimation: What is it and How to use it?
D
I'm a mobile/web developer 👨💻 who loves to build projects and share valuable tips for programmers
Follow me for Flutter, React/Next.js, and other awesome tech-related stuff 😉
- In the previous article, we saw how to use
AnimationControllerto control our animation. We will further customize our basketball animation in this article. - The following is an example of our earlier animation:

- Because of the lack of a smooth bouncing effect, the above animation appears strange. Let's make this animation better.
- But first, let's have a look at the basic Animation library that comes along with the Flutter SDK.
Animation:
Animationis a core library of the Flutter. This is anabstractclass. It means we won't be able to instantiate it.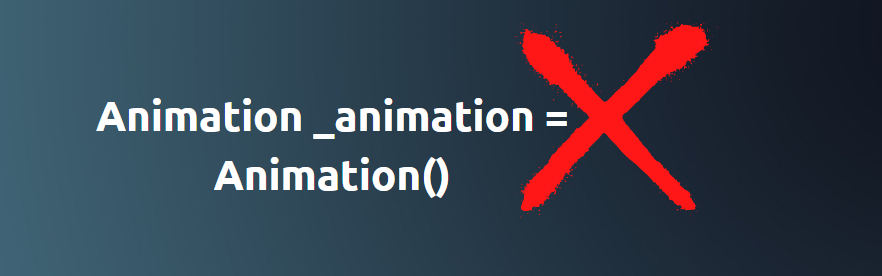
- We can track the animation's completion and dismissal using an instance of the Animation class. In addition, we can check the status of the currently running animation.
- Let's first create an
Animationinstance in our app. class _MyHomePageState extends State<MyHomePage> with TickerProviderStateMixin { late Animation _animation; //..... }- A value of type T is assigned to an animation. It means that we can make an animation for almost any datatypes. For example, we can make:
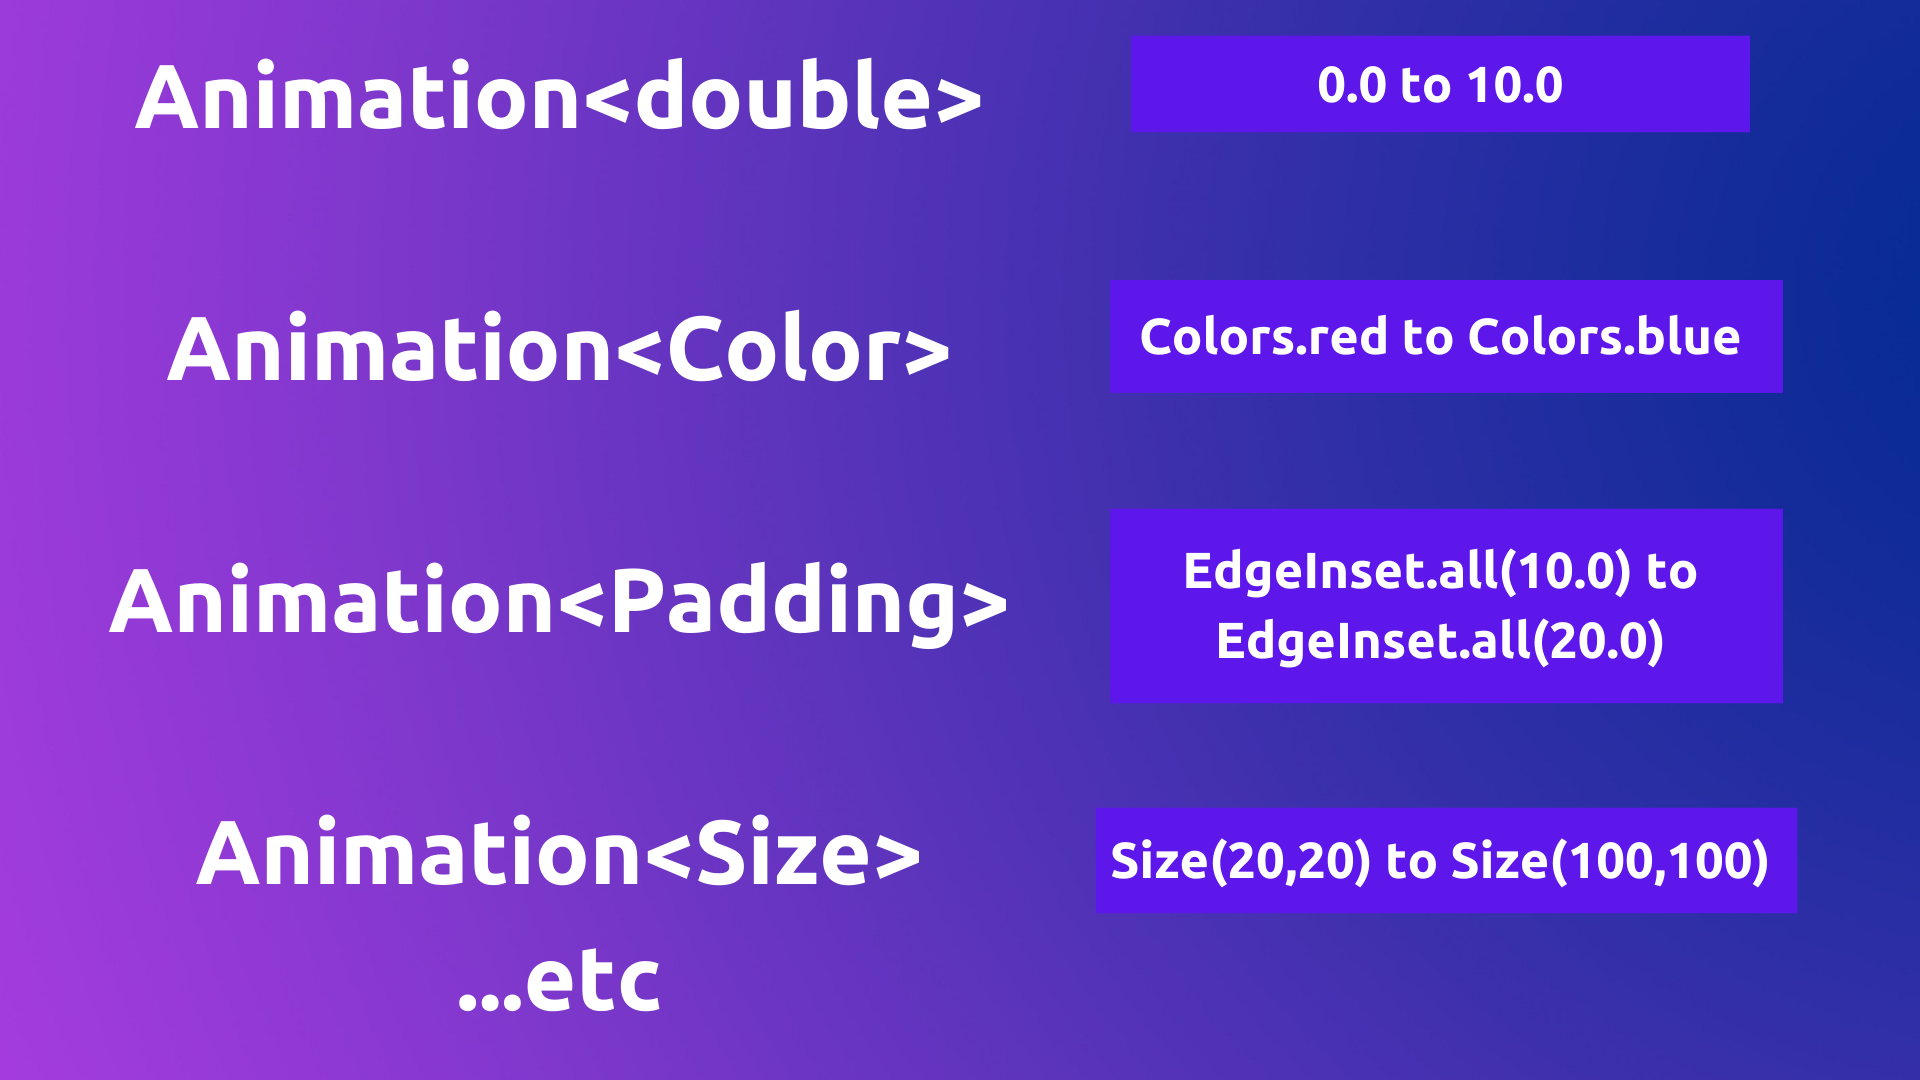
- In our case, we want an animation of type
double. Because we want to translate the ball position which is of typedouble. So let's update theAnimationtype. class _MyHomePageState extends State<MyHomePage> with TickerProviderStateMixin { late Animation<double> _animation; //..... }- As previously stated, Animation is an
abstractclass. It has no idea what is going on on-screen. It only understands thevaluesthat are passed to it and thestateof that specific animation. - The Animation provides us with more control over defining the
upperBoundandlowerBoundvalues of the animation, i.e. thebeginandendvalues. - When the controller plays this animation, it generates interpolated values between the
beginandendpoints. We use that interpolated value to animate our widget. - But now comes the question of how to make an animation? To do so, let us first define Tween.
Tween
- Tween animation is an abbreviation for In-Between animation. It means that there will only be one
beginvalue and oneendvalue. 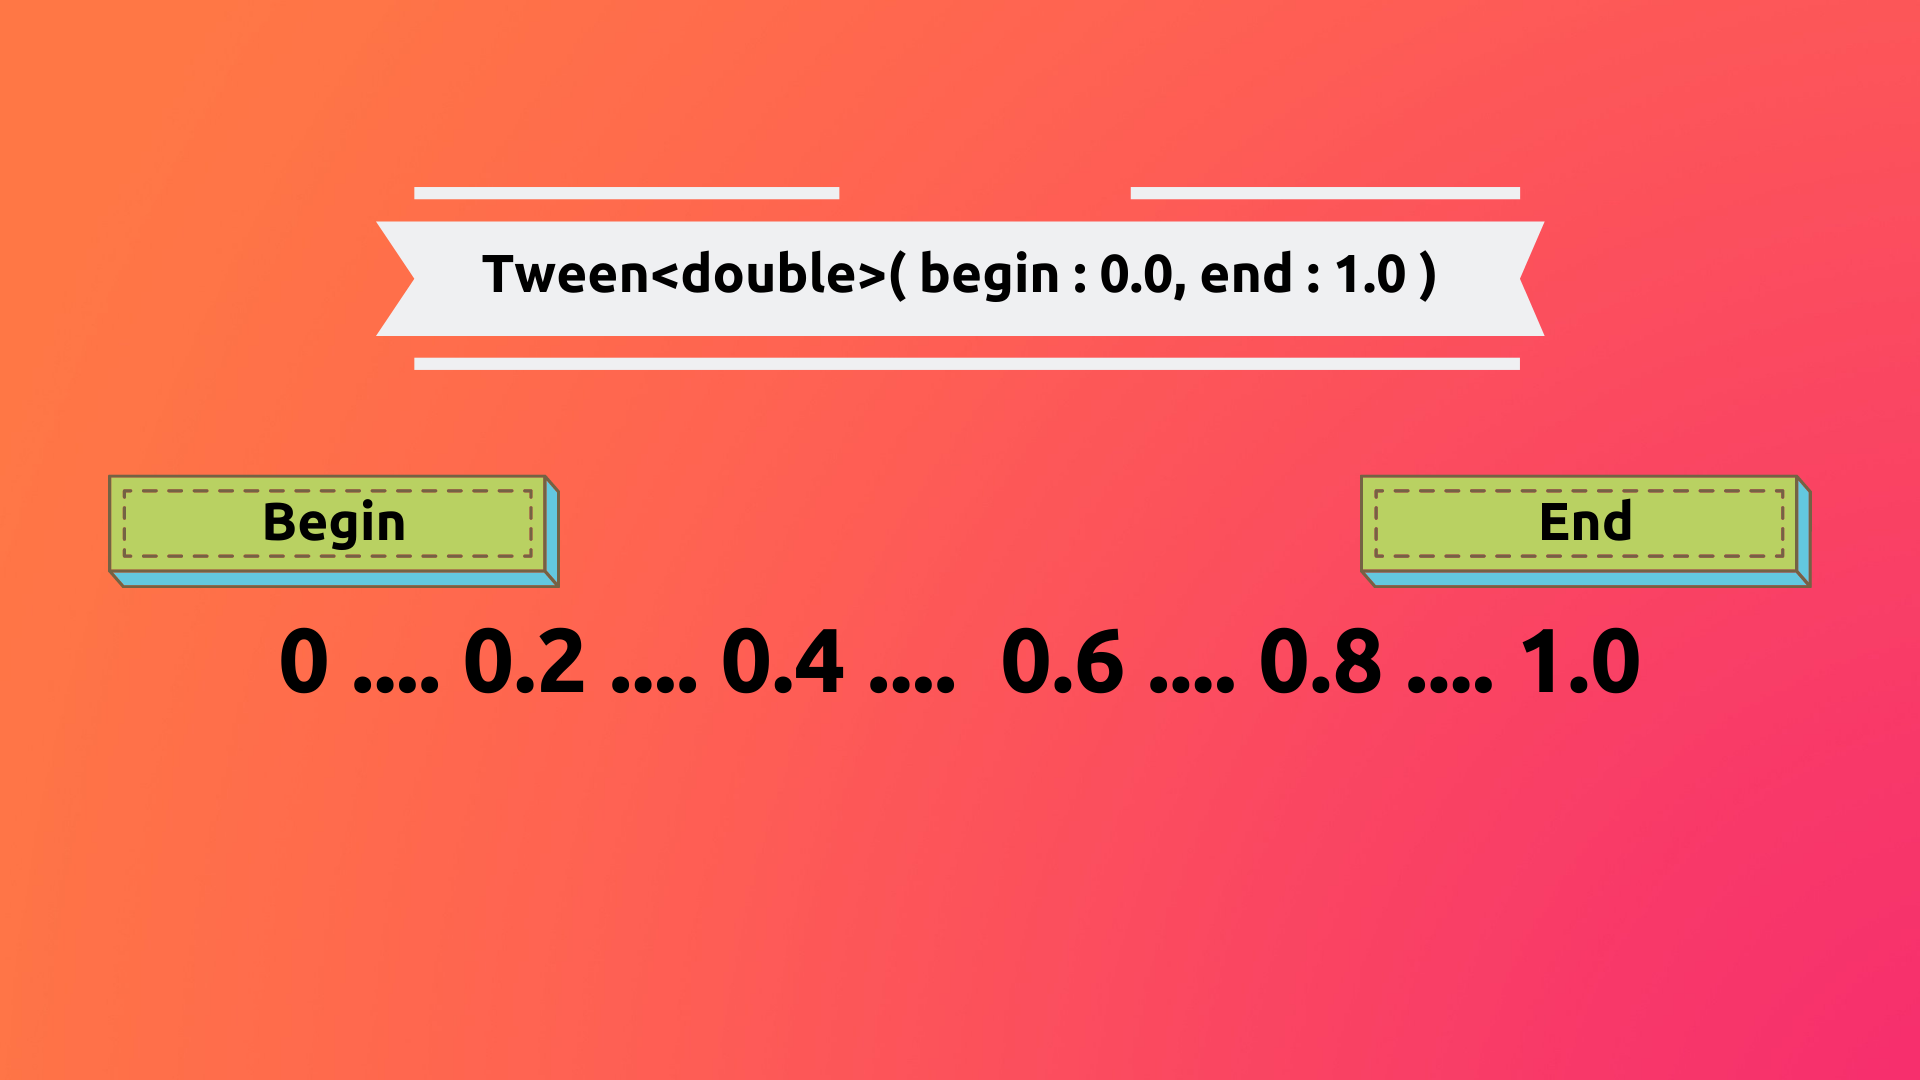
- And then, with a given duration, animation animate from that
begintoendvalue. - Tween animation is primarily used when no Implicit animation is available to meet our requirements.
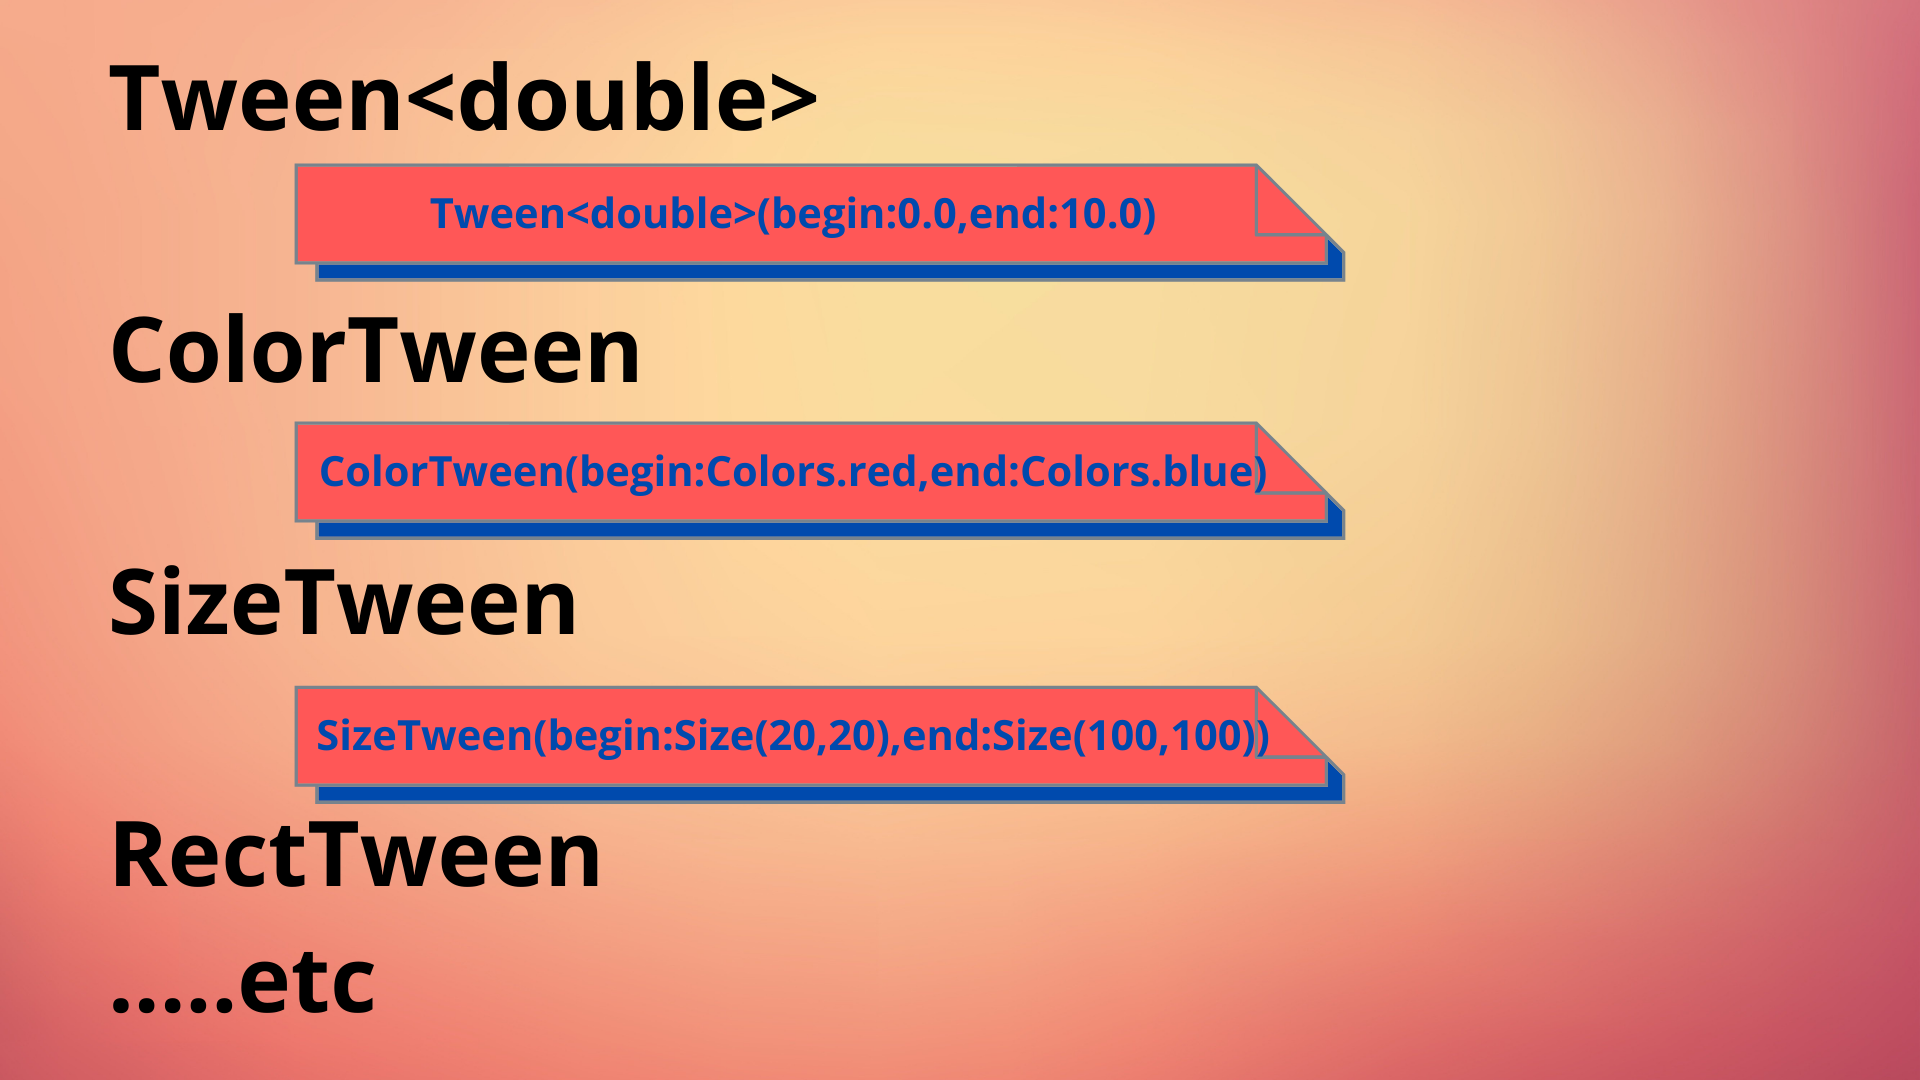
- There are various types of tweens, such as:
- When you have different data types, then you can simply specify that type to the
Tween<T>. For example:Tween<double> - Let's create one Tween animation for our basketball example. And that is going to be
Tween<double>. class _MyHomePageState extends State<MyHomePage> with TickerProviderStateMixin { late AnimationController _controller; late Animation<double> _animation; @override void initState() { super.initState(); _controller = AnimationController( duration: const Duration(milliseconds: 500), vsync: this, ); _animation = Tween<double>(begin: 0.0, end: 10.0).animate(_controller); //here _animation .addListener(() { setState(() {}); }); _controller.repeat(reverse: true); } //.... }- As you can see in the code above, I've chained one more function with the
Tween<double>, which is .animate(). This is because theTween<double>function returns a result of type Animatable rather than Animation. So, to retrieve a value of type Animation, Tween contains a function called animate() that returns an Animation value. - Another thing to note is that
.animate()requires an instance of an AnimationController as an argument. As a result, we've passed our_controller. - Now, if you want to examine the interpolated values of our animation, you can print them out using the _animation.addListener() function:
  _animation.addListener(() {
    print(_animation.value);
  });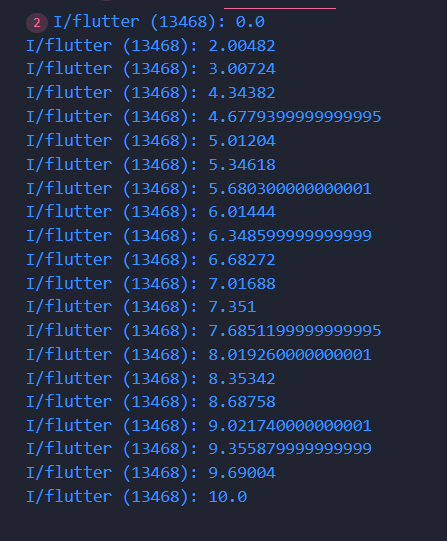
- If you want to use Color as your tween animation you can do something like this :
late Animation _colorTween;
@override
void initState() {
  super.initState();
  //...
  _colorTween = ColorTween(begin: Colors.green, end: Colors.blue)
      .animate(_controller);

  _controller.addListener(() {
    print(_animation.value);
  });
  _controller.forward();
}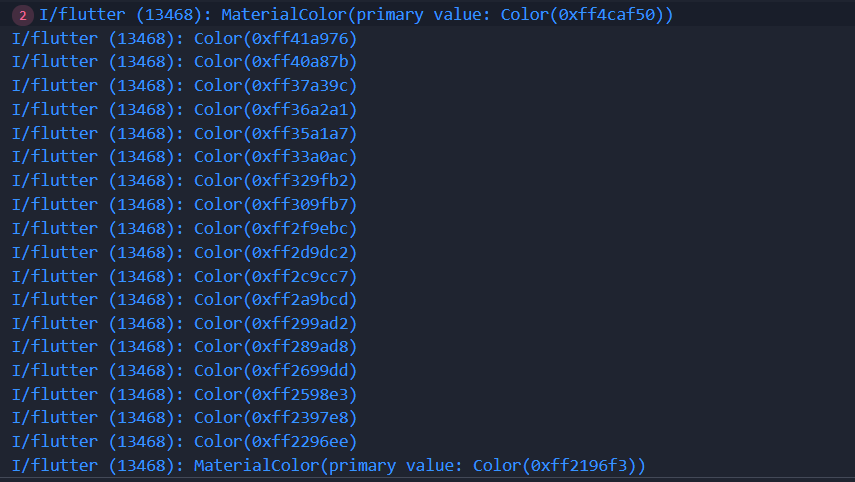
As you can see, we now have all of the interpolated values that are in the range of
Colors.greentoColors.blue. How cool is that !! 🤩Let's complete our bouncing ball example by supplying the
_animation.valuein theOffsetTransform.translate( offset: Offset(180.0, _animation.value), child: Image.asset( "assets/images/basketball.png", height: 70, width: 70, fit: BoxFit.contain, ), )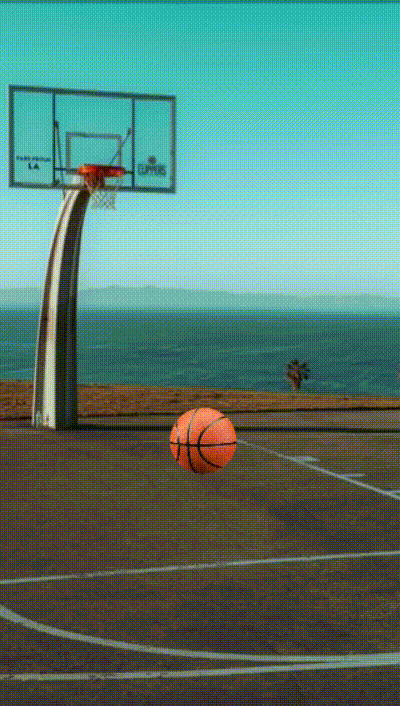
Wow, that seems to be working!! However, the problem from the previous article remains, i.e that the ball bouncing is neither smooth nor feels like a genuine ball bouncing.
- Let's have a look at the
CurvedAnimationto see how we may address this problem.
CurvedAnimation
- In Flutter, wherever you use Animation, you can also use Curves.
- So, what exactly is a
Curvesin animation? - So far, we've seen animation that moves in a Linear direction at a Constant Speed. Where the animation's start and end times are the same.
- We can control the accelerating and deceleration of our animation using CurvedAnimation.
- Curves represent the animation's speed at various points in time during the animation.
- CurvedAnimation accepts three different values:
- parent: This is where we specify which curves this animation will apply.
- curve: The curve that will be used in the forward direction. In the following example, we'll see a different curve.
- reverse: This as the name suggests, reverses the direction of the curves.
- Let's create one
CurvedAnimationfor our Bouncing Ball example: @override void initState() { super.initState(); // .... final _curvedAnimation = CurvedAnimation( parent: _controller, curve: Curves.fastOutSlowIn, ); // give `_curvedAnimation` instance in the `.animate()` instead `_controller` _animation = Tween<double>(begin: 680.0, end: 400.0).animate(_curvedAnimation); // ... }- OUTPUT:
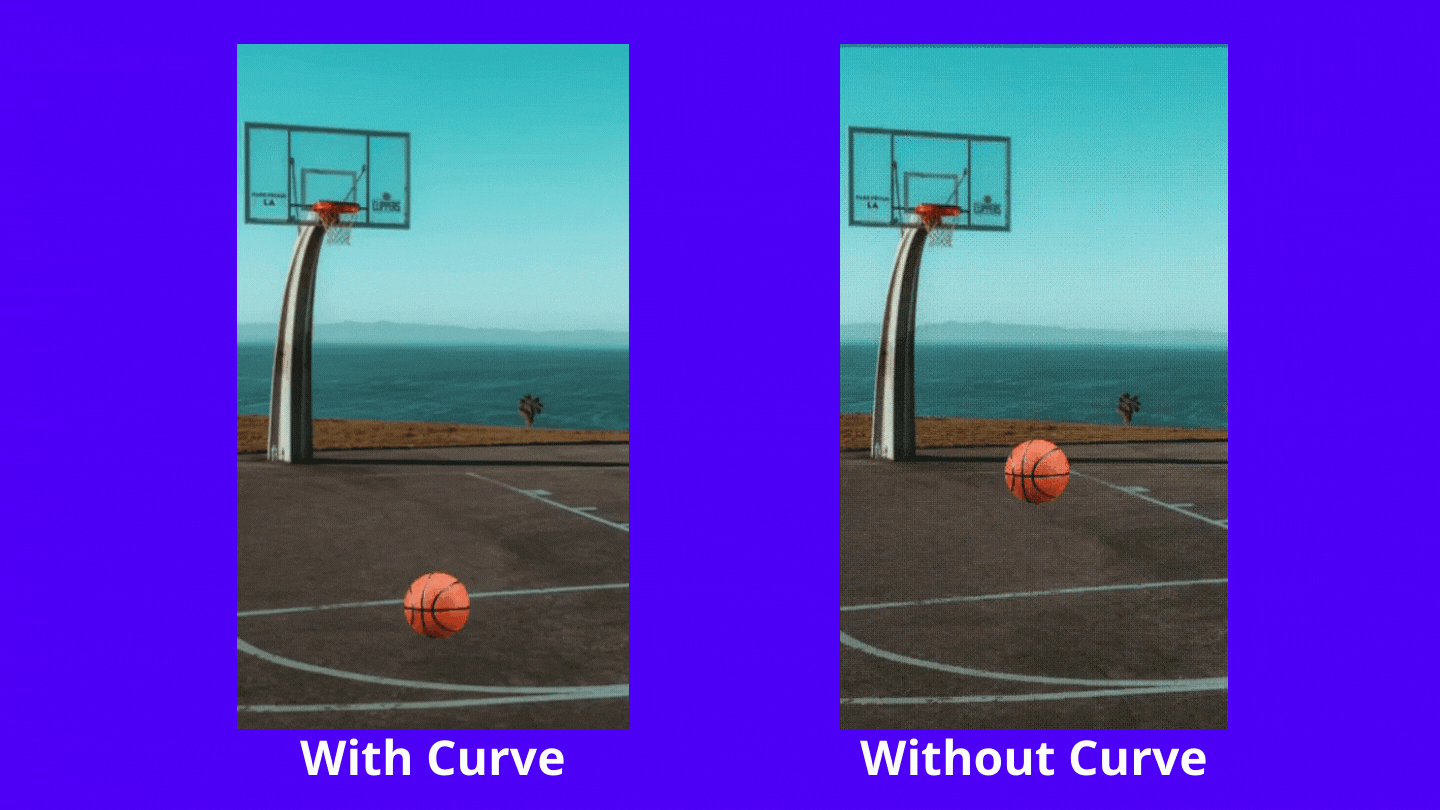

- In the CurvedAnimation above, I used the
fastOutSlowIncurve. In Flutter, there are far too many different curves to choose from. You can see more curves by following the link below:
Summary
- Animation: Animation is a core library of the Flutter SDK. It allows you to make an animation for almost any data type.
- Tween is an abbreviation for In-Between animation, which means there is only one begin value and one end value.
- In Flutter, wherever you use Animation, you can also use Curves. Curves represent the animation's speed at various points in time during the animation.
- We can control the accelerating and deceleration of our animation using CurvedAnimation.
Final Words:
- Thank you for taking the time to read this article. If you found it useful, please spread the word. Also, if you have any suggestions, please leave them in the comments section.
- This article is part of the ongoing Animation In Flutter series. If you want to learn more about Animation or Flutter in general, make sure to read my other blog posts.