

Networking In Flutter: 🔥Interceptors🔥
What is Auth and How Does It Work? What is Interceptor? How to add Interceptors to Network Requests and Response? How to store Auth Token?


Introduction
- Hello, Flutter Devs, I hope everything is going well for you. Here I am with another fascinating topic, which I believe is the most important when it comes to API authentication and data retrieval.
- We'll look at how authentication works, What is a token and what does an Auth Token do?
- We'll also look at what an Interceptor is. What is the point of it? and how can we use the Dio package to add Interceptor to request and response?
- Without further ado, let's get started.
How does Auth Works?
- Before I discuss the Interceptor, let's look at how authentication works in production-level apps that use APIs to retrieve data from databases.
- Let's have a look at an example:

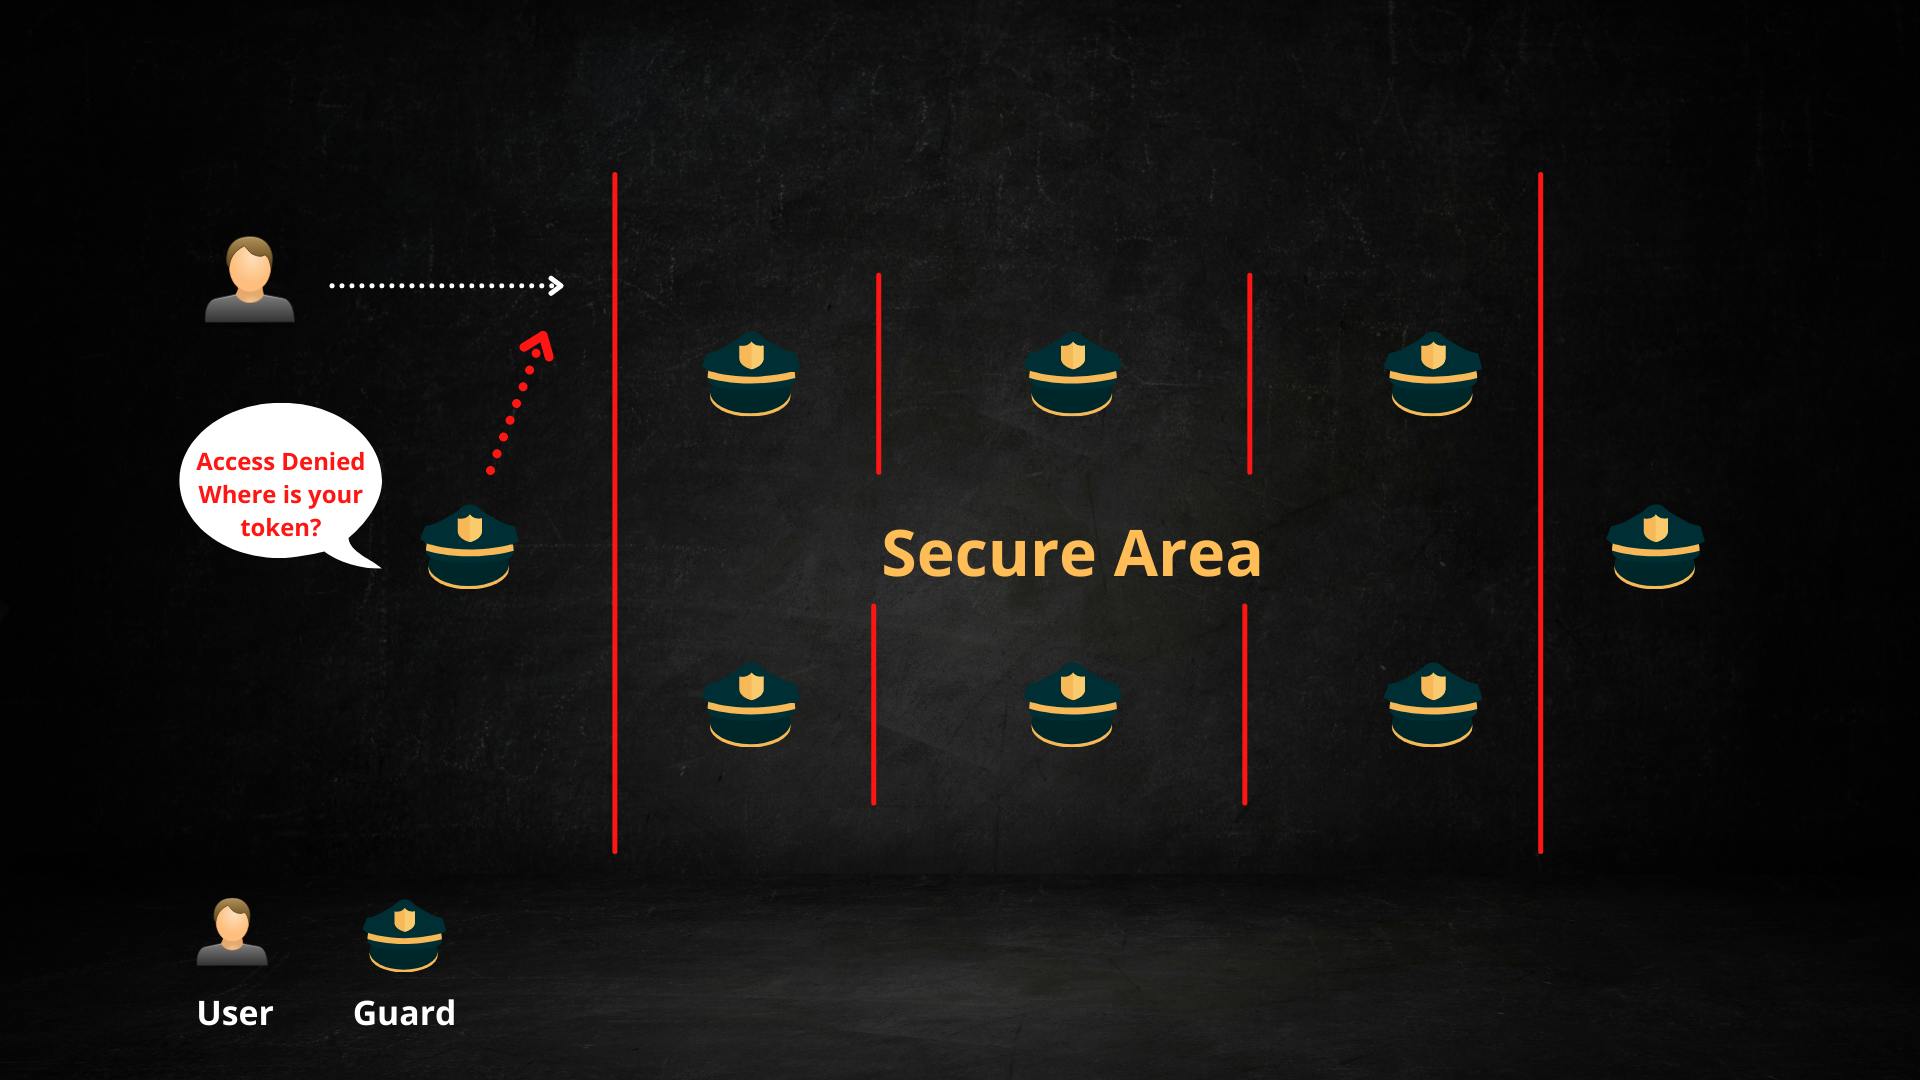
- As can be seen in the image above, there is a Secure Area. Normal individuals are not permitted entry. Security Guards are placed throughout the area. A VIP Pass is required to enter the security area.
- If someone from the outside tries to enter the security area, the guard will ask for the VIP Pass, and if he does not have it, he will be thrown out.
- Now, if the outsider manages to sneak past the first guard without the VIP Pass, he will be in serious danger because the area is heavily guarded. In either case, he'll be captured.
- Now imagine that the outsider has the VIP Pass, which is required to enter the secure area. If he attempts to enter the area now, the guard will see the VIP Pass and confirm it. He will now have access after the successful verification.
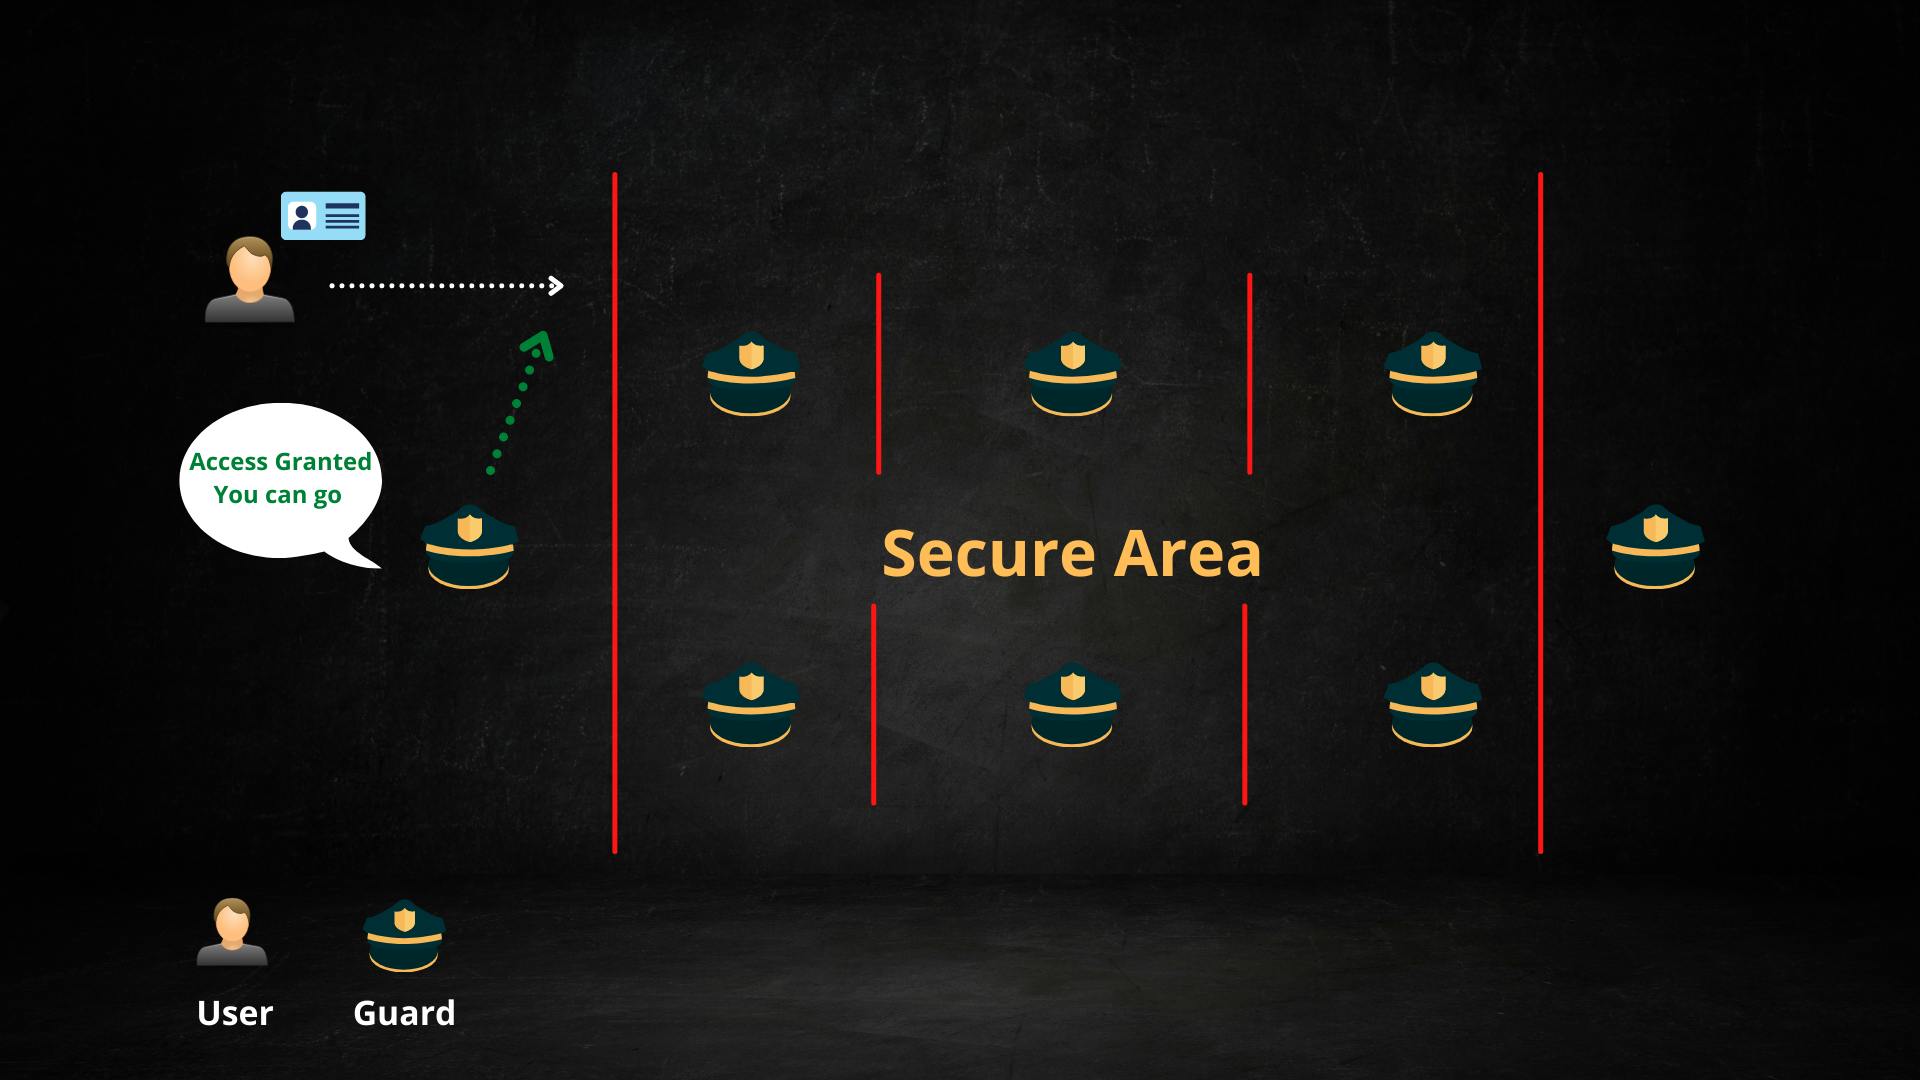
- He can show the security guards his VIP Pass to get access to any portion of the security area.

- Here consider the VIP Pass as the Token and the secure area as the Server.
- In the server, the Token will function similarly to the VIP Pass. We will gain access to the server if we send any request to the server that includes the Token. That server's data is available to us.
- So, let's take a look at this from a technical standpoint.
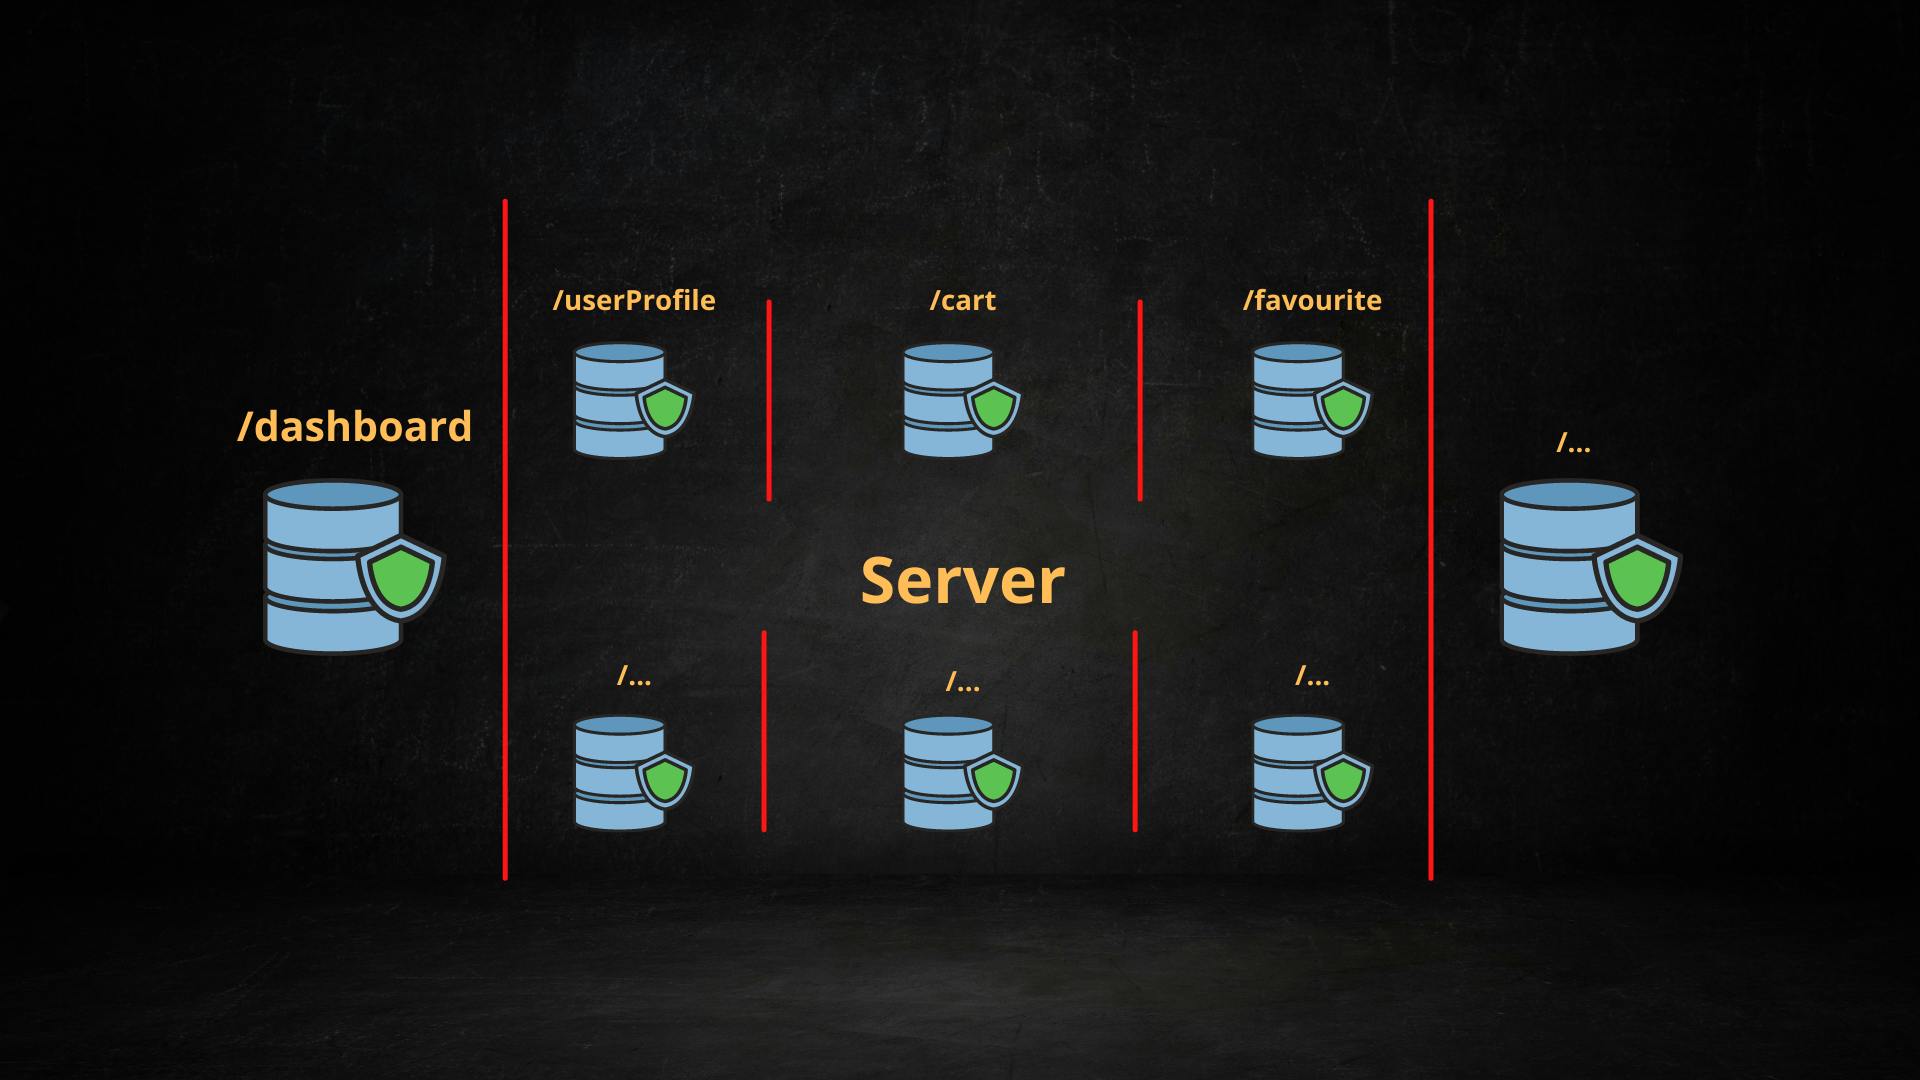
- As you can see, we now have access to the server. And there are a lot of pages and data on the server.
- Now, if we use the app to send a request to the server. The login request, for example, is submitted to the server. The server will send the Token after the request is sent to it.
- We'll now store the token in the application's local database after receiving it (For ex: Using SharedPreference).

- Now that we have the Token, we must include it in the request we make to the secure server whenever we need to use it.

- Now that we understood the basic workflow of the authentication we can now proceed with the example by creating an app in Flutter.
Starter Project
- You can get the starter project, which has all the screens and authentication implemented.
- BUT, it doesn't have Interceptor implemented. That we will do it in this article. So go ahead and fork or download the repo.
Starter Project Breakdown
- Before we start understanding the Interceptor, I would like to give you the basic walkthrough of the starter project. Let's see what each folder contains in the project and what are their use.
- In this project, I've used -
- Bloc for state management.
- Get_It for Dependency Injection.
- Dio for network requests.
- SharedPreference for data storage.
Presentation Folder
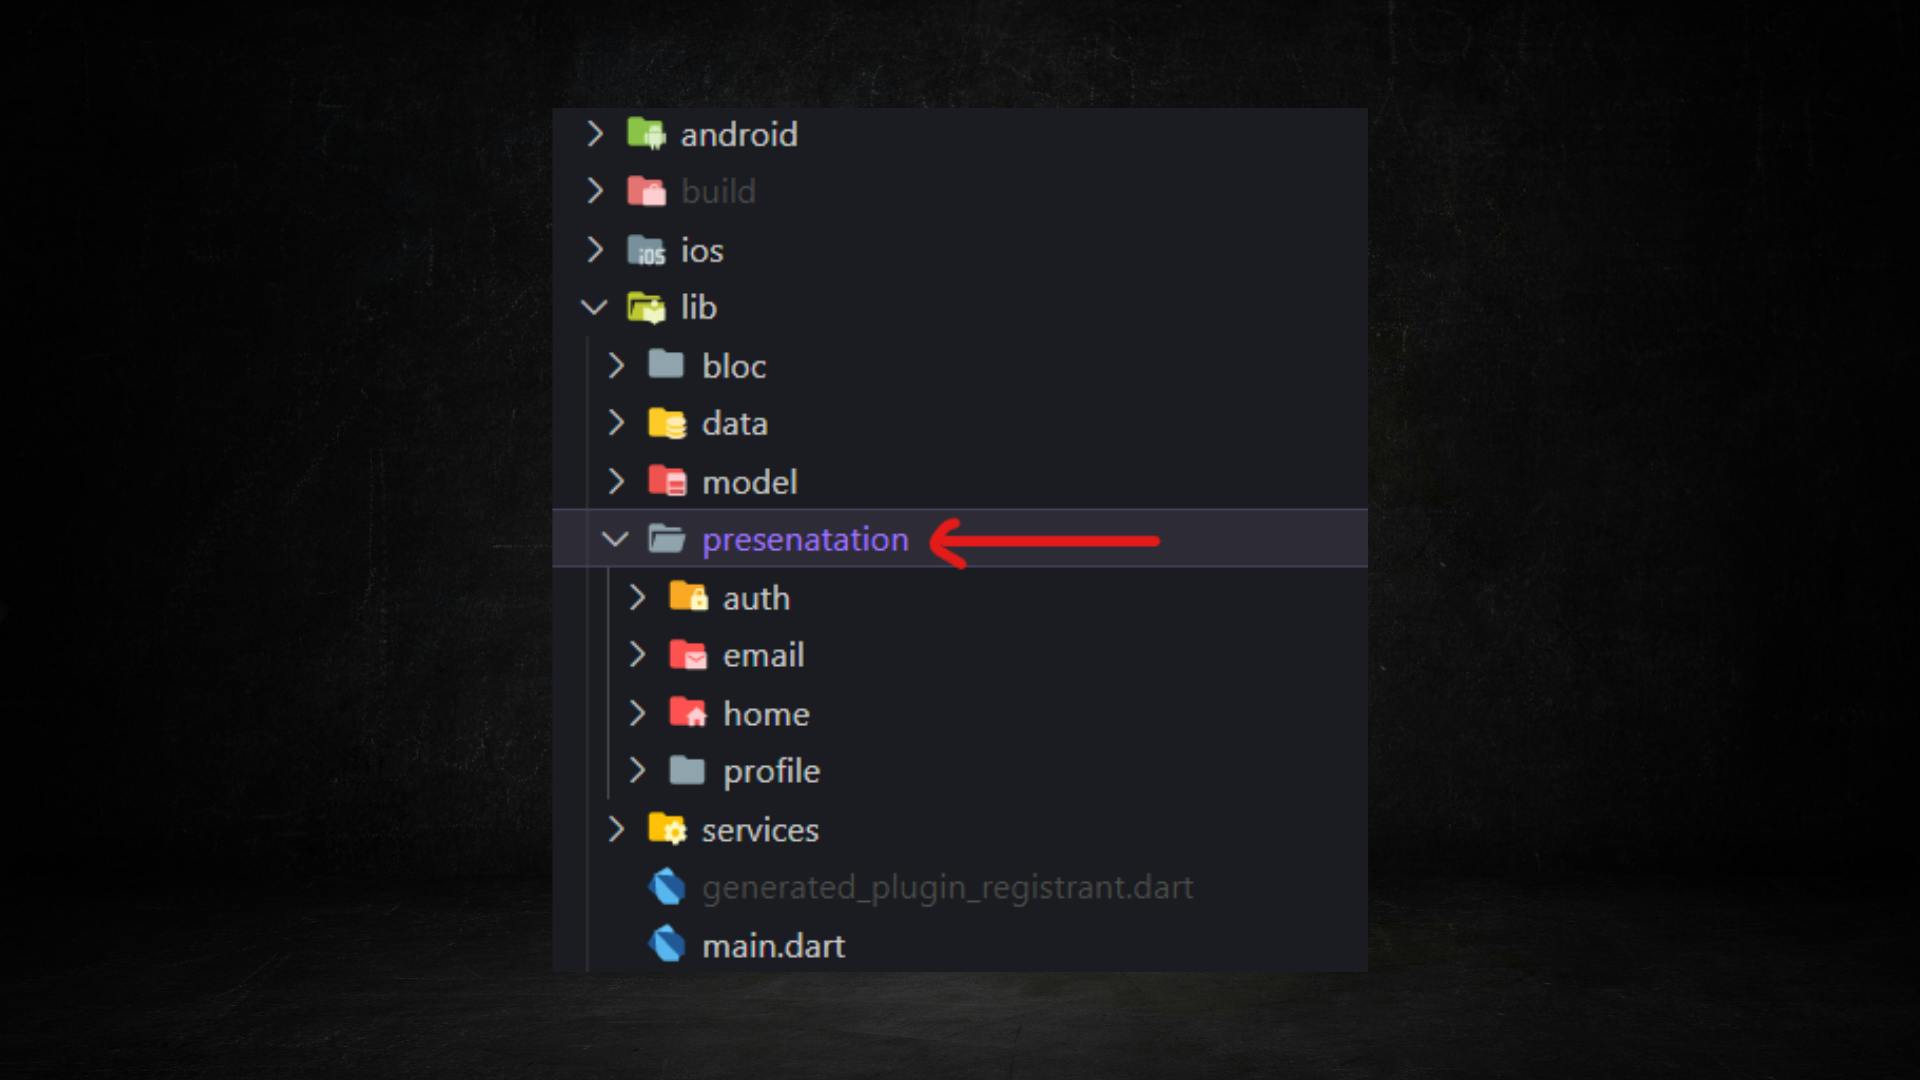
- In this folder there are in total 5 screens:
- Login
- Registration
- Home Screen- For Displaying all the users
- User Profile Screen- For Displaying current user Info
- Email Screen- For Displaying Individual user email
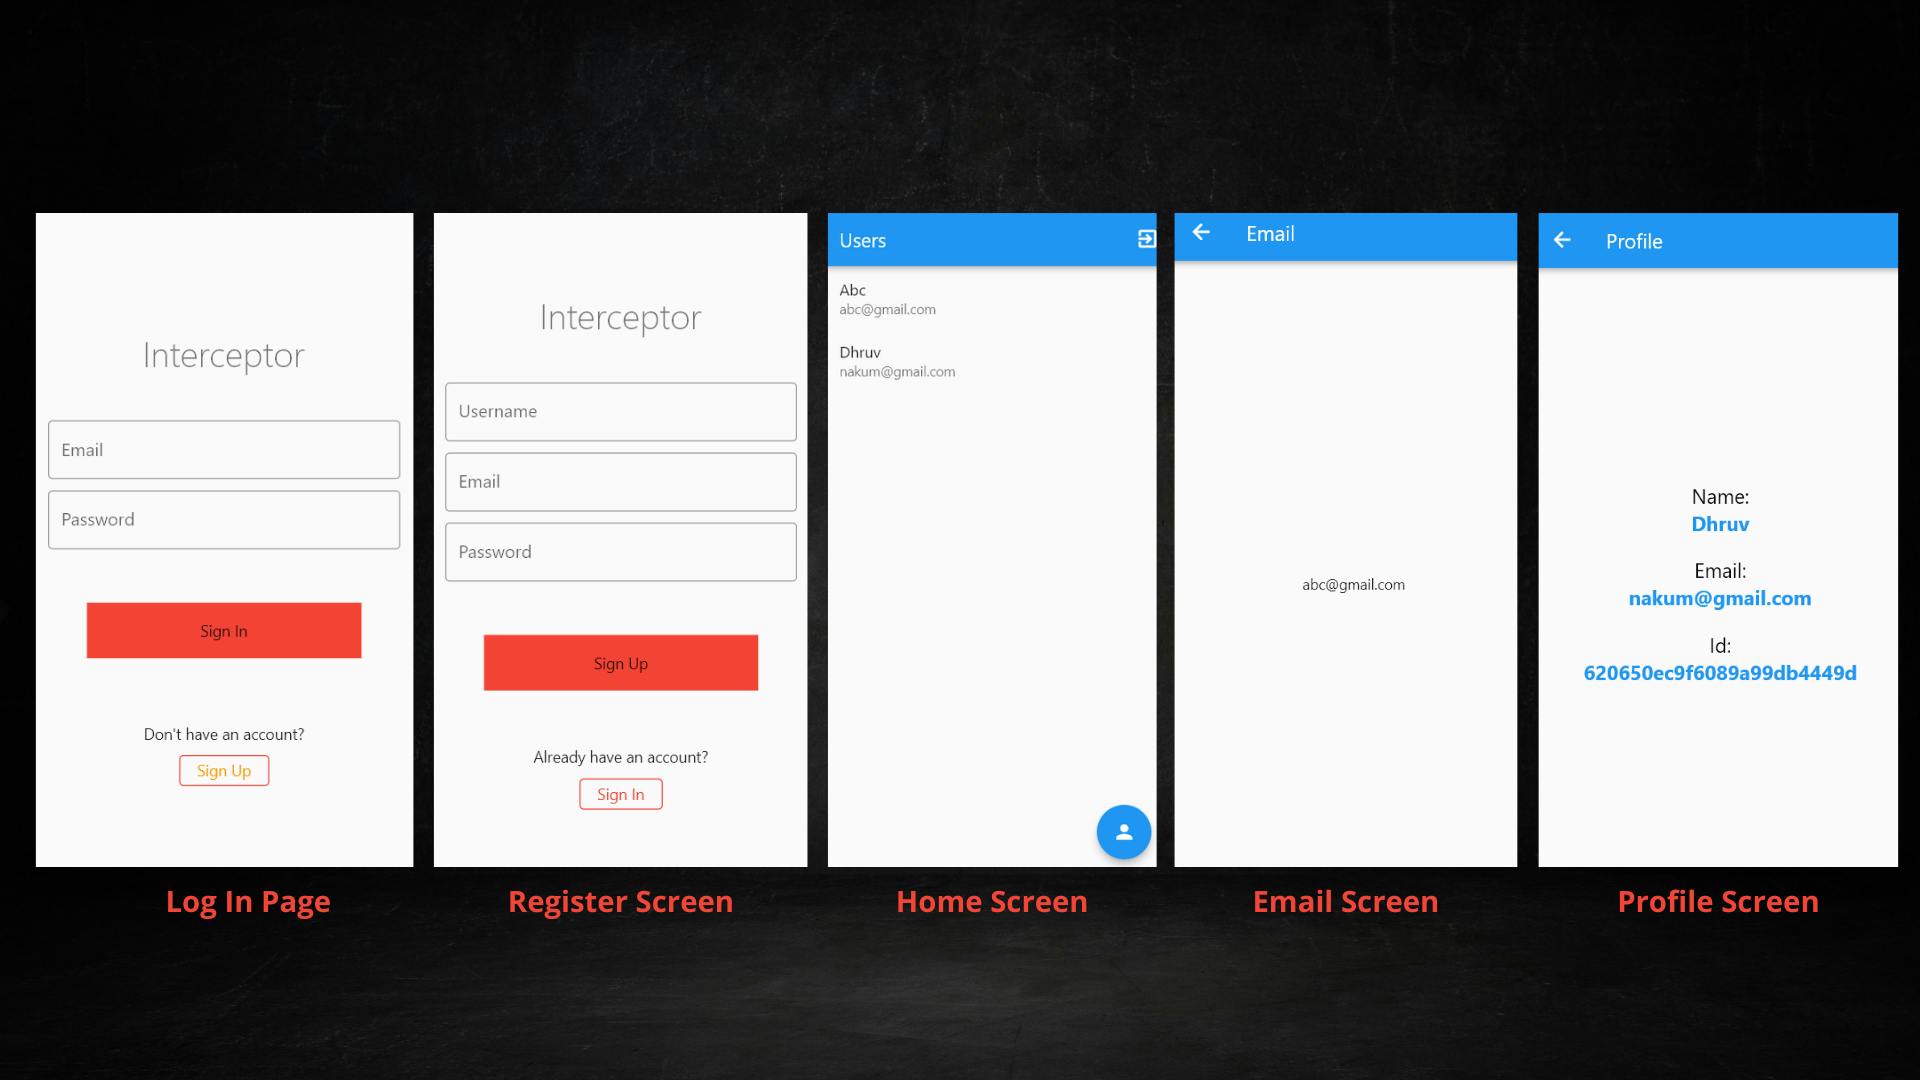
- As you can see, the UI is fairly simple with TextFields and Buttons. On the Home page, all the users are displayed. Profile Screen shows current user details, and the EmailPage will be opened when the user clicks on any user available on the home page. And the email of that clicked the user will be shown over there.
User Model
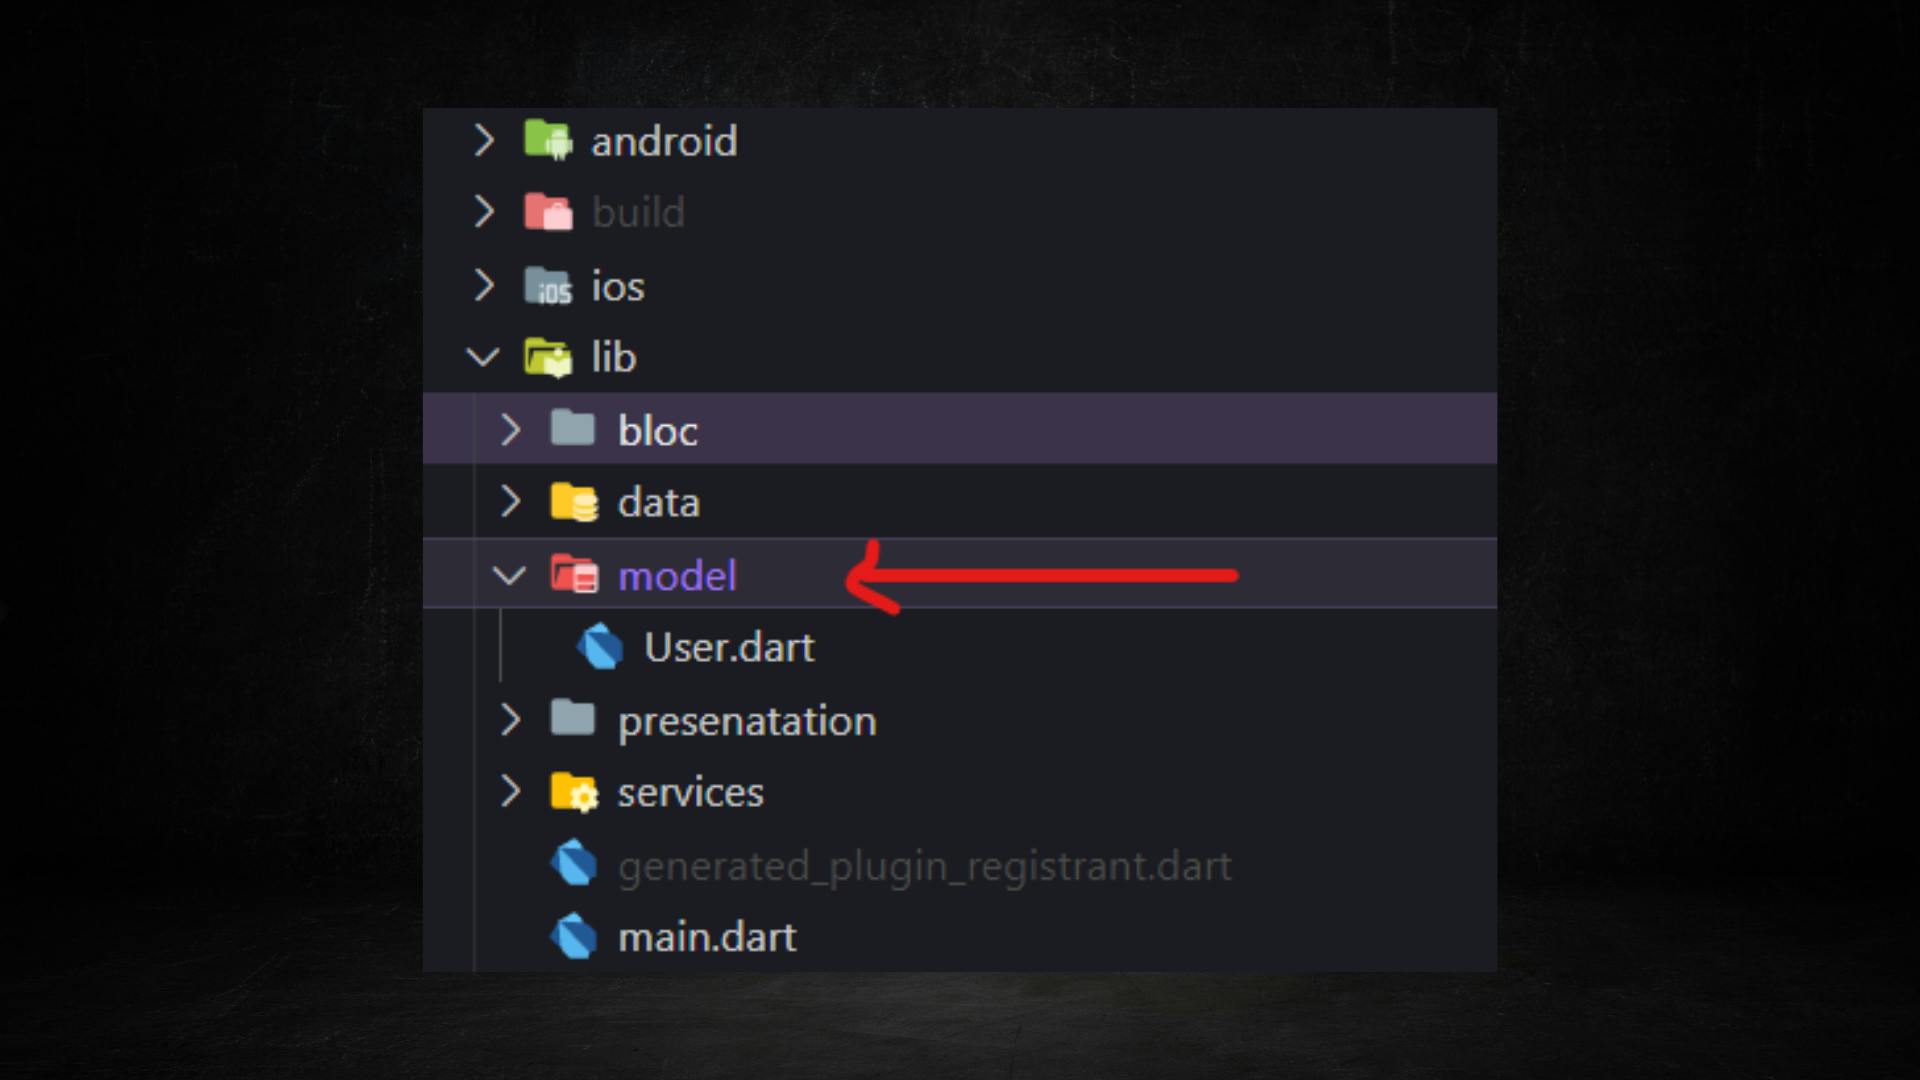
- This folder contains only one file
User.dartwhich is nothing but a data class. We will convert the user data received from the server into a dart understandable data class.
Endpoints and Network Folder
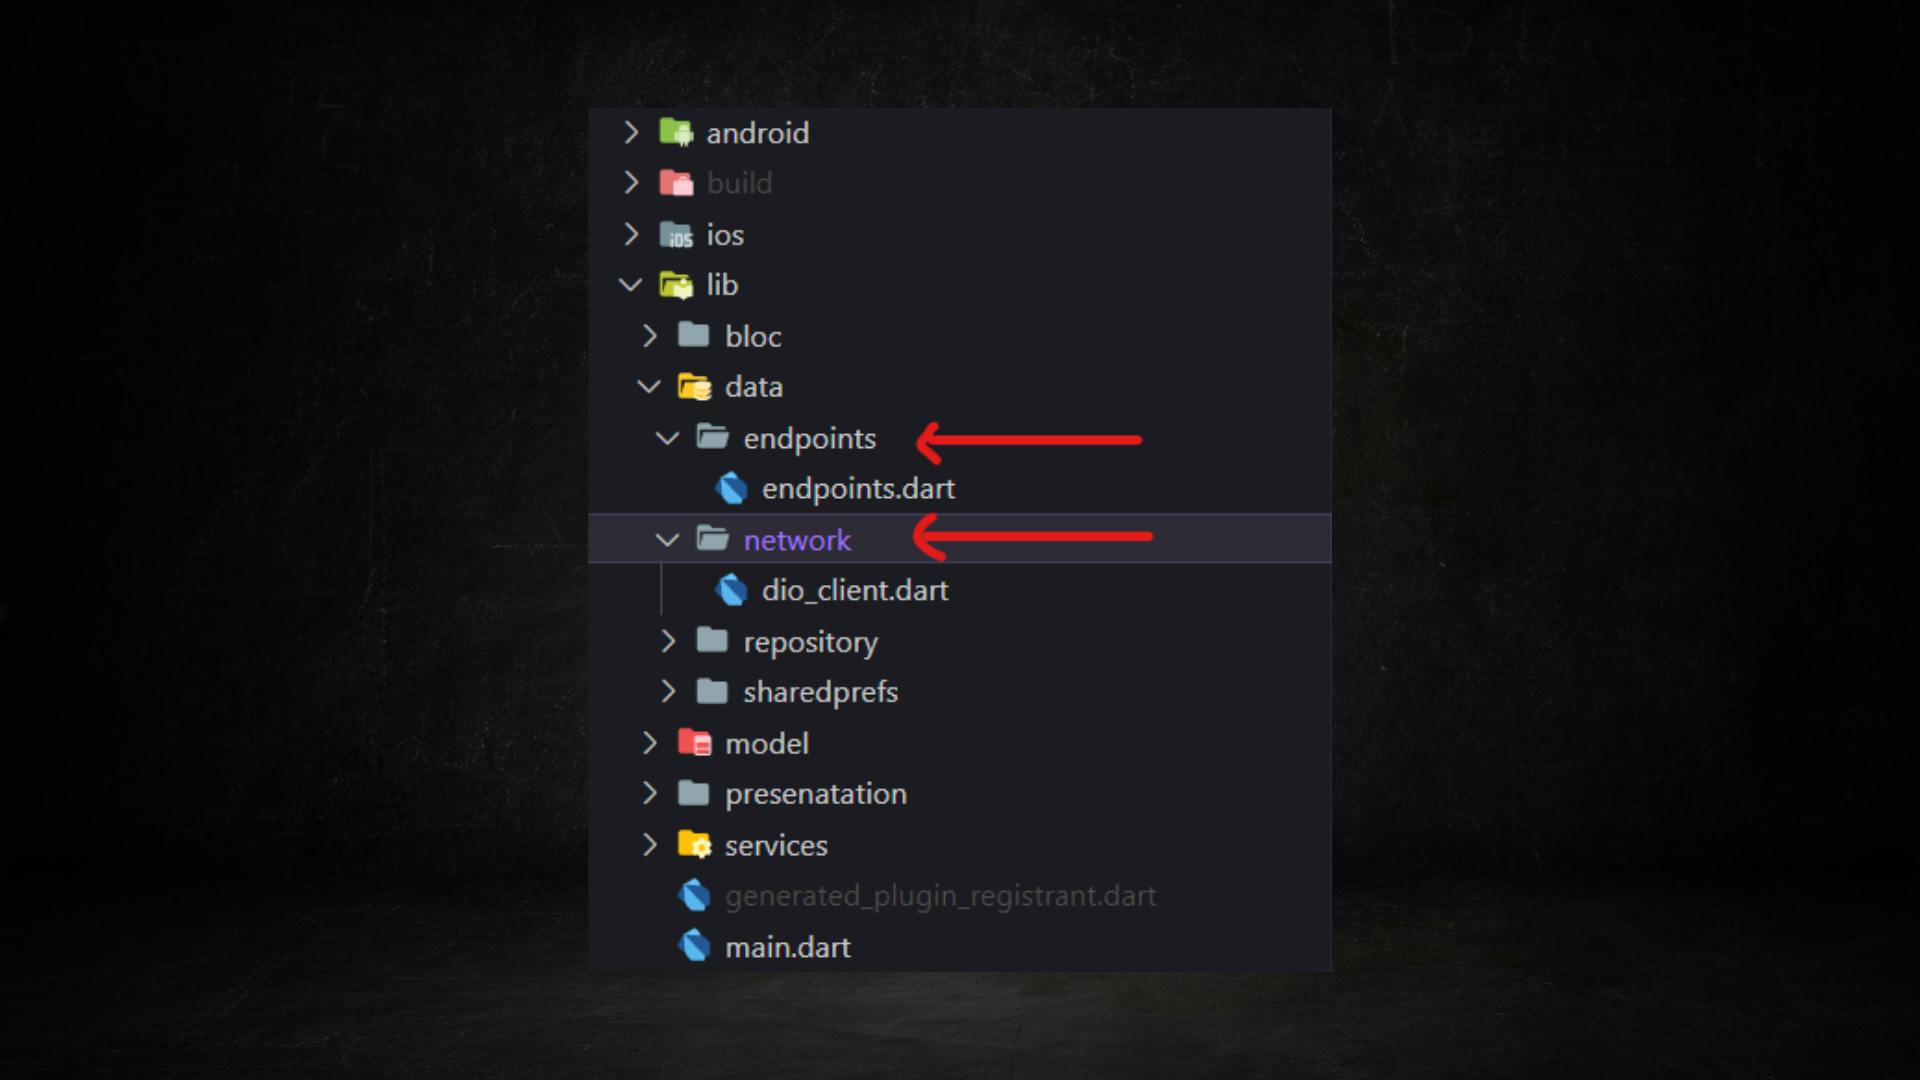
- In the Endpoints class I've defined all the endpoints, which we are used to fetching the data from the server.
class EndPoints { static const String baseUrl = 'http://localhost:3000'; static const String allUsers = '/users/all'; static const String userEmail = '/users/email'; static const String login = '/users/login'; static const String register = '/users/register'; static const String profile = '/users/profile'; } - And in the Network folder, I've created one DioClient class which simply returns the instance of the Dio class. We will use this singleton instance throughout the app.
class DioClient {
  final _dio = Dio();
  Dio get dio => _dio;
}
SharedPrefs Folder

- In order to store the Token in the local database, we are going to use the SharedPreference package.
In the SharedPreferenceHelper class, there are two main methods to store and get the token from the local DB.
class SharedPreferenceHelper { static const String token = "TOKEN"; final SharedPreferences prefs; SharedPreferenceHelper({required this.prefs}); Future<void> setUserToken({required String userToken}) async { await prefs.setString(token, userToken); } String? getUserToken() { final userToken = prefs.getString(token); return userToken; } }- We will also register this class as a singleton class.
- Let's now register both DioClient and SharedPreferenceHelper class as a singleton class.
Services Folder
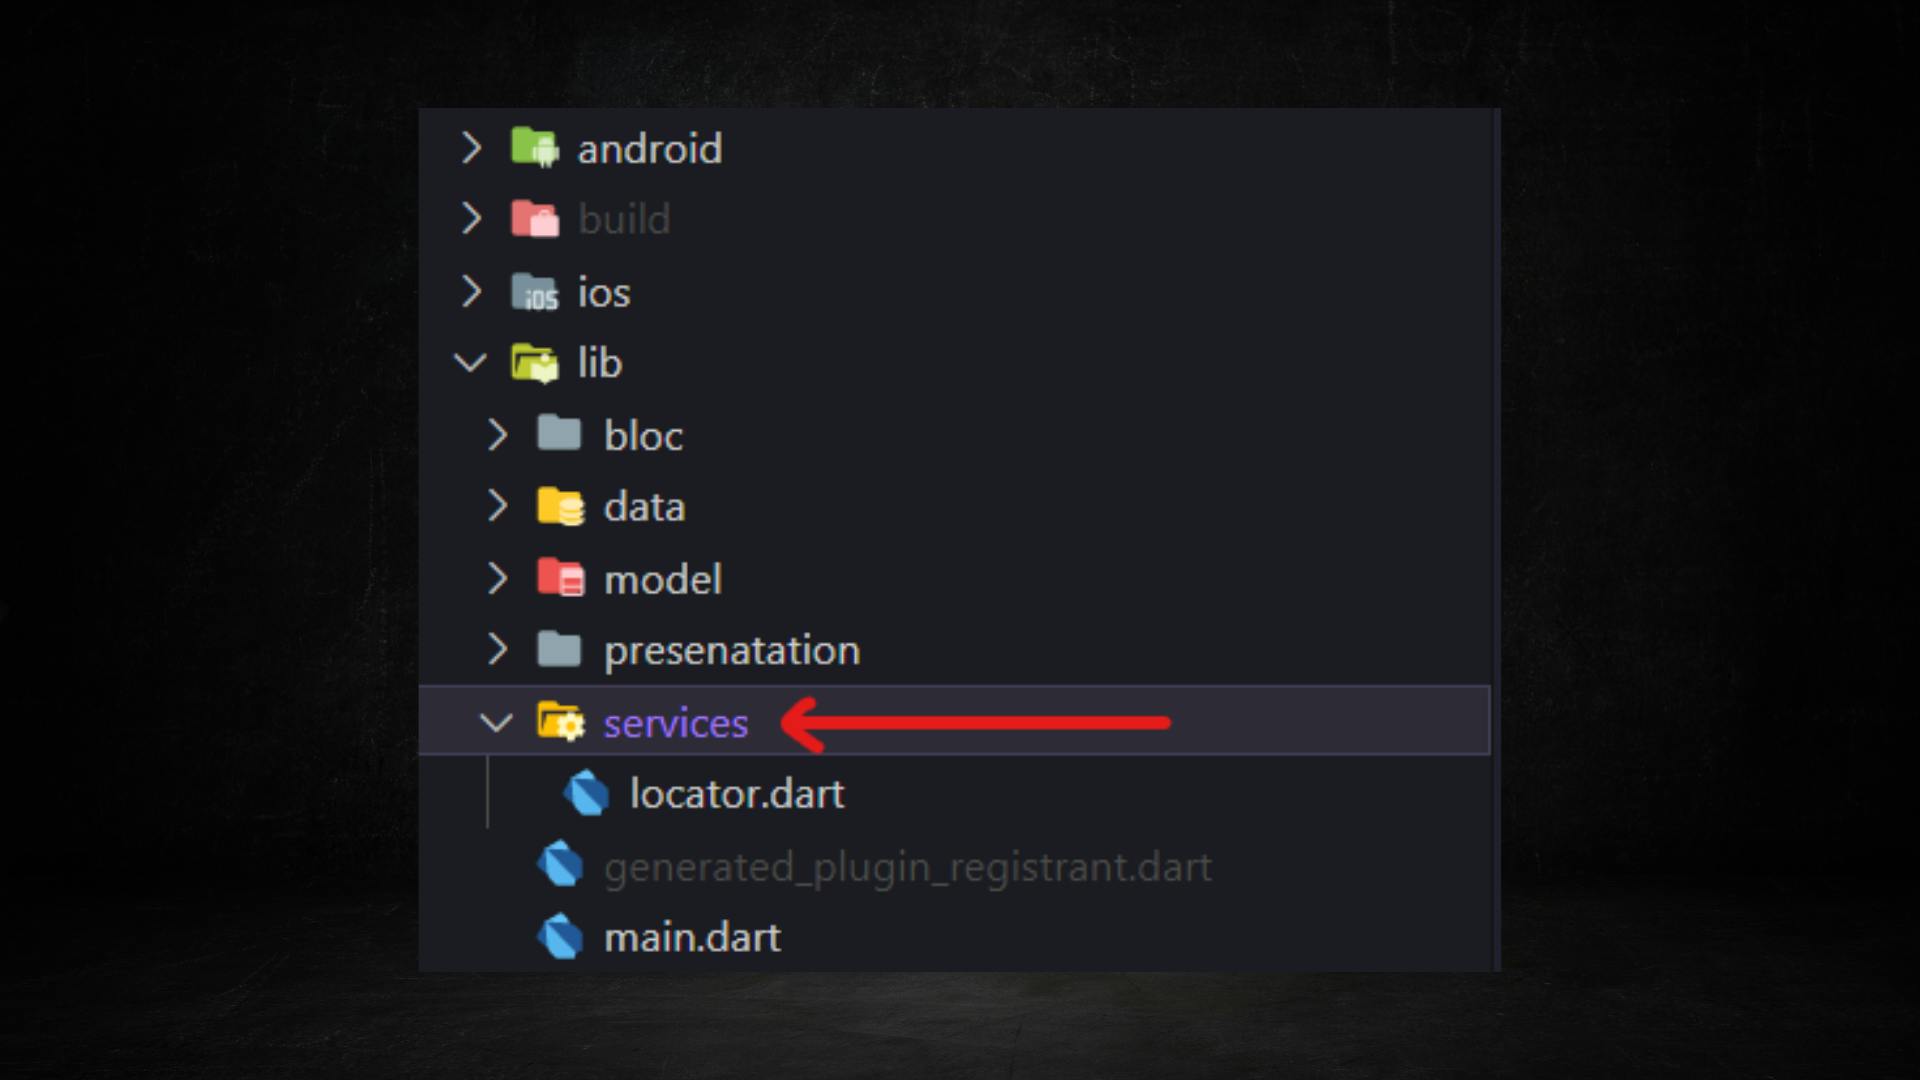
- Now in order to use the same class instance throughout the app we will use the get_it package.
- Inside the
locator.dartfile we are going to register both the classes.final getIt = GetIt.instance; // Future<void> setup() async { final _prefs = await SharedPreferences.getInstance(); getIt.registerSingleton<SharedPreferenceHelper>( SharedPreferenceHelper(prefs: _prefs), ); getIt.registerSingleton<DioClient>(DioClient()); } - We will call the
setup()method defined in this class in themain()method.Future<void> main() async { WidgetsFlutterBinding.ensureInitialized(); await setup(); runApp(const MyApp()); }
Bloc Folder
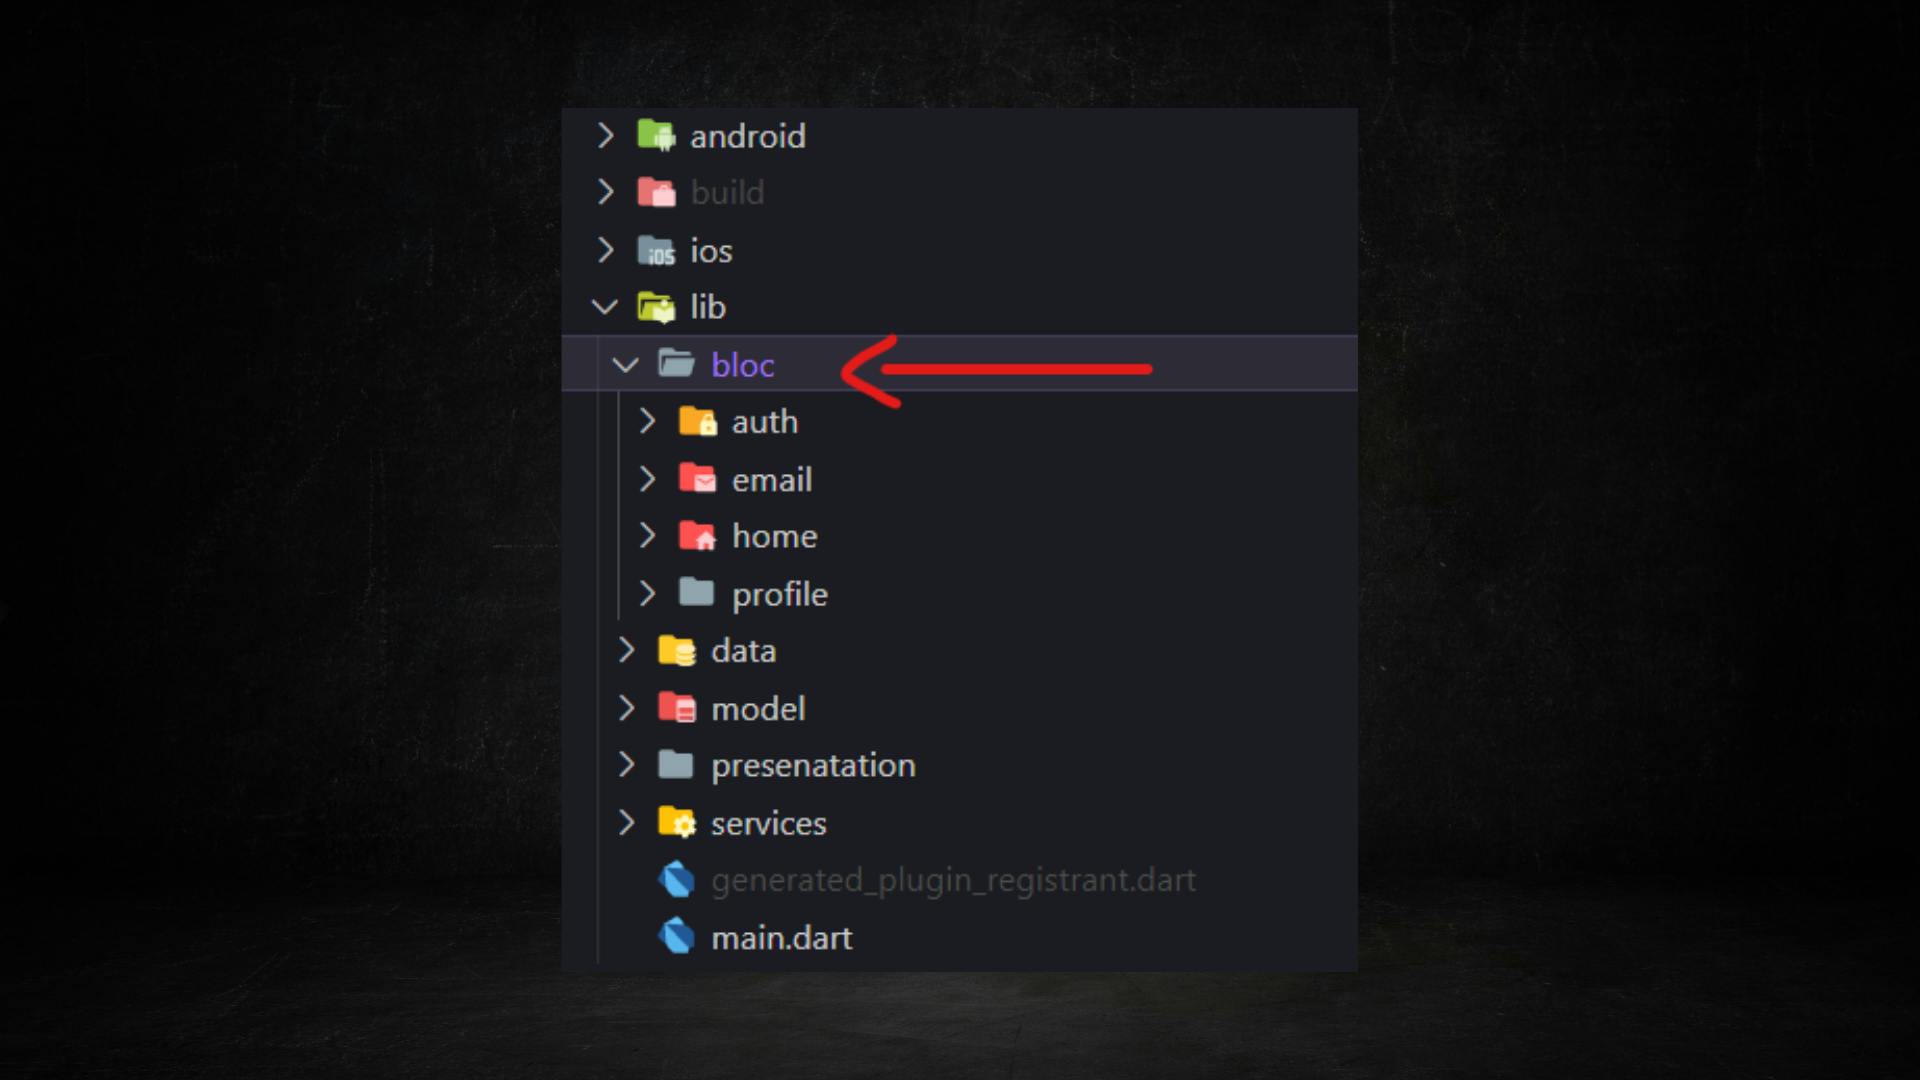
- In this folder, all the bloc files are created. All the screen have their own blocs for handling the user interaction and all.
- If you look at the
auth bloc.dartfile, you'll notice that we're storing the Token that we get from the auth repository's login() method. Keep in mind that this token will be used in later requests.
Repository Folder
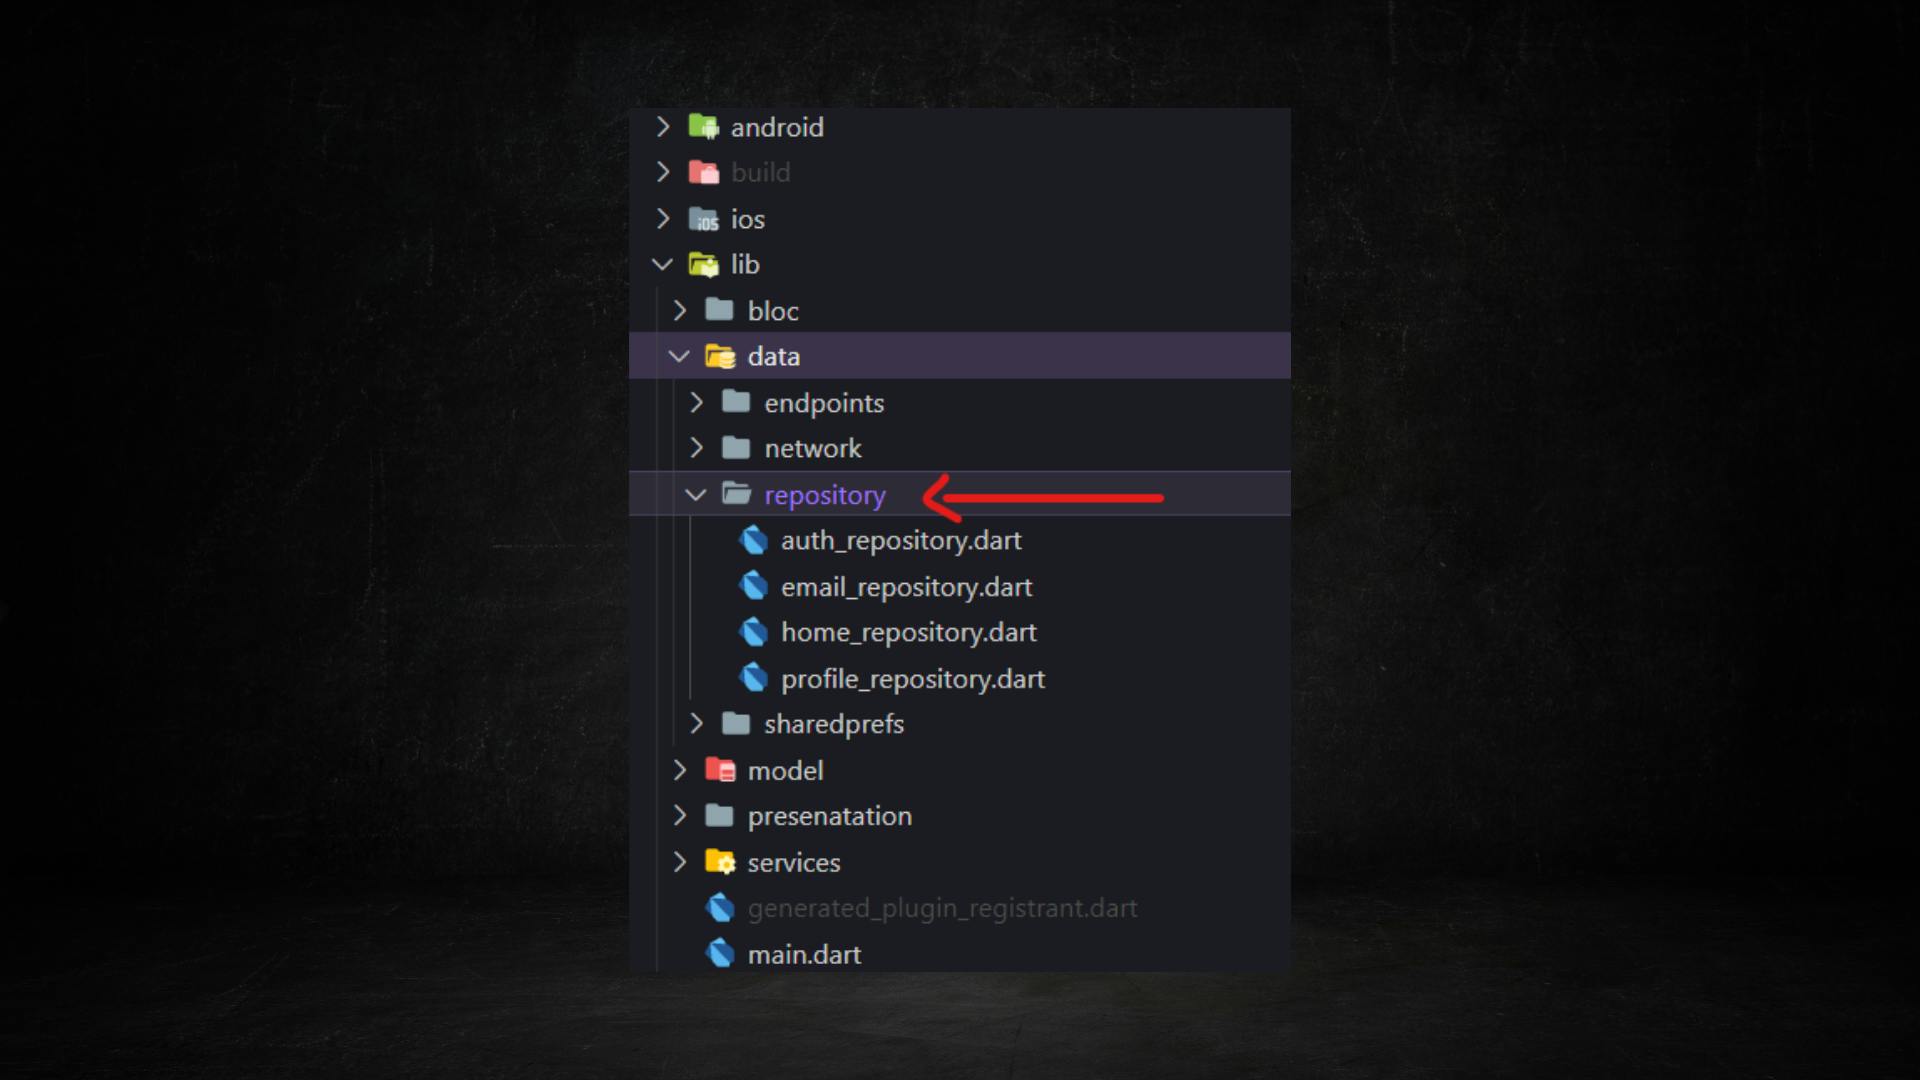
- In this, there are 4 repositories for all individual pages.
- In the auth_repository.dart file there are two methods:
register()andlogin(). Which will be called when the user presses the respective buttons from the UI. - In the home_repository.dart file there is only one method called
getAllUser()and as the name suggests, it is used to fetch all the users from the server. - In the profile_repository.dart file there is
getUserProfileDetails()method, which is used to get the currently logged in user data from the server. - In the email_repository.dart file again there is one method named
getEmail(), which is used to get the tapped user email from the server.
Backend
- I created a local server in my PC using Node.js and MongoDB for user authentication, storing the user in the database, and accessing the data of those users. You don't have to be worried if you don't know any of these.
- I'm just mentioning it so you're not confused about where the data comes from and whatnot.
Starter Project Output

What's the Problem?
- Now the problem with the above code, If you see the
home_repository.dart,email_repository.dartandprofile_repository.dartI've attached the Token with the request that we are making to the server in order to get the data.//home_repository.dart Future<List<User>> getAllUsers() async { final response = await netWorkLocator.dio.get( '${EndPoints.baseUrl}${EndPoints.allUsers}', options: Options( headers: { 'Authorization': '${sharedPrefLocator.getUserToken()}', <---Here }, ), ); final data = (response.data as List).map((e) => User.fromJson(e)).toList(); return data; } - In our case, I just created 3-4 screens, but imagine a production-ready app with 30-40 screens, each of which requires data from the server.
- In these kinds of scenarios, we must send this token to each repository separately. And in such a large application, this will get tedious.
- So, in order to overcome this issue, we use Interceptors.
What is an Interceptor?
- Interceptors as the name suggest, intercept something. It basically allows us to intercept incoming or outgoing HTTP requests using the HttpClient.
- Interceptors are a way to do some work for every single HTTP request or response.
- We can :
- Add a token or some custom HTTP header,
- Catch HTTP responses to do some custom formatting (i.e. convert CSV to JSON) before handing the data over to your service/component.
- Log all HTTP activity in the console, etc
- In our situation, instead of providing the token to each individual request, we only need to add it once when making the request to the server.
- Let's have a look at how we can achieve that in our app.
Adding Interceptor
- In order to add an interceptor, head over to the dio_client.dart file that is already created in the starter project.
class DioClient { final _dio = Dio(); Dio get dio => _dio; } - Here we've already have the instance of the Dio class. All we have to do is add the interceptor.
Ways of adding Interceptor
- We can add interceptors in two ways :
- Using Built-in class [InterceptorsWrapper, QueuedInterceptorWrapper] and
- By extending custom class
- Let's add interceptor using the second way.
- Create a new file named
dio_interceptor.dartfile inside the network folder. - Extend the custom DioInterceptor class with Interceptor class.
class DioInterceptor extends Interceptor {} Here we need to override three methods :
onRequest(): This method is used to perform operations in the request before sending it to the server. For example: Setting the Header, Adding Token, etc
- onResponse(): This method is used to perform operations on the response received from the server before sending it to the client.
- onError(): This method is used to perform operations if any error occurred during the network requests. For example: If the request gets canceled, Connect Timeout, Receive Timeout, etc.
You can utilize this method as per your own requirements. In our case, we need to implement the onRequest() method in order to add the Token when requesting to the server. Let's implement it
class DioInterceptor extends Interceptor {
  final _prefsLocator = getIt.get<SharedPreferenceHelper>();

  @override
  void onRequest(RequestOptions options, RequestInterceptorHandler handler) {
    options.headers['Authorization'] = _prefsLocator.getUserToken();
    super.onRequest(options, handler);
  }

  @override
  void onResponse(Response response, ResponseInterceptorHandler handler) {
    // TODO: implement onResponse
    super.onResponse(response, handler);
  }

  @override
  void onError(DioError err, ErrorInterceptorHandler handler) {
    // TODO: implement onError
    super.onError(err, handler);
  }
}
As you can see we are setting the Authorization key in the header when requesting to the server. That's it. Now head over to the
dio_client.dartfile and add this custom interceptor to our dio instance in the constructor.class DioClient { final Dio _dio = Dio(); DioClient() { _dio.interceptors.add(DioInterceptor()); } Dio get dio => _dio; }- You can also achieve this by using built-in classes like InterceptorWrapper as shown below:
DioClient() { _dio.interceptors.add( InterceptorsWrapper( onRequest: (options, handler) {}, onResponse: (response, handler) {}, onError: (error, handler) {}), ); } - Alright, now as we've added the Interceptor we can now remove the options that we've provided previously to all the requests.
home_repository.dartFuture<List<User>> getAllUsers() async { final response = await netWorkLocator.dio.get( '${EndPoints.baseUrl}${EndPoints.allUsers}', // options: Options( // headers: { // 'Authorization': '${sharedPrefLocator.getUserToken()}', // }, // ), ); final data = (response.data as List).map((e) => User.fromJson(e)).toList(); return data; }email_repositoryFuture<String> getEmail({required String id}) async { final response = await netWorkLocator.dio.get( "${EndPoints.baseUrl}${EndPoints.userEmail}", // options: Options( // headers: { // "Authorization": "${sharedPrefLocator.getUserToken()}", // }, // ), queryParameters: { "_id": id, }, ); return response.data["email"]; }profile_repository.dartFuture<User> getUserProfileDetails() async { final response = await netWorkLocator.dio.get( '${EndPoints.baseUrl}${EndPoints.profile}', // options: Options( // headers: { // 'Authorization': '${sharedPrefLocator.getUserToken()}', // }, // ), ); return User.fromJson(response.data['user']); }
Final Output
- Annnnddd let's RUN THE APP
Wrapping Up
- I hope you enjoyed and learned something from this article. If you have any feedback/queries, leave them in the comments.
- Thank you for spending time reading this article. See you in the next article. Until then...