Networking In Flutter : Dio
What is Dio? Why choose Dio over HTTP? How to Perform CRUD operation using Dio? How to Handle Dio Errors easily? - A Complete Beginners Guide
D
I'm a mobile/web developer 👨💻 who loves to build projects and share valuable tips for programmers
Follow me for Flutter, React/Next.js, and other awesome tech-related stuff 😉
Why choose Dio over HTTP?
- If you want a short answer to this question... It is because of More Featuresthat Dio provides.
- Yes, Dio provides a lot of capabilities that HTTP lacks. Interceptors, Global configuration, FormData, Request Cancellation, File downloading, Timeout, and so on.
- If you're not familiar with these terms, don't worry; in this post, I'll go through them one by one with some examples.
- Isn't CRUD operation the first thing that comes to mind when we think about networking? Then let's look at how we can use the DIO package to conduct CRUD tasks. Believe me when I say it's a lot easier than HTTP.
- However, we must first include the Dio package in the pubspec.yaml file.
Dependency Installation
- Install the dependencies listed below. In our example, we'll need all three.
dependencies: dio: ^4.0.6 get_it: ^7.2.0 intl: ^0.17.0 - Run
flutter pub getand you are ready to go.
Folder Structure
- It is advised that we follow a set structure when working on a large project.
- Let's have a look at how I've organized the project for this example.
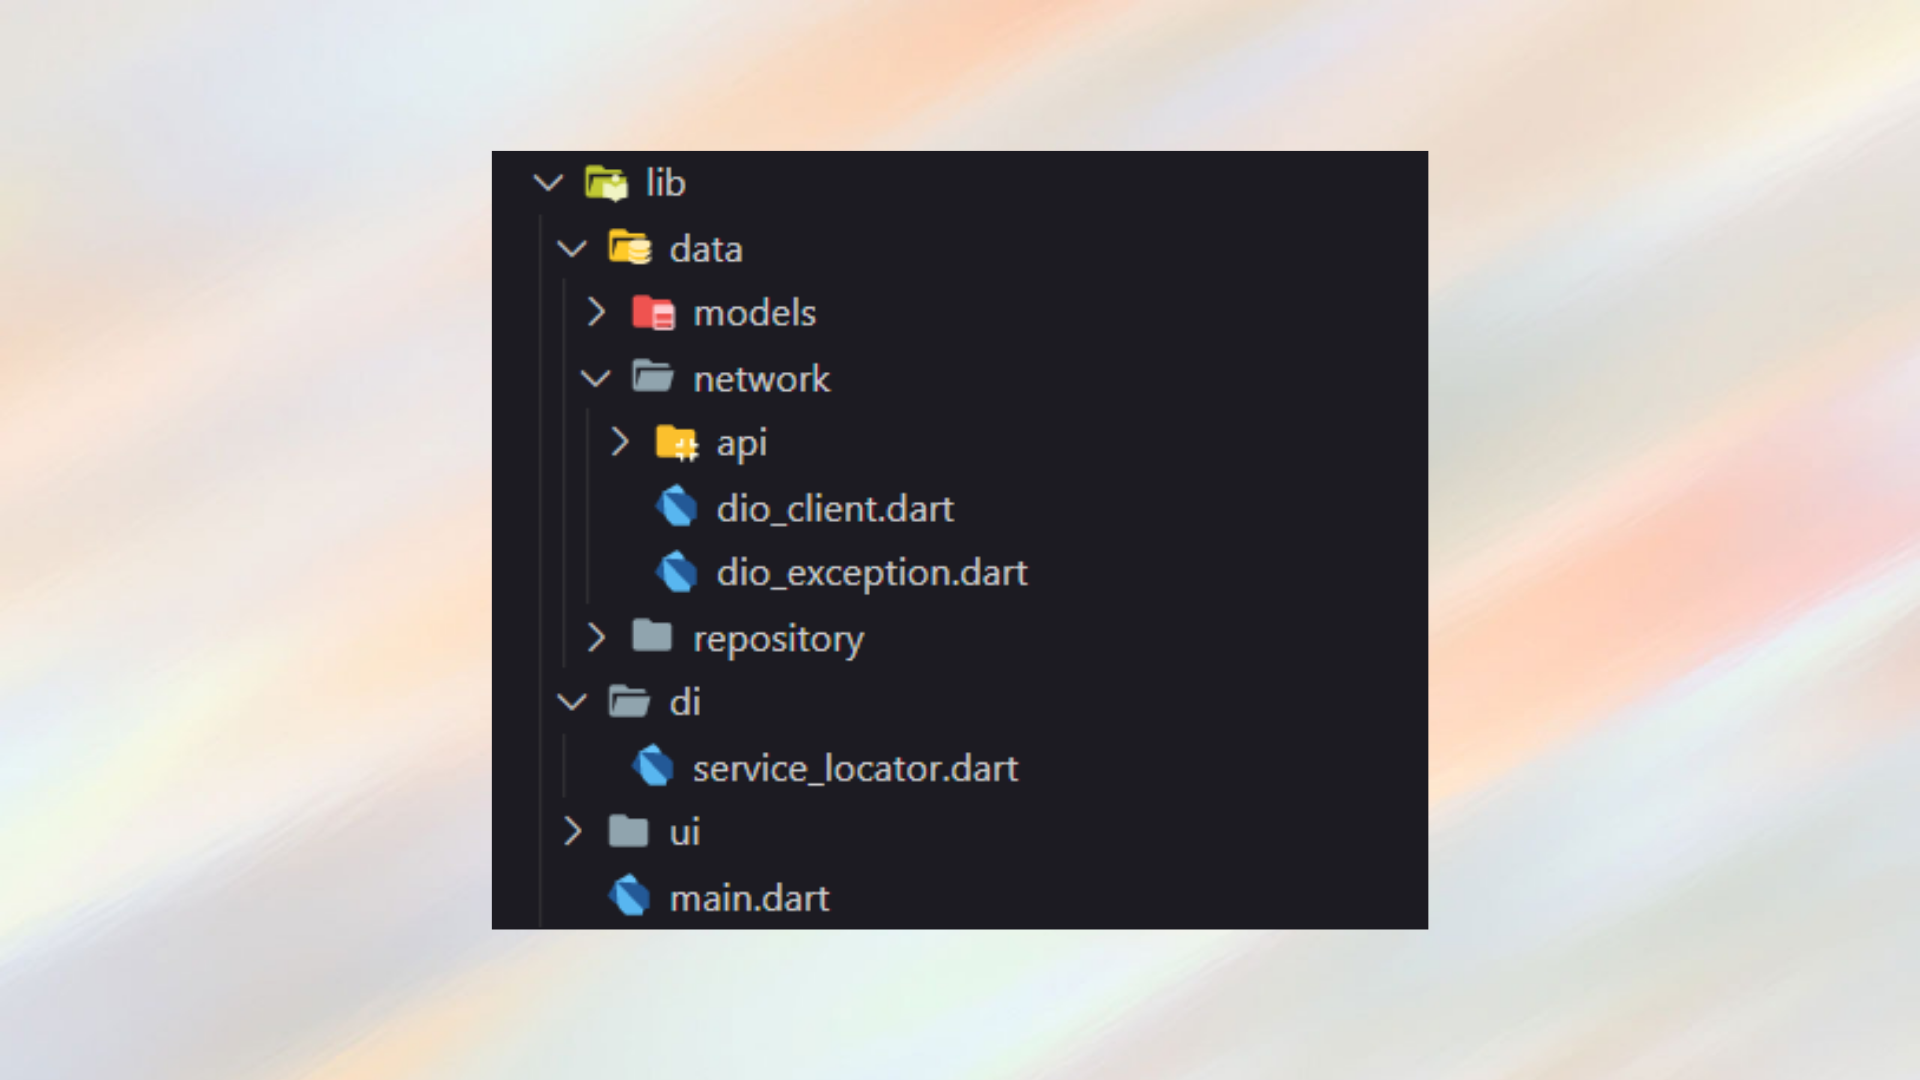
- As you can see there are 3 main folders:
- Data: Contains all the networking related stuff like Models, Apis, Repositories, etc
- DI : For dependency injection.
- UI : Contains screens, widgets.
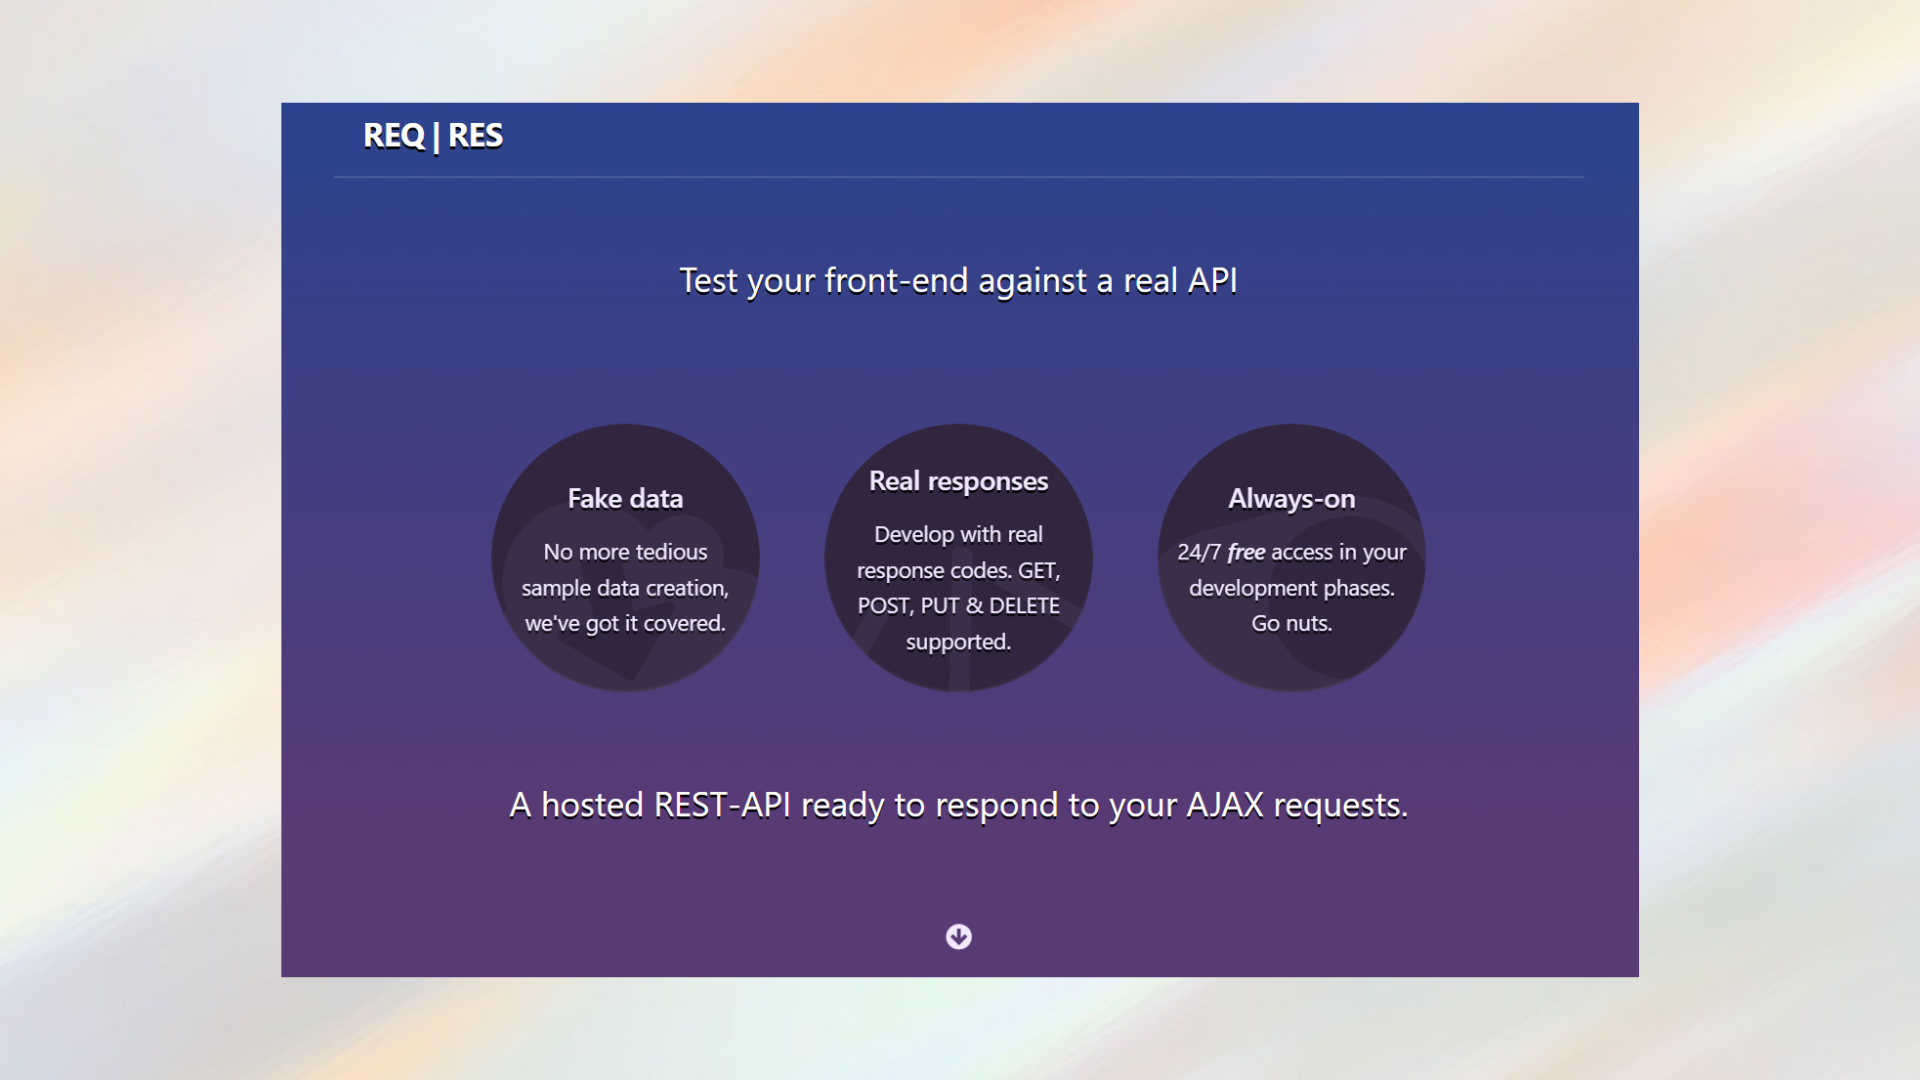
ReqRes API
- We will be using REQ | RES API in our example. This API provides all sorts of methods that we wanted: GET, POST, PUT, DELETE.
- Visit reqres.in for more info.
DioClient
- To send a request to the server, we must first create a Client. A client may be thought of as a middleman who makes requests and then responds to us.
- Here we can set the Base Url, Connection Timeout, Receive Timeout, and other options. As a result, we won't have to send all of these parameters in every request.
- Head over to
lib > data > networkand create a dio_client.dart file in it. Create a Dio instance and assign different parameters inside the constructor as below:
class DioClient { // dio instance final Dio _dio; DioClient(this._dio) { _dio ..options.baseUrl = Endpoints.baseUrl ..options.connectTimeout = Endpoints.connectionTimeout ..options.receiveTimeout = Endpoints.receiveTimeout ..options.responseType = ResponseType.json } }- As you can see we've assigned different properties as discussed above.
- Here you will be getting an error saying, Endpoints is not defined.
- To solve that, head over to
lib > data > network > api > constantand create a file named endpoints.dart - In this, we will define all the endpoints that we want to use in our application
Endpoints
class Endpoints {
  Endpoints._();

  // base url
  static const String baseUrl = "https://reqres.in/api";

  // receiveTimeout
  static const int receiveTimeout = 15000;

  // connectTimeout
  static const int connectionTimeout = 15000;

  static const String users = '/users';
}
Creating (GET, POST, PUT, DELETE) Methods
- Now that we've configured the Dio instance, it's time to create HTTP methods.
- Let's create a GET method first inside the same DioClient class
GET
// Get:-----------------------------------------------------------------------
  Future<Response> get(
    String url, {
    Map<String, dynamic>? queryParameters,
    Options? options,
    CancelToken? cancelToken,
    ProgressCallback? onReceiveProgress,
  }) async {
    try {
      final Response response = await _dio.get(
        url,
        queryParameters: queryParameters,
        options: options,
        cancelToken: cancelToken,
        onReceiveProgress: onReceiveProgress,
      );
      return response;
    } catch (e) {
      rethrow;
    }
  }
- URL:
- There is only one required parameter in Get method, URL. Whenever we want to make a GET request we need to pass that path from which we want a response back.
- Query Parameter:
- You can also define different query parameters if that is the case in your project. For example in some cases, the path could be:
https://abcapi.com/user?name=xyz. Herenameis the query parameter and you can pass this parameter in queryParameter in Map format: { 'name' : 'xyz' }
- You can also define different query parameters if that is the case in your project. For example in some cases, the path could be:
- Options:
- The Options describe the HTTP request information and configuration. We can pass basic configurations like Headers, Method Type, Content-Type, Response Type, etc.
- Cancel Token:
- You can cancel a request by using a cancel token. One token can be shared with different requests. when a token's [cancel] method is invoked, all requests with this token will be canceled.
- onReceiveProgress
- This is a callback which is used to listen the progress for sending/receiving data. It has two parameters.
- count: Indicates the length of the bytes that have been sent/received.
- total: Indicates the length of the response/body.
- You don't need to use these types of callback if you are doing a simple task. I'm just mentioning, so that you should know that it exists.
- Anyway, so these are the parameters that we are using in order to make a get request.
We are also catching the error on SocketException, FormatException. We are going to handle different errors further in this article.
Now let's define the remaining 3 methods:
POST
- While making GET requests we don't pass any data usually. But when making the request like POST, PUT, DELETE we need to pass the body/data.
- In our example, we will send a username and job type when we will make a post request.
- The parameters will remain same for all these 3 methods (POST, PUT, DELETE ) only the type of method will change (i.e _dio.post(), _dio.put(), _dio.delete().
- Consider the below 3 methods for POST, PUT and DELETE
// Post:----------------------------------------------------------------------
Future<Response> post(
  String url, {
  data,
  Map<String, dynamic>? queryParameters,
  Options? options,
  CancelToken? cancelToken,
  ProgressCallback? onSendProgress,
  ProgressCallback? onReceiveProgress,
}) async {
  try {
    final Response response = await _dio.post(
      url,
      data: data,
      queryParameters: queryParameters,
      options: options,
      cancelToken: cancelToken,
      onSendProgress: onSendProgress,
      onReceiveProgress: onReceiveProgress,
    );
    return response;
  } catch (e) {
    rethrow;
  }
}
PUT (UPDATE)
// Put:-----------------------------------------------------------------------
  Future<Response> put(
    String url, {
    data,
    Map<String, dynamic>? queryParameters,
    Options? options,
    CancelToken? cancelToken,
    ProgressCallback? onSendProgress,
    ProgressCallback? onReceiveProgress,
  }) async {
    try {
      final Response response = await _dio.put(
        url,
        data: data,
        queryParameters: queryParameters,
        options: options,
        cancelToken: cancelToken,
        onSendProgress: onSendProgress,
        onReceiveProgress: onReceiveProgress,
      );
      return response;
    } catch (e) {
      rethrow;
    }
  }
DELETE
// Delete:--------------------------------------------------------------------
  Future<dynamic> delete(
    String url, {
    data,
    Map<String, dynamic>? queryParameters,
    Options? options,
    CancelToken? cancelToken,
    ProgressCallback? onSendProgress,
    ProgressCallback? onReceiveProgress,
  }) async {
    try {
      final Response response = await _dio.delete(
        url,
        data: data,
        queryParameters: queryParameters,
        options: options,
        cancelToken: cancelToken,
      );
      return response.data;
    } catch (e) {
      rethrow;
    }
  }
Model Creation
- We need to develop a model for the data we're obtaining from the server in order to parse it in a Dart-readable format.
- In our case, we'll make two models. One is for the list of Users, and the other is for the new user we'll create as part of the POST method example.
UserModel
class UserModel {
  int? id;
  String? email;
  String? firstName;
  String? lastName;
  String? avatar;

  UserModel({this.id, this.email, this.firstName, this.lastName, this.avatar});

  UserModel.fromJson(Map<String, dynamic> json) {
    id = json['id'];
    email = json['email'];
    firstName = json['first_name'];
    lastName = json['last_name'];
    avatar = json['avatar'];
  }

  Map<String, dynamic> toJson() {
    final Map<String, dynamic> data = <String, dynamic>{};
    data['id'] = id;
    data['email'] = email;
    data['first_name'] = firstName;
    data['last_name'] = lastName;
    data['avatar'] = avatar;
    return data;
  }
}
NewUser
class NewUser {
  String? name;
  String? job;
  String? id;
  String? createdAt;
  String? updatedAt;

  NewUser({this.name, this.job, this.id, this.createdAt, this.updatedAt});

  NewUser.fromJson(Map<String, dynamic> json) {
    name = json['name'];
    job = json['job'];
    id = json['id'];
    createdAt = json['createdAt'];
    updatedAt = json['updatedAt'];
  }

  Map<String, dynamic> toJson() {
    final Map<String, dynamic> data = <String, dynamic>{};
    data['name'] = name;
    data['job'] = job;
    data['id'] = id;
    data['createdAt'] = createdAt;
    data['updatedAt'] = updatedAt;
    return data;
  }
}
- I've used Dart Model Generator for creating the above models.
API Request Class
- Now that we are all set to make an API request. Let's head over to
lib > data > network > apiand create a user folder and inside it create auser_api.dartfile. - In this, We are going to define different API request methods which will directly call the client's method and will return the RAW data. Notice I said the methods defined in this class will return the RAW data, not the model that we created earlier.
Consider the below code:
class UserApi { final DioClient dioClient; UserApi({required this.dioClient}); Future<Response> addUserApi(String name, String job) async { try { final Response response = await dioClient.post( Endpoints.users, data: { 'name': name, 'job': job, }, ); return response; } catch (e) { rethrow; } } Future<Response> getUsersApi() async { try { final Response response = await dioClient.get(Endpoints.users); return response; } catch (e) { rethrow; } } Future<Response> updateUserApi(int id, String name, String job) async { try { final Response response = await dioClient.put( Endpoints.users + '/$id', data: { 'name': name, 'job': job, }, ); return response; } catch (e) { rethrow; } } Future<void> deleteUserApi(int id) async { try { await dioClient.delete(Endpoints.users + '/$id'); } catch (e) { rethrow; } } }- As you can see, the code is pretty straightforward. We are simply calling different methods of the DioClient by passing the required path/endpoint.
- As we have already defined the base URL in the DioClient, we only need to pass the rest of the Endpoint and not the full URL.
- For the POST method the required data is passed in Map format.
- For the PUT method we need an Id, which is used to update only the user that contains that Id.
- For DELETE we only need the Id of the user that we want to delete.
Repository
- Remember I said, the UserApi class only returns the RAW data. Yes, that RAW data is converted to the UserModel/NewUser model inside the repository class.
- The reason for separating this logic is for better code readability and testing purpose.
- Another major reason for separation is in this class you can manipulate the data that you are passing to the server and also, you can manipulate the data the server is giving to you. You can perform validations, handle errors, etc in this class.
- Consider the below code:
class UserRepository {
  final UserApi userApi;

  UserRepository(this.userApi);

  Future<List<UserModel>> getUsersRequested() async {
    try {
      final response = await userApi.getUsersApi();
      final users = (response.data['data'] as List)
          .map((e) => UserModel.fromJson(e))
          .toList();
      return users;
    } on DioError catch (e) {
      final errorMessage = DioExceptions.fromDioError(e).toString();
      throw errorMessage;
    }
  }

  Future<NewUser> addNewUserRequested(String name, String job) async {
    try {
      final response = await userApi.addUserApi(name, job);
      return NewUser.fromJson(response.data);
    } on DioError catch (e) {
      final errorMessage = DioExceptions.fromDioError(e).toString();
      throw errorMessage;
    }
  }

  Future<NewUser> updateUserRequested(int id, String name, String job) async {
    try {
      final response = await userApi.updateUserApi(id, name, job);
      return NewUser.fromJson(response.data);
    } on DioError catch (e) {
      final errorMessage = DioExceptions.fromDioError(e).toString();
      throw errorMessage;
    }
  }

  Future<void> deleteNewUserRequested(int id) async {
    try {
      await userApi.deleteUserApi(id);
    } on DioError catch (e) {
      final errorMessage = DioExceptions.fromDioError(e).toString();
      throw errorMessage;
    }
  }
}
Error Handling
- If you see the above repository class I've used DioException class for catching the DioError. What is it?
- Basically, I've created a separate class that returns the human-understandable error message. It could be the connection timeout message, cancel request error, or the error that has been sent by the server too.
- This class is very handy when you are handling errors.
- Head over to
lib > data > networkand create dio_exception.dart class. Paste the below code inside this class
class DioExceptions implements Exception { late String message; DioExceptions.fromDioError(DioError dioError) { switch (dioError.type) { case DioErrorType.cancel: message = "Request to API server was cancelled"; break; case DioErrorType.connectTimeout: message = "Connection timeout with API server"; break; case DioErrorType.receiveTimeout: message = "Receive timeout in connection with API server"; break; case DioErrorType.response: message = _handleError( dioError.response?.statusCode, dioError.response?.data, ); break; case DioErrorType.sendTimeout: message = "Send timeout in connection with API server"; break; case DioErrorType.other: if (dioError.message.contains("SocketException")) { message = 'No Internet'; break; } message = "Unexpected error occurred"; break; default: message = "Something went wrong"; break; } } String _handleError(int? statusCode, dynamic error) { switch (statusCode) { case 400: return 'Bad request'; case 401: return 'Unauthorized'; case 403: return 'Forbidden'; case 404: return error['message']; case 500: return 'Internal server error'; case 502: return 'Bad gateway'; default: return 'Oops something went wrong'; } } @override String toString() => message; }- Now you just need to pass DioError inside the fromDioError method and it will return a relavent message
final errorMessage = DioExceptions.fromDioError(e).toString();
Injecting Dependency
- In order to inject the singleton classes we are using the GetIt package.
- For more info on Dependency Injection visit the following article.
- Paste the below code inside
lib > di > service_locator.dartfile
final getIt = GetIt.instance;

Future<void> setup() async {
  getIt.registerSingleton(Dio());
  getIt.registerSingleton(DioClient(getIt<Dio>()));
  getIt.registerSingleton(UserApi(dioClient: getIt<DioClient>()));
  getIt.registerSingleton(UserRepository(getIt.get<UserApi>()));
}
Building UI

- As you can see, the HomePage contains list of users. We will use FutureBuilder in order to display users, When the server successfully returns a data otherwise we will show an error.
Create a home_page.dart file inside
lib > ui > homeand paste the below code.class HomePage extends StatelessWidget { HomePage({Key? key}) : super(key: key); final homeController = getIt<HomeController>(); @override Widget build(BuildContext context) { return Scaffold( appBar: const BaseAppBar(), floatingActionButton: AddUserBtn(), body: FutureBuilder<List<UserModel>>( future: homeController.getUsers(), builder: (context, snapshot) { if (snapshot.connectionState == ConnectionState.waiting) { return const Center(child: CircularProgressIndicator()); } else if (snapshot.hasError) { final error = snapshot.error; return Center( child: Text( "Error: " + error.toString(), ), ); } else if (snapshot.hasData) { if (snapshot.data!.isEmpty) { return const Center( child: Text('No data'), ); } return ListView.builder( itemCount: snapshot.data?.length, itemBuilder: (context, index) { final user = snapshot.data![index]; return ListTile( leading: user.avatar != null ? ClipRRect( borderRadius: BorderRadius.circular(50), child: Image.network( user.avatar!, width: 50, height: 50, ), ) : null, title: Text(user.email ?? ''), subtitle: Text(user.firstName ?? ''), ); }, ); } return Container(); }, ), ); } }- As you can see we've created a controller for the home page. We will request data from the UI by triggering methods defined in the controller. And then controller will take rest of the responsibilities.
- Create a
controller.dartfile inside the same directory and paste the below code.
class HomeController {
  // --------------- Repository -------------
  final userRepository = getIt.get<UserRepository>();

  // -------------- Textfield Controller ---------------
  final nameController = TextEditingController();
  final jobController = TextEditingController();

  // -------------- Local Variables ---------------
  final List<NewUser> newUsers = [];

  // -------------- Methods ---------------

  Future<List<UserModel>> getUsers() async {
    final users = await userRepository.getUsersRequested();
    return users;
  }

  Future<NewUser> addNewUser() async {
    final newlyAddedUser = await userRepository.addNewUserRequested(
      nameController.text,
      jobController.text,
    );
    newUsers.add(newlyAddedUser);
    return newlyAddedUser;
  }

  Future<NewUser> updateUser(int id, String name, String job) async {
    final updatedUser = await userRepository.updateUserRequested(
      id,
      name,
      job,
    );
    newUsers[id] = updatedUser;
    return updatedUser;
  }

  Future<void> deleteNewUser(int id) async {
    await userRepository.deleteNewUserRequested(id);
    newUsers.removeAt(id);
  }
}
- The reason for creating the controller is to separate the business logic from the UI.
- You can define your input controllers, repositories, validations, etc.
Application Flow
- When you first launch the app, the FutureBuilder calls the controller's 'getUser()' function and attempts to retrieve the data. We display the data inside the ListTile after it has been successfully fetched.
- If an error occurs, the error will be shown by the FutureBuilder. We also show the progress indicator while the data is being fetched.
- If you wish to add a new user, simply click the FloatingAction button, which will open a bottom sheet where you can enter the new user's name and job description. After clicking the Add button, you'll be sent to the New Users page, which lists all of the newly added users.
- To update the details of a newly added user, simply click on any of the user ListTiles, and a bottom sheet will appear, from which you can alter the person's name and job. You may remove a user from the newly added users list by holding down the ListTile.
Final Output
Final Repo
Wrapping Up
- I hope you enjoyed and learned something from this article. If you have any feedback/queries, leave them in the comments.
- Thank you for spending time reading this article. See you in the next article. Until then...