Internationalize Your Flutter App, It's Easy!
Why is it important? How to localize your app? How to update and persist the locale of your app?
Why Internationalization?
- Localization is important because people do not always speak the language you expect them to. This means you must have an app with no strings attached and the ability to instantly use multiple languages.
- If your application supports some other language than English, you can make your users happy - and also support them by providing translated and localized applications. Certainly, it's not necessary for every application, but expect that eventually, you'll need it if you're going to target a diverse audience.
- In this article, I'll explain how to internationalize the flutter applications.

Adding Required Package
- Flutter, By default, provides English language.
- Flutter provides us a package
flutter_localizationswhich has the support of 78 languages (when I'm writing this). - To add
flutter_localizationspackage - - Open
pubspec.yamlfile. - And add it inside the
dependenciessection with proper indentation. dependencies: flutter: sdk: flutter flutter_localizations: sdk: flutter- Run
flutter pub getin terminal or simply Save it.
Adding Supported Languages
- Now, after adding the
flutter_localizationspackage, Go to themain.dartfile and under the MaterialApp widget you will findsupportedLocalesproperties. - This property has a list of locales that the app has been localized for.
- By default, only the American English locale is supported.
- Let's add some more locales:
English,Spanish,Hindi,Chinese MaterialApp( supportedLocales: [ Locale('en', 'US'), Locale('es', 'AR'), Locale('hi', 'IN'), Locale('zh', 'CN'), ], )
Verifying Device Locale with App's Supported Locale
- Okay, So now that we've added all the supported locales, we now have to check If the user's device locale is supported by our app or not.
- To do that MaterialApp has a property called
localeResolutionCallback. - What this will do is loop through all the
supportedLocalesand check if our app supports the user's device locale or not. If not then, simply return the defaultEnglishlocale. MaterialApp( localeResolutionCallback: (deviceLocale, supportedLocales) { for (var locale in supportedLocales) { if (locale.languageCode == deviceLocale!.languageCode && locale.countryCode == deviceLocale.countryCode) { return deviceLocale; } } return supportedLocales.first; }, )
Adding Default Delegates
MaterialApp/CupertinoAppgives many inbuilt widgets like, DatePicker, TimePicker, Calender etc.- Now what if we want to translate those widgets and other material/cupertino's inbuilt widgets
- To translate, Flutter provides us default delegates :
GlobalMaterialLocalizations.delegatefor Material widgets,GlobalCupertinoLocalizations.delegatefor Cupertino widgets- And
GlobalWidgetsLocalizations.delegatewhich handles the direction of the text (i.e Right-To-Left or Left-to-Right). For ex: Arabic language. MaterialApp( localizationsDelegates: [ GlobalMaterialLocalizations.delegate, GlobalWidgetsLocalizations.delegate, GlobalCupertinoLocalizations.delegate, ], )
Creating a Custom Delegate for Localizing our own messages
- We can create our own delegate similar to
GlobalMaterialLocalizations.delegateandGlobalCupertinoLocalizations.delegate. - It will help to translate our app's messages into many languages.
- To create our own delegate, first of all, create a file in
libfolder calledapp_localization.dart. We will write all the logic inside this file. Step 1 : Import necessary packages
import 'dart:convert';
import 'package:flutter/material.dart';
import 'package:flutter/services.dart';
Step 2 : Create
classnamedAppLocalizationclass AppLocalization { // .... }
Step 3 : Create a
finalvariableLocaleclass AppLocalization { late final Locale _locale; AppLocalization(this._locale); }
4 : Create Helper method
of()class AppLocalization { late final Locale _locale; AppLocalization(this._locale); static AppLocalization of(BuildContext context) { return Localizations.of<AppLocalization>(context, AppLocalization)!; } }- You can simply call
Localizations.of<AppLocalization>(context, AppLocalization)!too, to access the methods, but we can remove this long line of translating text by creating the aboveof()method. So whenever we want to translate our text we can simply write - Text(AppLocalization.of(context).getTranslatedValue("your text"))
Step 5 : Loading the Languages files
- We need to create one map which contains all the localized values of particular languages.
class AppLocalization { late final Locale _locale; AppLocalization(this._locale); static AppLocalization of(BuildContext context) { return Localizations.of<AppLocalization>(context, AppLocalization)!; } static const _localizedValues = <String, Map<String, String>>{ 'en': { 'title': 'Hello World', }, 'es': { 'title': 'Hola Mundo', }, // same for other languages }; }- But creating and adding all the values inside this file will create a mess.
- So, we need to create
.jsonfiles for all the languages. (ex:en.json,es.jsonetc). - These JSON files will contain all the values in their own languages.
- I am creating 4 different json files for
English,Hindi,Spanish, andChineselanguages inside the<root>/assets/langfolder en.json{ "home_appBar_title": "Flutter Internationalization", "simple_text":"Lorem Ipsum is simply dummy text of the printing and typesetting industry. Lorem Ipsum has been the industry's standard dummy text ever since the 1500s, when an unknown printer took a galley of type and scrambled it to make a type specimen book. It has survived not only five centuries, but also the leap into electronic typesetting, remaining essentially unchanged. It was popularised in the 1960s with the release of Letraset sheets containing Lorem Ipsum passages, and more recently with desktop publishing software like Aldus PageMaker including versions of Lorem Ipsum." }es.json{ "home_appBar_title": "Internacionalización de Flutter", "simple_text":"Lorem Ipsum es simplemente texto de relleno de la industria de la impresión y la composición tipográfica. Lorem Ipsum ha sido el texto de relleno estándar de la industria desde el año 1500, cuando un impresor desconocido tomó una galera de tipos y la mezcló para hacer un libro de muestras tipográficas. Ha sobrevivido no solo a cinco siglos, sino también al salto a la composición tipográfica electrónica, permaneciendo esencialmente sin cambios. Se popularizó en la década de 1960 con el lanzamiento de hojas de Letraset que contenían pasajes de Lorem Ipsum y, más recientemente, con software de autoedición como Aldus PageMaker que incluía versiones de Lorem Ipsum." }hi.json{ "home_appBar_title": "फ्लटर अंतर्राष्ट्रीयकरण", "simple_text":"Lorem Ipsum छपाई और अक्षर योजन उद्योग का एक साधारण डमी पाठ है. Lorem Ipsum सन १५०० के बाद से अभी तक इस उद्योग का मानक डमी पाठ मन गया, जब एक अज्ञात मुद्रक ने नमूना लेकर एक नमूना किताब बनाई. यह न केवल पाँच सदियों से जीवित रहा बल्कि इसने इलेक्ट्रॉनिक मीडिया में छलांग लगाने के बाद भी मूलतः अपरिवर्तित रहा. यह 1960 के दशक में Letraset Lorem Ipsum अंश युक्त पत्र के रिलीज के साथ लोकप्रिय हुआ, और हाल ही में Aldus PageMaker Lorem Ipsum के संस्करणों सहित तरह डेस्कटॉप प्रकाशन सॉफ्टवेयर के साथ अधिक प्रचलित हुआ." }zh.json{ "home_appBar_title": "Flutter 国际化", "simple_text":"Lorem Ipsum 只是印刷和排版行业的虚拟文本。 自 1500 年代以来,Lorem Ipsum 一直是行业标准的虚拟文本,当时一位不知名的印刷商使用了一个类型的厨房并争先恐后地制作了一本类型样本书。 它不仅存活了五个世纪,而且还经历了电子排版的飞跃,基本保持不变。 它在 1960 年代随着包含 Lorem Ipsum 段落的 Letraset 表的发布而流行,最近随着桌面出版软件 Aldus PageMaker 的发布,包括 Lorem Ipsum 的版本。" }- After creating all the
jsonfiles go topubspec.yamlload all these JSON file insideassets assets: - assets/lang/en.json - assets/lang/es.json - assets/lang/hi.json - assets/lang/zh.json- Now that we've added all languages in
pubspec.yaml. It's time to create a Map that will give us language-specific values requested by user. class AppLocalization { late final Locale _locale; AppLocalization(this._locale); static AppLocalization of(BuildContext context) { return Localizations.of<AppLocalization>(context, AppLocalization)!; } late Map<String, String> _localizedValues; // This function will load requested language `.json` file and will assign it to the `_localizedValues` map Future loadLanguage() async { String jsonStringValues = await rootBundle.loadString( "assets/lang/${_locale.languageCode}.json"); Map<String, dynamic> mappedValues = json.decode(jsonStringValues); _localizedValues = mappedValues.map((key, value) => MapEntry(key, value.toString())); // converting `dynamic` value to `String`, because `_localizedValues` is of type Map<String,String> } }
Step 6 : Create getTranslatedValue() function
- This function will be called from every widget which needs a localized text.
class AppLocalization { late final Locale _locale; AppLocalization(this._locale); static AppLocalization of(BuildContext context) { return Localizations.of<AppLocalization>(context, AppLocalization)!; } late Map<String, String> _localizedValues; // This function will load requested language `.json` file and will assign it to the `_localizedValues` map Future loadLanguage() async { String jsonStringValues = await rootBundle.loadString( "assets/lang/${_locale.languageCode}.json"); Map<String, dynamic> mappedValues = json.decode(jsonStringValues); _localizedValues = mappedValues.map((key, value) => MapEntry(key, value.toString())); // converting `dynamic` value to `String`, because `_localizedValues` is of type Map<String,String> } String? getTranslatedValue(String key) { return _localizedValues[key]; } }- It takes a
keywhich we will be passed from the widget - For example : Text( AppLocalization.of(context) .getTranslatedValue("home_appBar_title") ),- After receiving the
keyfrom the widget, it will return thevalueassigned to that particularkey.
Step 7 : Creating delegate for AppLocalization
- Now we need to create a
delegatewhich helps flutter to load the language and localize it when the user changes the language. - To do that create a
privateclass calledAppLocalizationDelegatewhich willextendstheLocalizationDelegateclass. class _AppLocalizationDelegate extends LocalizationsDelegate<AppLocalization> {}LocalizationsDelegateclass has3abstract methods which we need to overrideclass _AppLocalizationDelegate extends LocalizationsDelegate<AppLocalization> { const _AppLocalizationDelegate(); // It will check if the user's locale is supported by our App or not @override bool isSupported(Locale locale) { return ["en", "hi", "es", "zh"].contains(locale.languageCode); } // It will load the equivalent json file requested by the user @override Future<AppLocalization> load(Locale locale) async { AppLocalization appLocalization = AppLocalization(locale); await appLocalization.loadLanguage(); return appLocalization; } @override bool shouldReload(_AppLocalizationDelegate old) => false; }
Adding our custom delegate in MaterialApp
MaterialApp( localizationsDelegates: [ GlobalMaterialLocalizations.delegate, GlobalWidgetsLocalizations.delegate, GlobalCupertinoLocalizations.delegate, AppLocalization.delegate // here ], )- THAT'S! We've implemented all the functionalities that are required for doing localization.
- Now it's time to create the UI and implement the language switching functionalities in the app. I'm not explaining the UI part as it's very simple to understand. So I'm just giving the widget's code which I've used in
main.dart.
Creating UI
Text Widget
class SimpleText extends StatelessWidget { const SimpleText({Key? key}) : super(key: key); @override Widget build(BuildContext context) { return Padding( padding: const EdgeInsets.all(8.0), child: Text( AppLocalization.of(context) .getTranslatedValue("simple_text") .toString(), textAlign: TextAlign.center, ), ); } }- Date and Time picker Widgets
class FlutterPicker extends StatelessWidget { const FlutterPicker({Key? key}) : super(key: key); @override Widget build(BuildContext context) { return Row( mainAxisAlignment: MainAxisAlignment.center, children: [ ElevatedButton( onPressed: () { showDatePicker( context: context, initialDate: DateTime(2021, 1, 1), firstDate: DateTime(2021, 1, 1), lastDate: DateTime(2021, 1, 31), ); }, child: Text( "Pick Date", ), ), SizedBox( width: 10, ), ElevatedButton( onPressed: () { showTimePicker( context: context, initialTime: TimeOfDay.now(), ); }, child: Text( "Pick Time", ), ), ], ); } }- Language model class
class Language { final int id; final String name; final String flag; final String languageCode; Language(this.id, this.name, this.flag, this.languageCode); static List<Language> languageList() { return <Language>[ Language(1, "English", "🇺🇸", "en"), Language(1, "हिंदी", "🇮🇳", "hi"), Language(1, "española", "🇲🇽", "es"), Language(1, "中国人", "🇨🇳", "zh"), ]; } }- HomePage
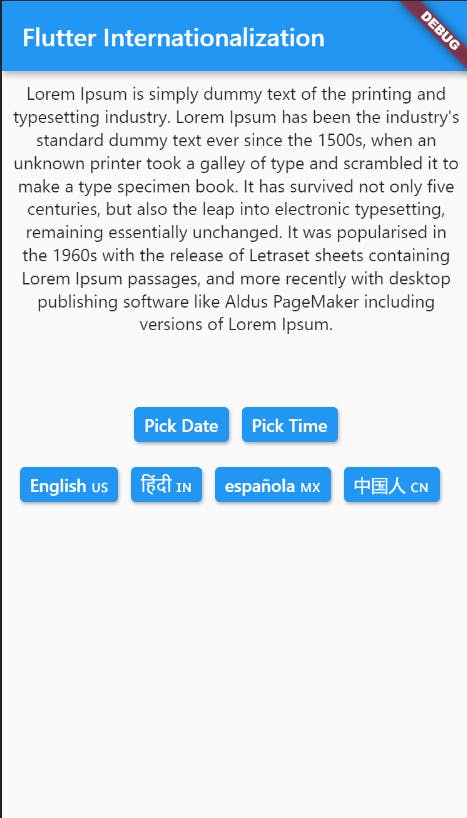
class HomePage extends StatelessWidget { @override Widget build(BuildContext context) { return Scaffold( appBar: AppBar( title: Text( AppLocalization.of(context) .getTranslatedValue("home_appBar_title") .toString(), ), ), body: SizedBox.expand( child: Column( children: [ Column( mainAxisAlignment: MainAxisAlignment.center, crossAxisAlignment: CrossAxisAlignment.center, children: [ SimpleText(), SizedBox( height: 50, ), FlutterPicker() ], ), SizedBox(height: 20), Wrap( children: Language.languageList() .map( (e) => Padding( padding: EdgeInsets.only(right: 10), child: ElevatedButton( onPressed: () { // change app locale }, child: Text("${e.name} ${e.flag}"), ), ), ) .toList()), ], ), ), ); } } - UI will look something like this -

- Now to change app locale when the user presses a button, Let's create a method called
_changeLanguage(). void _changeLanguage(Language language, context) { Locale _selectedLocale; switch (language.languageCode) { case ENGLISH: // here ENGLISH is a constant that I've created in another file called `constant.dart` file and same for other languages _selectedLocale = Locale(language.languageCode, 'US'); break; case HINDI: _selectedLocale = Locale(language.languageCode, 'IN'); break; case SPANISH: _selectedLocale = Locale(language.languageCode, 'AR'); break; case CHINESE: _selectedLocale = Locale(language.languageCode, 'CN'); break; default: _selectedLocale = Locale(language.languageCode, 'US'); } }- Call this on Language Button press
Wrap( children: Language.languageList() .map( (e) => Padding( padding: EdgeInsets.only(right: 10), child: ElevatedButton( onPressed: () { _changeLanguage(e, context); }, child: Text("${e.name} ${e.flag}"), ), ), ) .toList(), ), - But still, this will not do anything. If we need to change locale locally through the app we need some kind of
notiferthat tells Flutter to change its locale instantly whenever the user changes its language. - For that, we can use
ChangeNotifierProvierprovided byProviderpackage. - Let's create a file called
locale_notifier.dart class LocaleNotifier extends ChangeNotifier { Locale _locale = Locale("en"); Locale get locale => _locale; void setLocale(Locale locale) async { _locale = locale; notifyListeners(); } }- Now add the below code inside
_changeLocale()function void _changeLanguage(Language language, context) { // .... final appLocaleProvider = Provider.of<LocaleNotifier>(context, listen: false); appLocaleProvider.setLocale(_selectedLocale); // It will set new locale }- Wrap MaterialApp inside
ChangeNotifierProvider. And then provide theLocaleNotifierto itscreateproperty. - This
ChangeNotifierProviderwill notify the app when locale changes and will update accordingly. ChangeNotifierProvider( create: (context) => LocaleNotifier(), builder: (context, child) { final appLocaleProvider = Provider.of<LocaleNotifier>(context); return MaterialApp( locale: appLocaleProvider.locale, // MAKE SURE YOU ADD THIS localizationsDelegates: [ GlobalMaterialLocalizations.delegate, GlobalWidgetsLocalizations.delegate, GlobalCupertinoLocalizations.delegate, AppLocalization.delegate ], supportedLocales: [ Locale('en', 'US'), Locale('es', 'AR'), Locale('hi', 'IN'), Locale('zh', 'CN'), ], localeResolutionCallback: (deviceLocale, supportedLocales) { for (var locale in supportedLocales) { if (locale.languageCode == deviceLocale!.languageCode && locale.countryCode == deviceLocale.countryCode) { return deviceLocale; } } return supportedLocales.first; }, home: HomePage(), ); });
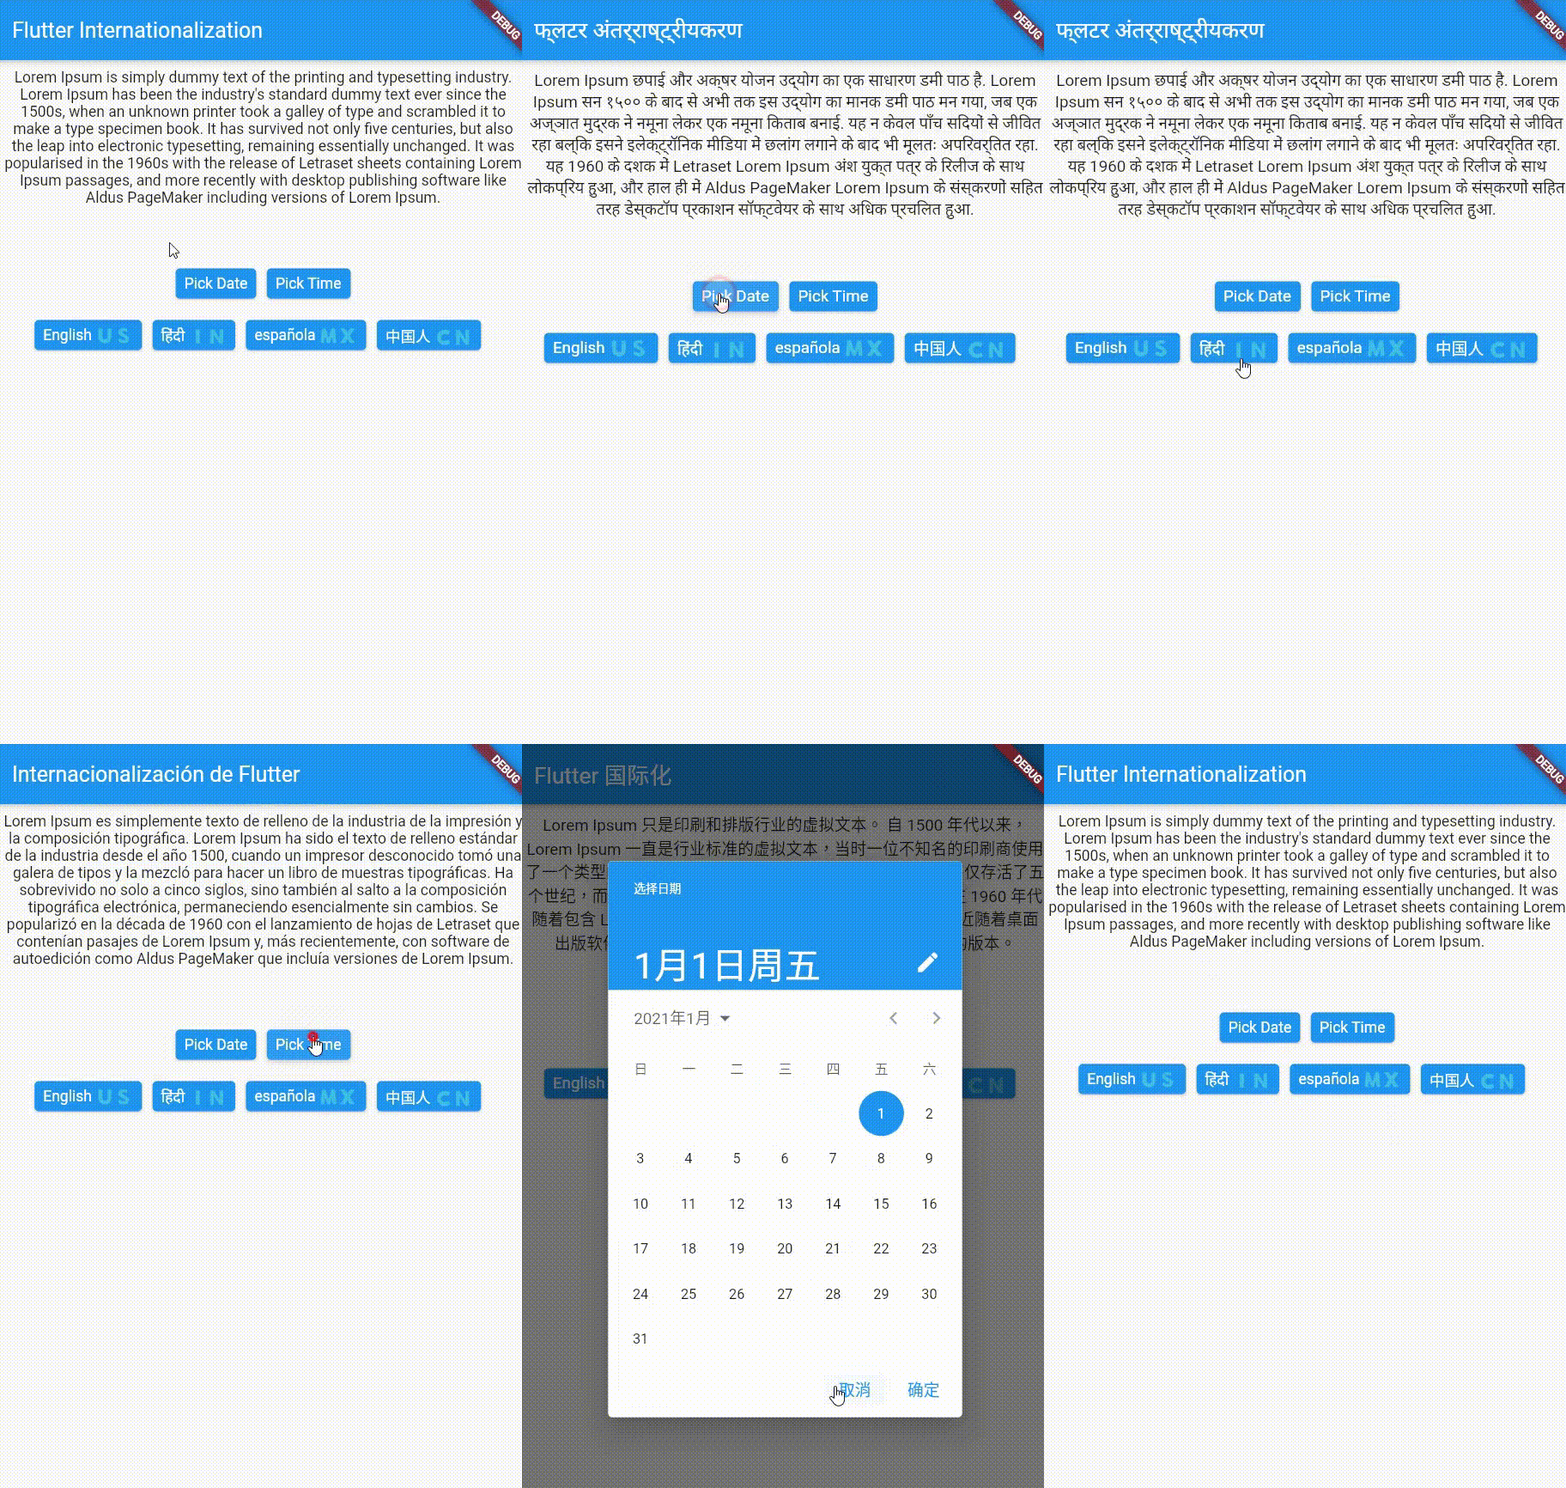
- AND THAT'S IT YOU MADE IT

Persisting Locale
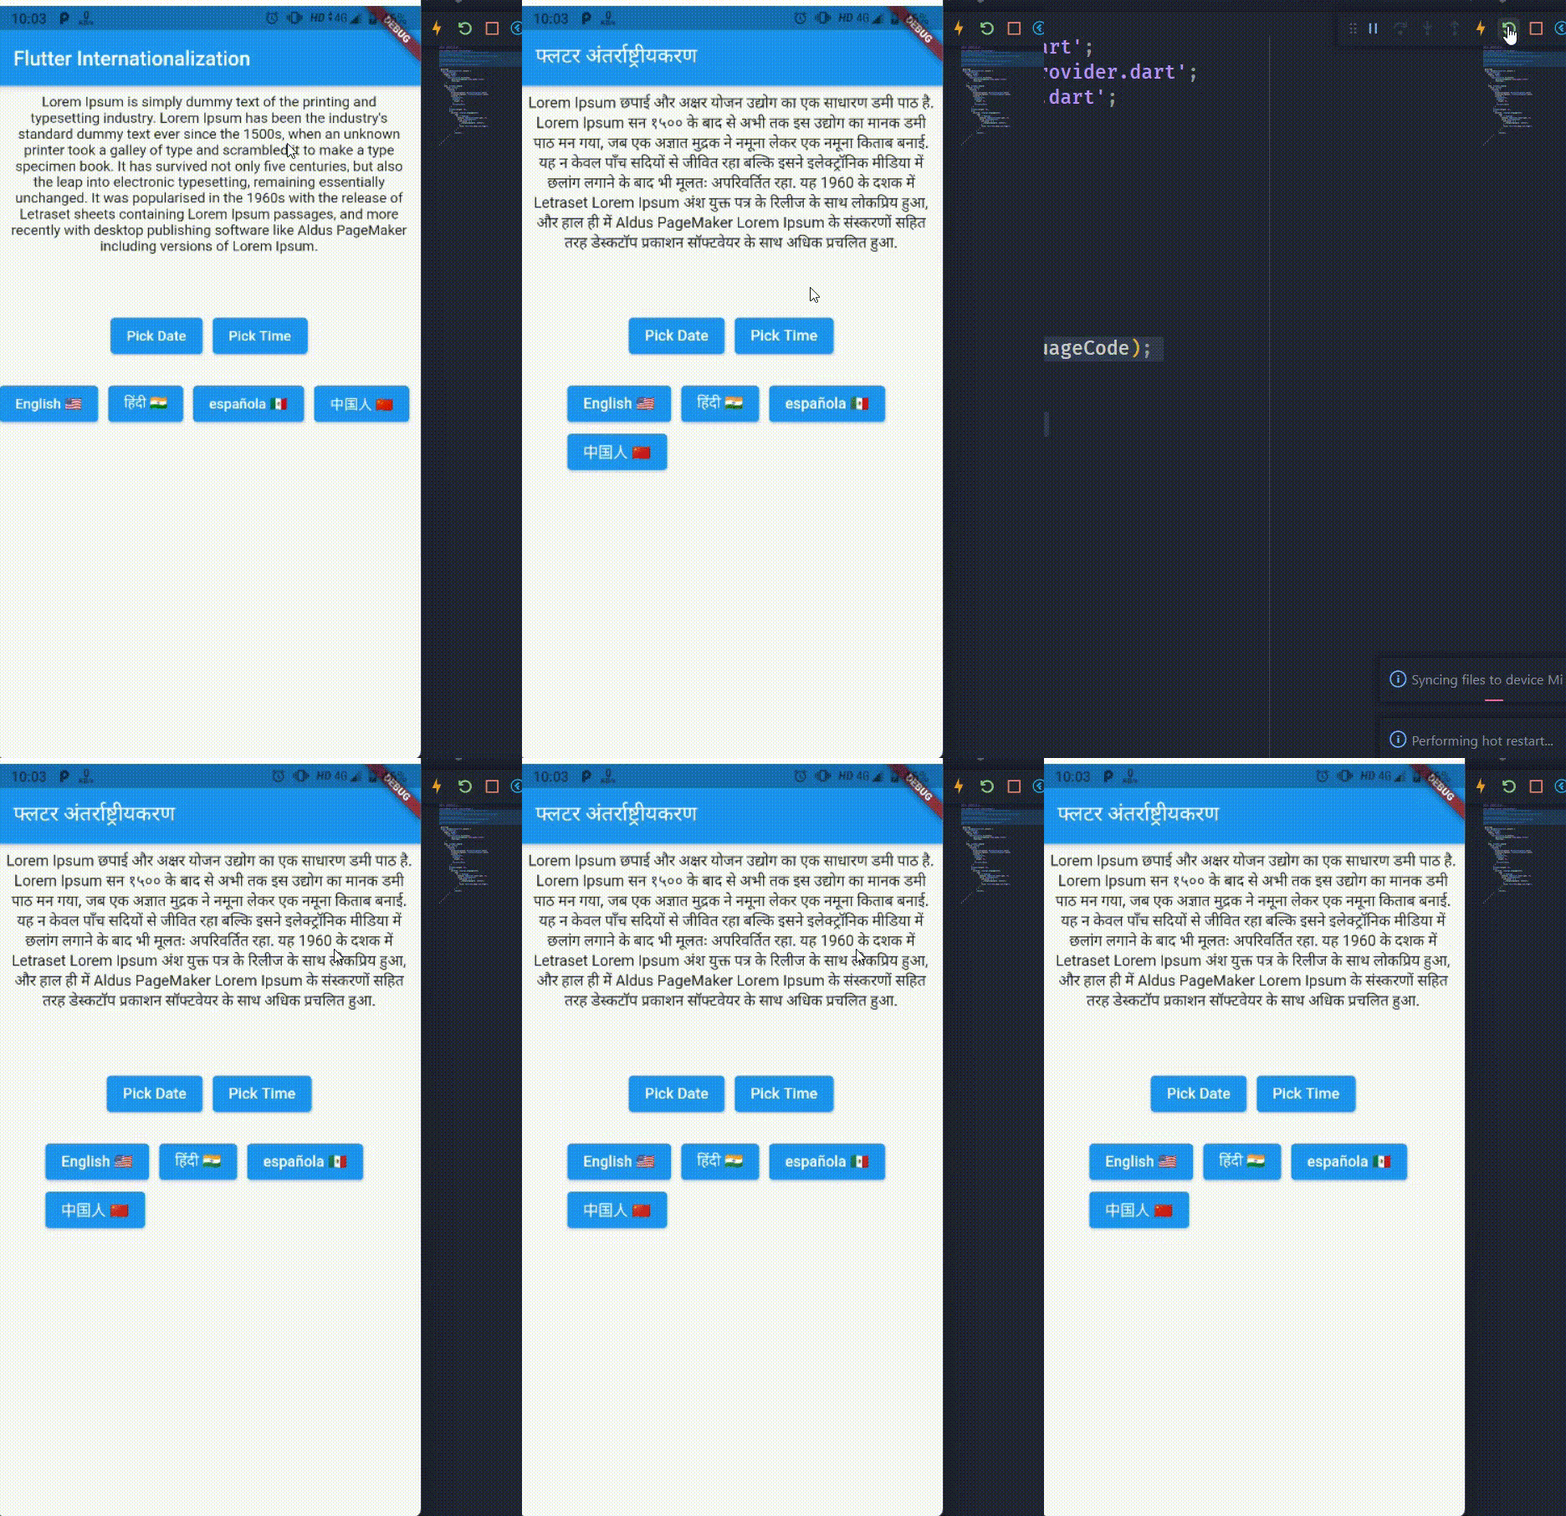
- The problem in the above example is, The Locale is not persistent .
- It means when you restart the app it will show you the default locale, not the one that you've selected.
- So to overcome this, we can use
SharedPreferences. - Create a file called
shared_preferences.dart - Add below code
- Import required packages
import 'dart:ui';
import 'package:blog/Internationalization/constants.dart';
import 'package:shared_preferences/shared_preferences.dart';
class AppSharedPreferences { static const String APP_LOCALE = "app_localization"; // Setting locale value in localstorage Future<Locale> setLocale(String languageCode) async { SharedPreferences _prefs = await SharedPreferences.getInstance(); await _prefs.setString(APP_LOCALE, languageCode); return _locale(languageCode); } // Getting locale value from localstorage Future<Locale> getLocale() async { SharedPreferences _prefs = await SharedPreferences.getInstance(); String languageCode = _prefs.getString(APP_LOCALE) ?? ENGLISH; return _locale(languageCode); } }Locale _locale(String languageCode) { Locale _tempLocale; switch (languageCode) { case ENGLISH: _tempLocale = Locale(languageCode, "US"); break; case HINDI: _tempLocale = Locale(languageCode, "IN"); break; case SPANISH: _tempLocale = Locale(languageCode, "AR"); break; case CHINESE: _tempLocale = Locale(languageCode, "CN"); break; default: _tempLocale = Locale(languageCode, "US"); } return _tempLocale; } - Update the
_changeLocale()method that we've created before. void _changeLanguage(Language language, context) async { Locale _selectedLocale = await AppSharedPreferences().setLocale(language.languageCode); final appLocaleProvider = Provider.of<LocaleNotifier>(context, listen: false); appLocaleProvider.setLocale(_selectedLocale); }- And also update the
setLocale()method inlocale_notifier.dart void setLocale(Locale locale) async { _locale = locale; await AppSharedPreferences().setLocale(locale.languageCode); //here notifyListeners(); }
Final Code:
Wrapping Up
- Thank you for reading. Hope you liked it.
- Feedback and Comments are welcomed 🤠
- See you in the next article
- Until then....


