
Flutter Riverpod: Effortlessly Managing API Calls in Your App
How to fetch the data from the API by using Riverpod State Management?

Introduction
Welcome to my blog! In this blog, we will be exploring how to make an API call using Riverpod.
If you have been following my Riverpod series, you know that we have covered a wide range of concepts related to this state management.
We have discussed what Riverpod is and how it works, so if you haven't had a chance to read those posts, make sure to check them out first.
In this blog, we will be putting all the things that we learned from the last two articles into the play and we will be creating two examples. So, Let's get started!
The Example
There are 2 API that we will use to create our example. In the first example, we will be using a Joke API to demonstrate how to make an API call using Riverpod.
The Joke API is a REST API that provides jokes in a consistent and well-formatted manner. Every time the API is called, it returns a random joke.
To start, we will design a simple user interface that consists of a Text widget to display the joke and a floating button that is used to retrieve a new joke from the API.
In the second example, we will be using Fake Store API. This API provides product lists. We will display those products and will add favorite/unfavourite functionality.
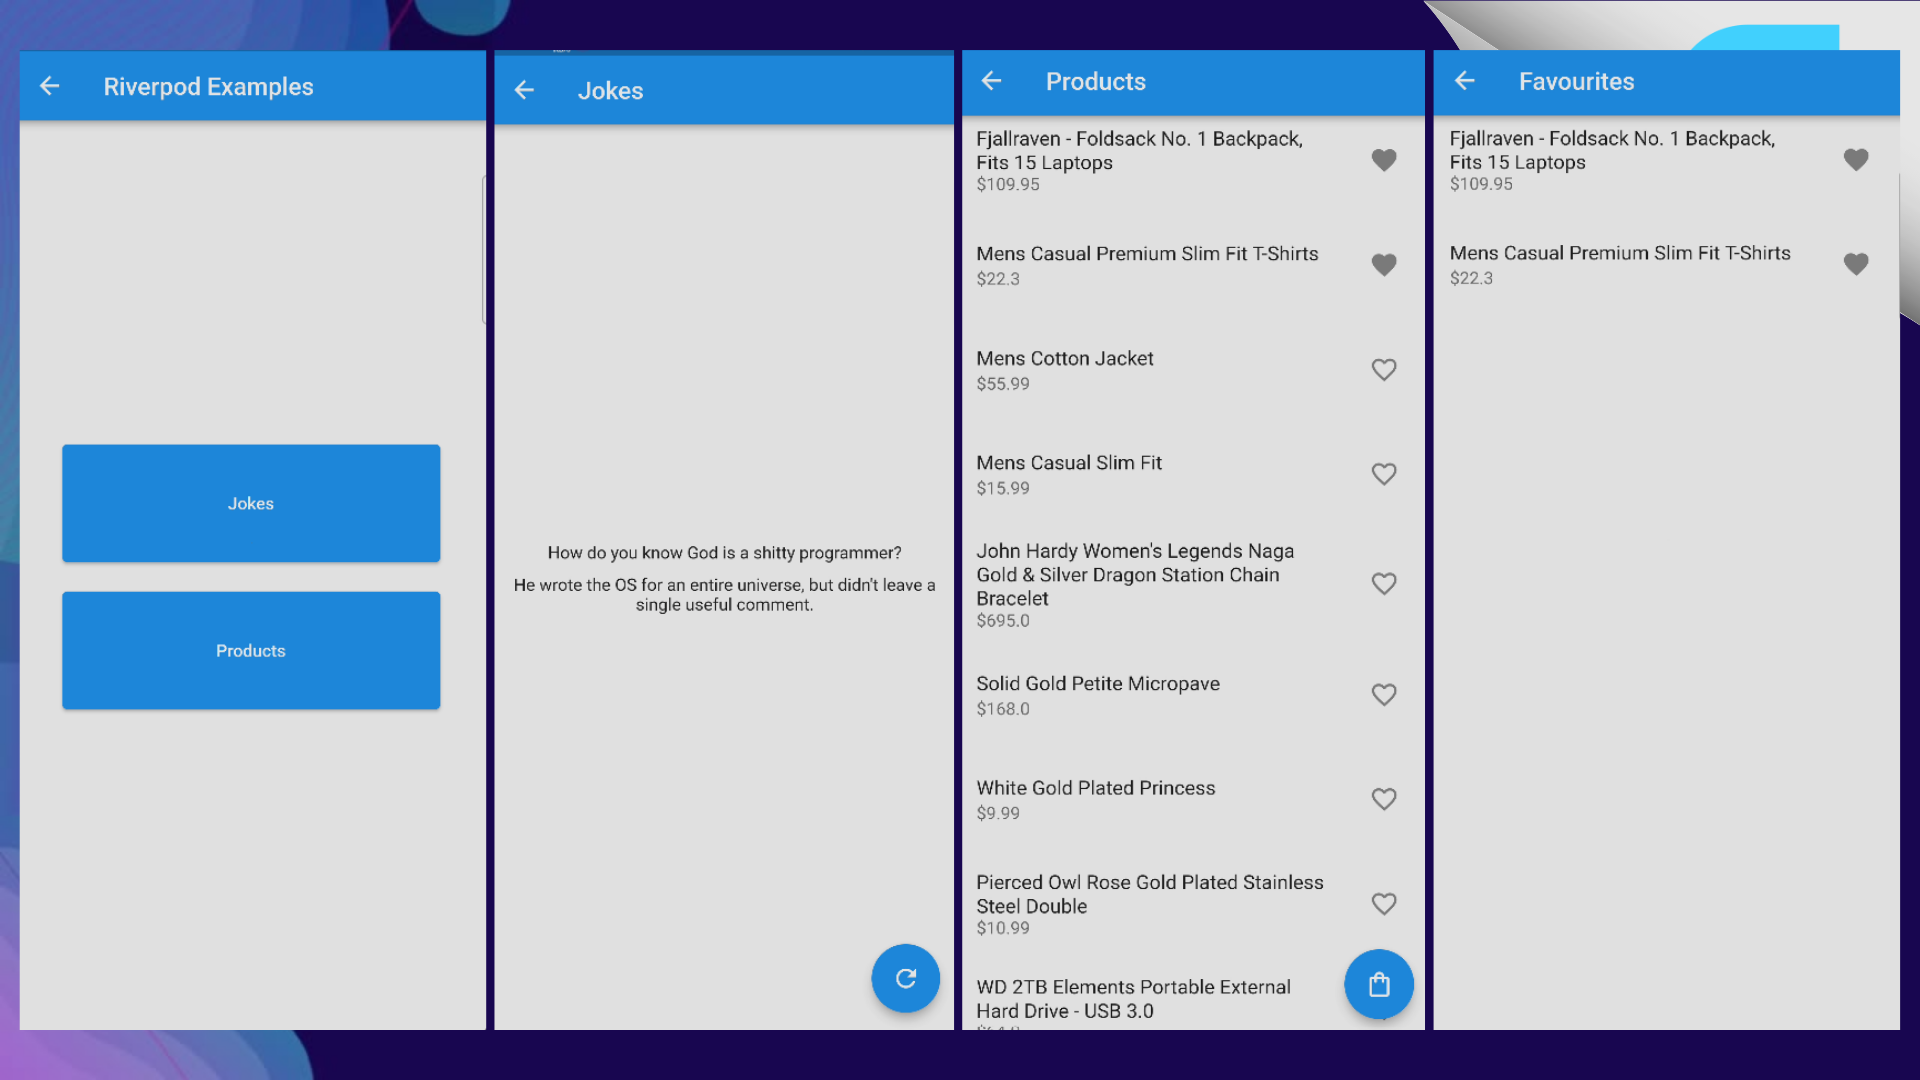
Here is the app that we will create at the end of the article.
Folder Structure
- I already have the base project created in my Github. If you want, you can start along with me using this project, as it has all the dependencies already installed and set up.
Here is the project structure which we are going to follow during this example.

core: Contains core application files such as constants, DIO client, shared preferences, etc.
features: Contains a specific feature of an application. In our example, we will be having 4 main features: home, joke, products, and favorites.
routes: Contains application routing files.
main.dart: Entry point of the application.
First Example (Joke API)
Building UI:
- Let's make a dummy design for all 4 pages: Home, Jokes, Products, and Favourite.
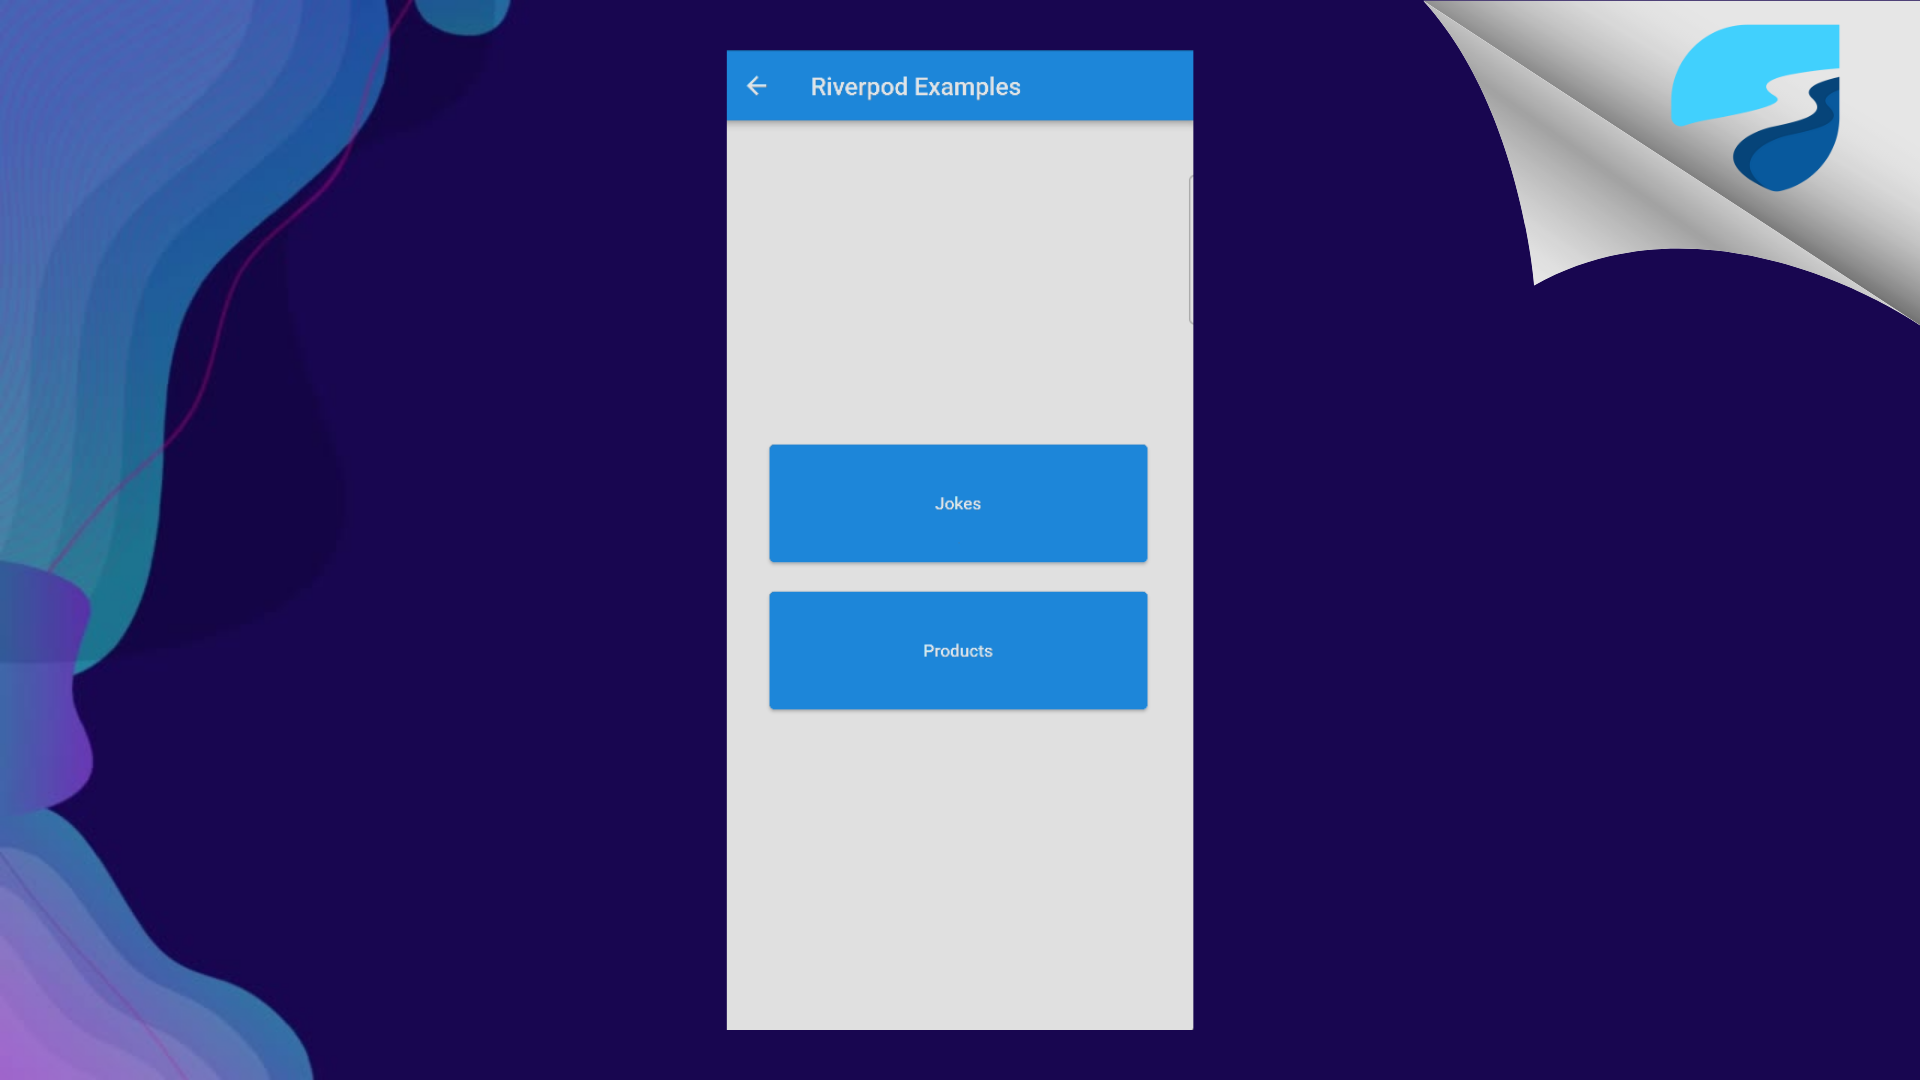
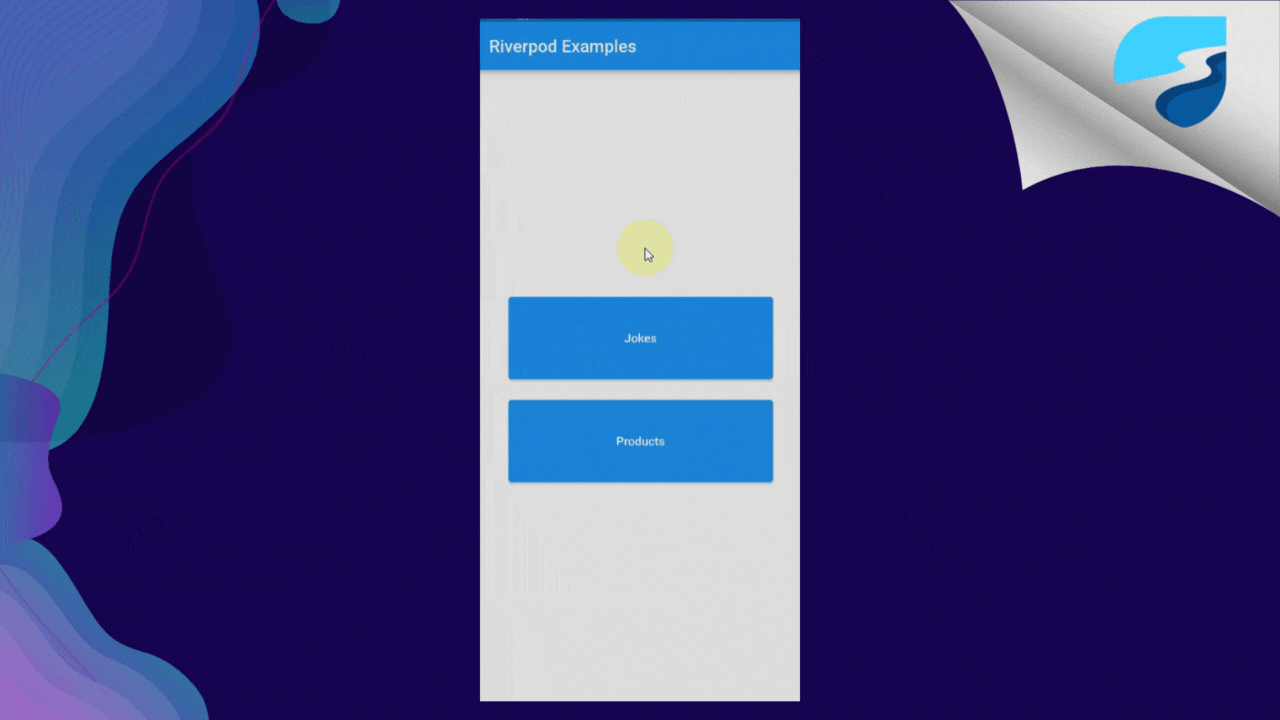
HOME PAGE :
- The home page is having two buttons: Jokes and Products. Which is used to redirect users to that particular page.
class HomePage extends StatelessWidget {
  const HomePage({super.key});

  @override
  Widget build(BuildContext context) {
    return Scaffold(
      appBar: AppBar(
        title: Text('title'.tr()),
      ),
      body: Center(
        child: Column(
          mainAxisAlignment: MainAxisAlignment.center,
          children: [
            HomeButton(
                title: 'jokes'.tr(),
                onTap: () {
                  Navigator.of(context).pushNamed(Routes.joke);
                }),
            Gap(20.h),
            HomeButton(
                title: 'products'.tr(),
                onTap: () {
                  Navigator.of(context).pushNamed(Routes.product);
                }),
          ],
        ),
      ),
    );
  }
}
- OUTPUT: If you run the application, you will see something like this on your screen.
JOKES PAGE:
This page is having two main widgets:
Text: Used to display the joke which we will be getting from an API.
Floating Button: Used to refresh the joke.
class JokePage extends ConsumerWidget {
  const JokePage({super.key});

  @override
  Widget build(BuildContext context, WidgetRef ref) {
    return Scaffold(
      floatingActionButton: const RefreshJoke(),
      appBar: AppBar(
        title: const Text('Jokes'),
      ),
      body: JokeView(),
    );
  }
}
RefreshJoke Widget:
class RefreshJoke extends ConsumerWidget {
  const RefreshJoke({
    Key? key,
  }) : super(key: key);

  @override
  Widget build(BuildContext context, WidgetRef ref) {
    return FloatingActionButton(
      onPressed: (){
         // Refresh new joke
      },
      child: const Icon(Icons.refresh),
    );
  }
}
JokeView Widget:
class JokeView extends StatelessWidget {
  const JokeView({Key? key}) : super(key: key);

  @override
  Widget build(BuildContext context) {
    return Center(
      child: Padding(
        padding: const EdgeInsets.all(18.0),
        child: Text(
          '',
          textAlign: TextAlign.center,
        ),
      ),
    );
  }
}
Output :

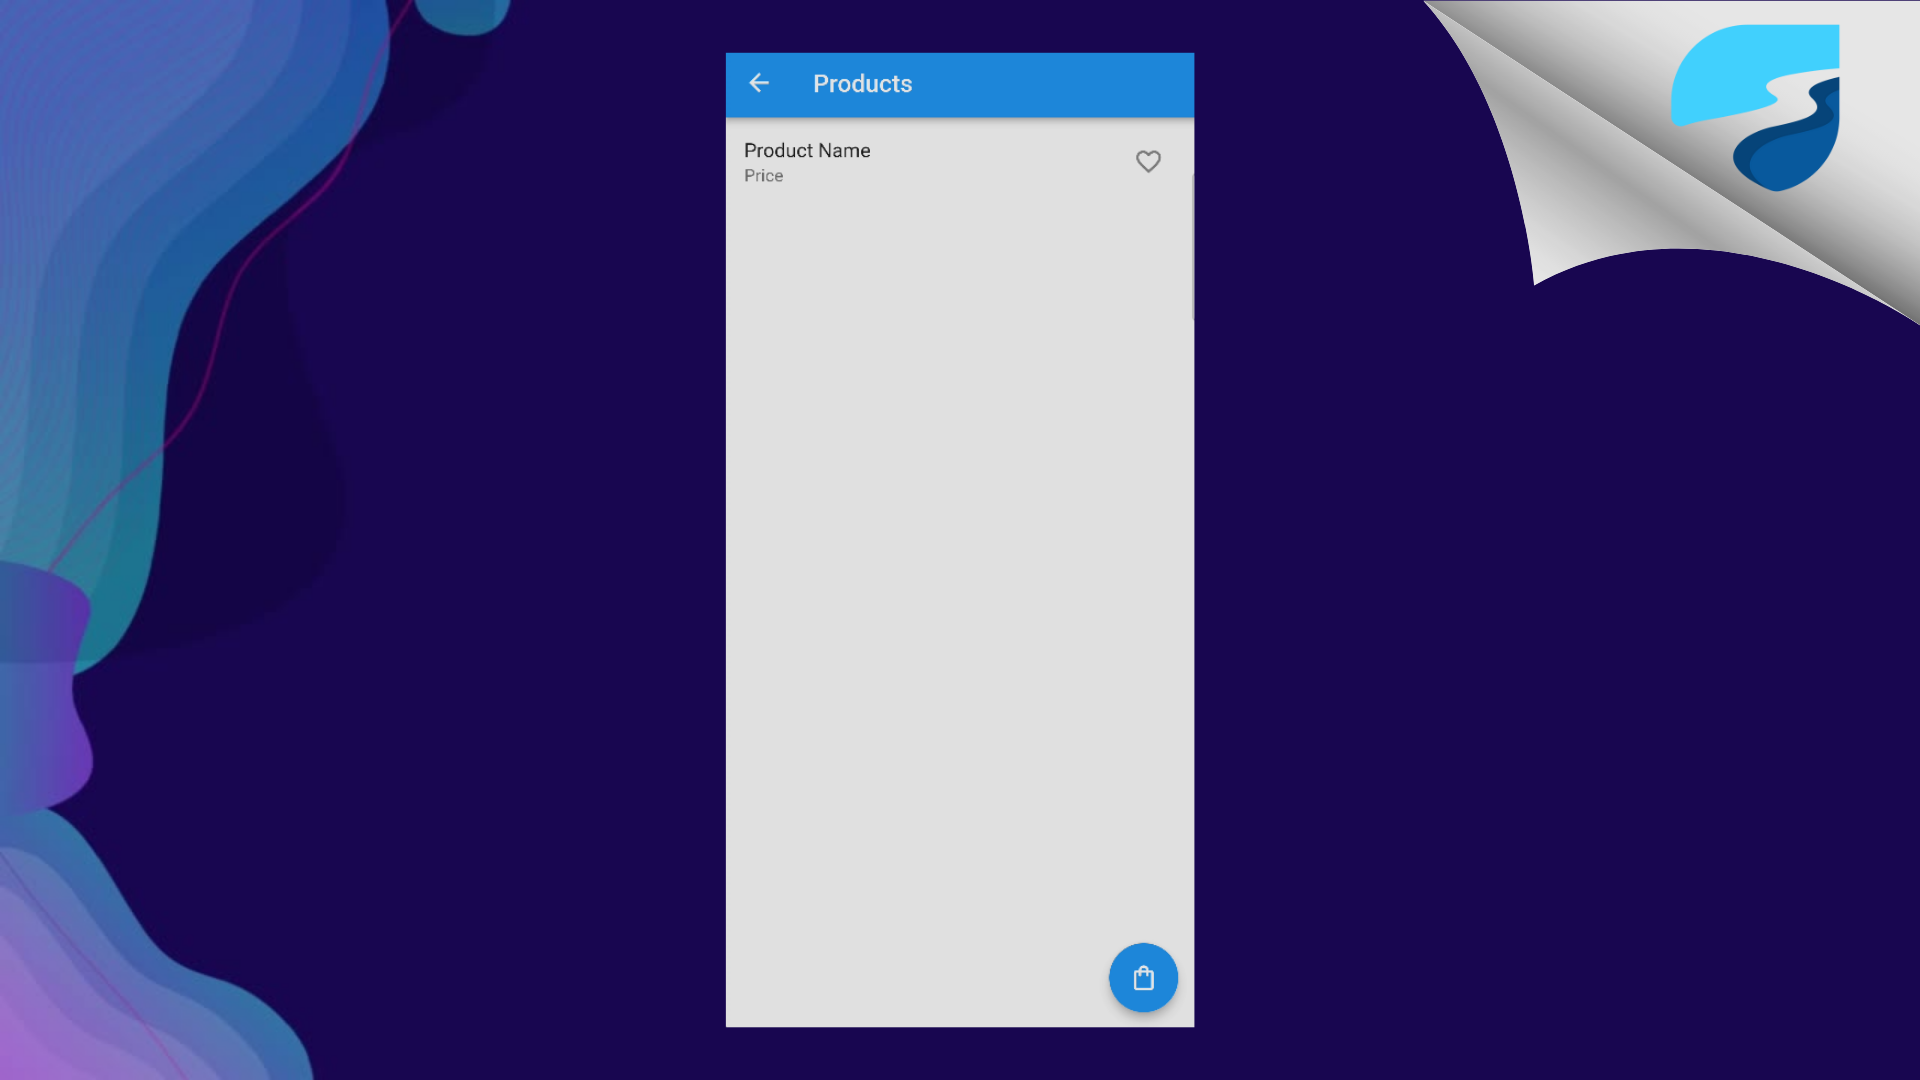
PRODUCT PAGE:
- The product page is having a Listview which we will use to display the list of products. And a Floating Button which will be used to redirect the user to the Favourite products page.
class ProductsPage extends ConsumerWidget {
  const ProductsPage({super.key});

  @override
  Widget build(BuildContext context, WidgetRef ref) {
    return Scaffold(
      floatingActionButton: FloatingActionButton(
        onPressed: () {
          Navigator.of(context).pushNamed(Routes.favourite);
        },
        child: const Icon(Icons.shopping_bag_outlined),
      ),
      appBar: AppBar(
        title: const Text('Products'),
      ),
      body: ListView.separated(
        itemCount: 1,
        separatorBuilder: (BuildContext context, int index) {
          return Gap(10.h);
        },
        itemBuilder: (BuildContext context, int index) {
          return ListTile(
            title: const Text('Product Name'),
            subtitle: const Text('Price'),
            trailing: IconButton(
              icon: const Icon(
                Icons.favorite_outline,
              ),
              onPressed: () {},
            ),
          );
        },
      ),
    );
  }
}
Output:
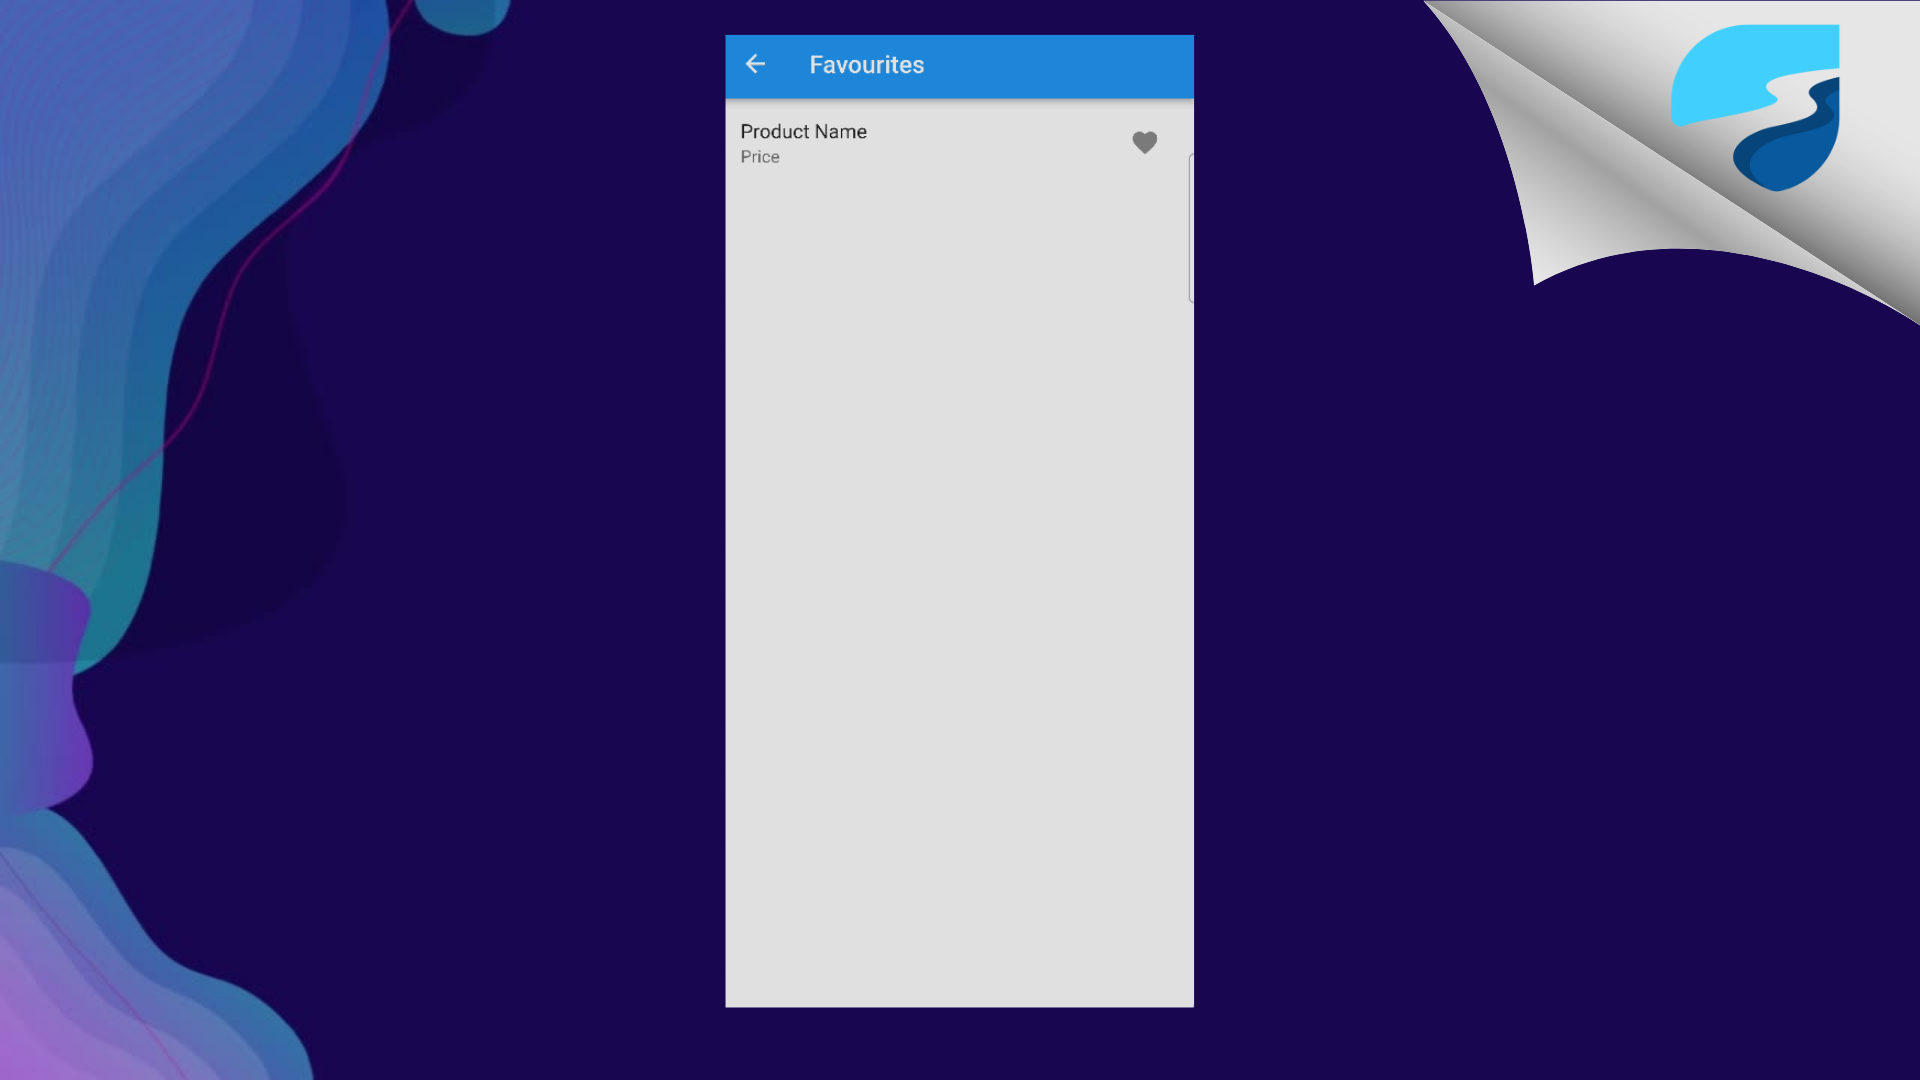
FAVOURITE PRODUCTS PAGE
- This page is will show the user list of favorited products. Users can remove the product from this list by pressing on the heart button.
class FavouriteProductsPage extends ConsumerWidget {
  const FavouriteProductsPage({super.key});

  @override
  Widget build(BuildContext context, WidgetRef ref) {
    return Scaffold(
        appBar: AppBar(
          title: const Text('Favourites'),
        ),
        body: ListView.separated(
          itemCount: 1,
          separatorBuilder: (BuildContext context, int index) {
            return Gap(10.h);
          },
          itemBuilder: (BuildContext context, int index) {
            return ListTile(
                key: const Key(''),
                title: const Text('Product Name'),
                subtitle: const Text('Price'),
                trailing: IconButton(
                  icon: const Icon(
                    Icons.favorite,
                  ),
                  onPressed: () {},
                ));
          },
        ));
  }
}
Creating Joke Model
We will be using the freezed package to convert the raw JSON response into a Dart model.
We are only interested in
jokeandidfrom the response. So we will only be converting these two in our model.For more information on how to use freezed, please refer to the documentation. We will not be discussing it in detail in this blog.
import 'package:freezed_annotation/freezed_annotation.dart';

part 'joke_model.freezed.dart';
part 'joke_model.g.dart';

@freezed
class JokeModel with _$JokeModel {
  const factory JokeModel({
    String? joke,
    int? id,
  }) = _JokeModel;
  factory JokeModel.fromJson(Map<String, dynamic> json) =>
      _$JokeModelFromJson(json);
}
- We also want some kind of state class that will be used to manage the loading state. For example, when the user presses on the load joke button, we want to show the loader.
import 'package:freezed_annotation/freezed_annotation.dart';
import 'package:riverpod_api/features/joke/data/models/joke_model.dart';

part 'joke_state.freezed.dart';

@freezed
class JokeState with _$JokeState {
  factory JokeState({
    @Default(JokeModel()) JokeModel joke,
    @Default(true) bool isLoading,
  }) = _JokeState;
}
- After that run the below command in your project-level terminal. It will generate the model classes for you.
flutter pub run build_runner build
Fetching Jokes From API
First of all, we need two Classes :
API: This will get the raw JSON data from the API and
Repository: This will convert the JSON to our JokeModel.
To achieve this, Let's create a
joke_api.dartfile insidelib/features/joke/data/apiwhich will get the raw JSON data for us.
joke_api.dart
class JokeApi {
  final DioClient _dioClient;

  JokeApi(this._dioClient);

  Future<Map<String, dynamic>> fetchJokesApiRequest() async {
    try {
      final res = await _dioClient.get(Endpoints.jokes);
      return res.data;
    } catch (e) {
      rethrow;
    }
  }
}
Now we want to convert this raw JSON data into our JokeModel.
To do that, create a file called
joke_repository.dartin thelib/features/joke/data/repositoryfolder and paste the code below into it.
joke_repository.dart
class JokeRepository {
  final JokeApi _jokeApi;

  JokeRepository(this._jokeApi);

  Future<JokeModel> fetchJoke() async {
    try {
      final res = await _jokeApi.fetchJokesApiRequest();
      final jokeModel = JokeModel.fromJson(res);
      return jokeModel;
    } on DioError catch (e) {
      final errorMessage = DioExceptions.fromDioError(e);
      log(errorMessage.toString());
      rethrow;
    }
  }
}
Creating Providers
Now that we have these two files, we need to create providers for them.
Create
joke_providerfile, insidelib/features/joke/providers/. In this, we will be putting all of the providersLet's create a simple provider for
JokeApiandJokeRepository.joke_provider.dart
final jokeApiProvider = Provider<JokeApi>((ref) { return JokeApi(ref.read(dioClientProvider)); }); final jokeRepositoryProvider = Provider<JokeRepository>((ref) { return JokeRepository(ref.read(jokeApiProvider)); });- Let's now create a StateNotifer class for managing the joke state.
### joke\_state\_provider.dart

*   The `JokeDataNotifier` class is meant to manage the state of a joke, and it accepts a `jokeRepository` object in its constructor, which it uses to fetch a joke when the `getJoke` the method is called.

*   More on `StateNotifier` visit :


%[https://dhruvnakum.xyz/flutter-riverpod-stateprovider-statenotifier-statenotifierprovider-futureprovider-streamprovider#heading-statenotifier-andamp-statenotifierprovider]
class JokeDataNotifier extends StateNotifier<JokeState> {
  JokeDataNotifier(this.jokeRepository) : super(JokeState()) {
    getJoke();
  }
  JokeRepository jokeRepository;

  Future<void> getJoke() async {
    state = state.copyWith(isLoading: true);
    await jokeRepository.fetchJoke().then((data) {
      state = state.copyWith(joke: data, isLoading: false);
    });
  }
}
Let's understand the above code.
When
getJokeis called, theJokeDataNotifierupdates its internal state object by settingisLoadingto true, and then it asynchronously fetches a joke using thejokeRepositoryobject.Once the joke is fetched, the
JokeDataNotifierupdates its internal state again by setting the joke property to the fetched joke, and settingisLoadingtofalse.Now that we've created our custom StateNotifier, we also need to create a Provider for it, so that we can use its state inside our widget.
Head over to
joke_provider.dartand paste the below provider
final jokeDataProvider =
    StateNotifierProvider.autoDispose<JokeDataNotifier, JokeState>((ref) {
  return JokeDataNotifier(ref.read(jokeRepositoryProvider));
});
Rendering UI
class JokePage extends ConsumerWidget {
  const JokePage({super.key});

  @override
  Widget build(BuildContext context, WidgetRef ref) {
    // 1 -------------------------
    final joke = ref.watch(jokeDataProvider).joke;
    // 2 -------------------------
    final isLoading = ref.watch(jokeDataProvider).isLoading;
    return Scaffold(
      floatingActionButton: const RefreshJoke(),
      appBar: AppBar(
        title: const Text('Jokes'),
      ),
      // 3 -------------------------
      body: isLoading
          ? const Center(
              child: CircularProgressIndicator(),
            )
          : JokeView(jokeData: joke),
    );
  }
}
We are obtaining the
jokestate from thejokeDataProviderprovider. We are usingref.watchin order to listen for a new changes and rebuilt the widget.We obtained the
isLoadingproperty from the jokeDataProvider state using theref.watchmethod. We will use this to conditionally render the UI according to the current state.We are returning a CircularProgressIndicator if the
isLoadingproperty is true, or aJokeViewwidget ifisLoadingisfalse. TheJokeViewwidget is passed the joke data as the jokeData property.
- Let's also look into
RefreshJokeWidget
@override
  Widget build(BuildContext context, WidgetRef ref) {
    return FloatingActionButton(
      onPressed: ref.read(jokeDataProvider.notifier).getJoke,
      child: const Icon(Icons.refresh),
    );
  }
When the FloatingActionButton is pressed, the
JokeDataNotifier'sgetJokemethod will be called, which will cause the JokeDataNotifier to asynchronously fetch a joke and update its internal state.Now let's look into
JokeViewwidget
class JokeView extends StatelessWidget {
  const JokeView({
    Key? key,
    required this.jokeData,
  }) : super(key: key);

  final JokeModel jokeData;

  @override
  Widget build(BuildContext context) {
    return Center(
      child: Padding(
        padding: const EdgeInsets.all(18.0),
        child: Text(
          jokeData.joke ?? '',
          textAlign: TextAlign.center,
        ),
      ),
    );
  }
}
As you can see we are simply using the
jokeData's joke property to display the joke on the screen.And that's it !!! We completed our first example 🥳.
Second Example (E-Comm Products API)
To begin, we will retrieve the products from the API and display them in a list.
Next, we will add the ability for users to favorite or unfavorite products by pressing the Heart Icon.
The product will be added or removed from the user's Favorite Page accordingly.
Users can access and view all their favorite products on their Favorite Page.
Let's begin!
Creating Product Model Class
From this API we only want
id,titleandpriceof the product, and we are also going to add a booleanisFavourite. Its default value will befalse.Let's generate the ProductModel class
import 'package:freezed_annotation/freezed_annotation.dart';

part 'product_model.freezed.dart';
part 'product_model.g.dart';

@freezed
class ProductModel with _$ProductModel {
  factory ProductModel({
    int? id,
    String? title,
    double? price,
    @Default(false) bool isFavourite,
  }) = _ProductModel;
  factory ProductModel.fromJson(Map<String, dynamic> json) =>
      _$ProductModelFromJson(json);
}
Now run : flutter pub run build_runner build command
Create API and Repository Class
- Similar to our previous example we are going to create two classes for managing the API and the response.
product_api.dart
class ProductApi {
  final DioClient _dioClient;

  ProductApi(this._dioClient);

  Future fetchProductsApiRequest() async {
    try {
      final res = await _dioClient.get(Endpoints.product);
      return res.data;
    } catch (e) {
      rethrow;
    }
  }
}
product_repository.dart
class ProductRepository {
  final ProductApi productApi;

  ProductRepository(this.productApi);

  Future<List<ProductModel>> fetchProductRequested() async {
    try {
      final res = await productApi.fetchProductsApiRequest();
      final productModel =
          (res as List).map((e) => ProductModel.fromJson(e)).toList();
      return productModel;
    } on DioError catch (e) {
      final errorMessage = DioExceptions.fromDioError(e);
      log(errorMessage.toString());
      rethrow;
    }
  }
}
- Both of the classes are self-explanatory. We are just getting raw data in ProductApi class and converting it in ProductModel in ProductRepository Class.
Creating Product Providers
- Let's first create a basic provider for API and Repository classes.
final productApiProvider = Provider<ProductApi>((ref) {
  return ProductApi(ref.read(dioClientProvider));
});

final productRepositoryProvider = Provider<ProductRepository>((ref) {
  return ProductRepository(ref.read(productApiProvider));
});
- We also want one LoadingProvider, which we will use to show the Loading indicator, so let's create it too.
final isLoadingProductsProvider = StateProvider<bool>((ref) {
  return true;
});
- Now we will create a StateNotifier for managing the Product List state and Favourite/UnFavourite functionality.
class ProductsNotifier extends StateNotifier<List<ProductModel>> {
  // Fetching all products whenever anyone starts listning.
  // Passing Ref, in order to access other providers inside this.
  ProductsNotifier({required this.ref}) : super([]) {
    fetchProducts(ref: ref);
  }
  final Ref ref;

  Future fetchProducts({required Ref ref}) async {
    await ref
        .read(productRepositoryProvider)
        .fetchProductRequested()
        .then((value) {
      // Setting current `state` to the fetched list of products.
      state = value;
      // Setting isLoading to `false`.
      ref.read(isLoadingProductsProvider.notifier).state = false;
    });
  }

  void toggleFavourite(int id, {required bool isFavourite}) {
    // Getting the tapped Product and setting it's isFavourite to respective value.
    final updatedProduct = state
        .firstWhere((element) => element.id == id)
        .copyWith(isFavourite: isFavourite);

    // In order to trigger the consumer to rebuild.
    // state must equal a new value of that object,
    // updating variables of the state object itself will not work.
    state = [
      for (int i = 0; i < state.length; i++)
        if (state[i].id == id) updatedProduct else state[i]
    ];
  }
}
- Let's create a Provider for the same
final productProvider =
    StateNotifierProvider<ProductsNotifier, List<ProductModel>>((ref) {
  return ProductsNotifier(ref: ref);
});
Rendering UI
class ProductsPage extends ConsumerWidget {
  const ProductsPage({super.key});

  @override
  Widget build(BuildContext context, WidgetRef ref) {

    final data = ref.watch(productProvider);
    final isLoading = ref.watch(isLoadingProductsProvider)

    return Scaffold(

      floatingActionButton: FloatingActionButton(
        onPressed: () {
          Navigator.of(context).pushNamed(Routes.favourite);
        },
        child: const Icon(Icons.shopping_bag_outlined),
      ),

      appBar: AppBar(
        title: const Text('Products'),
      ),

      body: isLoading
          ? const Center(
              child: CircularProgressIndicator(),
            )
          : ListView.separated(
              itemCount: data.length,
              separatorBuilder: (BuildContext context, int index) {
                return Gap(10.h);
              },
              itemBuilder: (BuildContext context, int index) {
                return ListTile(
                  title: Text(data[index].title ?? ''),
                  subtitle: Text('\$${data[index].price.toString()}'),
                  trailing: data[index].isFavourite
                      ? IconButton(
                          icon: const Icon(
                            Icons.favorite,
                          ),
                          onPressed: () {      ref.read(productProvider.notifier).toggleFavourite(
                                data[index].id ?? 0,
                                isFavourite: false);
                          },
                        )
                      : IconButton(
                          icon: const Icon(
                            Icons.favorite_outline,
                          ),
                          onPressed: () {                                    ref.read(productProvider.notifier).toggleFavourite(
                                data[index].id ?? 0,
                                isFavourite: true);
                          },
                        ),
                );
              },
            ),
    );
  }
}
OUTPUT:

Creating Favourite Products Provider
final favouritesProvider = StateProvider<List<ProductModel>>((ref) {
  final res = ref
      .watch(productProvider)
      .where((element) => element.isFavourite == true)
      .toList();
  return res;
});
As you can see, In order to get our favorite products, we are simply watching over the
productProviderand filter out based on theisFavouritevariable.It's that simple.
The UI will be also the same as the Product Listing page except there will be only UnFavourite functionality and no Favouriting functionality.
 class FavouriteProductsPage extends ConsumerWidget {
  const FavouriteProductsPage({super.key});

  @override
  Widget build(BuildContext context, WidgetRef ref) {
    final data = ref.watch(favouritesProvider);
    return Scaffold(
      appBar: AppBar(
        title: const Text('Favourites'),
      ),
      body: data.isNotEmpty
          ? ListView.separated(
              itemCount: data.length,
              separatorBuilder: (BuildContext context, int index) {
                return Gap(10.h);
              },
              itemBuilder: (BuildContext context, int index) {
                return ListTile(
                    key: Key(data[index].id.toString()),
                    title: Text(data[index].title ?? ''),
                    subtitle: Text('\$${data[index].price.toString()}'),
                    trailing: IconButton(
                      icon: const Icon(
                        Icons.favorite,
                      ),
                      onPressed: () {              ref.read(productProvider.notifier).toggleFavourite(
                            data[index].id ?? 0,
                            isFavourite: false);
                      },
                    ));
              },
            )
          : const Center(
              child: Text('No Favourites Found'),
            ),
    );
  }
}
OUTPUT:

Source Code
Conclusion
There is still much to learn about Riverpod, so be sure to explore the documentation and examples on GitHub. Riverpod has introduced many new features recently.
In future blogs, I will go deeper into these features.
I hope you found this article useful and informative. If you have any questions, please leave them in the comments section.
Thank you for reading and I look forward to our next article. Until then..


