Flutter and AdMob: A blog around monetizing your Flutter app with AdMob.
Integrate `Banner`, `Interstitial`, and `Rewarded` ads to your flutter application.
Introduction
- Mobile applications are a great way to earn revenue from your programming skills. There are many ways to earn money apart from the app store revenue. You can add ads to your apps and monetize them.
- Google is the biggest player in the online advertisement industry. Recently, Flutter released a package called google_mobile_ads for monetizing the Flutter application.
- This plugin currently supports loading and displaying banner, interstitial (full-screen), native ads, and rewarded video ads.
- This plugin can also support Google Ad Manager, if you want to load and display ads from Google Ad Manager
Starter Project
- The starter project contains a basic layout for showing posts.
- You can get the starter project from the below link -
Output of the starter project
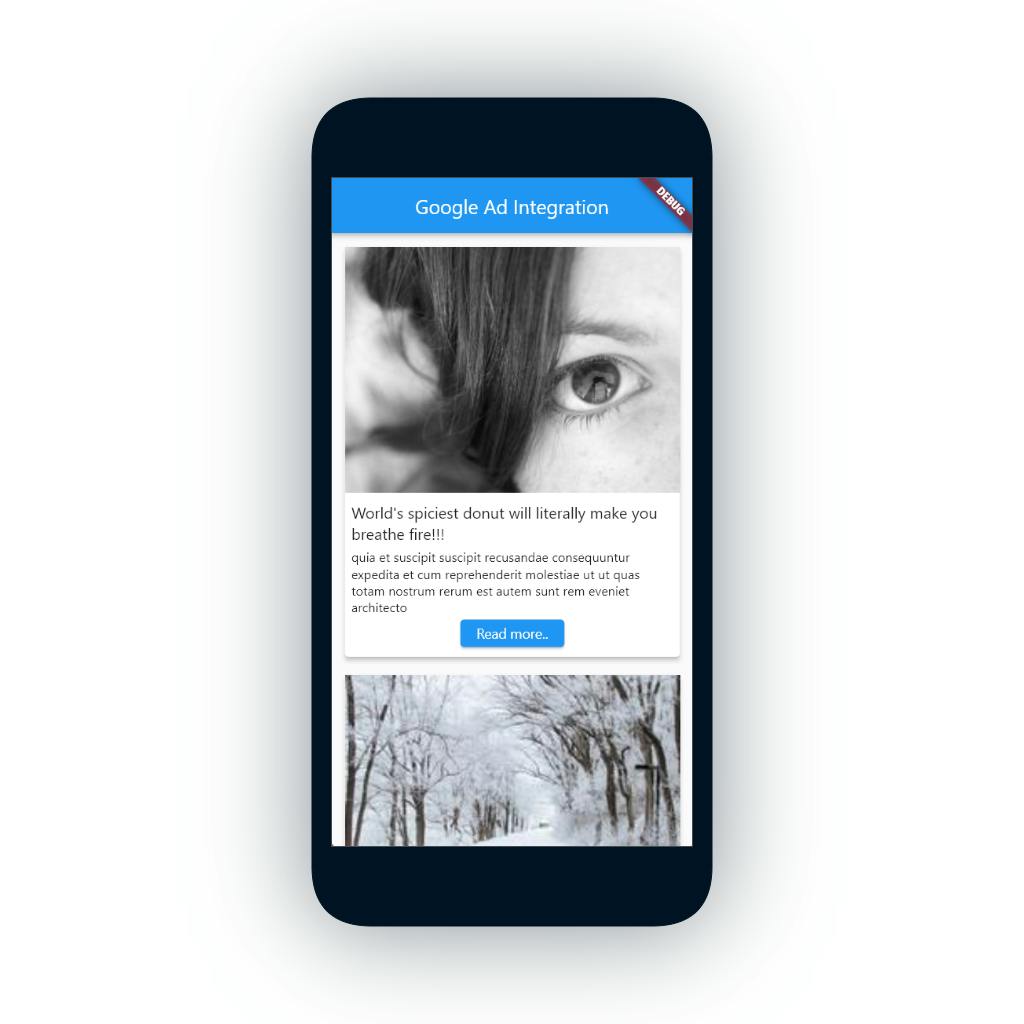
These Posts are coming from the
post.dartfile and is displayed with the help ofListView.builder()widget.- Now that we've seen the starter projects, we can now proceed further by integrating ads in the app.
Install Package
- Goto pub.dev and copy the latest version of
google_mobile_adspackage. - And then paste it inside
pubspec.yaml dev_dependencies: flutter_test: sdk: flutter google_mobile_ads: ^0.13.4
Create AdMob account
- Open admob website and LogIn/SignUp by using your google account.
- After signing in into the admob account. You will be redirected to the dashboard. Which will look like this -
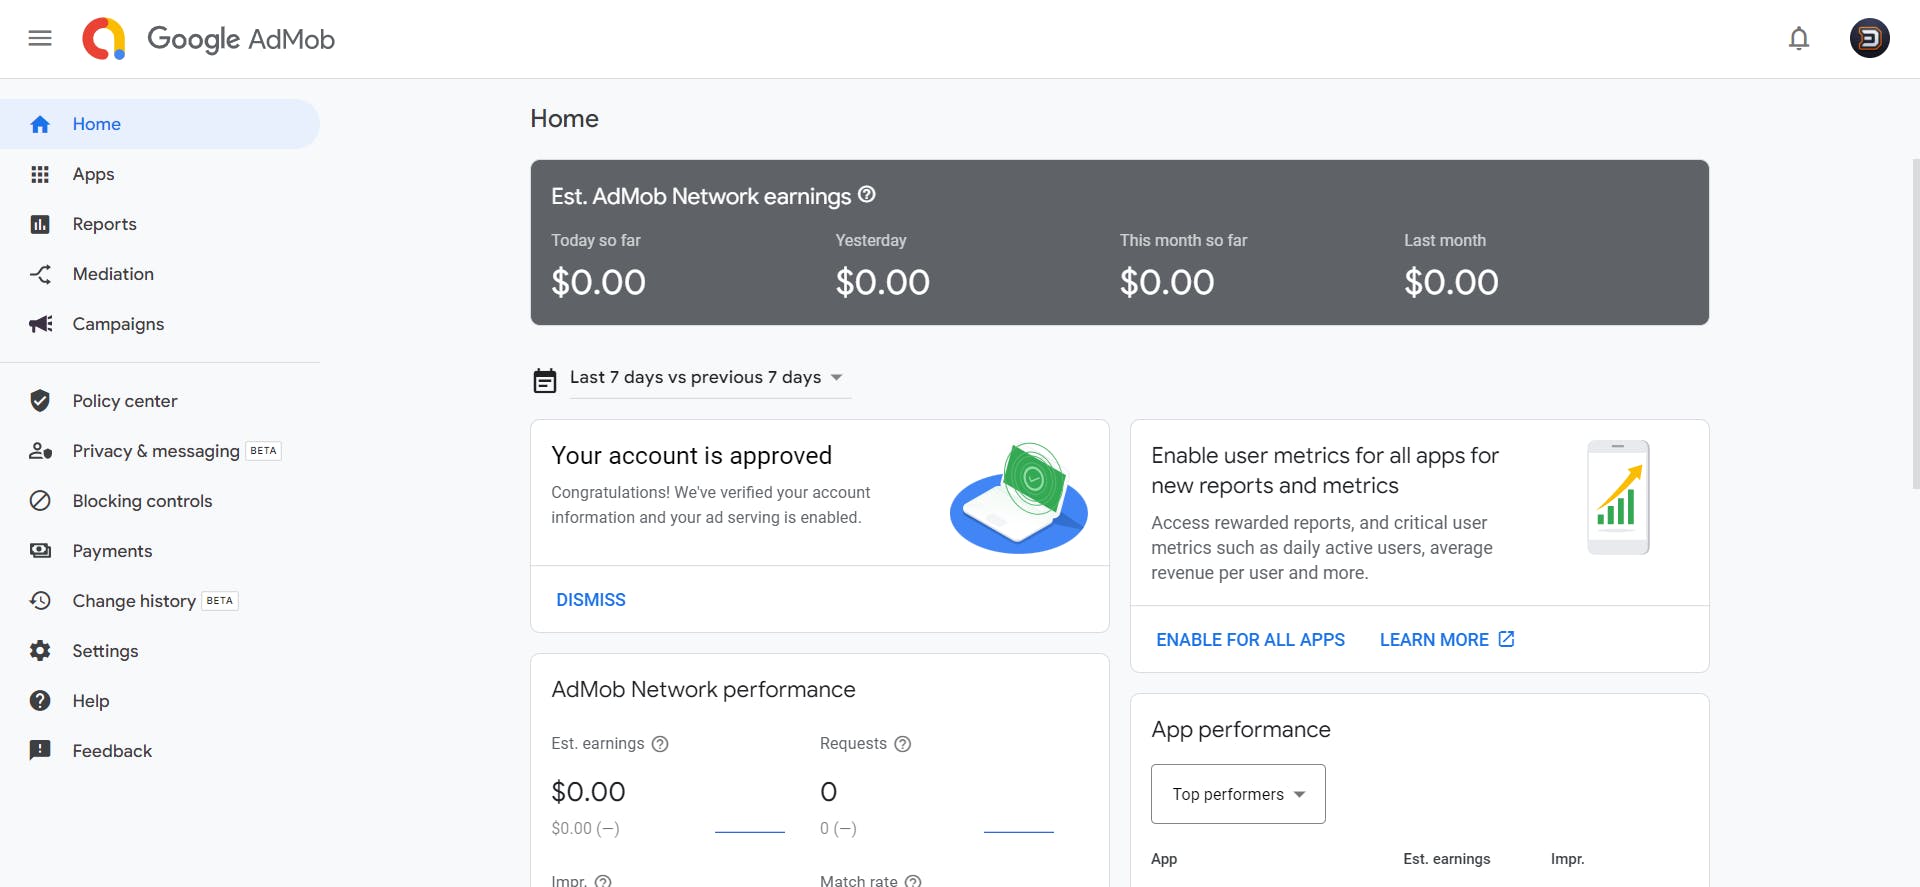
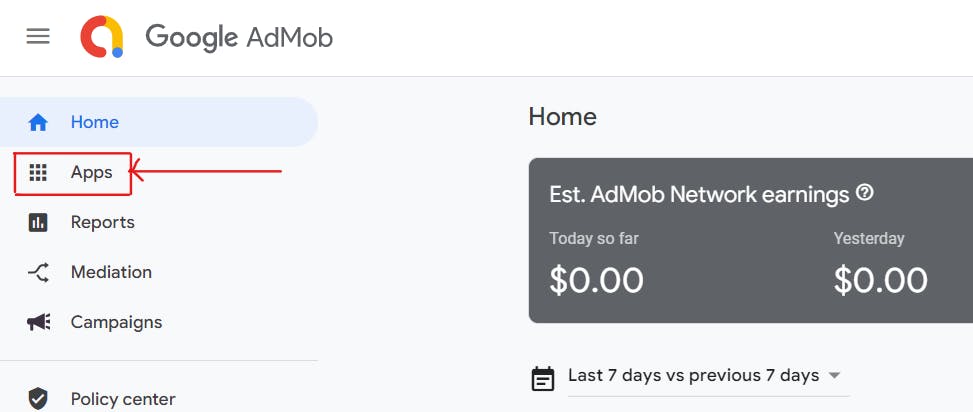
- Now go to the Apps in the left sidebar and then click “Add Your First App”.
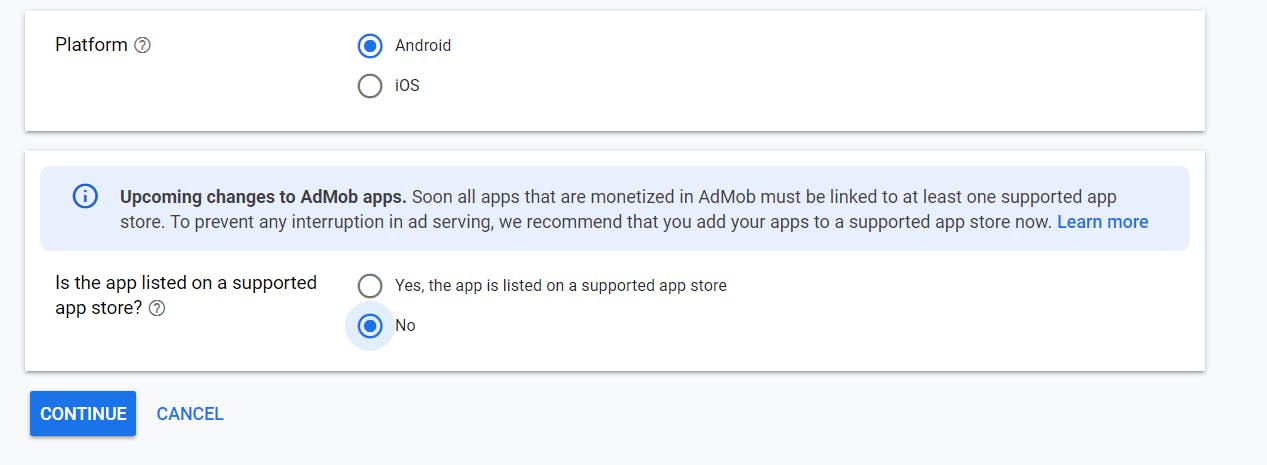
- Now you have to choose the Platform on which you want to show ads. The steps for both are the same. I'm choosing Android for this tutorial.
- They are also asking if your app has already been listed on the play store or not. If yes then select yes, otherwise select no.
- After that, you will be asked to enter the name of your app and whether you want to use user metrics or not. User Metrics is used to understand the user behavior like, how they are interacting, how many daily active users are there for how much time, etc.
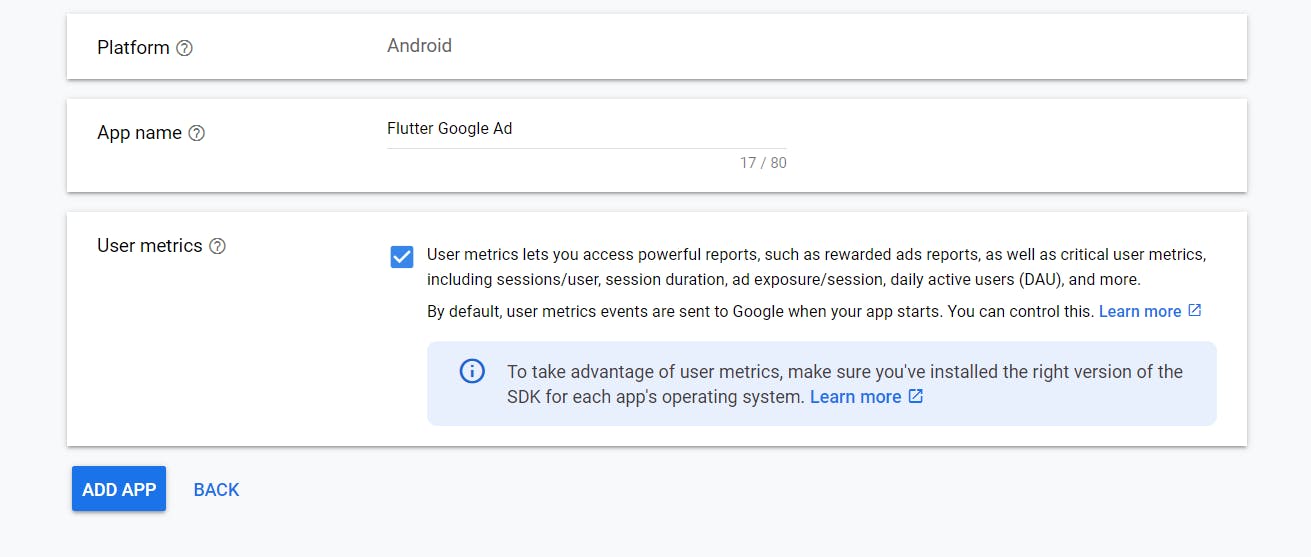
- Now that you have successfully added your app. Let's create an Ad Unit
Create Ad Unit
- Ad units are containers you place in your apps to show ads to users. Ad units send ad requests to AdMob, then display the ads they receive to fill the request. When you create an ad unit, you assign it an ad format and ad type(s). Ad format describes the way ads will look in your app and where they'll be located.
- Head over to the Ad units section in the left panel. And click on the Get Started button in order to create ad units.
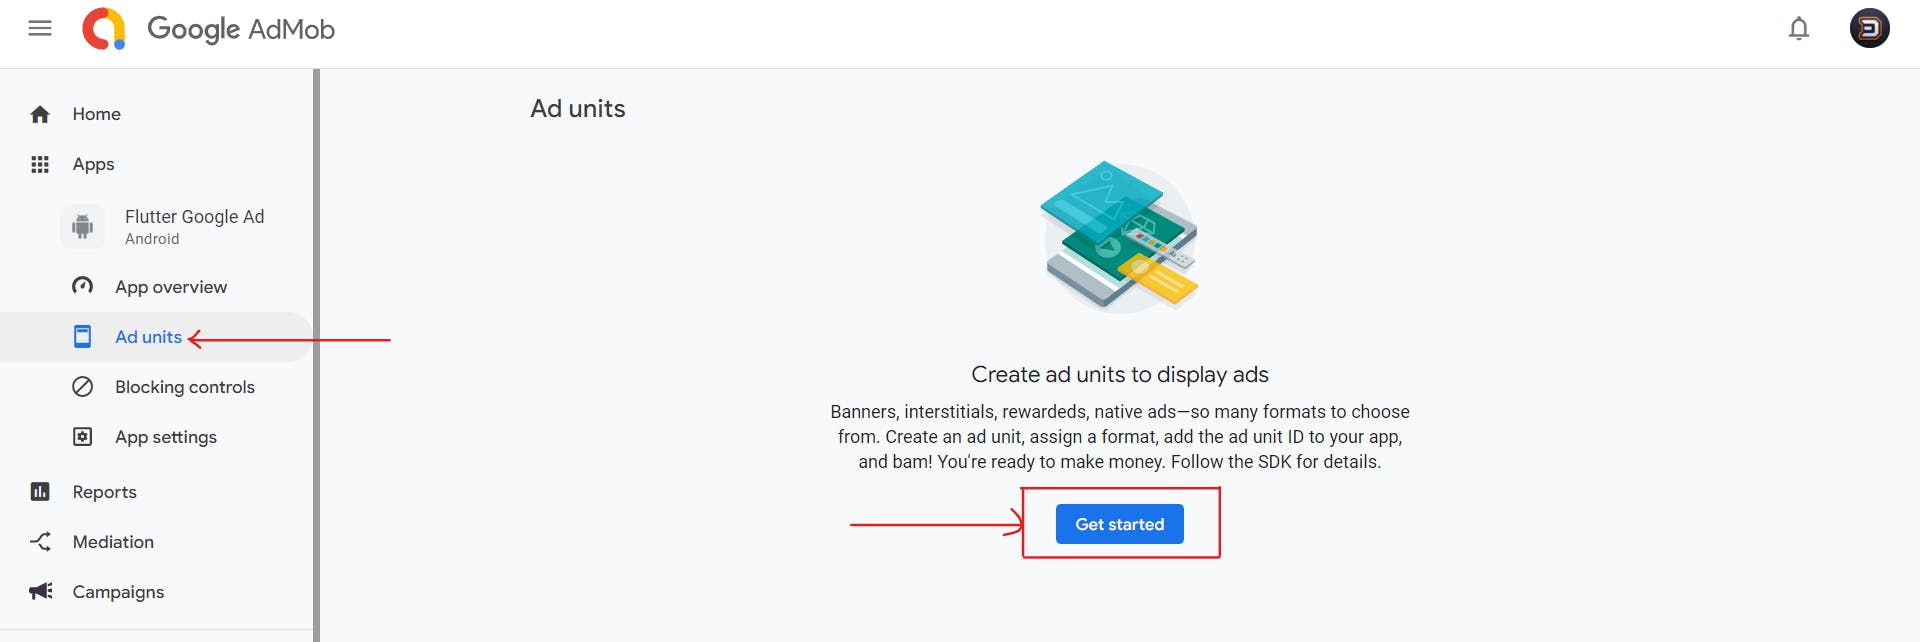
- Here you will see different types of ad units.

- We are going to use Banner, Interstitial, and Rewarded ad units in our app.
- First, let's create a Banner ad unit. You have to enter a name for your ad unit. You can also change some advanced settings if necessary.
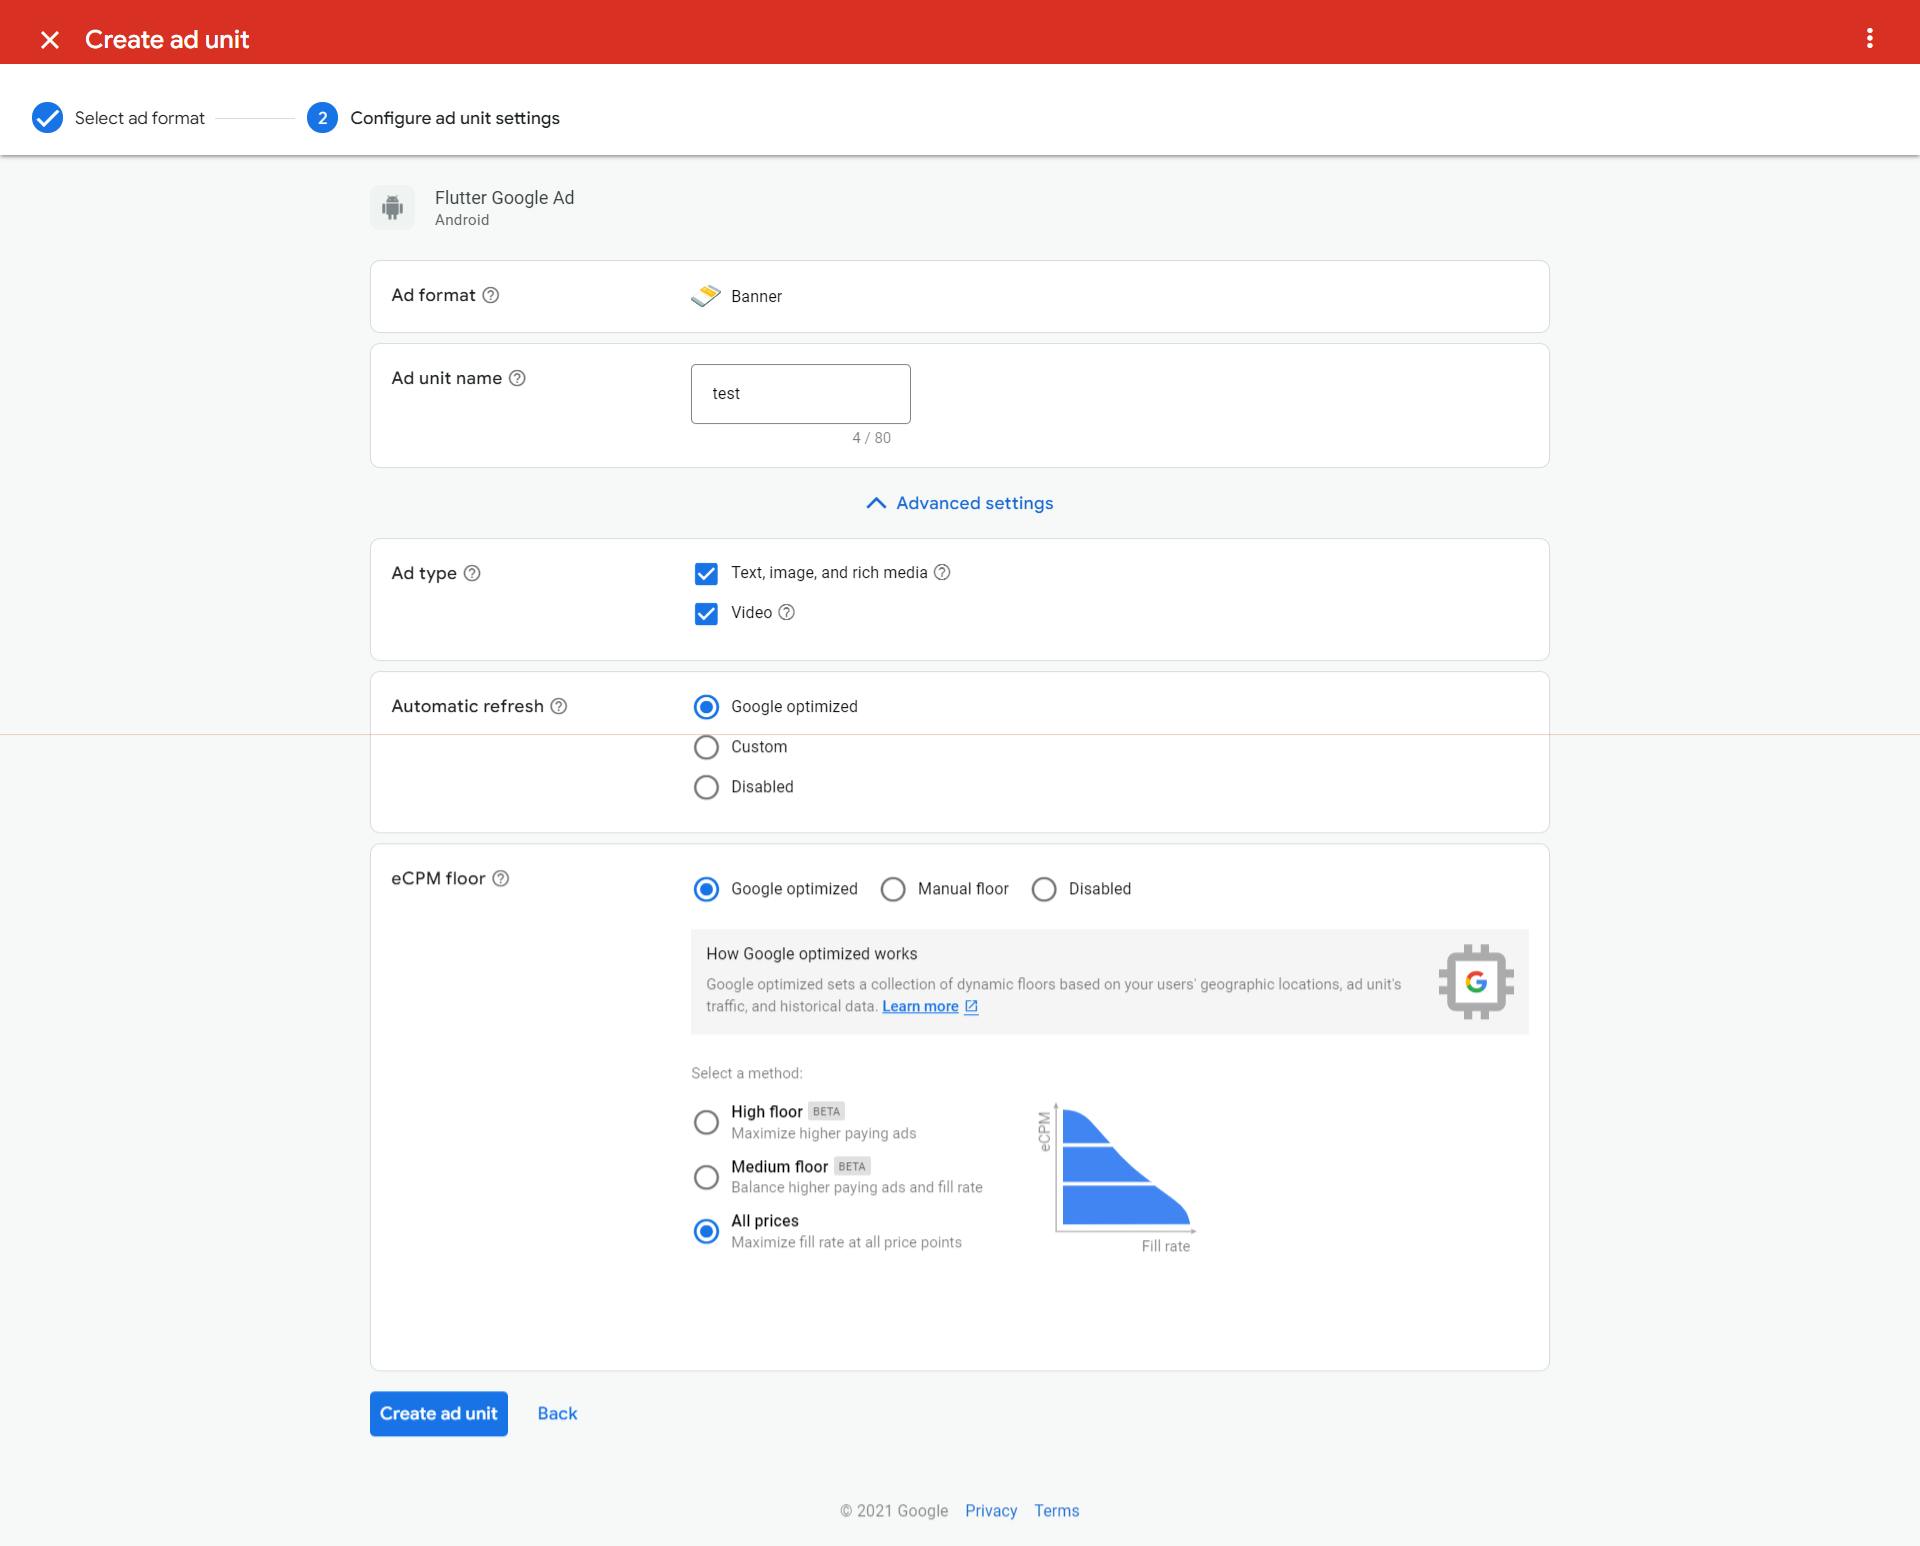
- Now click on the Create ad unit and you'll get the
app IDandad unit IDthat you need to place when you are shipping your app in production.Don't use production
app idandunit idwhile developing apps. Use thetestkeys provided by the admob. You can get the test ids for Android here and for iOS here - Now that we've created a banner ad unit we can add it inside our flutter application.
Configuration
iOS Configuration :
- Update your app's ios/Runner/Info.plist file to add two keys:
- A
GADApplicationIdentifierkey with a string value of your AdMob app ID (identified in the AdMob UI). - A
SKAdNetworkItemskey with Google'sSKAdNetworkIdentifiervalue ofcstr6suwn9.skadnetwork. <key>GADApplicationIdentifier</key> <string>ca-app-pub-3940256099942544~1458002511</string> <key>SKAdNetworkItems</key> <array> <dict> <key>SKAdNetworkIdentifier</key> <string>cstr6suwn9.skadnetwork</string> </dict> </array>
Android Configuration :
- Head over to
AndroidManifest.xmlfile and add the below code under the<application>tag <meta-data android:name="com.google.android.gms.ads.APPLICATION_ID" android:value="ca-app-pub-3940256099942544~3347511713"/>- Now head over to app-level
build.gradleand update the minSdkVersion to 19 or higher defaultConfig { applicationId "com.example.google_ad" minSdkVersion 19 targetSdkVersion 30 versionCode flutterVersionCode.toInteger() versionName flutterVersionName }
Initialize SDK
- Now that all the configuration is done. The next thing to do is to initialize the Android Ad SDK.
- To do that, head over to
main.dartand add the below code undermainfunction. void main() { WidgetsFlutterBinding.ensureInitialized(); MobileAds.instance.initialize(); runApp(const MyApp()); }
Create Ad State Class
- To provide AdUnitId for different platforms (Android, iOS) we need a state which gives us that
unit idaccording to platform. - So let's create a file
ad_state.dartand add the below code under it. class AdState { String get bannerUnitId { if (Platform.isAndroid) { return "ca-app-pub-3940256099942544/6300978111"; // test unit id } else { return "ca-app-pub-3940256099942544/2934735716"; // test unit id } } }- This
bannerUnitIdgetter will provideunitIdfor specific platform. You have to update this test id with your productionunit ids when you deploy your app.
Adding BannerAd to UI
- Now let's create a reference of BannerAd and also a boolean which will change its value when the ad initializes.
- Open the
HomePage.dartand add below code class _HomePageState extends State<HomePage> { late BannerAd _bannerAd; final bool _isBottomBannerAdLoaded = false; ....- Now to initialize the
_bannerAdoverride theinitstateand add below code inside it. @override void initState() { super.initState(); _bottomBannerAd = BannerAd( adUnitId: AdState.bannerUnitId, size: AdSize.banner, listener: BannerAdListener( onAdLoaded: (_) { setState(() { _isBottomBannerAdLoaded = true; }); }, onAdFailedToLoad: (ad, error) { setState(() { _isBottomBannerAdLoaded = false; }); ad.dispose(); }, ), request: const AdRequest(), )..load(); }- And also don't forget to dispose the BannerAd instance.
- Here the
adUnitIdgets our banner unit id from the class AdState that we've created earlier. sizeproperty takes the size of the ad. There are different sizes available. For example, fullBanner, largeBanner, leaderborad, etc.listenerwill receive notification for the lifecycle of a BannerId.onAdLoadedsuggests Ad successfully loaded - display an AdWidget with the banner ad.onAdFailedToLoadsuggests Ad failed to load - log the error and dispose the ad.requestis used to request the ad for displaying it in the UI.
Adding AdWidget to UI
- Now to add
BannerAdto the screen, the package provides us a widget called AdWidget. - We have to pass our
_bottomBannerAdtoAdWidgetconstructor Scaffold( bottomNavigationBar: _isBottomBannerAdLoaded ? SizedBox( height: _bottomBannerAd.size.height.toDouble(), width: _bottomBannerAd.size.width.toDouble(), child: AdWidget(ad: _bottomBannerAd), ) : Container(), // .....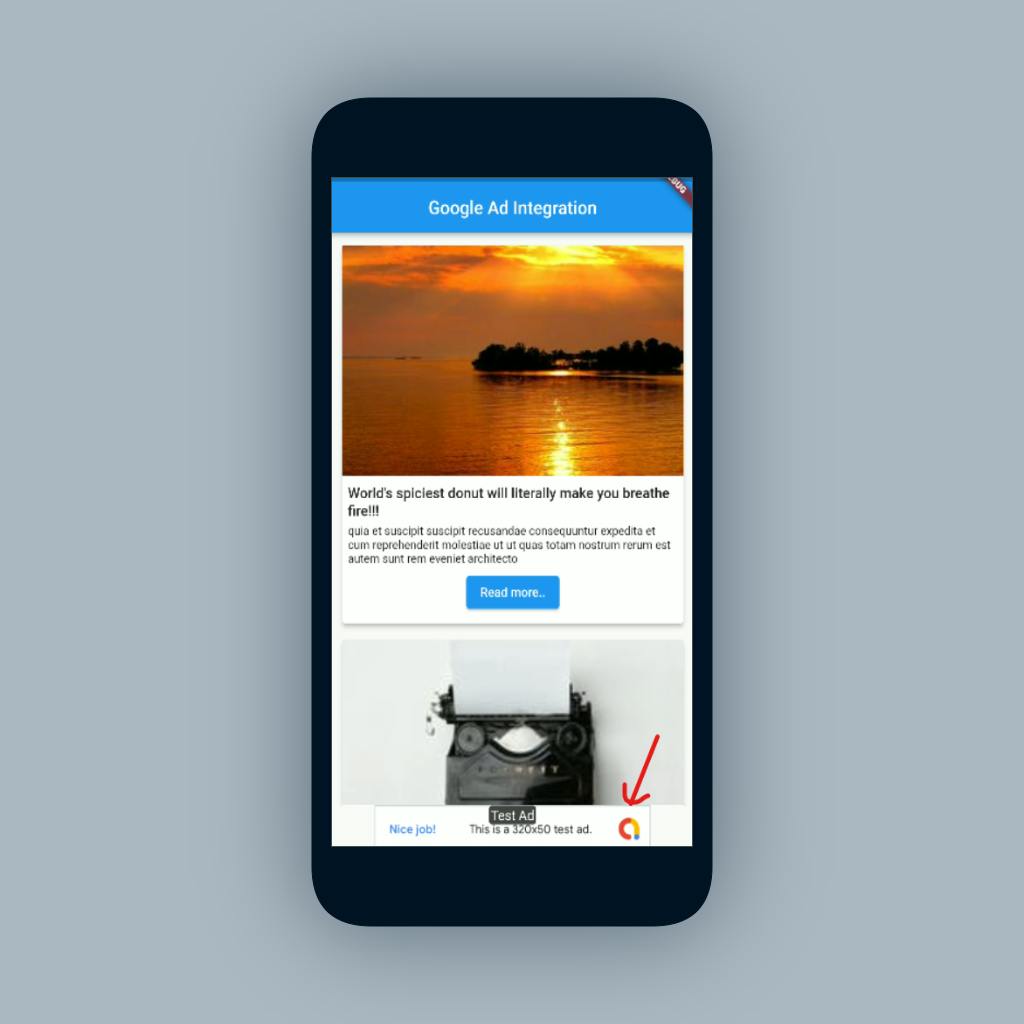
- Woohoo!! 🎉

Adding InterstialAd to UI
- Interstitial ads are full-screen ads that cover the interface of the app.
- So, first, create an InterstialAd ad unit from the AdMob console. And then head over to the next step.
- Let's now create a getter in
AdStatefile for getting the unitID static String get interstitialAdUnitId { if (Platform.isAndroid) { return "ca-app-pub-3940256099942544/8691691433"; } else { return "ca-app-pub-3940256099942544/5135589807"; } }- To display Interstitial ads we have to first create an instance and also a boolean which is used to check if the ad is loaded or not.
InterstitialAd? _interstitialAd; bool _isInterstitialAdLoaded = false;- Now,
loadtheInterstitialAdinside theinitstateand also dispose the_interstitialAdinsidedisposefunction. @override void initState() { super.initState(); InterstitialAd.load( adUnitId: AdState.interstitialAdUnitId, request: const AdRequest(), adLoadCallback: InterstitialAdLoadCallback( onAdLoaded: (InterstitialAd ad) { _interstitialAd = ad; _isInterstitialAdLoaded = true; }, onAdFailedToLoad: (LoadAdError error) { _isInterstitialAdLoaded = false; _interstitialAd.dispose(); }, ), ); } @override void dispose() { _bottomBannerAd.dispose(); _interstitialAd.dispose(); super.dispose(); }Now let's load this
InterstitialAdwhen the user clicks on any of the posts.- To do that, all you have to do, is to call the
show()method on Navigation, Just like below GestureDetector( onTap: () { if (_isInterstitialAdLoaded) { _interstitialAd.show(); // <- here } Navigator.push( context, MaterialPageRoute( builder: (_) => PostPage( post: post, ), ), ); }, child: PostCard( hasReadMore: true, post: post, ) ),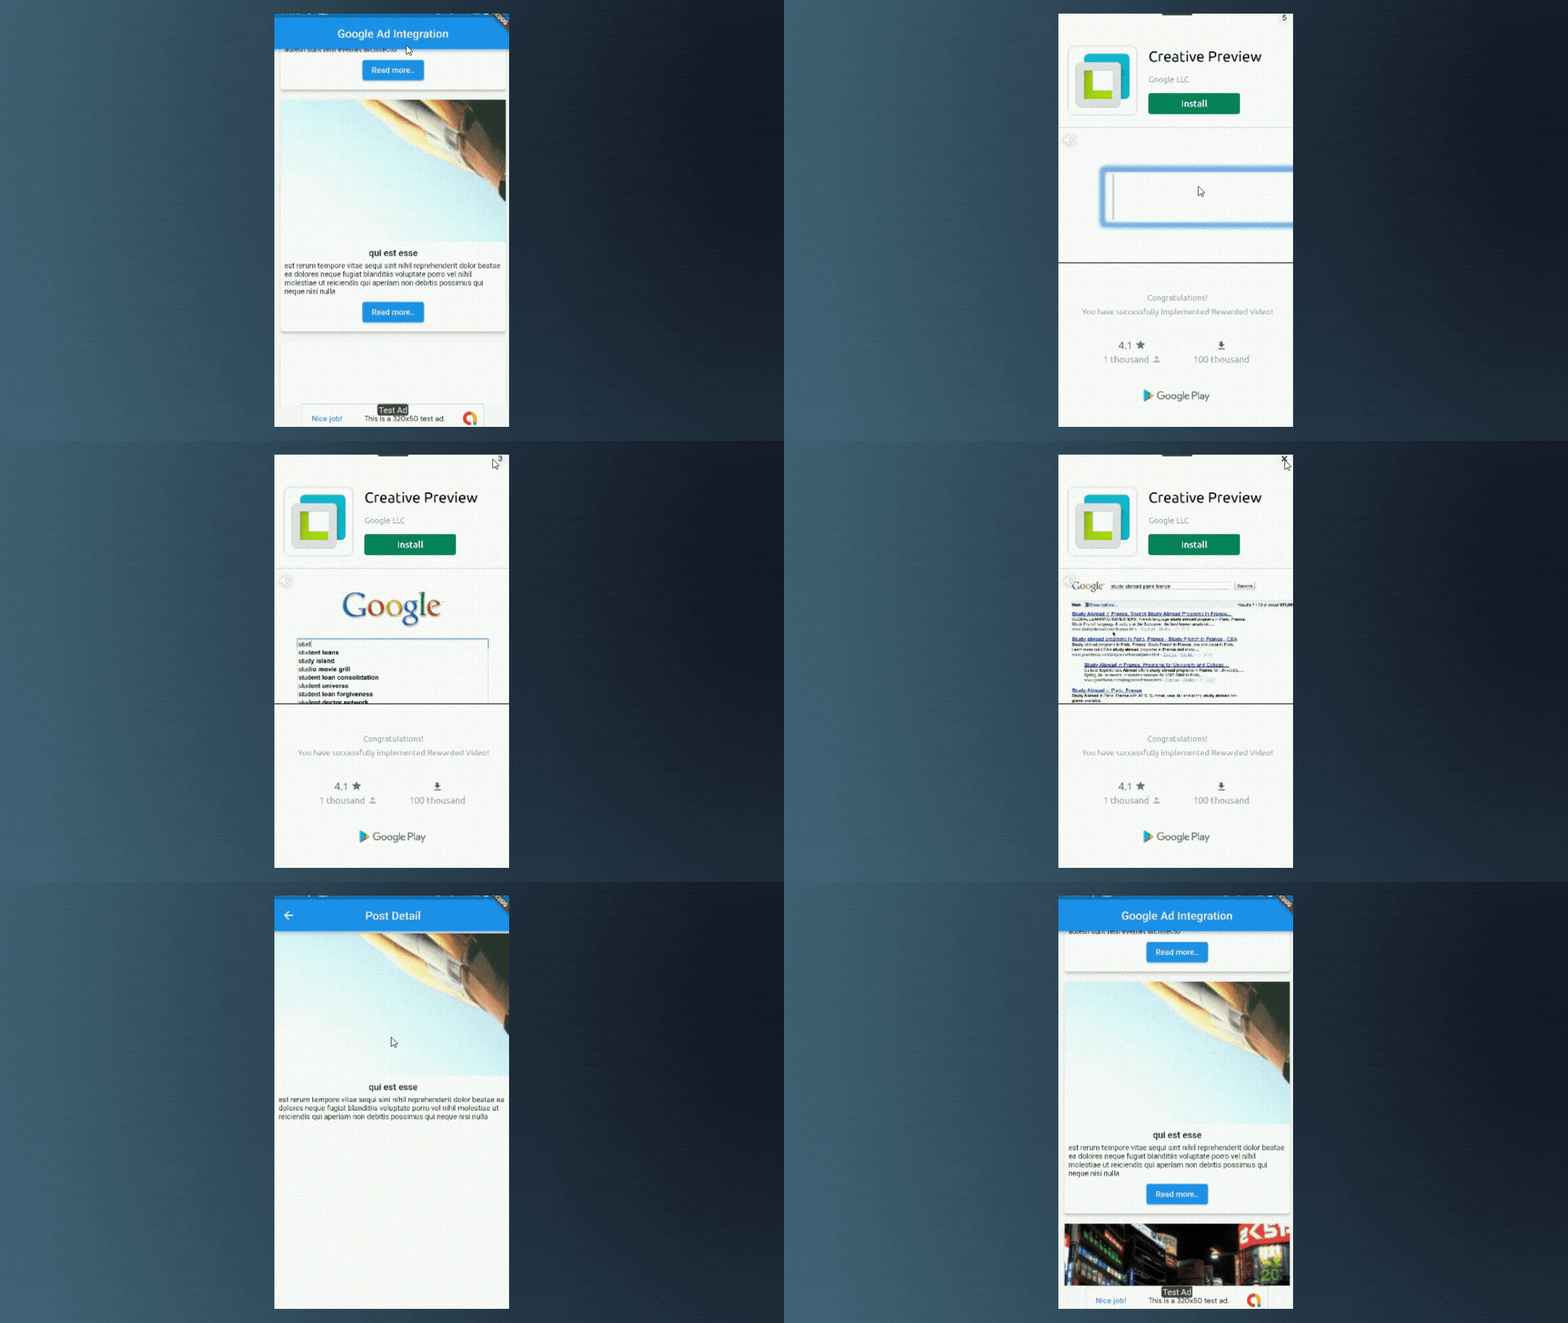
Woohoo!! 🎉

Adding RewardedAd to UI
- Rewarded ads provide an opportunity for users to watch a video or engage with a playable ad in exchange for a reward within the app.
- This is usually used in Games.
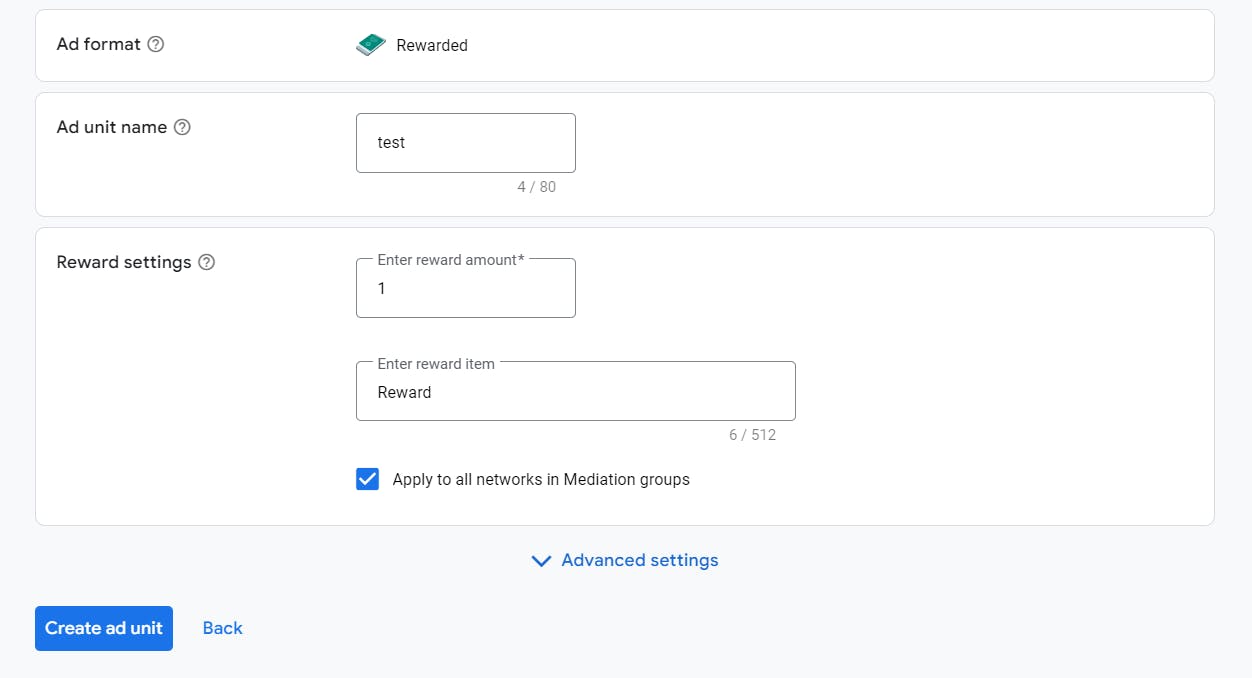
- So, first, create a Rewarded ad unit from the AdMob console. Here you can also Enter information about the rewards users will receive after viewing a rewarded ad in this ad unit. Define the reward items—such as coins or extra lives—and their amounts.
- First, let's create a getter for getting the unitId for rewarded ads
static String get rewardedAdUnitId { if (Platform.isAndroid) { return "ca-app-pub-3940256099942544/5224354917"; } else { return "ca-app-pub-3940256099942544/1712485313"; } }- Now, let's implement it in our app. First, let's create an instance and a boolean as we've done in the above two example
late RewardedAd _rewardedAd; bool _isRewardedAdLoaded= false;- Let's initialize this inside
initState @override void initState() { super.initState(); RewardedAd.load( adUnitId: AdState.rewardedAdUnitId, request: const AdRequest(), rewardedAdLoadCallback: RewardedAdLoadCallback( onAdLoaded: (ad) { _rewardedAd = ad; ad.fullScreenContentCallback = FullScreenContentCallback( onAdDismissedFullScreenContent: (ad) { setState(() { _isRewardedAdLoaded = false; }); }, ); setState(() { _isRewardedAdLoaded = true; }); }, onAdFailedToLoad: (err) { setState(() { _isRewardedAdLoaded = false; }); }, ), ); }- Also dispose it inside
dispose()function @override void dispose() { _bottomBannerAd.dispose(); _interstitialAd.dispose(); _rewardedAd.dispose(); super.dispose(); }- Now let's
show()this on FloatingActionButton clickScaffold( floatingActionButton: FloatingActionButton( child: const Icon(Icons.gamepad), onPressed: () { _rewardedAd.show( onUserEarnedReward: (ad, reward) { // perform operation when earned rewards }, ); }, ), //.... 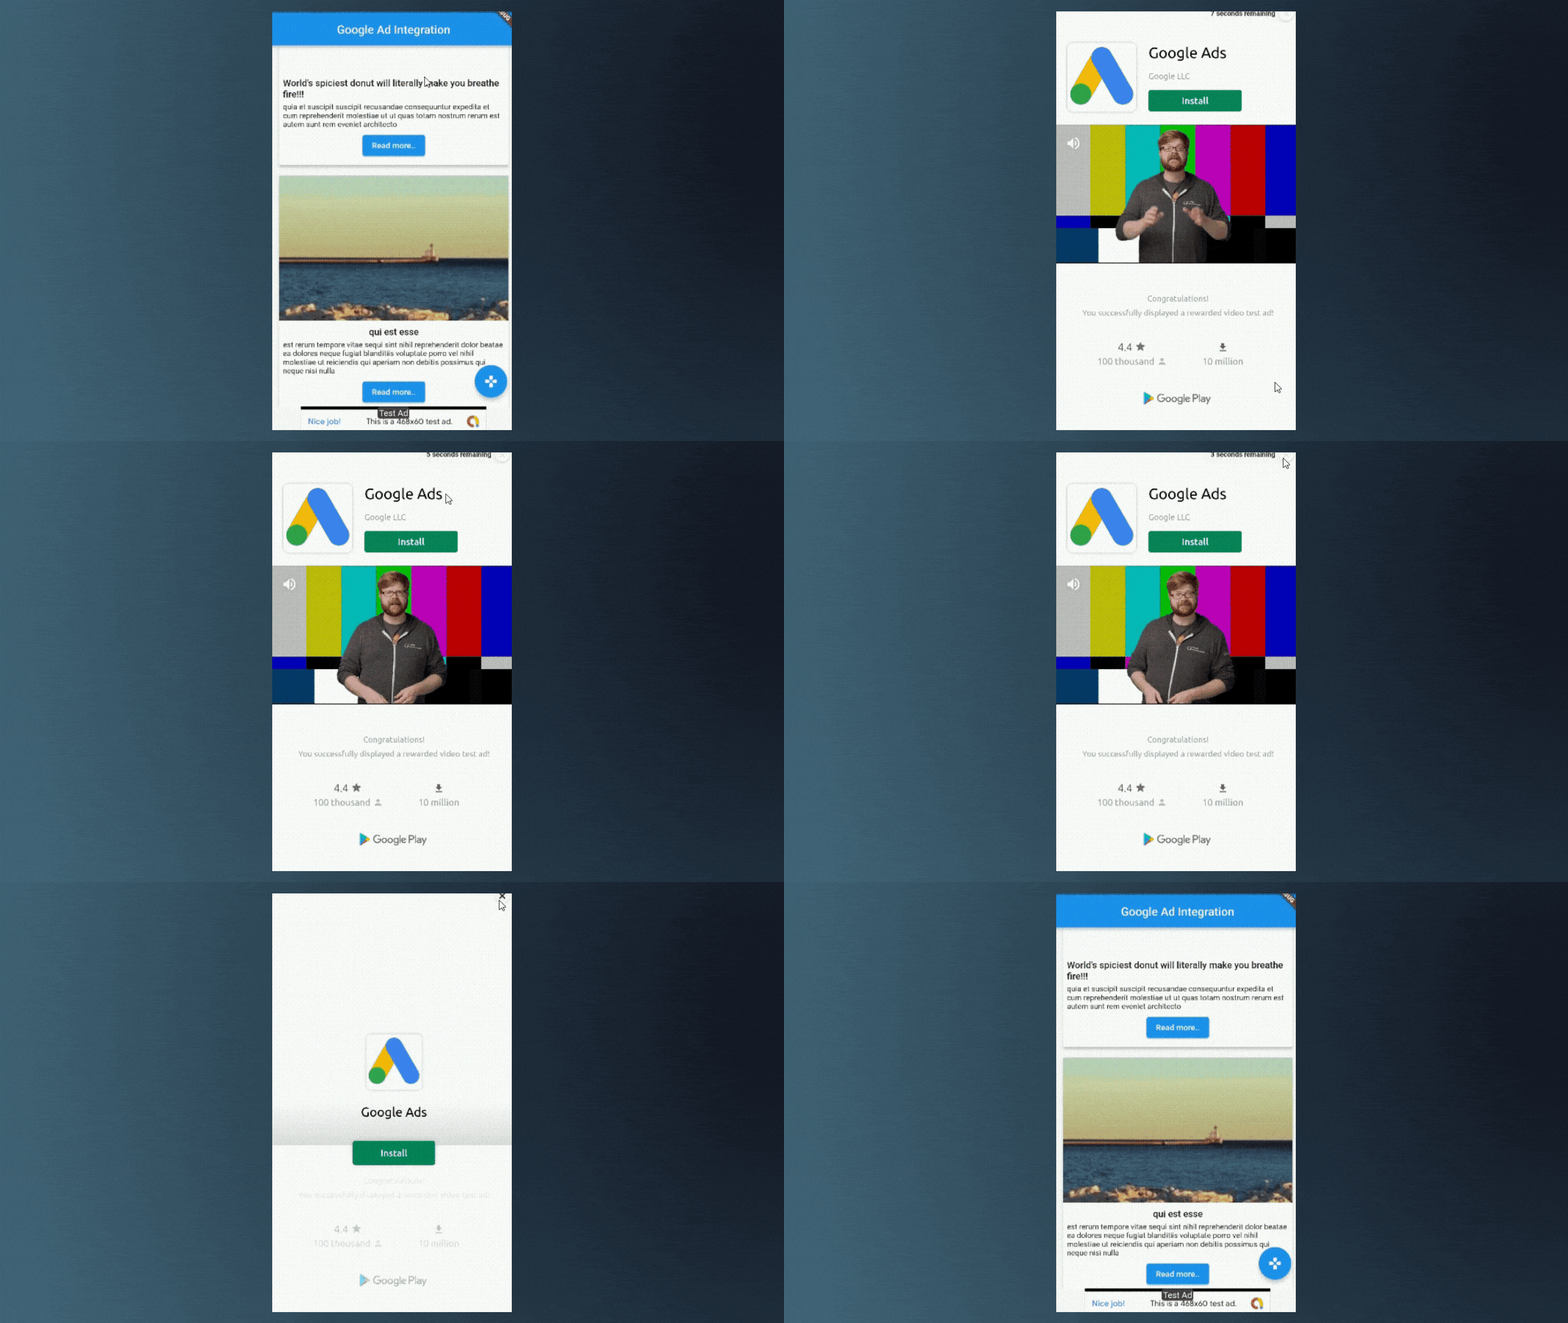

Wrapping Up
- That's It. It's that simple to integrate ads in your app. But only adding ads is not efficient when it comes to monetizing.
- You should also take care of your user experience and not popping ads every single place. There are many strategies that you can use to make your app more user-friendly and also a source of income at the same time.
- So, If you found this article helpful then make sure to share it with others. And also leave feedback in the comments.
- Thanks for reading. See you in the next article. Till then.....


