# Firebase x Flutter: Cloud Messaging
## Intro
- One of the most important components of any application is notification. We can use it to notify users about new emails, offers, or other information, effectively re-engaging and retaining them.
- 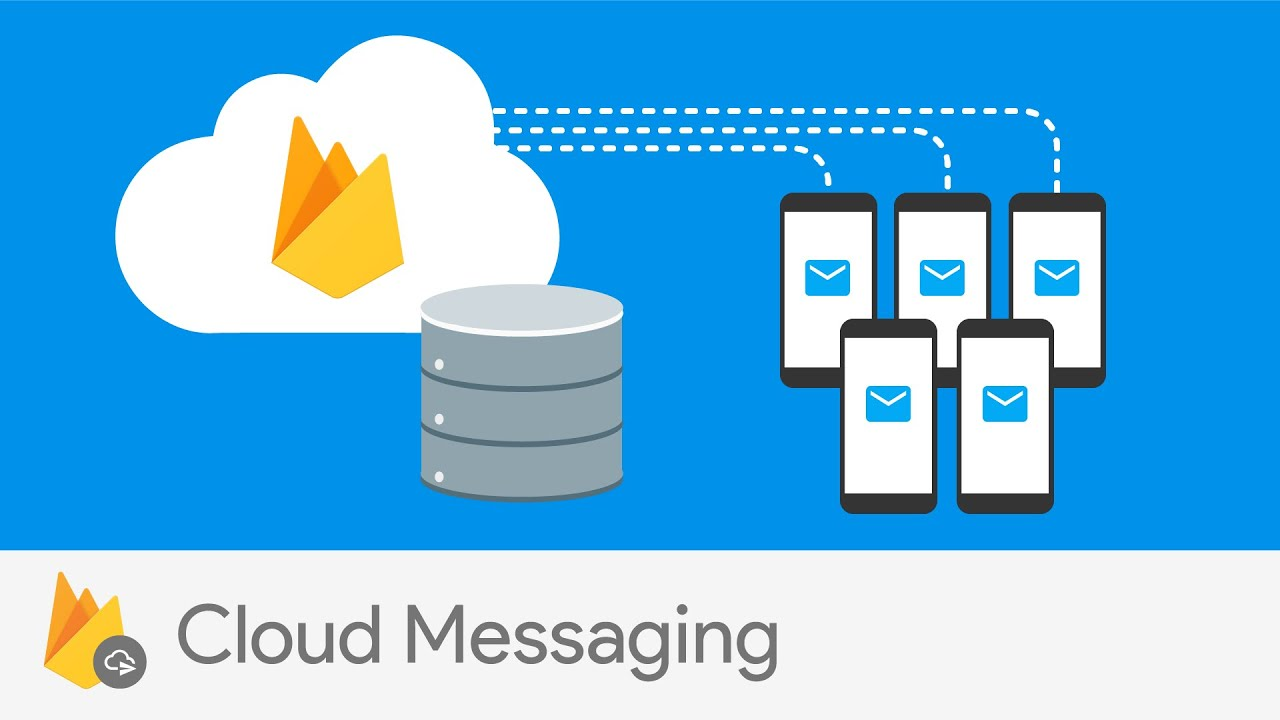
- And you can do just that using Firebase Cloud Messaging. Sending messages to your users is simple with Firebase. It's a free tool that lets you deliver messages to your users' apps on several platforms.
- We can send notifications to a single device or a group of devices, as well as to users who have subscribed to a topic.
- The following are the main advantages of adopting FCM:
1. **It's Strong**
2. **It's Scalable**
3. **It's Capable of Delivering Hundreds of Billions of Messages Per Day**
4. **Message Delivery in 250 Milliseconds**, and so on.
- After a brief introduction to FCM, let's look at how we may manage push notifications in the Flutter application.
----------
## Connect Firebase to Flutter
- First and foremost, we must connect our app to Firebase in order to deliver notifications via the Firebase Console.
- Go to the [Firebase Console](https://console.firebase.google.com/) and make a project there. And connect the Android and iOS with it.
> Make sure you do not forget to add the **SHA** keys to your project. And place the updated **google-services.json** in the `android/src/` folder.
- Check [this](https://stackoverflow.com/questions/51845559/generate-sha-1-for-flutter-react-native-android-native-app) for getting SHA keys
----------
## Installation of Dependencies
- Now that we've successfully connected Firebase to our app, we can open the project in VSCode or any other editor of your choice.
- And add the dependencies listed below to the `pubspec.yaml` file. Make sure you're using the most recent version of the dependencies.
-
```
dependencies:
flutter:
sdk: flutter
cupertino_icons: ^1.0.2
firebase_core: ^1.12.0
firebase_messaging: ^11.2.6
get_it: ^7.2.0
```
-------------
## Using Cloud Messaging
- Now that we've completed all of the necessary configurations, it's time to integrate Cloud Messaging into our application.

- So, first and foremost, we must initialize Firebase in the `main` function.
```
Future main() async {
WidgetsFlutterBinding.ensureInitialized();
await Firebase.initializeApp();
runApp(const MyApp());
}
```
- Now, under the `lib\services` folder, create a file named `push_notification.dart` to use the Cloud Messaging service.
- We will cover all scenarios in this class in order to get notifications in both the **foreground** and **background**.
- First, let's make a **FirebaseMessaging** instance.
```
class PushNotificationService {
final FirebaseMessaging _fcm = FirebaseMessaging.instance;
}
```
- Next, add two variables of type **ValueNotifier** to hold the message text received in the notification. Why **ValueNotifier**? It's because We want to listen to the notification and change the message based on what we receive from the notification.
```
class PushNotificationService {
// ...
final ValueNotifier _title = ValueNotifier(null);
final ValueNotifier _body = ValueNotifier(null);
ValueNotifier get getTitle => _title;
ValueNotifier get getBody => _body;
set setTitle(titleText) {
_title.value = titleText;
}
set setBody(bodyText) {
_body.value = bodyText;
}
}
```
### Getting the Permission from the User
- To get the notification, you must first request permission from the user in Apple/Web. It is not necessary for Android apps to ask for permission.

- To receive the user's permission to show the notification, the Firebase Messaging package provides a function called `requestPermission()` out of the box.
- This API takes a number of named arguments to specify the permissions you want to obtain.
- To begin, inside our class, add a single function called `initialise()` that will handle all permissions.
-
```
Future initialise() async {
// Requesting the permission from the user to show the notification
NotificationSettings settings = await _fcm.requestPermission(
alert: true,
announcement: false,
badge: true,
carPlay: false,
criticalAlert: false,
provisional: false,
sound: true,
);
}
```
- We can use AuthorizationStatus to verify the state of permissions. We can now listen to the notification using the **onMessage** stream after the user permits the app to send it.
- While your application is running in the foreground, the **onMessage** stream listens for messages.
- The stream contains a **RemoteMessage**. Which contains all of the relevant information, such as the notification payload, unique ids, sent time, and so on.
-
```
Future initialise() async {
// ...
// Continuosaly Listening to notification using [onMessage] stream
if (settings.authorizationStatus == AuthorizationStatus.authorized) {
FirebaseMessaging.onMessage.listen((RemoteMessage message) {
// Updating the local values
if (message.notification != null) {
setTitle = message.notification!.title;
setBody = message.notification!.body;
}
});
} else if (settings.authorizationStatus ==
AuthorizationStatus.provisional) {
debugPrint('User granted provisional permission');
} else {
debugPrint('User declined or has not accepted permission');
}
}
```
### Handling the Background Notifications
- The **onMessage** stream can listen to and handle foreground messages, as we've seen above.
- FirebaseMessaging contains a function named `onBackgroundMessage()` that handles messages that arrive while the app is operating in the background.
- There are a few considerations for your background message handler:
- **It can't be an anonymous function.**
- **It has to be a top-level function (e.g. not a class method that requires initialization).**
- Let's create a method outside of our **PushNotification** class.
```
// Called when the app is in the background or terminated.
Future firebaseMessagingBackgroundHandler(RemoteMessage message) async {
debugPrint("Handling a background message: ${message.messageId}");
}
class PushNotificationService {
//...
}
```
- Now call this method inside the `main` method
-
```
Future main() async {
//...
FirebaseMessaging.onBackgroundMessage(firebaseMessagingBackgroundHandler);
}
```
- When the app is running in the background, we want our users to be able to click on the notification. To accomplish this, we must listen to the FirebaseMessaging class's `onMessageOpenedApp` stream. Let's use our PushNotification class to build this method.
-
```
Future setupInteractedMessage(context) async {
// Handle any interaction when the app is in the background via a
// Stream listener
FirebaseMessaging.onMessageOpenedApp.listen((RemoteMessage message) {
_handleMessage(message, context);
});
}
//..
void _handleMessage(RemoteMessage message, BuildContext context) {
// Updating local values with the values received from the Notification
if (message.notification != null) {
setTitle = message.notification!.title;
setBody = message.notification!.body;
}
//..
// Navigating to specific screen
if (message.data['type'] == 'offer') {
Navigator.push(
context,
MaterialPageRoute(
builder: (_) => OfferPage(offerData: message.data),
),
);
}
}
```
----------
## Setting up Locator (Singleton Class)
- For dependency injection, we'll use the [get it](https://pub.dev/packages/get it) package. This is because I wanted to use a singleton class in this case. You are free to use whatever you want. It's just useful when only one object is required to coordinate actions throughout the entire system.
- Create a `locator.dart` class inside `lib\services` and add the below code.
-
```
import 'package:fcm_flutter/services/push_notification.dart';
import 'package:get_it/get_it.dart';
//..
GetIt locator = GetIt.instance;
//..
void setupLocator() {
locator.registerLazySingleton(() => PushNotificationService());
}
```
- Now let's call this `setupLocator` method inside the `main` method.
-
```
Future main() async {
//...
setupLocator();
//...
}
```
----------
## Showing Notification Messages on Screen
- Recall that we defined two variables: `title` and `body`. Now let's put these variables to work in the UI.
- The user interface is straightforward, as demonstrated below:
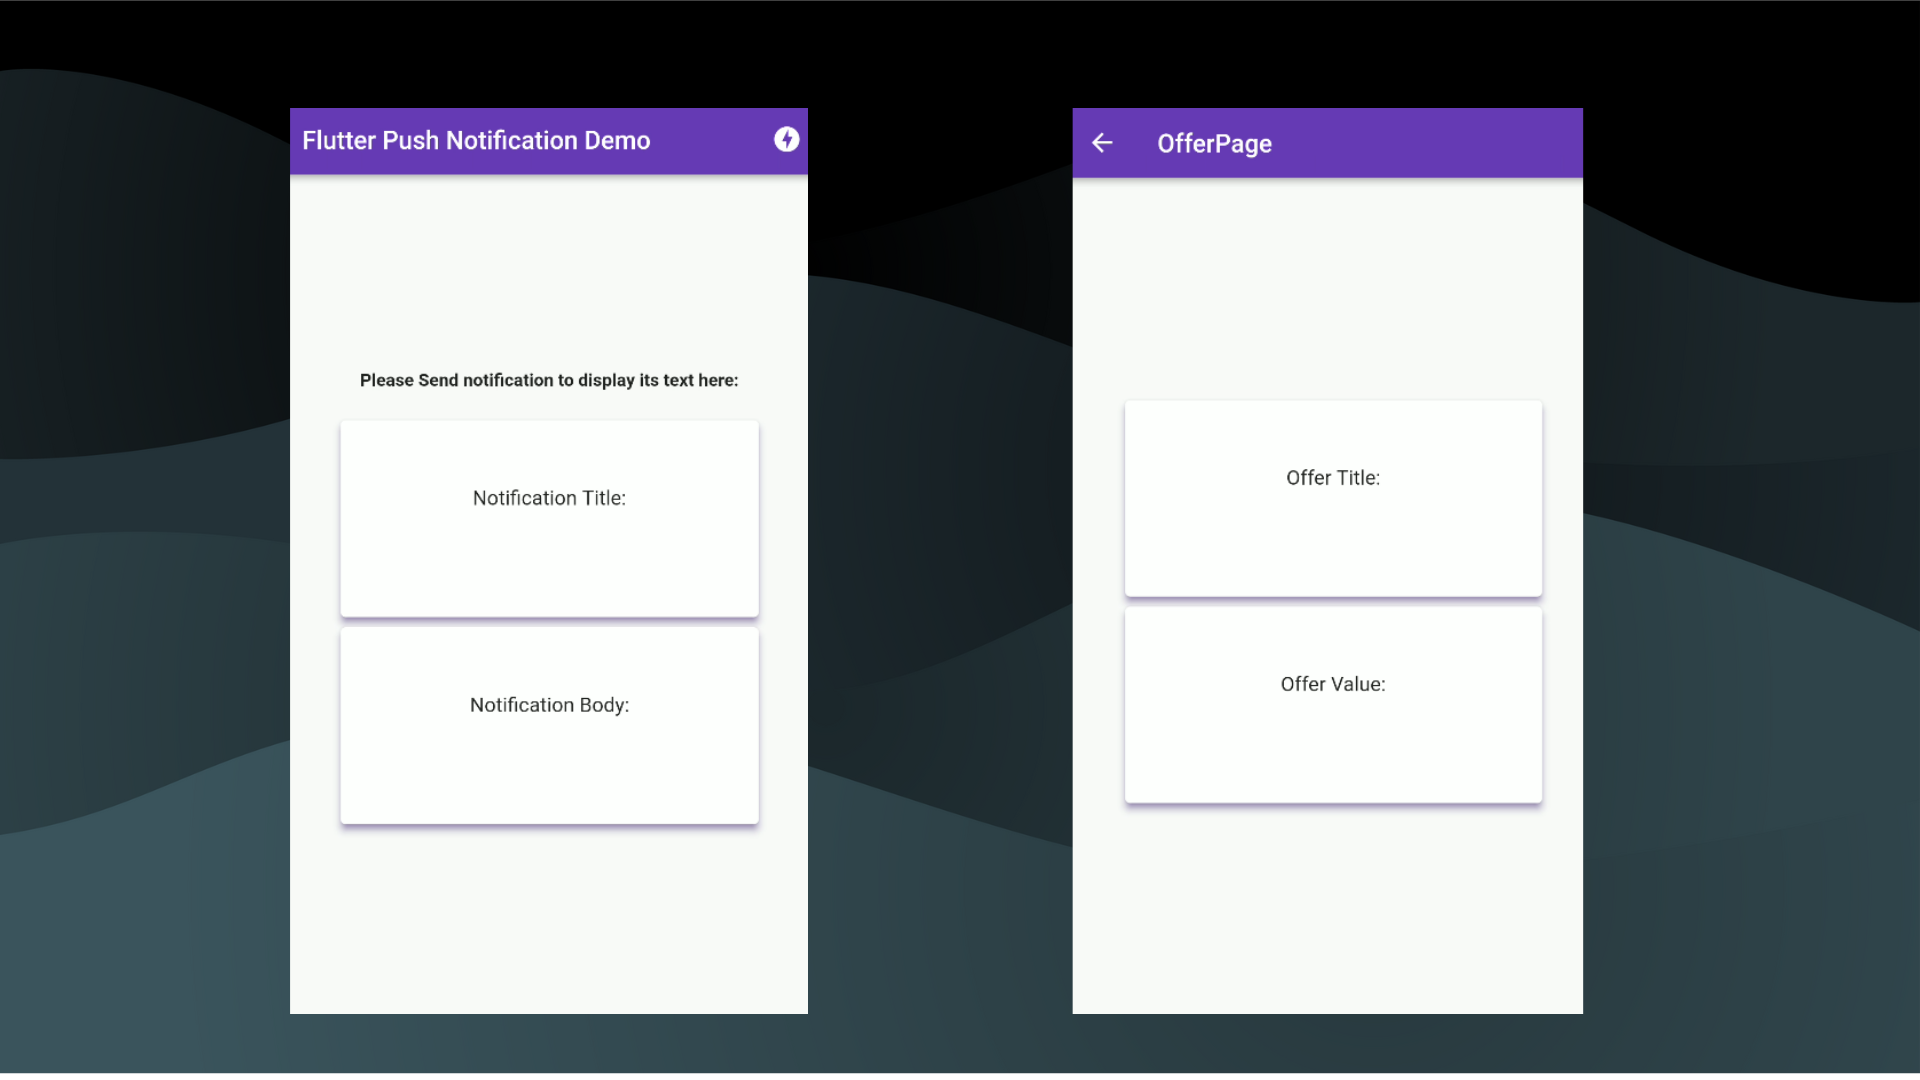
- HomePage and OfferPage are the two screens. And both will have two cards: one with the notification title text and the other with the notification body.
- Let's start with the HomePage. We need to call the `initialise()` method to listen to the notification. In order to interact with the notification while the app is running in the background, we must also call the **PushNotification** class `setupInteractedMessage()` from within the `initState()` method.
-
```
final PushNotificationService pushNotificationService =
locator();
//..
@override
void initState() {
pushNotificationService.initialise();
pushNotificationService.setupInteractedMessage(context);
super.initState();
}
```
- Now that all of the methods have been initialized. To listen to the changes, we must surround our `title` and `body` content with **ValueListenableBuilder**.
-
```
ValueListenableBuilder(
valueListenable: pushNotificationService.getTitle,
builder: (context, title, _) {
return Text("${title ?? ""} ,
style: const TextStyle(
fontSize: 24,
fontWeight: FontWeight.bold,
),
textAlign: TextAlign.center,
);
},
)
//....
ValueListenableBuilder(
valueListenable: pushNotificationService.getBody,
builder: (context, body, _) {
return Text("${body?? ""} ,
style: const TextStyle(
fontSize: 24,
fontWeight: FontWeight.bold,
),
textAlign: TextAlign.center,
);
},
)
```
--------
## Sending Notification using FCM Console
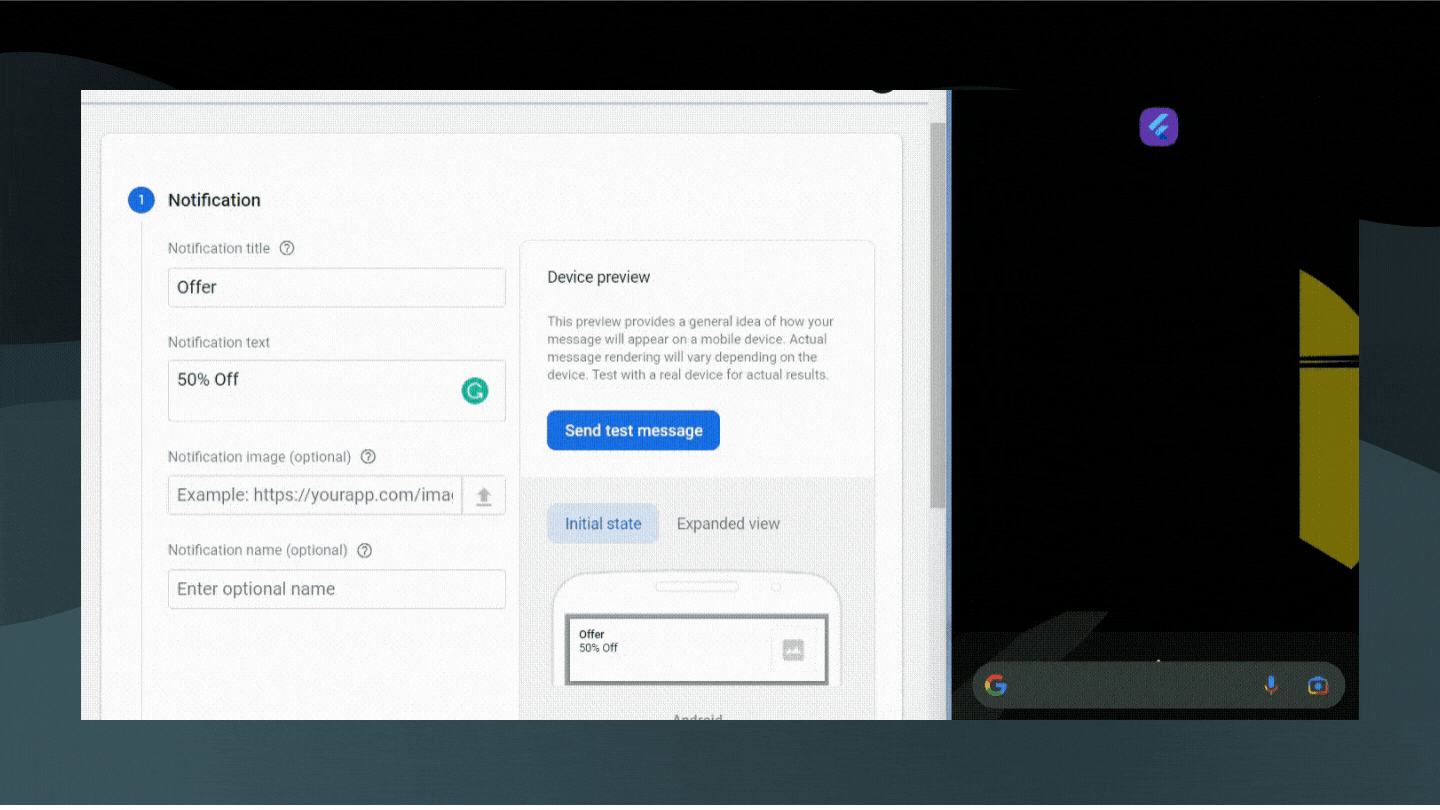
- Now that our application is ready for the notifications. Let's try to send some.
- Head over to Firebase Console. Find the Cloud Messaging section on the left panel.
- And send your first notification...
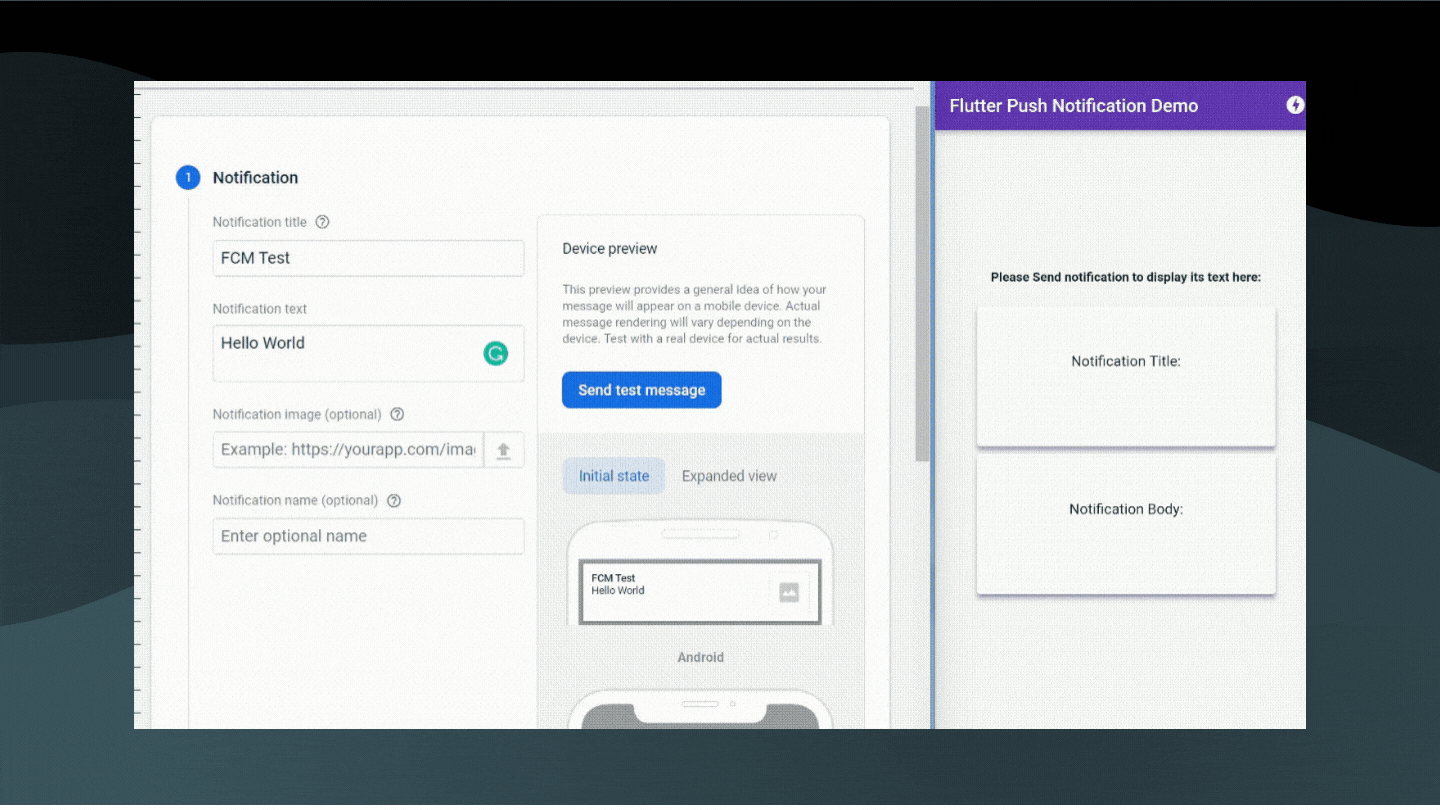
- As you can see, the notification's **Title** and **Body** have been correctly shown by the app.
- Let's try minimizing the app and sending the notification now. This time, when the app receives a notification and the user clicks on it, the user will be taken to the offer page.
> Remember to include the `intent-filter` element in the AndroidManifest.xml file under the tag.
```
```
- As you can see we are being redirected to the offer page after clicking on the notification.
-----------
## Sending Notification to Topics
- Topics are an FCM-managed technique that allows a device to subscribe to and unsubscribe from named PubSub channels.
- Rather than delivering a message to a specific device via FCM token, you can instead send a message to a topic, which will be received by all devices subscribed to that topic.
- To subscribe to a device, call the `subscribeToTopic` method with the topic name:
```
await FirebaseMessaging.instance.subscribeToTopic('weather');
```
- To unsubscribe from a topic, call the `unsubscribeFromTopic` method with the topic name:
```
await FirebaseMessaging.instance.unsubscribeFromTopic('weather');
```
----------
## Final Project Repo
- %[https://github.com/red-star25/blog_fcm_flutter]
> Make sure **your** `google-services.json` file is included.
---------
## Wrapping Up
- **I hope you enjoyed this article. If you have any feedback/queries, leave them in the comments.**
- **Thank you for spending time reading this article. See you in the next article. Until then...**