Firebase x Flutter: Cloud Messaging
How to push notification in Flutter using Firebase Cloud Messaging (FCM)?

Intro
- One of the most important components of any application is notification. We can use it to notify users about new emails, offers, or other information, effectively re-engaging and retaining them.
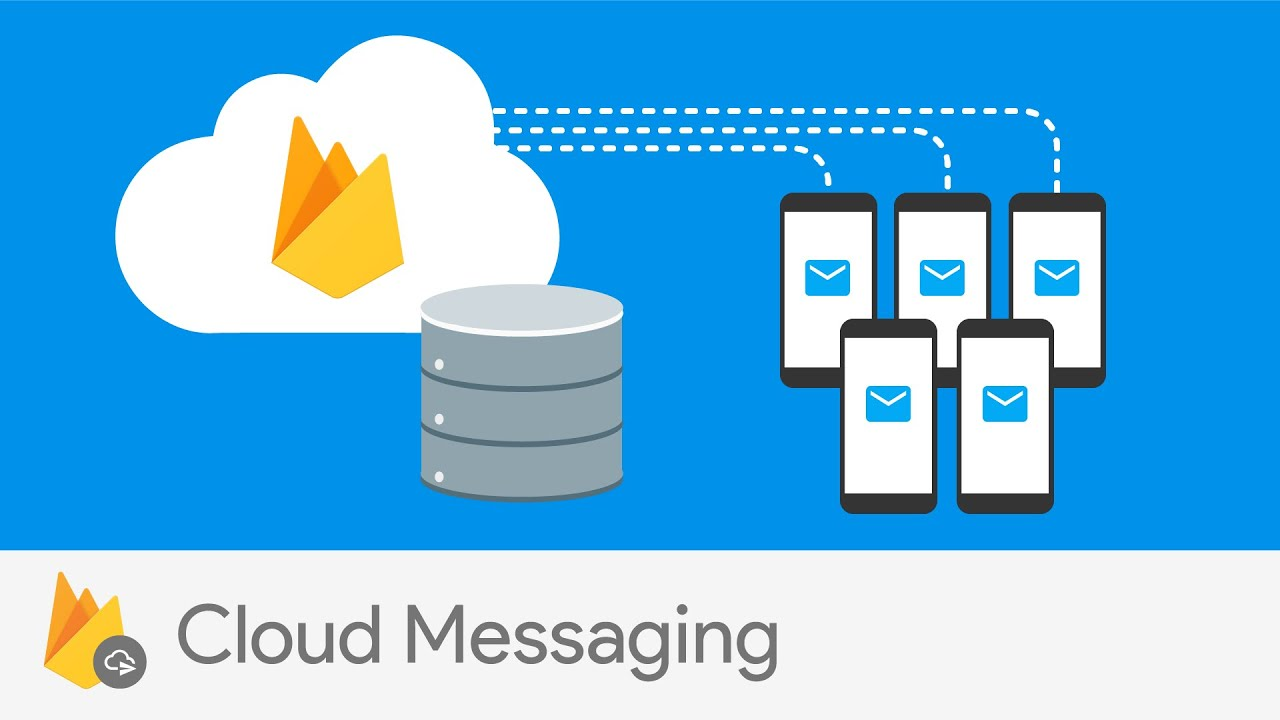
- And you can do just that using Firebase Cloud Messaging. Sending messages to your users is simple with Firebase. It's a free tool that lets you deliver messages to your users' apps on several platforms.
- We can send notifications to a single device or a group of devices, as well as to users who have subscribed to a topic.
- The following are the main advantages of adopting FCM:
- It's Strong
- It's Scalable
- It's Capable of Delivering Hundreds of Billions of Messages Per Day
- Message Delivery in 250 Milliseconds, and so on.
- After a brief introduction to FCM, let's look at how we may manage push notifications in the Flutter application.
Connect Firebase to Flutter
- First and foremost, we must connect our app to Firebase in order to deliver notifications via the Firebase Console.
- Go to the Firebase Console and make a project there. And connect the Android and iOS with it.
Make sure you do not forget to add the SHA keys to your project. And place the updated google-services.json in the
android/src/folder. - Check this for getting SHA keys
Installation of Dependencies
- Now that we've successfully connected Firebase to our app, we can open the project in VSCode or any other editor of your choice.
- And add the dependencies listed below to the
pubspec.yamlfile. Make sure you're using the most recent version of the dependencies. dependencies: flutter: sdk: flutter cupertino_icons: ^1.0.2 firebase_core: ^1.12.0 firebase_messaging: ^11.2.6 get_it: ^7.2.0
Using Cloud Messaging
- Now that we've completed all of the necessary configurations, it's time to integrate Cloud Messaging into our application.

- So, first and foremost, we must initialize Firebase in the
mainfunction.Future<void> main() async { WidgetsFlutterBinding.ensureInitialized(); await Firebase.initializeApp(); runApp(const MyApp()); } - Now, under the
lib\servicesfolder, create a file namedpush_notification.dartto use the Cloud Messaging service. - We will cover all scenarios in this class in order to get notifications in both the foreground and background.
- First, let's make a FirebaseMessaging instance.
class PushNotificationService {
 final FirebaseMessaging _fcm = FirebaseMessaging.instance;
}
Next, add two variables of type ValueNotifier to hold the message text received in the notification. Why ValueNotifier? It's because We want to listen to the notification and change the message based on what we receive from the notification.
class PushNotificationService {
// ...
 final ValueNotifier<String?> _title = ValueNotifier(null);
 final ValueNotifier<String?> _body = ValueNotifier(null);

 ValueNotifier<String?> get getTitle => _title;
 ValueNotifier<String?> get getBody => _body;

   set setTitle(titleText) {
     _title.value = titleText;
   }

   set setBody(bodyText) {
     _body.value = bodyText;
   }
}
Getting the Permission from the User
- To get the notification, you must first request permission from the user in Apple/Web. It is not necessary for Android apps to ask for permission.

- To receive the user's permission to show the notification, the Firebase Messaging package provides a function called
requestPermission()out of the box. - This API takes a number of named arguments to specify the permissions you want to obtain.
- To begin, inside our class, add a single function called
initialise()that will handle all permissions. Future initialise() async { // Requesting the permission from the user to show the notification NotificationSettings settings = await _fcm.requestPermission( alert: true, announcement: false, badge: true, carPlay: false, criticalAlert: false, provisional: false, sound: true, ); }- We can use AuthorizationStatus to verify the state of permissions. We can now listen to the notification using the onMessage stream after the user permits the app to send it.
- While your application is running in the foreground, the onMessage stream listens for messages.
- The stream contains a RemoteMessage. Which contains all of the relevant information, such as the notification payload, unique ids, sent time, and so on.
Future initialise() async {
  // ...
  // Continuosaly Listening to notification using [onMessage] stream
  if (settings.authorizationStatus == AuthorizationStatus.authorized) {
    FirebaseMessaging.onMessage.listen((RemoteMessage message) {
      // Updating the local values
      if (message.notification != null) {
        setTitle = message.notification!.title;
        setBody = message.notification!.body;
      }
    });
  } else if (settings.authorizationStatus ==
      AuthorizationStatus.provisional) {
    debugPrint('User granted provisional permission');
  } else {
    debugPrint('User declined or has not accepted permission');
  }
}
Handling the Background Notifications
- The onMessage stream can listen to and handle foreground messages, as we've seen above.
- FirebaseMessaging contains a function named
onBackgroundMessage()that handles messages that arrive while the app is operating in the background. - There are a few considerations for your background message handler:
- It can't be an anonymous function.
- It has to be a top-level function (e.g. not a class method that requires initialization).
- Let's create a method outside of our PushNotification class.
// Called when the app is in the background or terminated. Future<void> firebaseMessagingBackgroundHandler(RemoteMessage message) async { debugPrint("Handling a background message: ${message.messageId}"); } class PushNotificationService { //... } - Now call this method inside the
mainmethod Future<void> main() async { //... FirebaseMessaging.onBackgroundMessage(firebaseMessagingBackgroundHandler); }When the app is running in the background, we want our users to be able to click on the notification. To accomplish this, we must listen to the FirebaseMessaging class's
onMessageOpenedAppstream. Let's use our PushNotification class to build this method.Future<void> setupInteractedMessage(context) async { // Handle any interaction when the app is in the background via a // Stream listener FirebaseMessaging.onMessageOpenedApp.listen((RemoteMessage message) { _handleMessage(message, context); }); } //.. void _handleMessage(RemoteMessage message, BuildContext context) { // Updating local values with the values received from the Notification if (message.notification != null) { setTitle = message.notification!.title; setBody = message.notification!.body; } //.. // Navigating to specific screen if (message.data['type'] == 'offer') { Navigator.push( context, MaterialPageRoute( builder: (_) => OfferPage(offerData: message.data), ), ); } }
Setting up Locator (Singleton Class)
- For dependency injection, we'll use the get it package. This is because I wanted to use a singleton class in this case. You are free to use whatever you want. It's just useful when only one object is required to coordinate actions throughout the entire system.
- Create a
locator.dartclass insidelib\servicesand add the below code. import 'package:fcm_flutter/services/push_notification.dart'; import 'package:get_it/get_it.dart'; //.. GetIt locator = GetIt.instance; //.. void setupLocator() { locator.registerLazySingleton(() => PushNotificationService()); }- Now let's call this
setupLocatormethod inside themainmethod. Future<void> main() async { //... setupLocator(); //... }
Showing Notification Messages on Screen
- Recall that we defined two variables:
titleandbody. Now let's put these variables to work in the UI. - The user interface is straightforward, as demonstrated below:
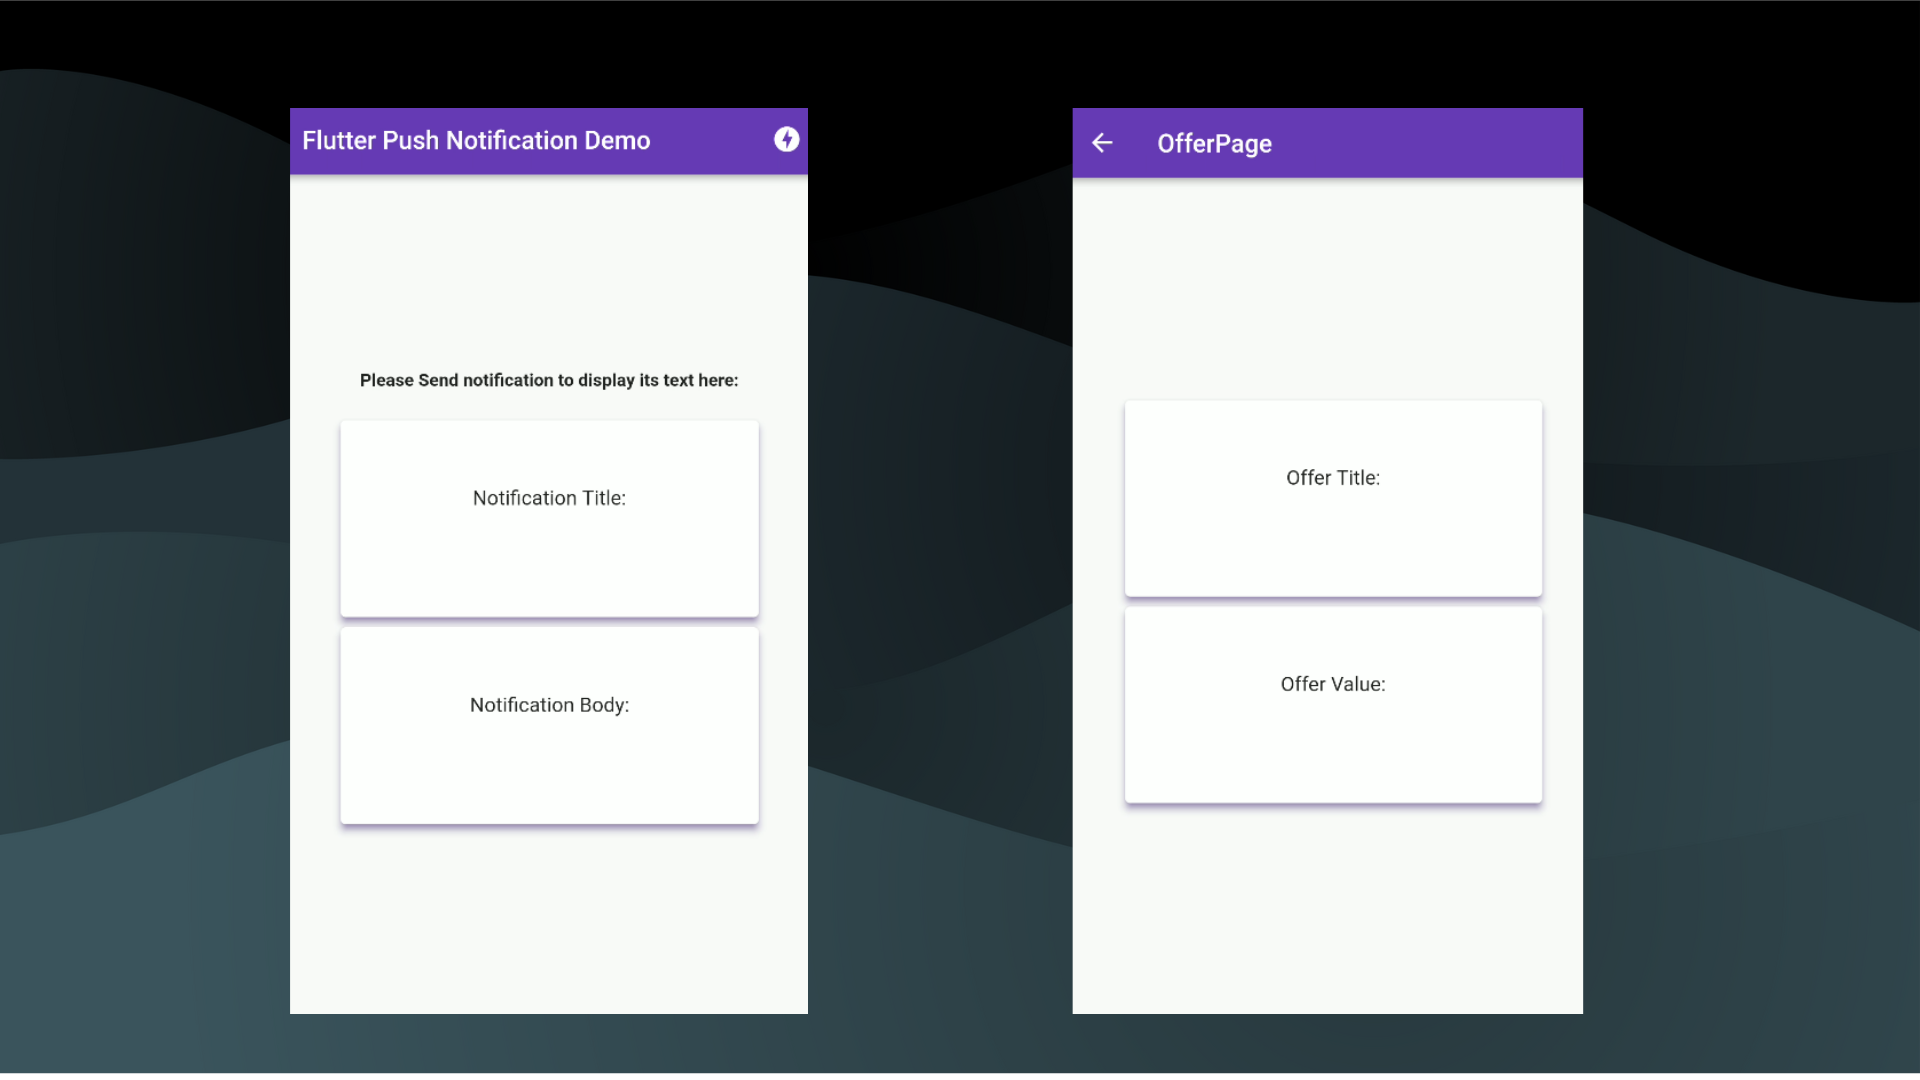
- HomePage and OfferPage are the two screens. And both will have two cards: one with the notification title text and the other with the notification body.
- Let's start with the HomePage. We need to call the
initialise()method to listen to the notification. In order to interact with the notification while the app is running in the background, we must also call the PushNotification classsetupInteractedMessage()from within theinitState()method. final PushNotificationService pushNotificationService = locator<PushNotificationService>(); //.. @override void initState() { pushNotificationService.initialise(); pushNotificationService.setupInteractedMessage(context); super.initState(); }- Now that all of the methods have been initialized. To listen to the changes, we must surround our
titleandbodycontent with ValueListenableBuilder. ValueListenableBuilder<String?>( valueListenable: pushNotificationService.getTitle, builder: (context, title, _) { return Text("${title ?? ""} , style: const TextStyle( fontSize: 24, fontWeight: FontWeight.bold, ), textAlign: TextAlign.center, ); }, ) //.... ValueListenableBuilder<String?>( valueListenable: pushNotificationService.getBody, builder: (context, body, _) { return Text("${body?? ""} , style: const TextStyle( fontSize: 24, fontWeight: FontWeight.bold, ), textAlign: TextAlign.center, ); }, )
Sending Notification using FCM Console
- Now that our application is ready for the notifications. Let's try to send some.
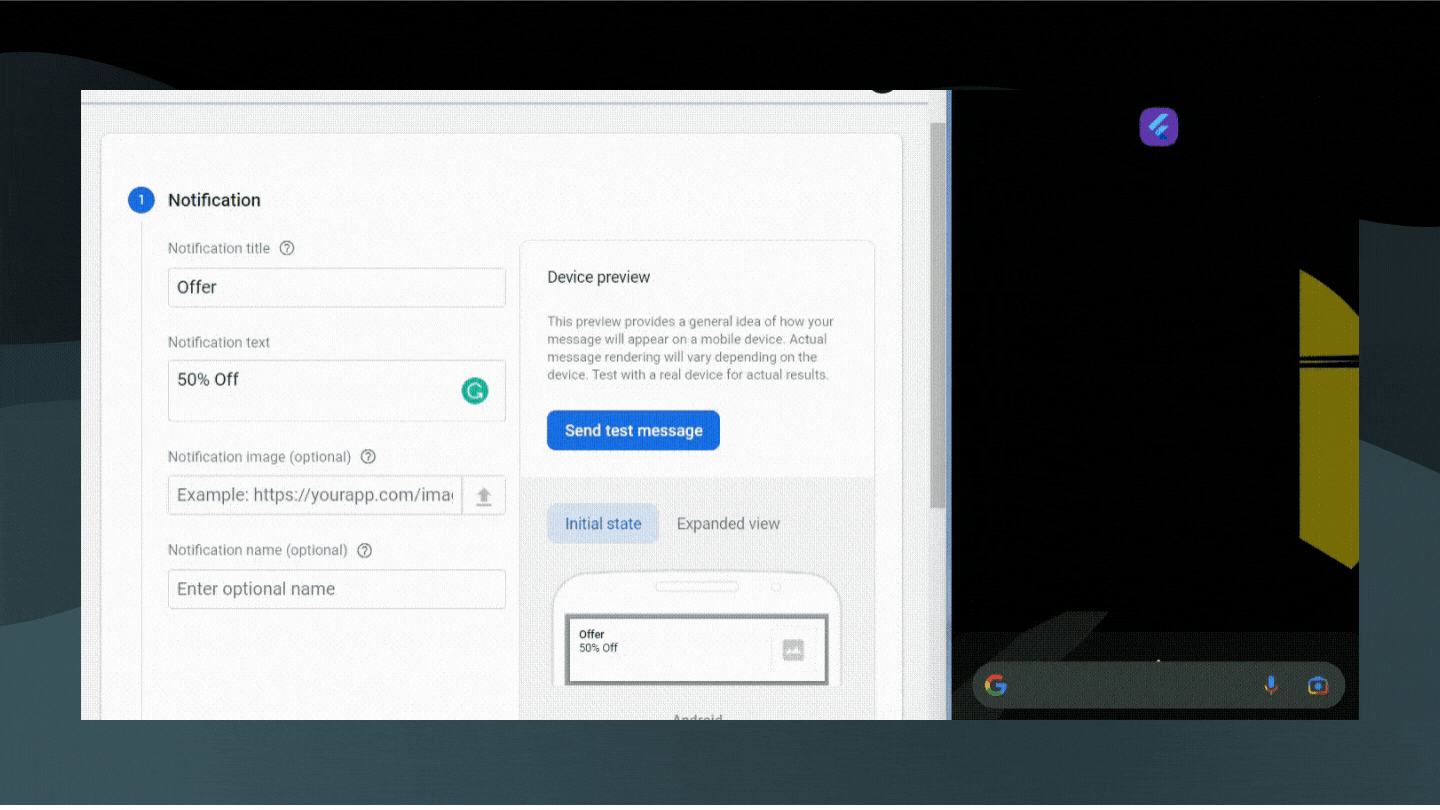
- Head over to Firebase Console. Find the Cloud Messaging section on the left panel.
- And send your first notification...
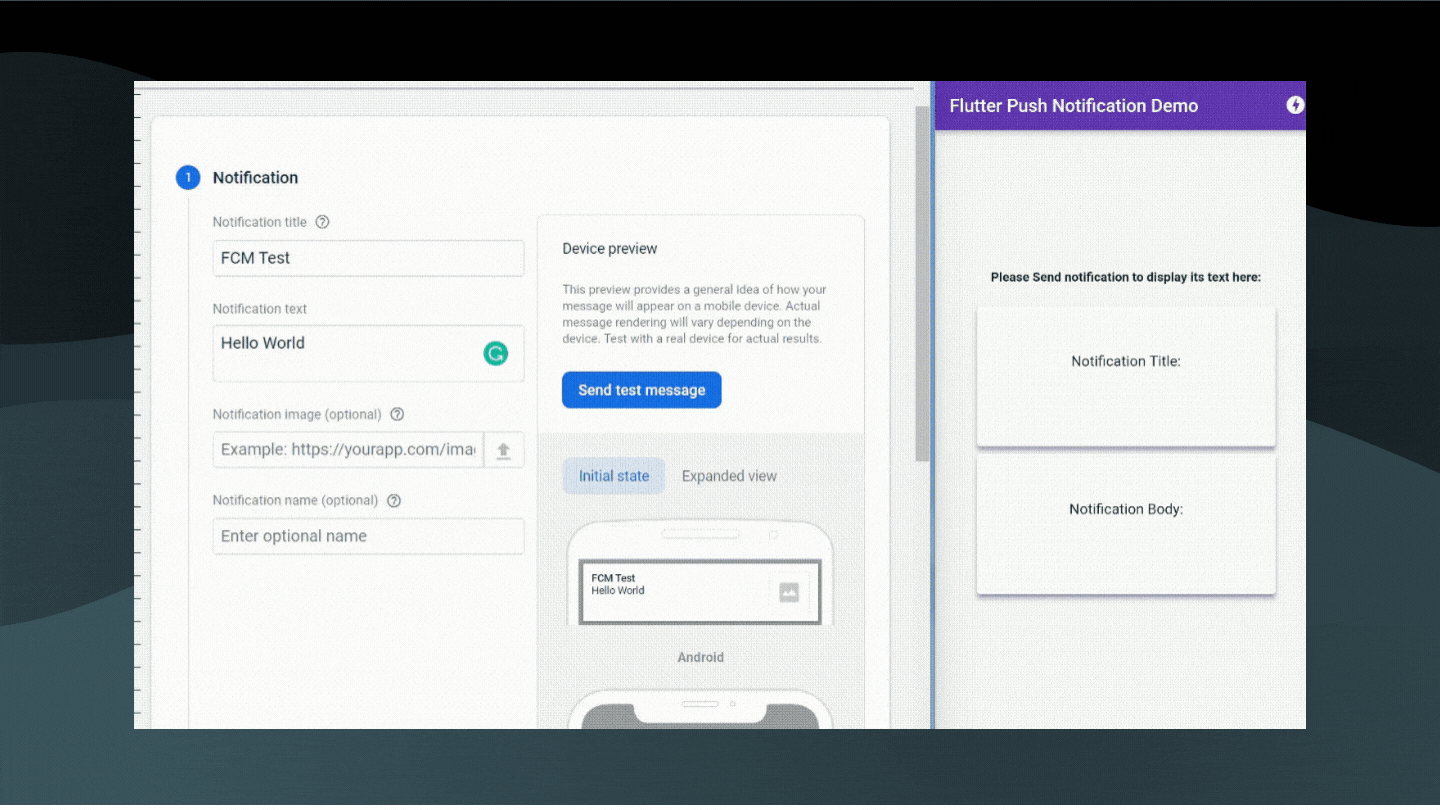
- As you can see, the notification's Title and Body have been correctly shown by the app.
- Let's try minimizing the app and sending the notification now. This time, when the app receives a notification and the user clicks on it, the user will be taken to the offer page.
Remember to include the
intent-filterelement in the AndroidManifest.xml file under the tag.
<intent-filter>
  <action android:name="FLUTTER_NOTIFICATION_CLICK" />
  <category android:name="android.intent.category.DEFAULT" />
</intent-filter>
- As you can see we are being redirected to the offer page after clicking on the notification.
Sending Notification to Topics
- Topics are an FCM-managed technique that allows a device to subscribe to and unsubscribe from named PubSub channels.
- Rather than delivering a message to a specific device via FCM token, you can instead send a message to a topic, which will be received by all devices subscribed to that topic.
- To subscribe to a device, call the
subscribeToTopicmethod with the topic name:await FirebaseMessaging.instance.subscribeToTopic('weather'); - To unsubscribe from a topic, call the
unsubscribeFromTopicmethod with the topic name:await FirebaseMessaging.instance.unsubscribeFromTopic('weather');
Final Project Repo
-
Make sure your
google-services.jsonfile is included.
Wrapping Up
- I hope you enjoyed this article. If you have any feedback/queries, leave them in the comments.
- Thank you for spending time reading this article. See you in the next article. Until then...