# Animation In Flutter: Staggered / Sequence Animation
## 🏀 Introduction
- We've seen **Implicit **and **Explicit **animations up to this point. How to use **Tween**, **CurvedAnimation**, and the **Animation **class to make a custom animation.
- We've shown how to animate several widgets at the same time. However, many times we want our widgets to animate in Sequential order.
- Let's take an example :
-
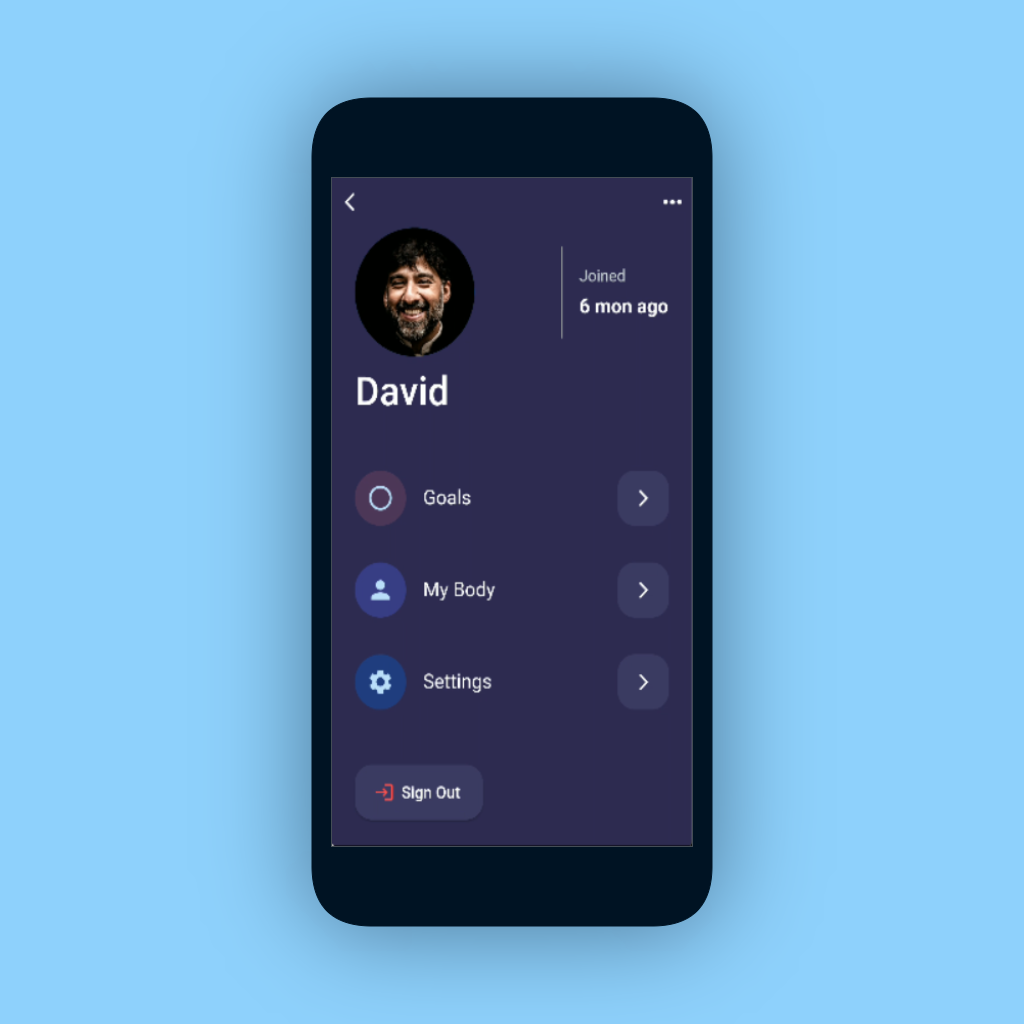
The above design is inspired by [Den Klenkov](https://dribbble.com/shots/15276067-Fitness-Goals)
- As you can see In the above mockup, there are many widgets available on the screen. Now, animating everything at once isn't going to look nice.
- In that situation, we may use **Staggered Animation** to animate it one by one with various **Curves **and **Animations**.
### 🚨 Important Note:
- Before digging into Staggered/Sequential animation, make sure you read the previous animation articles since we will be using the concepts of Tween, AnimationController, and Animation class in this article.
----------
## 🏐 Staggered Animation
- **Staggered Animation** is a series of animations that appears on the screen. It indicates that the animations will play one after the other in order.
-
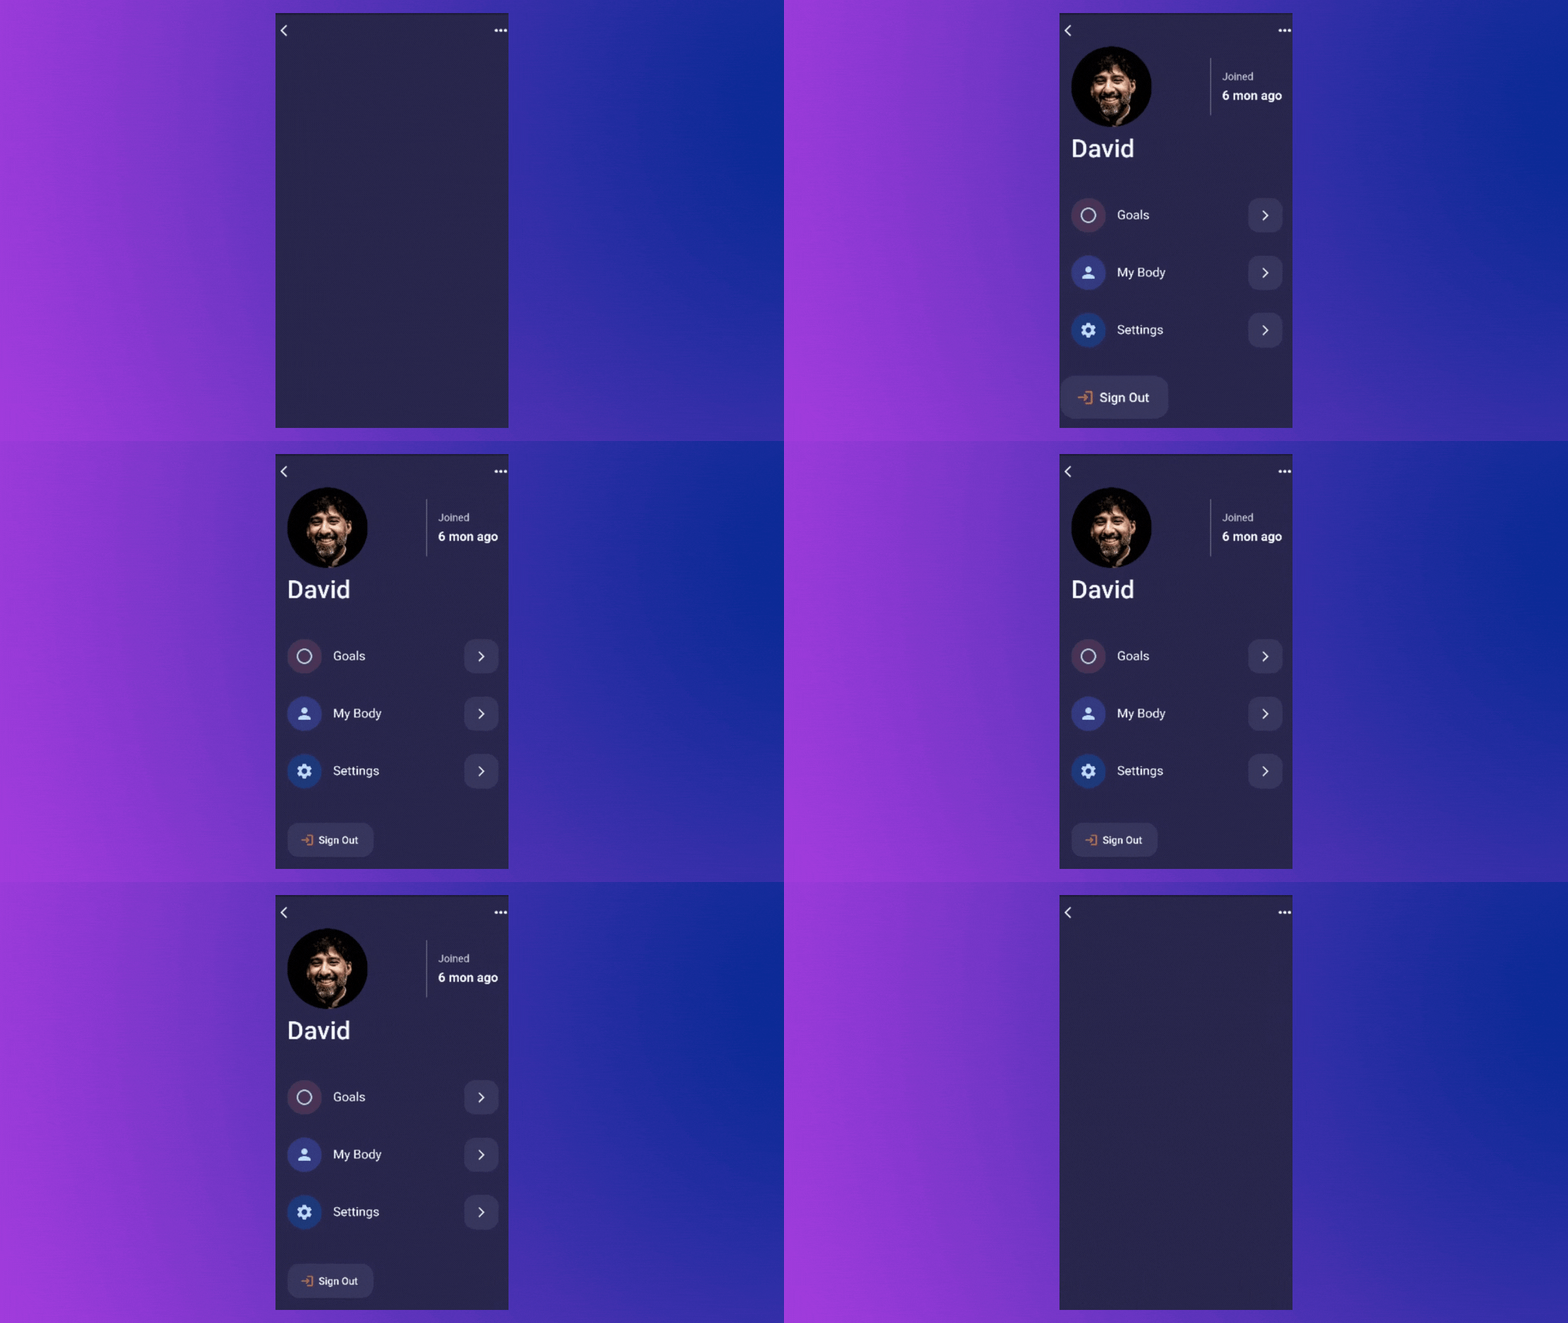
- As you can see in the sample above, the animation occurs in sequential order:
- First, the **Top section ** moves from the **Top **to the **Original **position.
- Then, **Text ** is **Fading in**,
- After that, The **ListMenu ** is animating from `Left` to `Right` and
- Finally, the **Sign Out Button ** is scaling from `0` to `1`.Everything is happening one by one.
- So, how do you create such animation? If you've read the preceding articles, you'll find it quite simple to comprehend.
- Before you begin the implementation, there are a few things you should be aware of:
- All of the animations that you are seeing in the above example are using only one single **AnimationController**.
-
The controller’s values must be between 0.0 and 1.0, inclusive.
-
Each animation has an `Interval` between 0.0 and 1.0, inclusive. You will see more about `Interval` further in this article.
-
Create a `Tween` and specify the `begin` and `end` values for each property that animate in the interval time.
---------
- Let's first understand what `Interval` is:
### ⌚ Interval
- **Interval **is used to simply delay the animation. It implies that if a period of `5 `seconds is specified and the **Interval** of the specific animation is set to `0.5` to `1.0`, the animation will begin when the time reaches `0.25` seconds.
- In our case, the **Interval **timeline will appear like this for various widget sections:
-
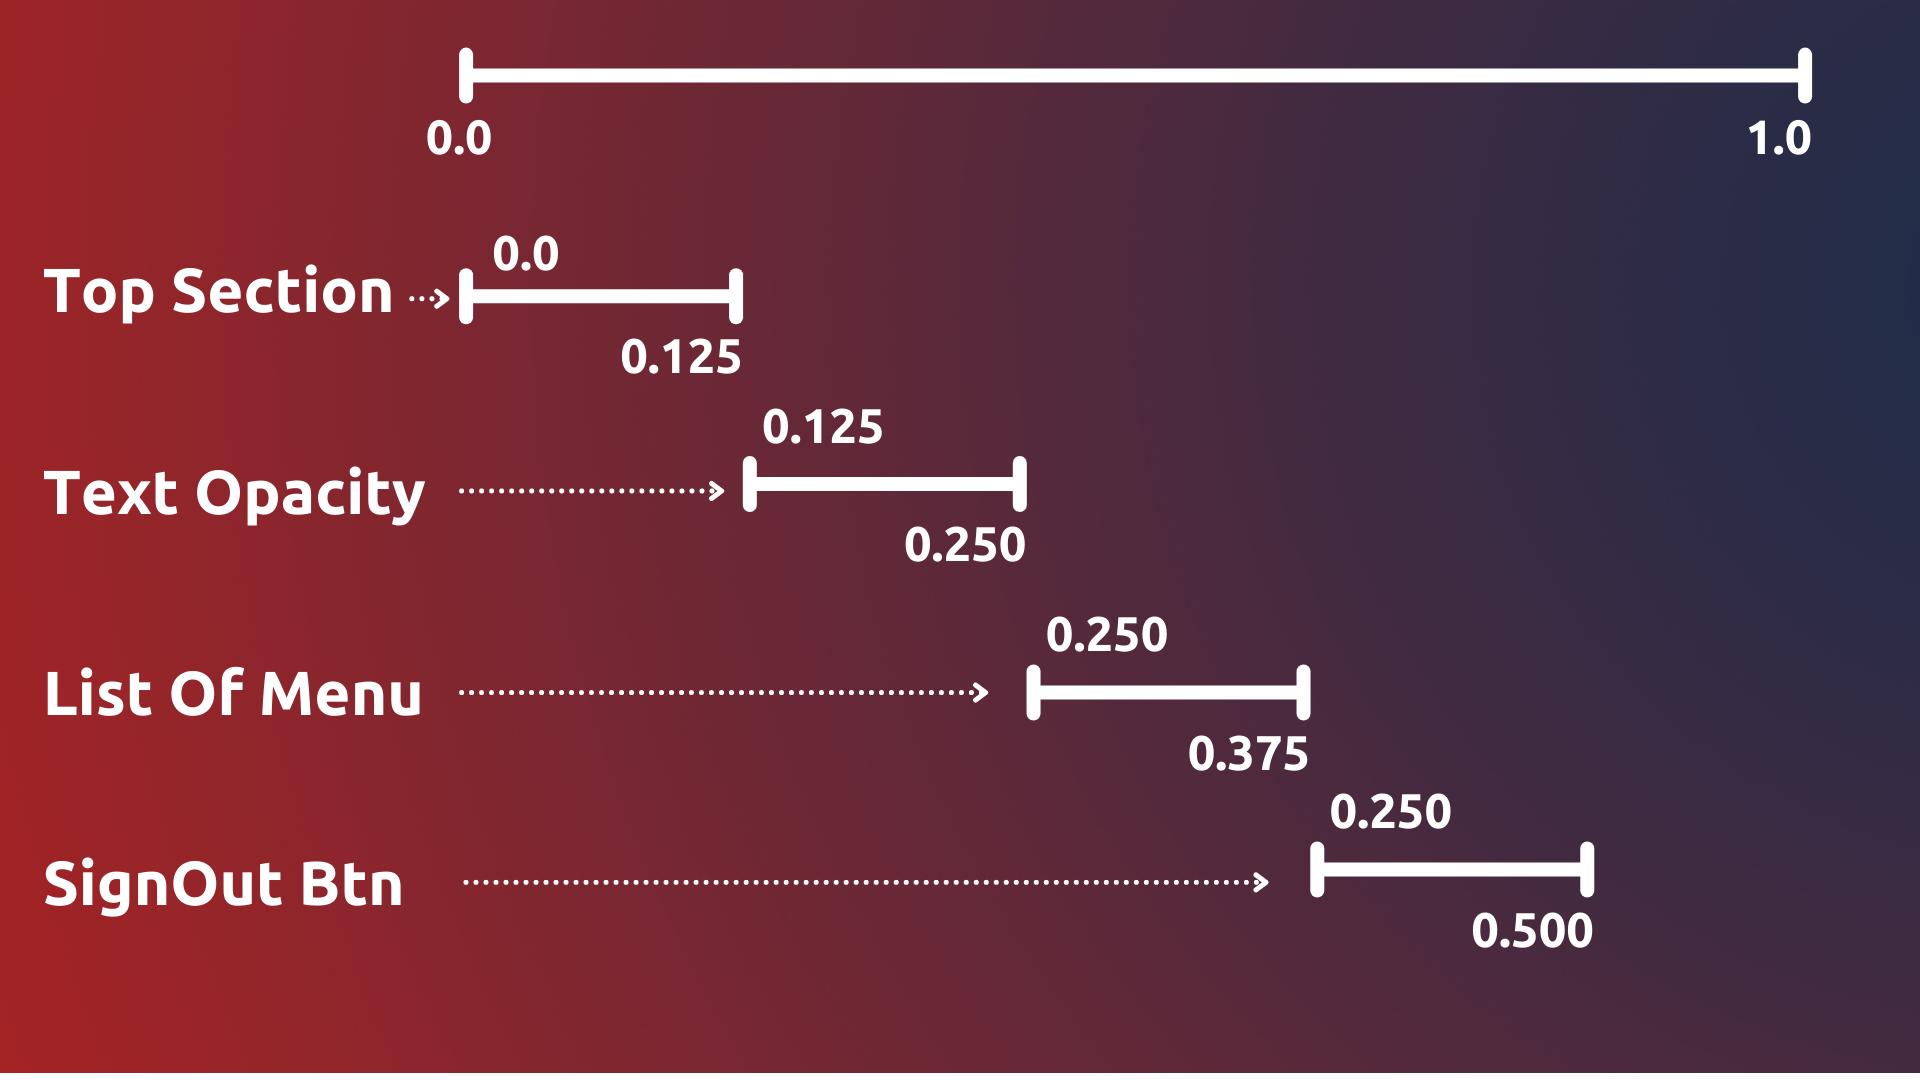
- The **minimum **and **maximum **values for the start and finish times are `0.0` and `1.0`, respectively.
- Within the **CurvedAnimation** widget, we may provide the **Interval**. If you are unfamiliar with **CurvedAnimation**, please read the preceding article.
- Example :
```
CurvedAnimation(
parent: _controller,
curve: const Interval(0.0, 0.125, curve: Curves.easeOut),
);
```
- As you can see `Intervel` takes `3` parameters,
-
-
**begin**: Used to define initial starting time of the animation.
-
**end**: Used to desine ending time of the animation.
-
**curve**: Default is `Curves.linear`
### 🚧 When to use **Interval**?
- If you have many animations on your screen, you may use **Interval**. And you want to animate the various widgets in a sequence.
- When there is only one widget moving on the screen, the Interval is **useless**. You can just set the `duration` in the parent controller for the single widget animation.
- Now that you've learned everything there is to know about staggered animation, let's put it to use in our example.
--------
## 💻 Implementation
- You can get the UI code from this link : [UI](https://gist.github.com/red-star25/e2bd9eb108f63abc0f9c1791edc0c573)
- We have several animations for various widgets. So let's specify all of the necessary animations.
-
```
late Animation profileTopAnimation;
late Animation textOpacityAnimation;
late Animation profileMenuAnimation;
late Animation signOutBtnAnimation;
```
- Now that we've created different animations for our widgets, we can instantiate them within the `initState` function.
-
%[https://gist.github.com/red-star25/14a2c6ec1c4bba51c9d18b6bb932f86a]
- Now, use these animation values to animate the widget by surrounding it with for example `Transform`, `Opacity`, etc.
-
%[https://gist.github.com/red-star25/65b62ffc0867442915e2f8c7a84e2e6e]
-------
## Output
- 
- You can reverse the animation by calling `_controller.repeat(reverse:true)`.
---------
## 🙋Final Words
- **Thank you for taking the time to read this article.** 🙏
- **If you found it useful, please share it with others.** 🤠
- **Also, if you have any suggestions, please leave them in the comments section.** ✍️
- **See you soon. Until then....**
-