Animation In Flutter: Staggered / Sequence Animation
What is Staggered animation? How to animate more than one widget in Sequential order?
D
I'm a mobile/web developer 👨💻 who loves to build projects and share valuable tips for programmers
Follow me for Flutter, React/Next.js, and other awesome tech-related stuff 😉
🏀 Introduction
- We've seen Implicit and Explicit animations up to this point. How to use Tween, CurvedAnimation, and the Animation class to make a custom animation.
- We've shown how to animate several widgets at the same time. However, many times we want our widgets to animate in Sequential order.
- Let's take an example :
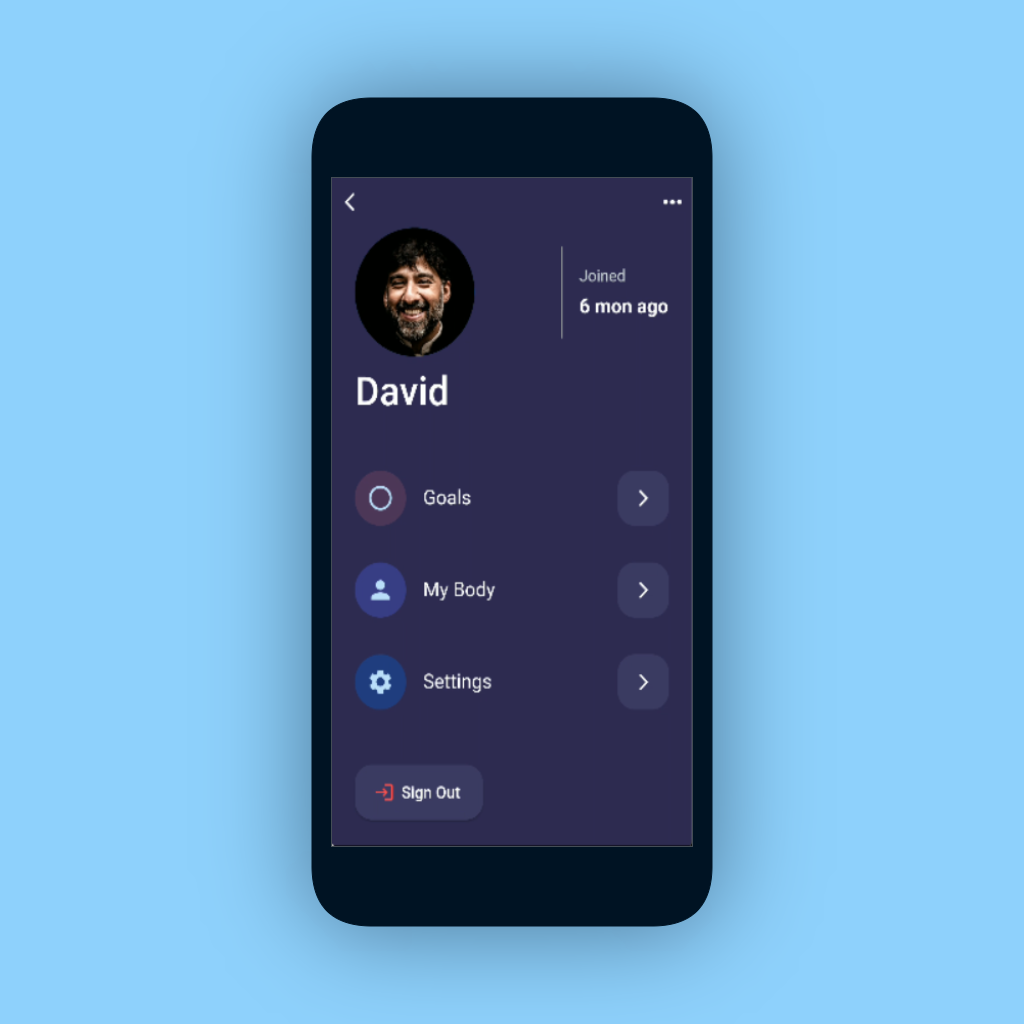 The above design is inspired by Den Klenkov
- As you can see In the above mockup, there are many widgets available on the screen. Now, animating everything at once isn't going to look nice.
- In that situation, we may use Staggered Animation to animate it one by one with various Curves and Animations.
🚨 Important Note:
- Before digging into Staggered/Sequential animation, make sure you read the previous animation articles since we will be using the concepts of Tween, AnimationController, and Animation class in this article.
🏐 Staggered Animation
- Staggered Animation is a series of animations that appears on the screen. It indicates that the animations will play one after the other in order.
- As you can see in the sample above, the animation occurs in sequential order:
- First, the Top section moves from the Top to the Original position.
- Then, Text is Fading in,
- After that, The ListMenu is animating from
LefttoRightand - Finally, the Sign Out Button is scaling from
0to1.Everything is happening one by one. So, how do you create such animation? If you've read the preceding articles, you'll find it quite simple to comprehend.
Before you begin the implementation, there are a few things you should be aware of:
- All of the animations that you are seeing in the above example are using only one single AnimationController.
- The controller’s values must be between 0.0 and 1.0, inclusive.
-
Each animation has an
Intervalbetween 0.0 and 1.0, inclusive. You will see more aboutIntervalfurther in this article. -
Create a
Tweenand specify thebeginandendvalues for each property that animate in the interval time.
- Let's first understand what
Intervalis:⌚ Interval
- Interval is used to simply delay the animation. It implies that if a period of
5seconds is specified and the Interval of the specific animation is set to0.5to1.0, the animation will begin when the time reaches0.25seconds. - In our case, the Interval timeline will appear like this for various widget sections:
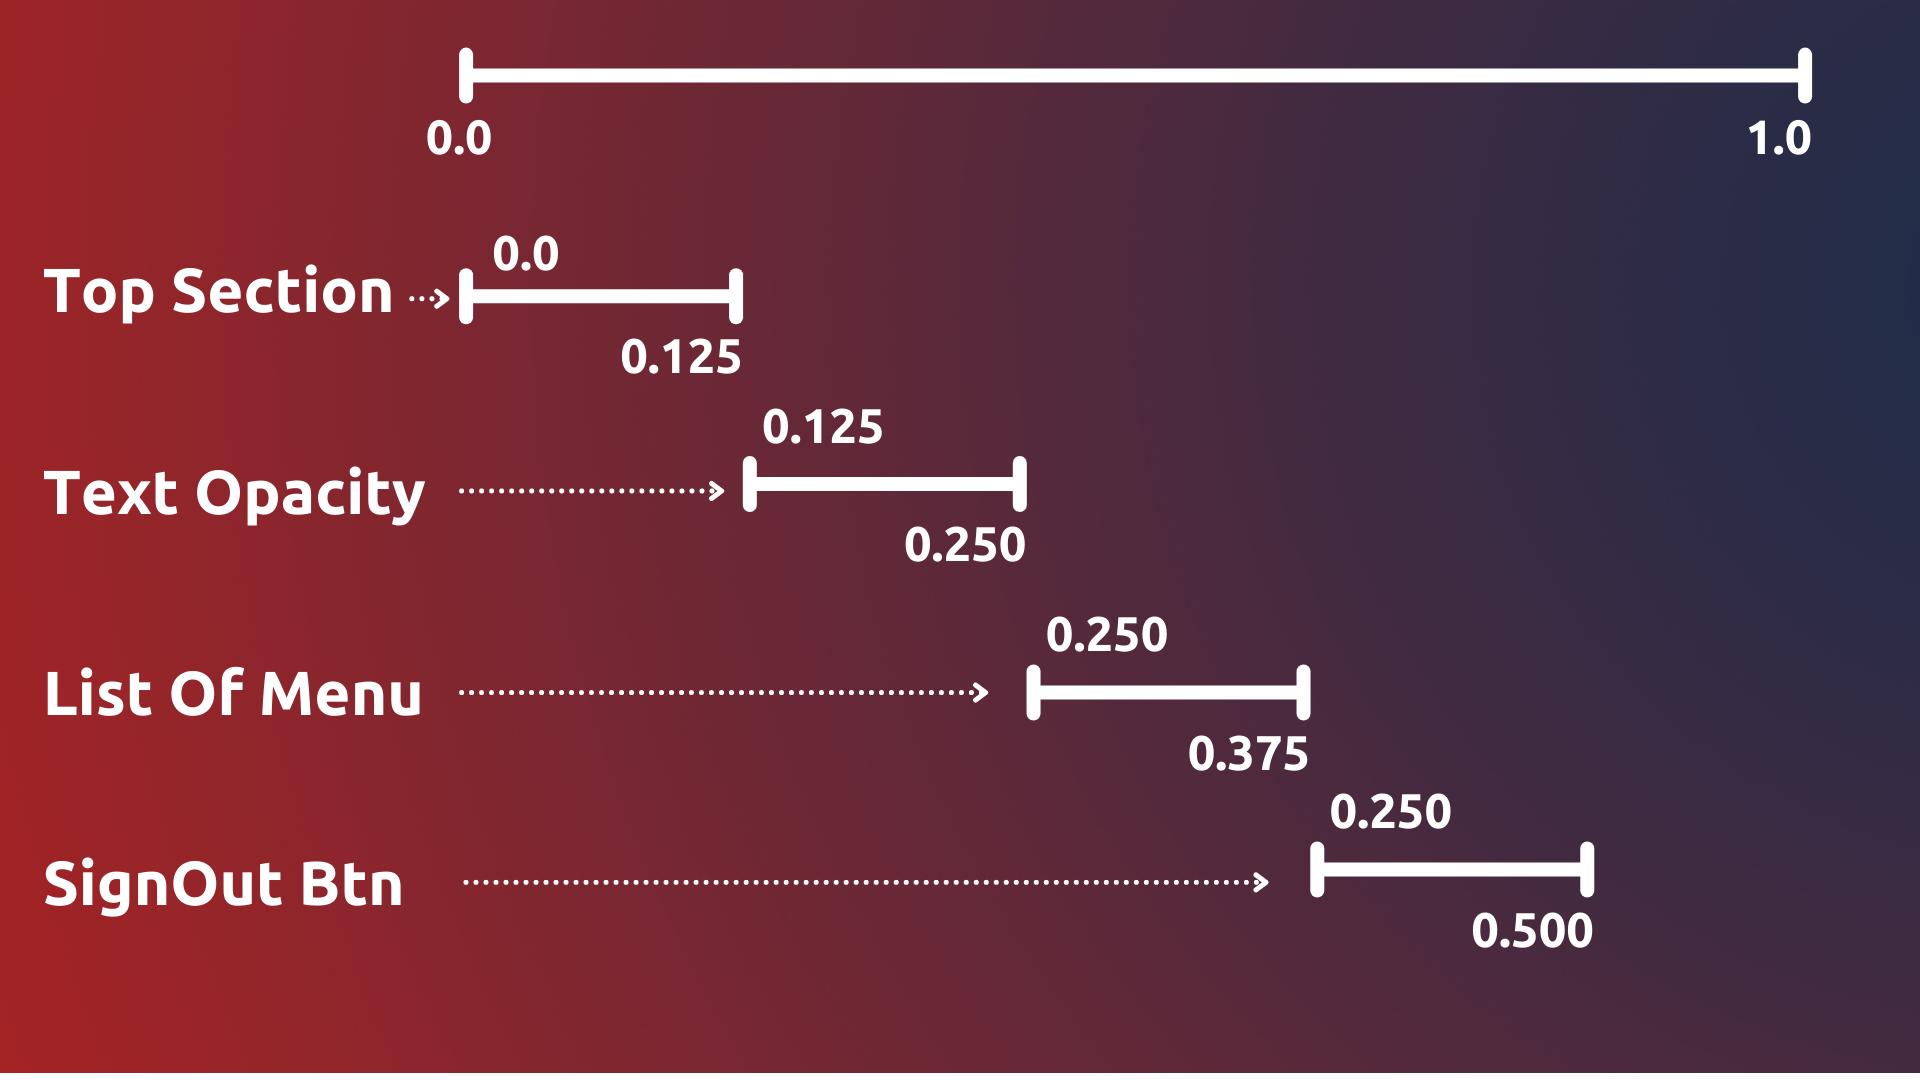
- The minimum and maximum values for the start and finish times are
0.0and1.0, respectively. - Within the CurvedAnimation widget, we may provide the Interval. If you are unfamiliar with CurvedAnimation, please read the preceding article.
- Example :
CurvedAnimation( parent: _controller, curve: const Interval(0.0, 0.125, curve: Curves.easeOut), ); - As you can see
Interveltakes3parameters, - begin: Used to define initial starting time of the animation.
- end: Used to desine ending time of the animation.
-
curve: Default is
Curves.linear
🚧 When to use Interval?
- If you have many animations on your screen, you may use Interval. And you want to animate the various widgets in a sequence.
- When there is only one widget moving on the screen, the Interval is useless. You can just set the
durationin the parent controller for the single widget animation. - Now that you've learned everything there is to know about staggered animation, let's put it to use in our example.
💻 Implementation
- You can get the UI code from this link : UI
- We have several animations for various widgets. So let's specify all of the necessary animations.
late Animation<double> profileTopAnimation; late Animation<double> textOpacityAnimation; late Animation<double> profileMenuAnimation; late Animation<double> signOutBtnAnimation;- Now that we've created different animations for our widgets, we can instantiate them within the
initStatefunction. - Now, use these animation values to animate the widget by surrounding it with for example
Transform,Opacity, etc.
Output
- You can reverse the animation by calling
_controller.repeat(reverse:true).
🙋Final Words
- Thank you for taking the time to read this article. 🙏
- If you found it useful, please share it with others. 🤠
- Also, if you have any suggestions, please leave them in the comments section. ✍️
- See you soon. Until then....